If you want to try the new Windows 10 but aren't ready to give up Windows 7 or 8 just yet, we have a simple solution for you: install it in a virtual machine. A virtual machine is a program that creates a second computer with its own, independent operating system and resources allocated from your real operating system. In this article we will tell you step by step how to perform a similar operation and try out the new operating system.
Using a virtual machine for testing new Windows 10 is worth the effort because it can be easily installed or removed completely and without a trace.
There are several packages software to create virtual machines, but we recommend using Oracle VirtualBox. Of course, you can also use VMware to create the VM, but VirtualBox is much easier to set up.
Installing Windows 10 on VirtualBox requires modern computer, because it will run two operating systems that are very resource intensive. To work comfortably with a virtual machine, we recommend using a computer with the capacity random access memory at least 3 GB.
So what do you need for installation?
- The processor is enabled by BIOS virtualization.
- At least 3 GB of RAM.
- 50 GB or more free disk space on your computer.
- One hour of free time.
Step 1: Make sure your processor supports virtualization
You can check virtualization support in the processor specification, which can be found on the Internet. In most cases, virtualization is disabled by default in Motherboard BIOS fees. To check whether virtualization support is enabled in the BIOS, you need to restart the computer and use the F2, F10, F12 or Del keys to enter the BIOS menu. Typically, setting virtualization parameters is located in the “Advanced” - “CPU Settings” menu. If you have another BIOS version, refer to the motherboard instructions or enter the appropriate search query.Step 2: Download the Windows 10 installation image
At this point, you must decide whether you will use the 32-bit or 64-bit version of Windows 10. The difference is how much RAM you plan to use for the virtual machine. If 4 GB or higher, we recommend that you download the 64-bit version of Windows 10. Otherwise, the 32-bit version of Windows 10.Step 3: Download and Install Oracle VirtualBox
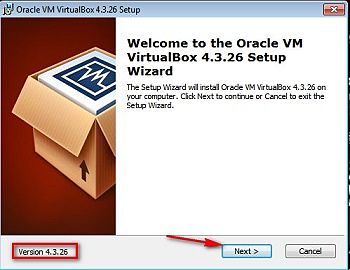
The VirtualBox software package is free, so you can easily download it from the official website. Installing Oracle VirtualBox is easy: just run installation file and follow the installation wizard instructions. Once completed, run the program.Step 4: Set up the program
First of all, you need to create and configure a virtual machine on which the OS will later be installed. To do this, click the “New” button in the toolbar. It's in the upper left corner.
The virtual machine creation wizard will launch, where you will need to do the following:
 Note:
In some versions of VirtualBox, selecting the virtual disk size may be the very last step.
Note:
In some versions of VirtualBox, selecting the virtual disk size may be the very last step.
Step 5: Advanced Oracle VirtualBox Settings
Even after creating a new VM, you have the opportunity to change almost all its parameters of the VM you created. You can allocate more RAM, disk space, or processor cores. You can change your Internet connection type and more.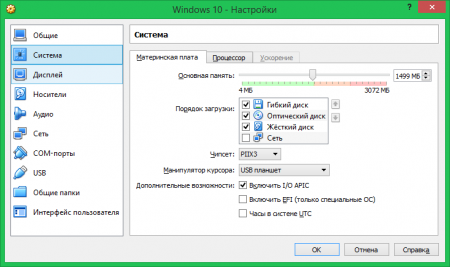
Step 6: Starting the VM and Windows 10 Installation Procedure
After the configuration listed above, your virtual machine ready to launch and install Windows 10. In the left panel of VirtualBox, double-click on the machine name to turn it on. If you skipped the previous step and did not assign an image path, VirtualBox will ask you which image file to use. Specify the path where the downloaded file is stored. copy of Windows 10.The installer will ask you to read the text license agreement and then confirm it. Confirm your agreement by checking the appropriate box and click “Next” again.

Just like the physical OS installation, the next step requires you to select an installation type. Select Clean Install and click Next.

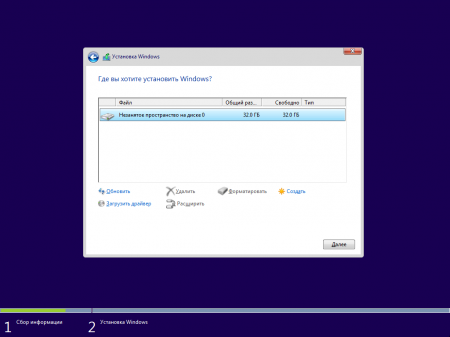
Next you need to prepare virtual disk. On the newly created virtual disk, not on file system, as well as sections You will see it as a continuous unmarked area. To create a partition, select the disk, click on the “Settings” button and then on the “Create” button. After this, you will have a formatted partition ready to install the OS.
Click the Install button to begin the Windows 10 installation process. This step may take a long time depending on the speed of your computer and the type of drive: ISO image or disk drive.
During VirtualBox installations will be rebooted several times. Then you must select settings by Windows default 10: recommended OS or your personal ones. We recommend leaving the default settings at first, after installation you can change any of these settings.
It remains to be decided whether to use account Microsoft or create a local administrator on the computer. We recommend that you create your own Microsoft account as it gives you the ability to use all Windows 10 apps from the store Microsoft Store.
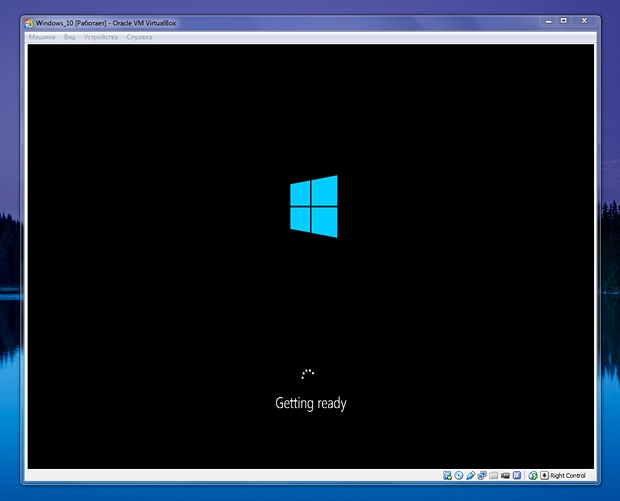
Just wait a few minutes and you will see the initial Windows screen 10.
Step 8: Using Windows 10 in a Virtual Machine
Windows 10 is ready and now you can try everything you want. One thing that is important to remember is that even though the OS is installed on the virtual machine, an improper shutdown can cause the virtual OS to crash, requiring you to reinstall it. To avoid problems of this nature, you must correctly complete Windows operation 10 and only then turn off the virtual machine.There are situations when you need to install not one operating environment on your computer, but several. For example, when you want to check your work from your own experience Ubuntu systems or Mandriva, and the computer already has a brand new Windows 10. Installing a second operating system on HDD- is not always a rational decision, because this can affect the performance of one of the OS. The question arises - what to do in this case? You can, of course, use the LiveCD tool, but this option is only suitable for a superficial acquaintance with the emulated environment. In the case when you need access to full functionality, you should resort to the help of a virtual machine.
The main function performed by a virtual machine is emulation of the computer's software environment. This article will talk about the Virtualbox program, how it is installed on Windows 10, and how it works.
The Virtualbox application is not particularly demanding on computer hardware resources. You will need to ensure that your computer meets the following requirements:
- Processor built on x86 architecture;
- 200 MB of free hard disk space;
- Windows 10 will require hardware rendering support. Without it, the program simply will not install on your computer.
However, one significant point should be taken into account - the main load on the computer is not borne by the Virtualbox virtual machine itself. Basically, the computer will be loaded by guest operating environments and virtual devices that will be installed on it.
For example, the size of virtual hard drives in many cases will be at least several tens of GB. And if Windows 7 is used as a guest system, then it will require about 16 GB of free space (not to mention the fact that Windows 10 itself requires from 16 to 20 GB of disk space). When planning your virtual machine installation, all of this needs to be taken into account.
Installation
So, the main features and requirements of the Virtualbox virtual machine have been discussed, now you can consider installing the product on a Windows 10 system. Installing Virtualbox (as well as similar virtual machines) is quite understandable for any user. The installation package is downloaded from the official website. After double-clicking on the executable file, the usual program installation window will appear.
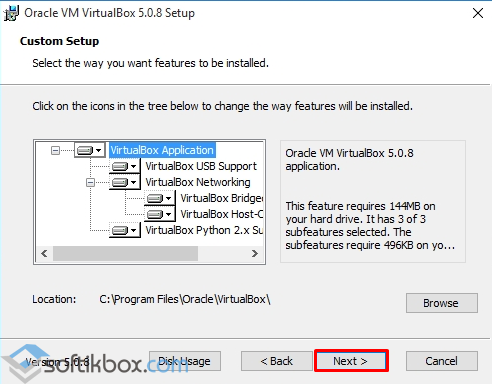
In order to continue installing Virtualbox for Windows 10, click “Next”. In the next window, you can select which specific components will be installed. Can be installed USB support, Python network environment, network access support.

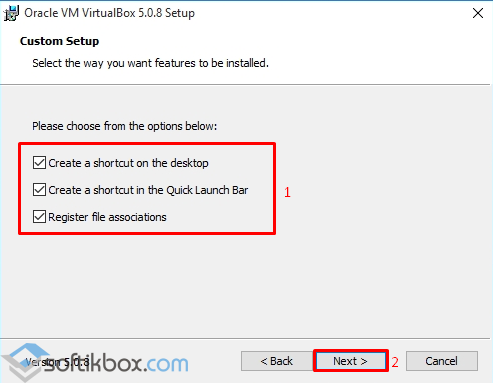
If you wish, you can create a shortcut on the Windows 10 desktop and quick access panel. Immediately before the installation process begins, a warning window will appear indicating that Internet access will be denied during the installation of the virtual machine. The user will have to agree to this, otherwise the installation of the Virtualbox machine will not be possible.
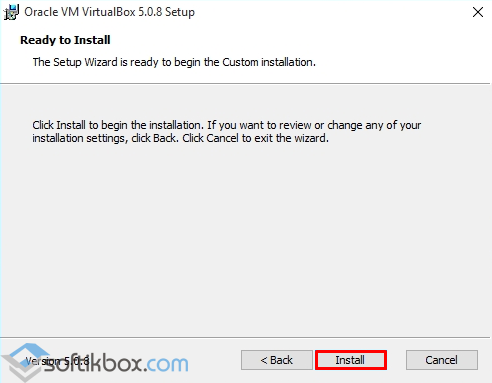
That’s it, all you have to do is click on the “Install” button, after which the Virtualbox installation process will begin. During installation, the program will offer to additionally install some components, namely:
- Network service;
- Network adapters;
- USB controllers.
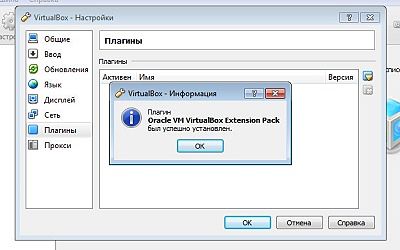
As soon as the installation of Virtualbox is completed, a standard window will appear on the screen with a message about this and a proposal to start the virtual machine. You can do this right away because correct operation You will also need to install the Virtualbox plugin Extension Pack, which will allow you to work with the high-speed interface of modern flash drives, web cameras, and also manage a remote desktop.
To install the plugin, you will need to do the following sequence of actions:
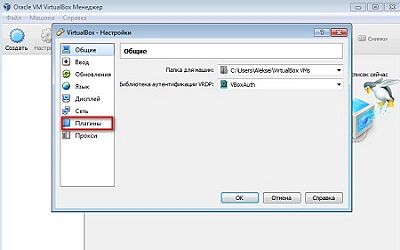
- In the program window, open the menu item File – Settings.
- Available program settings will appear on the screen.
- You will need the Plugins tab.
- Once you click on it, a window will open that displays the available plugins.
- The list is still empty, since the virtual machine was only recently installed.

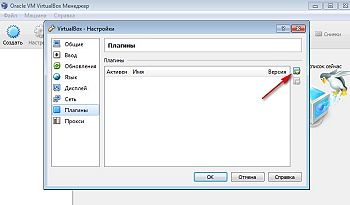
You can select the extension you need by clicking on the button to the right of the list. You select the required plugin, the program recognizes it and offers installation. Before installation begins, you must agree to the license terms.

Beginning of work
So, Virtualbox is installed on the Windows 10 system and is ready to go. It remains to figure out how this virtual machine works. There is a “Create” button in the main program window. You need to click on it, after which the virtual machine creation wizard will open. You can specify a name for the machine, as well as determine the type and version of the emulated system. Next, using the wizard, set the following parameters virtual system:
- The amount of RAM is determined;
- A virtual boot HDD device is selected (you can define an existing hard drive as such);
- The parameters of the display, audio and video outputs, network, etc. are set.
After all the manipulations, a window will appear with the parameters of the virtual system, which will run on real Windows 10. Installing a virtual operating system is no different from installing the OS on a real computer. After completing the installation of the virtual system that suits you, you can begin working in it.
(Visited 11,306 times, 10 visits today)
Friends, in this instruction, intended mainly for beginners, we will tell you in detail how you can install Windows 10 in VirtualBox. We think this is a great option for those who are interested new system, but there is no time or desire to take risks by installing its frequently released unstable versions on real hardware.
Simply put, you will be able to work with the latest OS without any damage to the system that you currently have installed.
What you will need
Modern PC. As we noted in previous articles, the requirements have practically not increased compared to the requirements of the two previous versions of Windows. However, this does not change the fact that to run two operating systems simultaneously, you will need relatively powerful and modern hardware.First of all, this concerns the amount of RAM – it should be at least 2 GB. Note that even this option is extremely undesirable: at certain moments there will be barely enough RAM, which is why everything can easily start to slow down. Ideally, experiments with VirtualBox should begin with 4 GB of RAM or more.
The video card is no less important. If it is already five years old or more, then most likely you will no longer be able to set the native resolution for a Full HD monitor.
ISO- Windows image 10. Microsoft is happy to share early test builds of Windows 10 during testing in exchange for user feedback. Another part of the test assemblies leaks to the network unofficially. Finding an iso image of a technical preview of Windows 10 on popular torrent trackers will not be difficult.

The most current build of Windows 10 at the time of writing was available online only unofficially. Official builds in 2014 ended at
The biggest advantage of test versions of Windows 10 is that, unlike the final version, they are free. Disadvantages: the presence of a relatively high number of defects, the absence of the Russian language (can be treated with a Russifier) and a limited lifespan. For example, the very first technical preview of Windows 10 (build 9841) will turn into a pumpkin on April 15, 2015. However, until this time you will be able to update to later test versions. Their lifespan will also be limited, but by more distant dates in the calendar.
Which version should I choose: x86 (32 bit) or x64 (64 bit)? The first one weighs less and also requires less RAM. This is what we recommend to everyone who just wants to get acquainted with Windows 10 in VirtualBox.
VirtualBox program. Actually, the third and last component we need is VirtualBox. This program from Oracle is distributed absolutely free of charge and has an interface localized into Russian.

The only thing, for God’s sake, don’t bother the search engine with the request “VirtualBox download for free”, just go to the official page of the program and download its most current version from there.
So let's get straight to it how to install Windows 10 in VirtualBox.
Creating and configuring a virtual machine in VirtualBox
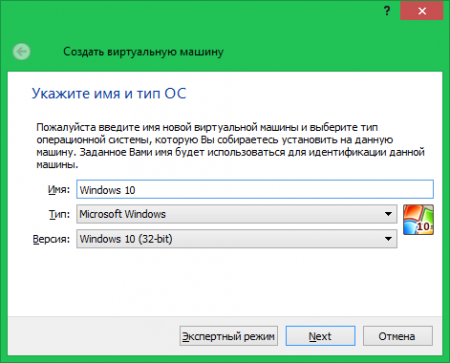
Step 1. Open the program and click the “create” button. A new window will appear in front of you: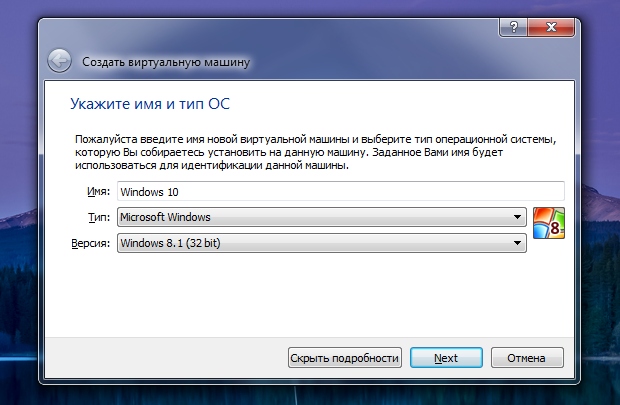
Here, first of all, you need to specify the name of the system being created. For clarity, we called it “Windows 10”. Below select the type " Microsoft Windows" Once this is done, options will appear in the "Version" section different versions Windows. If by the time you read this article there is already a “Windows 10” option, select it, of course.
At the time of writing this material, the current version of VirtualBox did not yet have such an option, so we chose Windows 8.1 with the bit depth corresponding to the loaded Windows 10 build (in our case, it is 32 bit (x86)). Click "Next".
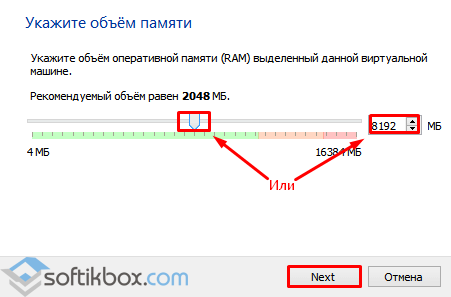
Step 2. Now you need to decide how much RAM to “donate” to the virtual OS. This amount will be automatically immediately subtracted from the total amount of your RAM every time you start the virtual machine and, therefore, will be returned back as soon as you turn off this machine.

Windows 10 32 bit should be given at least 1 GB (1024 MB). Windows 10 64 bit minimum requirements twice as high - here you need at least 2 GB.
At the same time, you should also leave at least 2 GB for your system (and this is most likely Windows 7 or 8). Keep in mind that even these numbers are minimal. Thus, having 4 GB of RAM does not guarantee you a particularly comfortable experience with virtual systems.
On our test computer with 4 GB of RAM, we allocated virtual Windows 10 32 bit 1 GB, leaving 3 GB for the main system (see screenshot above).
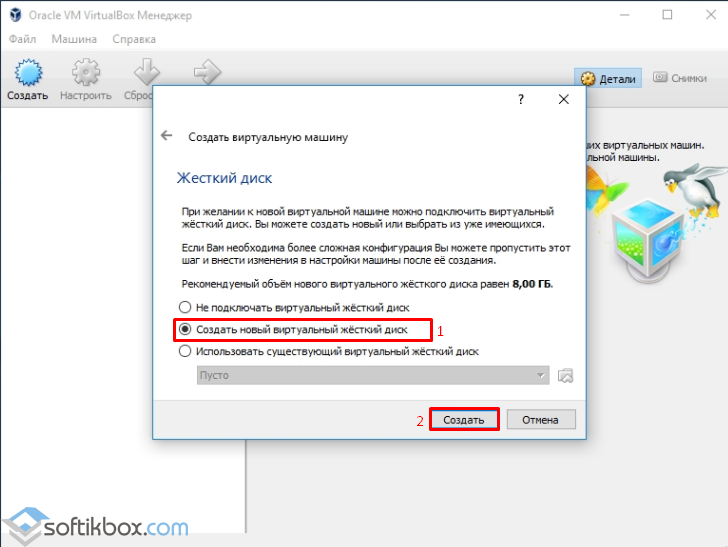
Step 3. In the next window, select the “Create a new virtual hard disk” option, and then click “Create”:

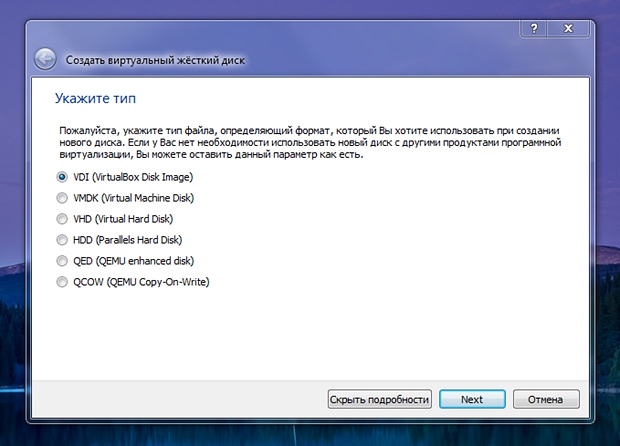
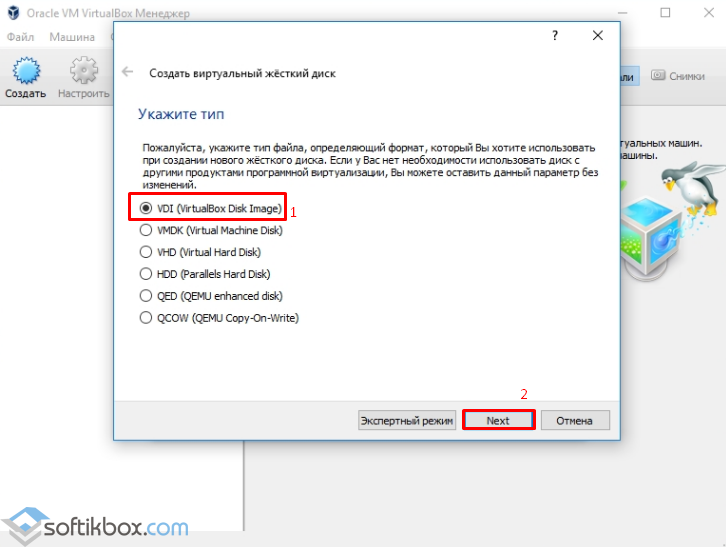
Step 4. From the proposed list of types virtual disks select the very first option, click “Next”:
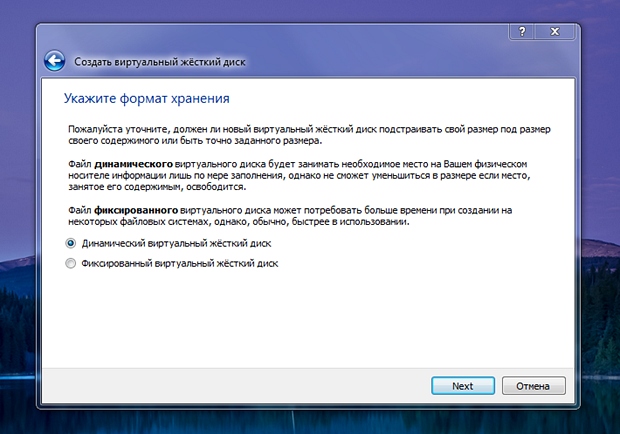
Step 5. Now you need to choose between a dynamic and a fixed virtual hard disk. What is the difference between them is explained quite well by VirtualBox itself. For ourselves, we preferred the first option, since it allows you to save gigabytes on a real hard drive without wasting them on the space reserved in advance for the virtual machine.
Step 6. At this point, you first need to specify the size of the virtual hard disk. To get acquainted with the system, in our opinion, 25 GB is quite enough. If you selected a fixed virtual disk in the previous step, then these 25 GB will immediately be reduced from your real hard disk (by deleting the virtual machine, you will, of course, get them back). If, as we advised, you chose dynamic disk, then only about 10 GB will immediately decrease. The virtual machine will take the remaining 15 GB from your hard drive gradually and only if necessary.

Before you click Create, notice the small icon that the arrow points to in the screenshot above. Clicking on it allows you to select a partition and a specific location on your real hard drive where the virtual disk will be located. It is not by chance that we draw attention to this point: not everyone has an extra 25 GB on their system “C”.
Step 7 After clicking the “Create” button, the new virtual OS will appear in the list of the left panel of VirtualBox:
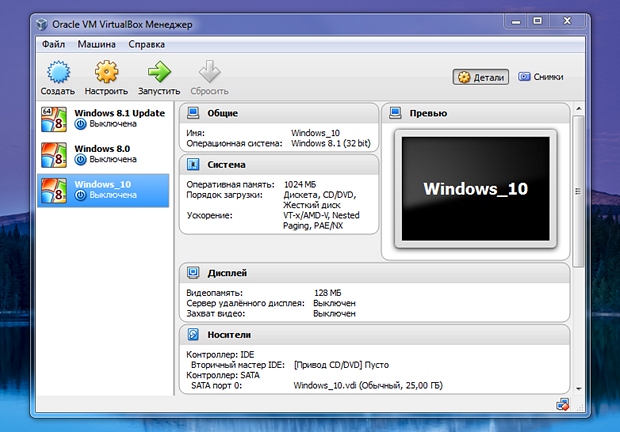
Before starting the virtual system, you can go through the settings. Open them by clicking on the “Customize” icon in the form of a gear on top panel. If at the very first step you selected Windows 10 (or 8.1), and not “Other Windows” or something else, then all the basic settings should already be adequate by default. Just pay attention to the boot order (section “System” -> “ Motherboard»).
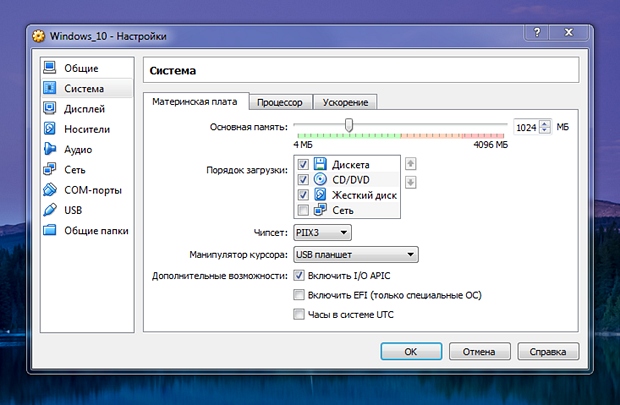
“CD/DVD” should be located above the hard drive, and the floppy disk can be disconnected.
Step 8 Select the virtual OS you just created and click the green “run” arrow on the top panel. This first start is very important, since you must manually tell VirtualBox where the file you downloaded earlier is located. Windows iso image 10. In the first dialog box, do not rush to click “continue”; instead, click on the button highlighted by the arrow in the screenshot below:
Next, the system will prompt you to indicate your preferred interface language, select time and currency formats, as well as the input language.
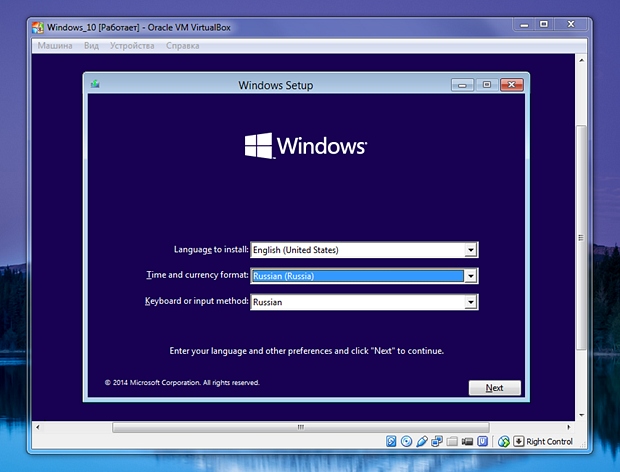
The Russian interface is not yet provided in early test builds of Windows 10, so you should leave “English” in the first field, but for the next two fields the “Russian” option, as for almost any other country, is in the list initially.
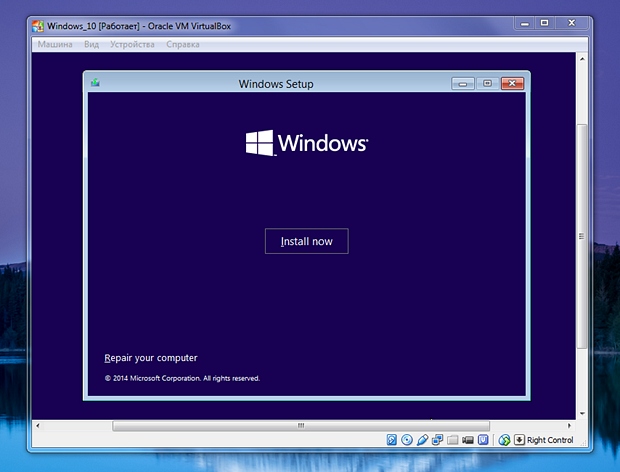
After clicking “Next”, in the next window that appears, click “Install Now”:
Next, agree to the license agreement: check the box at the bottom and click “Next”:

In the next window, select the second option (clean installation):

In the disk layout window, select the only available option and click “Next”:

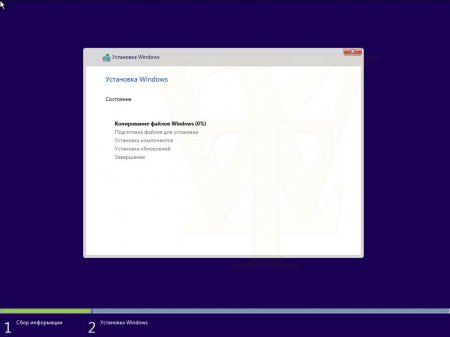
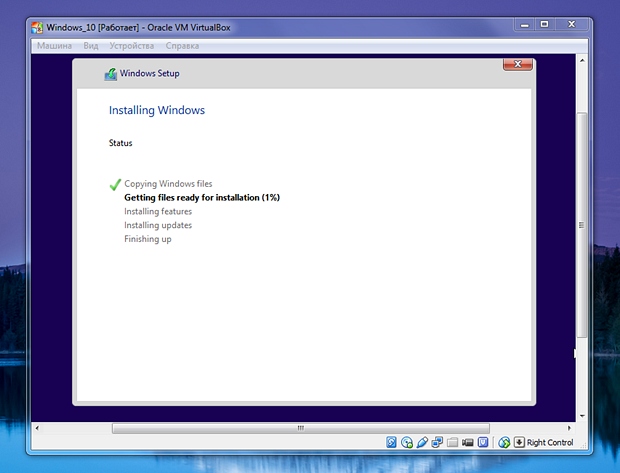
The installation process will begin. Its duration depends both on the hardware of the real computer and specifically on those resources that you have allocated to the virtual system.
This may be followed by several reboots inside the virtual system, so you will see the familiar boot screen more than once:
In the next Windows window 10 will ask you whether you want to configure certain settings yourself (Customize button) or trust the system and accept what it offers by default (Use Express Settings button).
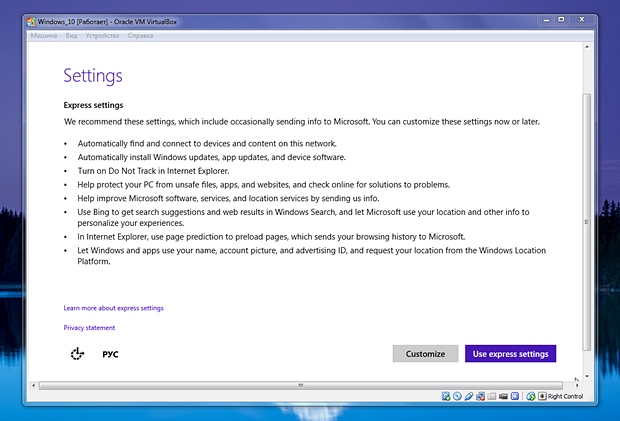
In the latter case, you agree to automatic search and connection to available networks, automatic installation updates, enabling the “do not follow me” mechanism (is only a recommendation) in the standard Windows browser, enabling security mechanisms by default in Windows and IE, using Bing internally Windows search and sending feedback at Microsoft. We recommend accepting these default settings.
As you can easily see, installing Windows 10 in VirtualBox is not at all difficult: the installation is simple. However, at its final stage there is a feature that may at first somewhat confuse those who have remained on Windows 7 and at one time decided to skip Windows 8:

Instead of creating a familiar local account, the system in the screenshot above by default prompts you to log into your Microsoft account by entering the address Email, to which this account is registered and the password for it. Perhaps the main convenience of such a system is the synchronization of many of your data, which eliminates unnecessary steps.
Luckily, the ability to create a classic local account is still here. Click on the link “Create a new account” (the purple text blending into the background in the screenshot above).
Once you do this, you will be prompted to create a Microsoft account, but below there will be a link to create a local account: “Sing in without a Microsoft account.”

Click on this link and you will see a form for creating a classic account. Here, in the old fashioned way, you need to come up with a name for your account and a password, confirm this password, and also come up with a reasonable hint for restoring it.
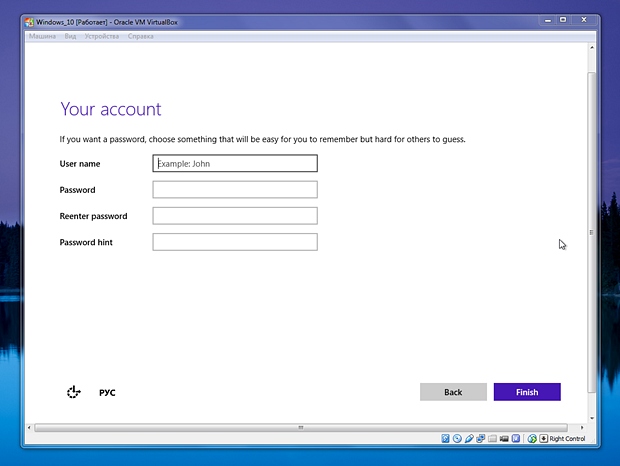
After filling out the form and clicking the coveted “Finish” button, the system can still “take care of several things” within a few minutes:
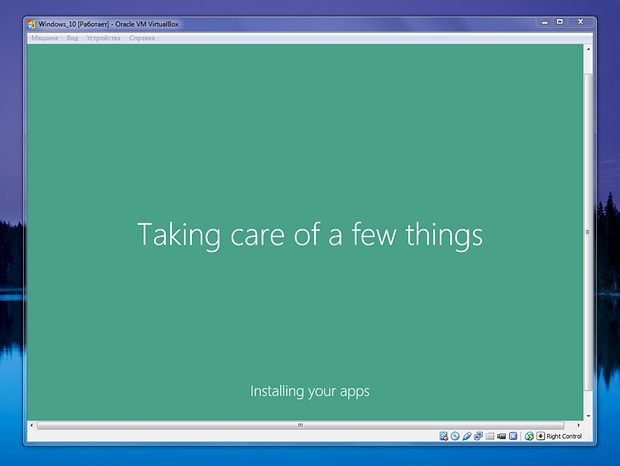
Finally a worker will appear Windows table 10:

We hasten to congratulate you: Windows installation 10 in VirtualBox is complete.
Today, many programs have been released that allow you to use virtualization for various operating systems. Among them, the product from Oracle, which is distributed under the GNU GPL license and is compatible with all released operating systems, including Windows 10, is extremely popular.
Where to download and how to install Virtualbox on Windows 10?
If you want to install and test some operating system or program, but do not want to use your own OS for this, Virtualbox will help solve this problem.
To go to the "Programs" section and download the installation file or download latest version software from the official website of the developer. For the Windows 10 operating system, Virtualbox 5.0.20 or the earlier 5.0.8 version, which is also compatible with Windows 10, is perfect. The principle of their operation is the same.
After downloading the installation file, you should run the installation.

In the next window a list of additional components of the future virtual machine will appear, namely
- Virtualbox USB Support – is responsible for supporting all devices that connect to the virtual machine via a USB port.
- Virtualbox Networking – responsible for support network adapters and Internet access;
- Virtualbox Python 2 x Support – required to support programming languages.
In the next window you should leave all three marks. They are responsible for the presence of a program shortcut in the Start menu and on the desktop, and also allow you to associate files of other virtual machines.
The next step is to install some network components. The installer will notify you about this. Click “Yes” and wait for their installation to complete.

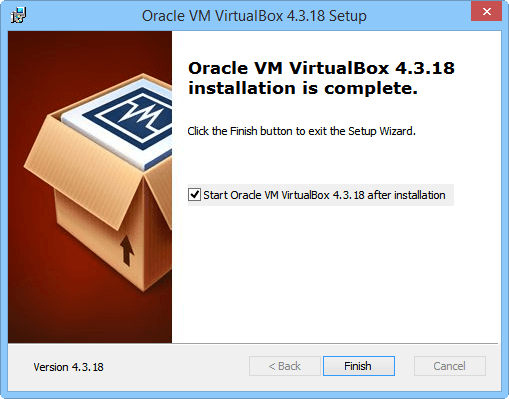
As soon as the installation of the software for creating a virtual machine is completed, the following window will appear. Check the “Run program” checkbox and click “Finish”.

The initial program window will open.
![]()
How to create a virtual machine using Virtualbox on Windows 10?
In order to create a virtual machine on Windows 10, you should initially download the distribution kit of the operating system that you want to install on Virtualbox. After loading the system, click on the “Create” button in the main program window.

We assign a name to the virtual machine, indicate the version of the OS that you will install and its type.
In the next window you should indicate the amount of RAM that you allow Virtualbox to use.
Select which disk you want to install the machine on. Click “Create a new virtual hard disk.”
Select the disk type. Since we are creating a virtual disk, we click VDI.
In the next window we indicate what kind of disk it will be: dynamic or fixed. If you are creating a virtual machine for testing and will not use it in the future, you should choose fixed. But if you use a virtual OS and install programs on it, you need to choose a dynamic disk. It will expand as it fills.

Specify a name for the disk and select a size.

The virtual machine is now created on Windows 10.

If you click on the “Configure” button, you can change the size of the video adapter, increase or decrease the load on the processor. To start the car, you need to click the “Start” button.

After clicking the “Run” button, the program will ask you to specify the storage location for the installation file of the new OS.

The installer window will appear. We follow the prompts. Installing an operating system on a virtual machine is very similar to installing it on a regular PC.

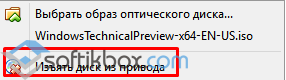
IMPORTANT! When installing the OS, a request “Press any key to boot from the CD/DVD” may appear on the monitor screen. To prevent this message from appearing, you should disable ISO file from the virtual drive. To do this, before installation or during (you need to minimize the installation window), go to the “Settings” section and select “Media”.

Here you need to click on the disk icon.

A list of options will appear. Set "Remove disk from drive".
Only after completing these steps will the installation of the new OS on the virtual machine be completed successfully.
Why doesn't VirtualBox start on Windows 10?
- If, when you try to launch VirtualBox on Windows 10, the program does not work and does not respond to user requests, the reason lies in the fact that the software does not detect network interfaces. To fix this problem, you should go to the developer’s website and download the latest version of the program.
- If an application crash appears with code 0xc0000005, you should run the program as Administrator.


- Also, if VirtualBox worked on a previous version of the OS, but does not start after upgrading to Windows 10, you should configure the software to work in compatibility mode.
For details on how to install VirtualBox on Windows 10, watch the video:
To learn how to create a virtual machine with a different operating system on Windows 10, watch the video:
As with any product still in development, launching the Windows 10 Technical Preview is a risky proposition. Here's the most reliable and easiest way to install and run a preview version of the next Windows - in a virtual machine.
This article covers recent changes to virtual machine (VM) software and the installation process for Windows 10 Technical Preview (Win10 Preview for short).
VMs are not only reliable and easy to install, they can be used by almost any operating system. And in this case, both Windows 10 Preview and the virtual PC creation program are 100 percent free. Best of all, running in a VM, Windows 10 Preview poses essentially no risk to your main system (host). It's as if Windows system 10 was installed on its own, separate physical computer.
Three Basic Steps
These steps assume that you have not yet installed software to create virtual machines. We will use VirtualBox from Oracle. In addition to being free, it is also quite mature and relatively easy to install. (Note: VirtualBox is updated frequently. If you already have it installed, now is the time to get the latest version.) Steps:
- Download and install VirtualBox on a standard PC;
- In VirtualBox, create a new virtual machine optimized to run Win10 Preview;
- Download Win10 Preview and install it on a new virtual machine.
Important Preliminary Steps
Requirements for Windows startup 10 Preview inside virtual VirtualBox machines relatively moderate. The vast majority of today's personal computers working in any modern Windows versions- Vista, Windows 7 or Windows 8.x - will likely meet or exceed minimum specifications.
Here's what's required:
At least 3 GB of system RAM. Win10 Preview needs at least 1GB of RAM, VirtualBox needs another 512MB, and the host system usually needs at least another 1GB or so. Add some more memory for shared system functions. It's better to have more than 3GB of RAM - the typical PC sold today is designed with between 6GB and 12GB. (To quickly check the amount of memory installed on your system, click Start/Control Panel/System. Under System, look for the heading “ Installed memory(RAM)".)
At least 30 GB of available disk space. Win10 Preview requires approximately 25GB of free space, plus another 4GB or so for the Win10 installation file, but as with RAM, more free disk space is always better. (You will, of course, make up this space when you remove the Win10 VM.) There is no requirement that the Win10 VM be on the primary disk ( C:), but this will make the installation process much easier.
Support for hardware virtualization. Almost all PCs sold in recent years have built-in hardware support for virtualization, as used in VirtualBox (and similar VPC/VM products). But older systems may not have this necessary feature.
Here are ways to determine if your PC supports virtualization:
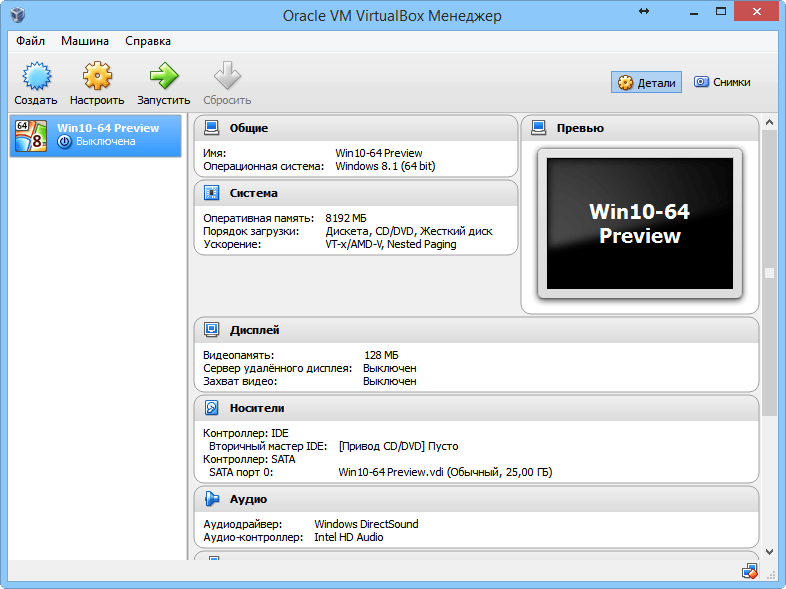
1) One method is to simply install VirtualBox and install a new virtual machine (more on this below). Then, for the installed machine, right-click, select the "Customize..." menu and go to the "System" section. Click the Acceleration tab and check if the hardware virtualization option is enabled Enable VT-x/AMD-V as shown in Figure 1. (Note: On some systems, you may have to enable hardware virtualization support in System BIOS. Check out the Windows SevenForums page for a quick look at this.

If your system does not support hardware virtualization, you can simply remove VirtualBox.
2) Intel offers its free utility“Does my processor support Intel Virtualization Technology?” (“Does My Processor Support Intel Virtualization Technology?”) (). Likewise, AMD offers the “AMD Virtualization Technology and Microsoft Hyper-V System Compatibility Check Utility” on its . (Scroll to the bottom of the list or click here to download.) You can also try Microsoft's “Hardware-Assisted Virtualization Detection Tool,” but the app only works on Windows XP. Vista and Windows 7 - not in Windows 8.
3) You can also look up your CPU's model number on the manufacturer's website and look at the specifications listed.
But again, note that almost all machines sold in recent years have virtualization support.
And finally, before we continue, backup your current system (backup programs). While none of the steps below are particularly risky, this measure is simply a good habit to get into. backup before installing new software or making any changes to the host system.
Step 1: Download and Install VirtualBox
Go to the VirtualBox for Windows page (at the time of writing this is version 4.3.18). This program will work on all current versions of Windows.
Note: Oracle also offers the VirtualBox Extension Pack, a separate package that allows the guest operating system to more fully integrate with the host OS. Your specific case may - or may not - require an Extension Pack. To keep things simple, I suggest installing only the core VirtualBox package. If you need an Extension Pack, there will be a hint for you later. You can then return to the helpful links on the VirtualBox download page to install the Extension Pack.
Once the installation file VirtualBox forWindows downloaded completely, click on it to start the program installation process (Figure 2).

After the introductory window appears, VirtualBox will show two custom dialog boxes Custom Setup , the first of which is shown in Figure 3. Technical Preview works well with default settings - without making changes; just click Next(Next) in both dialog boxes.

You will receive a warning that your network interfaces will be reset (Figure 4). VirtualBox requires this step to integrate into network system your PC and allow the VM (guest) operating system - Windows 10, in this case - to access the Internet.

This network suspension will be short-lived, but it will temporarily interrupt your Internet connection. Make sure that in this moment You are unable to complete tasks, such as downloading software. Click Yes to continue installing VirtualBox.
Then you will see a confirmation window Ready to install(Everything is ready to install). Click Install(Install). From this point on, the process is mainly automated; the program will simply request permission for various permissions as the process progresses. Give the required permissions and agree to all the default settings - eventually you will see the final dialog box (Figure 5) informing you that the VirtualBox installation is complete. Click the button Finish.
Step 2: Download Windows 10 Technical Preview
Depending on the speed of your Internet connection, downloading Win10 Preview will take approximately 30 - 45 minutes (ISO download sizes range from 2.91 to 3.96 GB). Setting up a virtual PC will only take a few minutes. Thus, now is the time to start downloading the Win10 Preview installation file. Let it download to background while you are setting up a new virtual Windows machine 10.
You don't have to pay for Win10 Preview, but it does require that you have a Microsoft account and that you join an Insider Windows program InsiderProgram(). Once this is done, click on the "Install Technical Preview" link, which will direct you to download the ISO file. Select the language and bit depth (32 or 64) you need and click Download.
If you're currently running 64-bit Windows, you can download and run either the 32-bit or 64-bit versions of Win10 Preview; if you have a 32-bit system, you can only use the 32-bit version.
Please note that there is only one key - NKJFK-GPHP7-G8C3J-P6JXR-HQRJR- but you probably won't need it.
Please keep in mind that an ISO image file is essentially DVD image. VirtualBox can use the Win10 Preview installation file directly - you won't need to burn the image to an optical disc or flash device. Just leave it on your PC in a convenient place such as the Downloads folder.
Step 3: Create a new virtual machine for Windows 10 Technical Preview
When you launch VirtualBox for the first time, its main manager, VirtualBox Manager, will display a welcome dialog (Figure 6). Start the new virtual PC setup process by clicking the blue icon Create in the upper left corner of the manager.
VirtualBox will now guide you through a series of installation dialogs.
- Tell them the OS type as well. (virtual PC name and operating system): it is better to give the virtual machine a simple and meaningful name. In the following examples, I will be installing the 64-bit version of Win10 Preview. Thus, in the field Name I entered a completely self-explanatory title: Win10-64 Preview. Name your virtual machine whatever you like.
Finally, use this simple method to select the version. Win10 Preview uses the same presets VirtualBox, same as Windows 8.1. So, if you downloaded the 32-bit Win10 Preview, select Windows 8.1 (32-bit); if you downloaded the 64-bit Win10 Preview, select Windows 8.1 (64-bit). Figure 7 shows what I chose.

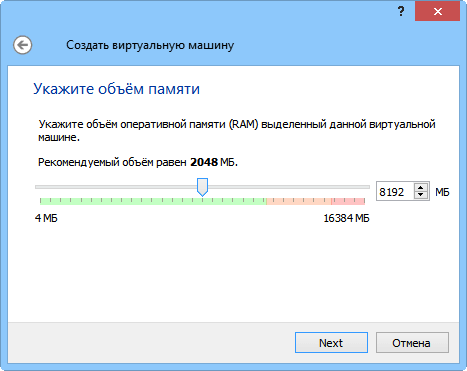
- Adjust virtual memory size : In the Specify Memory dialog box (Figure 8), make sure your Win10 is assigned at least 1 GB of RAM. Better if more. Moving the control knob along the color-coded scale adjusts the total amount of RAM available to the VM. Set the regulator in the green area so that both the VM and the non-virtual host system have enough memory to operate normally.
- Other settings : You will now go through dialogues Select your hard drive, Specify type(hard drive), Specify storage format(storing data on a physical hard drive), and Specify the file name and size(file location and size). Simply confirm the suggested default settings in each dialog box: “Create virtual hard disk", "VDI (VirtualBox Disk Image)", "Dynamic Virtual Hard Disk" and "25 GB" as the virtual disk size.
As a result, you will have a simple, empty and untouched virtual PC created, ready to install a new operating system.
Step 4: Last two settings
By default, the new VM will try to boot from its virtual hard disk. But your virtual machine's virtual disk is currently empty. To install Win10 Preview on empty disk, the VM must first load the downloaded ISO file using virtual optical drive (virtual device for optical disks). (At this point, however, the file is most likely still downloading. Take a coffee break.)
Selecting the virtual optical drive for the VM requires only a few clicks, just like the other preset setting, selecting the VM's cursor handle. Let's start with the manipulator.
Select the new virtual machine in the VirtualBox manager and click the Configure icon (the big orange gear) as shown in Figure 9.
Go to section System in the Settings window to enter it. On the Motherboard tab, open the drop-down list Cursor manipulator and select PS/2 mouse, USB tablet or USB Multi-Touch Tablet, depending on which pointer you are using on your host machine. I'm using a standard PC with a mouse, so I chose PS/2 mouse(see Figure 10). When you select what you need, click " OK".

Now you need to make VirtualBox use the Win10 Preview (ISO) installation file. The whole point is to correctly insert the virtual installation DVD into the virtual optical drive V.M. (The next few steps are illustrated in Figure 11.)
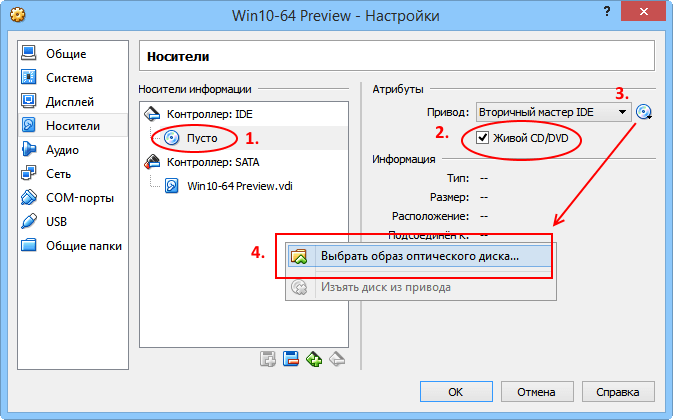
Click the main Customize icon again and select Media. Then, in the “Storage Media” section under the device Controller: IDE click Empty(this is No. 1 in Figure 11). On right side New options will appear in the Media panel.
Now in the Attributes section, check the box Live CD/DVD(#2) and then click the disk icon to the right of the text Secondary IDE Master(No. 3). A pop-up menu will appear. Select Select image optical disk (№4).
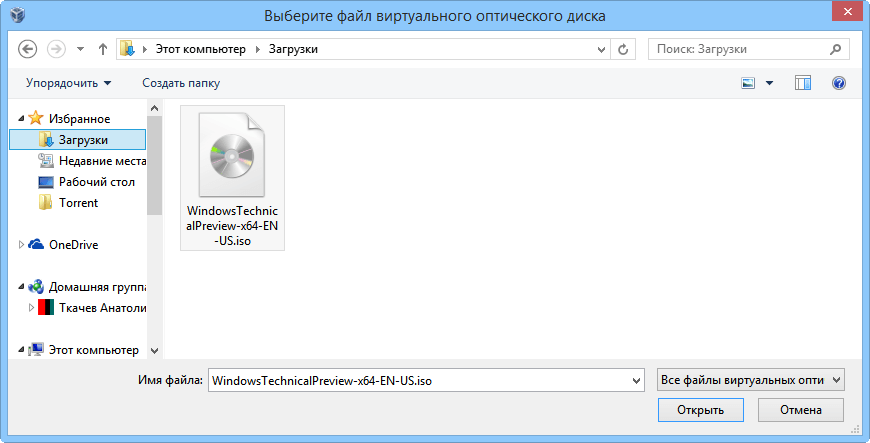
At this step, a recognizable window in the form of Explorer opens. Find the ISO file you downloaded - most likely in your Downloads folder - and select it (usually it will be labeled something like WindowsTechnicalPreview-x; see figure 12). Click Open.
The program will then return you to the Settings/Media dialog. Click OK.
Note: As noted earlier, you may receive a dialog box prompting you to install the VirtualBox Extension Pack. This additional package does not need to be paid for and can be downloaded from the same page where you received the main VirtualBox installation file.
Congratulations! Now the installation of the virtual machine is complete, you can install and run Windows 10!
Step 5: Install Windows 10 Technical Preview
From the main menu of the VirtualBox manager, either double-click the Win10 virtual machine or select it and click the “Run” icon (Figure 13).

The VM will now boot from the installation ISO file located in the virtual DVD drive and start installing Win10 Preview. The initial dialog boxes will probably be familiar to you - they are very similar to those in previous versions Windows.
Note: When you first click inside a VM window, a VirtualBox message may appear telling you that your cursor will be temporarily locked within the window. This is a common situation. If you decide to go outside the VM window, simply click left (or on some systems right) Ctrl key to return control of the mouse to the host computer.
In the first Win10 installation dialog, the program will ask you to confirm or change the language and keyboard type. Select “Russian (Russia)” from the “Time and currency format” drop-down menu (Figure 14). Then you will see a window with a button Install now(Start installation). Click it. You will then be asked to accept the terms of the license agreement - do so.


After some time, the VM will reboot. Ignore the “Press any key to boot from the CD/DVD” prompt and let the VM boot from its own hard drive. Once you reboot, the program will walk you through a final series of Win10 settings (the defaults are fine) and personalization settings, such as prompting for login information Microsoft records.
If you don't have a Microsoft account, or if you don't want to use an existing account, you can create a new one for free as you go. The final options and features of the installation procedure are self-explanatory; For Windows users 8 or 8.1, as before, they will look familiar.
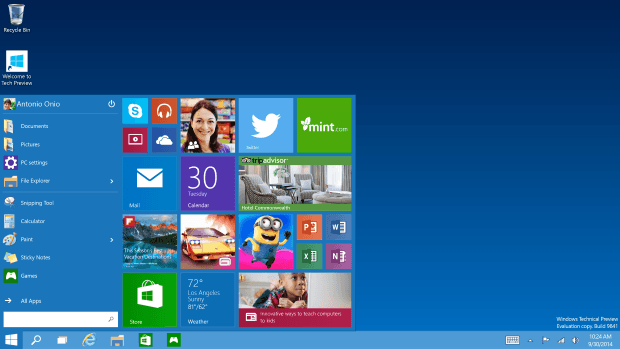
When you're done, Win10 will be up and running and ready for you to test. If you selected a mouse as your pointing device, you will be taken directly to the Win10 Desktop, shown in Figure 16.
Note: Windows 10 Technical Preview has already had several updates. One of your first tasks is to launch Windows Update(Windows Update). (Right-click the Start button with the Windows flag and select Control Panel from the pop-up menu, click System and Security/Windows Update Windows updates), and then click the link Check for Updates(Search for updates)).
A few more preparations so that everything loads smoothly
At this point, your virtual machine is still configured to boot from the installation ISO file. If you leave everything as is, then every time you start your VPC you will receive a request “Press any key to boot from the CD/DVD”.
To avoid this you should disconnect ISO file from virtual DVD drive. Only a few simple steps are required.
Close Win10 as usual - that is, right-click on the Start button in Win10 and select Shut down or sign out(Shut down or log out), then Shut down(Shutdown). When Win10 closes, you will be returned to the VirtualBox manager. (Note: Most virtual PC settings cannot be changed while the virtual machine session is running.)
With the Win10 VM selected, click the Configure icon and go to the Media section (you went there before, see Figure 11.) On the right side of the Media window, click the disk icon next to the item Secondary master IDE .
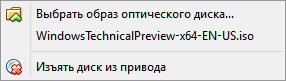
From the options drop-down list, select Disc removed from drive, as shown in Figure 17.
Click OK to close the settings window. Ready!
Try Windows 10 Technical Preview
If you know Windows 8, then, mainly, in Win10 Technical Preview you will feel like a fish in water. The overall concept is basically the same, but with many of the expected improvements added. If you've never used Windows 8, you may find working on the new OS a little difficult.
The following information about the Windows 10 Technical Preview on our site should help guide you:
- Microsoft introduced the new Windows 10 OS. Official Microsoft press release.
User manual in Russian.
- Antiviruses for Windows 10 Technical Preview. Information about official support for the new platform from antivirus vendors, user experience in installing antivirus solutions.