Long-time experts in the field computer technology note the priority of Apple in the field of personal computer development.
From the mid-70s of the last century to the present day, Apple has been confidently competing with IBM in the creation of computer technology. In the old fashioned way, their computers are called “Macs,” despite the fact that real Macintoshes are already of museum value.
Their technical solutions famous manufacturers shamelessly copy them. Macs are reliable and functional. At the same time, the Windows operating system is more familiar, so a number of users need to install Windows 7 on MAC OS.
Popularity of Apple computers
The main differences between Apple's developments:
- “closedness” of architecture;
- high reliability and ease of use;
- ease of working with graphics and printing;
- leader of new products in the computer industry.
The MacBook belongs to the family of popular laptops developed by Apple. MacBook laptop latest version features functionality, compactness and quiet operation. The dimensions are amazing: thickness about 13 mm, weight up to 1 kg. The developers were able to abandon the use of fans in the design and create a new motherboard with a high density of elements.
The keyboard has a highly stable press locking mechanism, and the keys have individual backlighting. Retina display 13" diagonal is exceptionally thin and produces high-resolution images. The touchpad panel is very sensitive to touch, capable of varying the degree of pressure when touched. The battery capacity has been increased by optimizing the housing design.
Aluminum parts create a strong and reliable mechanism for fastening the rotating part of the housing. The use of a new USB-C connector for charging, video and sound playback, and data transfer also makes it possible to ensure the declared geometric parameters of the product.
Two installation methods
There are two installation methods: using Apple's own Boot Camp software and using the Virtualbox virtual machine.
Boot Camp offers the user the following sequence of operations to install the Windows operating environment:
The virtualbox machine emulates the work:
- BIOS;
- random access memory;
- hard drive;
- peripheral devices.
 For computers designed for the Windows platform, used to install a system other than MAC OSX. The program is distributed free of charge.
Installing Windows 7 on MAC OS X via Boot Camp
Installation requirements:
- the hardware platform must have a connection to the Internet;
- an OS X administrator account is used to access the “Boot Camp Assistant” program;
- have a working keyboard, mouse, trackpad;
- 2 GB or more of RAM and 30 GB or more of disk space must be available for the initial installation of Windows to upgrade earlier versions Windows will need at least 40 GB;
- necessary installation disk For Microsoft Windows when installing via a built-in or external DVD drive;
- You may need a USB flash drive with a capacity of at least 8 GB to install drivers.
What is necessary?
Installation requires:

System update
Installing Windows 7 OS usually requires version 4 of Boot Camp Assistant (BCA) on a 32-bit platform and version 5 for 64-bit platforms. Update your Boot Camp software to have the latest Windows drivers to your Mac computer.
This can be done in two ways:
Entry into the BCA program may require knowledge account with administrator rights.
Video: Installing Windows 7 on Mac
Installation steps
The installation is lengthy and will require connecting a source adapter. We proceed from the fact that full installation updates have been made. Seven requires use file system NTFS format.
First remove all disks with lower numbers if the installation is not on the first disk.
Once the OS installation is complete, the data disks can be recovered. If you have installation problems, use disk utilities recovering and erasing data with restarting the BCA.
Installation procedure:

Install OS using VirtualBox
To install, you need to download the program file and run it on your computer.
Installing the program
Installing VirtualBox is carried out by performing the sequence of operations 1-15:
Windows OS Installation Steps
Installation can take place via an installation disk or its ISO image. If the installation takes place using an installation disk, then it should be inserted into the DVD drive, in the “Attributes” column, select the “Drive” item from the drop-down list, and also check the “Allow direct access” checkbox.
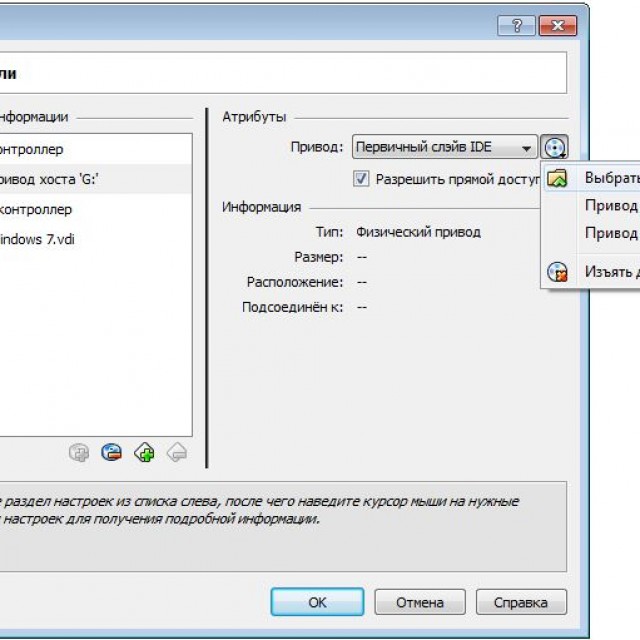
Photo: Checking the Allow direct access checkbox
If there is an ISO image of the program installation disk, then the “Attributes” column is filled in through the “Virtual Media Manager” as follows:

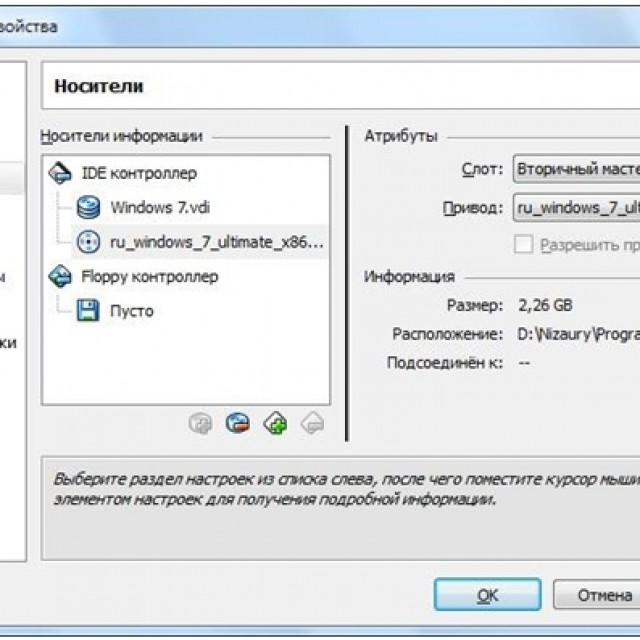
Photo: Media item in Windows properties section
Next, you should exit to the main program window, where you click the “Start” button. When information windows appear, click the “OK” button. On the virtual machine screen, click the mouse and press the “Capture” button. Further installation of the OS on the VM is no different from normal installation.
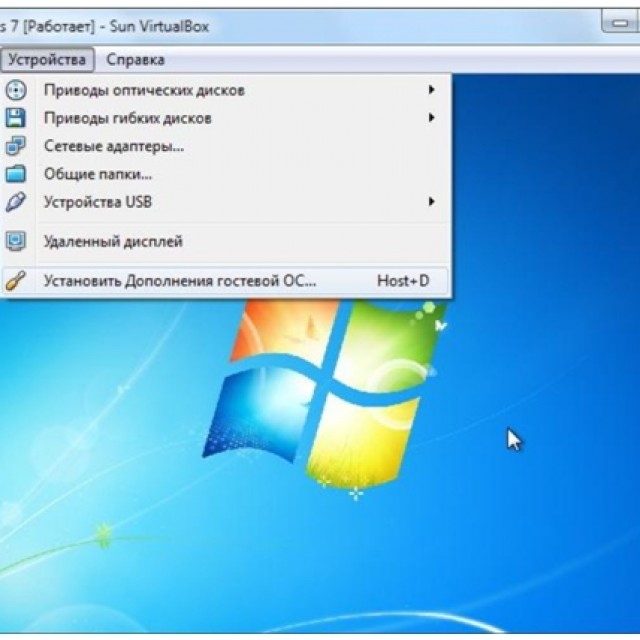
Once the installation is complete, VirtualBox will immediately launch the operating system. The VM blocks mouse and keyboard use when used in a host environment. Switching between VM windows and the main OS window is done using the Right Control host key. If you exclude the capture of the mouse cursor and keyboard of the VM, then you can use the mouse cursor in the virtual and main operating systems, and also have a common clipboard. To do this, use the "Devices" menu VirtualBox machines go to the “Install Guest OS Additions” item.
Computers from the well-known company Apple are very multifunctional and have a wide selection of specially designed software. But sometimes it happens that a Mac or iMac user wants to install an operating system that is already so familiar to them Windows system. Sometimes OS Windows may be needed to install some programs so that you can play your favorite games, but there is no suitable alternative for Mac.
You can install the OS yourself. This can be done in several ways, for example, through a utility or using a flash drive. Let's look at the example of applications from Apple, which are called Bootcamp, Parallela Desktop and Virtual Box.
Preparing and installing Bootcamp
This option allows you to install an additional OS on Mac and iMac in a separately created partition on your hard drive. You can choose which system to boot into during startup. The advantage of this utility is that by installing the program through it, all the resources of your PC will be available to Windows, this will allow you to use the Mac’s performance to the maximum. The computer will easily play the latest games and perform complex tasks.
Before installing an additional OS, keep in mind that it will take up a lot of space on your hard drive. Make sure it has the required gigabytes. On average, you may need about 30 Gb.
Before you begin installing the operating system on your iMac or Mac, check and prepare Boot camp. First, make sure that all updates from Apple are installed on it. To do this you need to do the following:
When you launch the utility, you will have the opportunity to select the location where OS Windows will be installed. Before starting the software, you should close all open applications and programs.
Once the utility and flash drives for copying information are ready, you can proceed to the first steps:
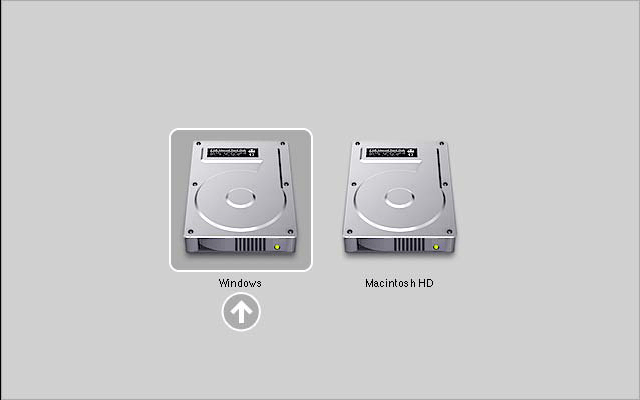
Once all files have been copied, the iMac will automatically begin rebooting. Next, to display the boot manager, press and hold the Alt key. On the Mac, the disk menu will open, mark the partition with the name of the operating system. This will be followed by launching the OS and setting the parameters.
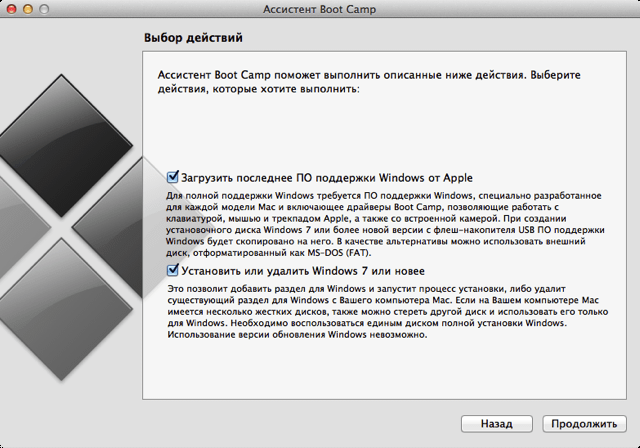
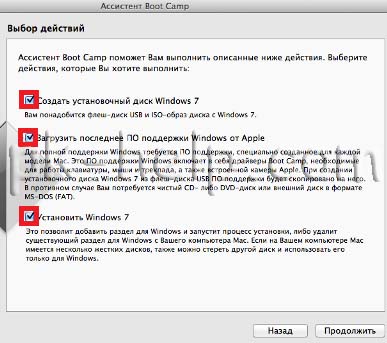
To install Windows 8 you need to do the same. Only in the window Selecting Actions"You should check the boxes next to the items " Download latest software" And " Create a disk to install Windows 7 or new».
Windows installation on a Mac, or rather, setting up the program begins with choosing a language. Select the correct language right away, otherwise you will have to do all the steps again. Having selected all the parameters in this window, click the Next button, which is located in the lower right corner.
To install the Windows operating system on a Mac, carefully follow all the instructions provided. Do not restart or turn off your computer during the process. The procedure cannot be interrupted in any way.
After your iMac restarts a second time, you can begin installation. necessary drivers. To do this, download them back from the flash drive, install and run the installation program.
Installing Windows via Bootcamp using a USB flash drive
Installation can be carried out either using a disk with operating system, and via a USB drive. To load a program from a flash drive onto a Mac, you must first download it. If we are talking about Windows 8, then the version of this system must be in iso format.
This installation option on Mac and iMac is no different from the previous one. Before you begin, you should also check bootcamp for updates and save all the necessary data. The following instructions will help you complete the task:
But it happens that when installation media is a flash drive, the utility requires you to insert a disk with the program and refuses to continue downloading the software to the iMac. In this case, you can download the driver Daemon Tools Lite iMac. With its help we install Windows iso image, he will serve virtual drive and then Bootcamp will complete the installation process of our OS without any problems.
Installing Windows on Mac and iMac via Parallela Desktop
In addition to Boot Camp, there are several other options for installing an additional operating system. For example, you can use the program Parallela Desktop, which is a virtual machine on the Windows installation. You will be able to run Windows programs without rebooting the PC.
You can complete the installation by following the instructions below:

Feature of Parallela Desktop - high performance programs. You can download the free trial version or buy Parallela Desktop using the link below:
Installing Windows using VirtualBox
VirtualBox is one of popular programs virtualization. With its help, your PC will easily run two operating systems at once. Installing an additional OS via VirtualBox is quite simple.
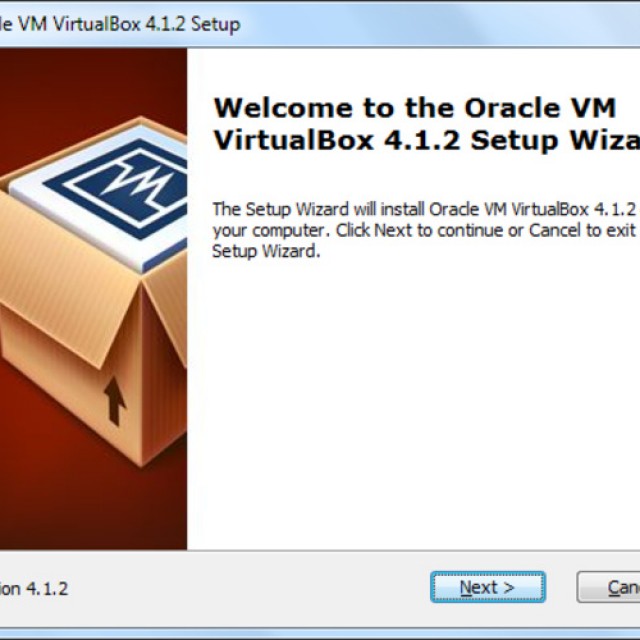
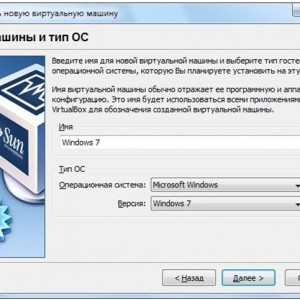
To get started, enter the query VirtualBox into the search engine, go to the official website and download the program. Once installation is complete, click on the program icon and select “Create”. After this, you can begin installing Windows.
Sometimes it happens that after installing an additional operating system, problems with sound or video playback appear on the iMac. To solve this problem, you need to install on your Mac all the drivers that were previously saved to an additional storage device (disk or flash drive).
After all the steps taken, the installation of Windows on Mac is completely completed. Restart the program and everything will definitely work.
Video on the topic
Over the past few years, laptops and Apple computers (phones and tablet computers, of course, are no less popular, but we’re not talking about them now). But having bought an Apple computer or laptop, some people are faced with the fact that they absolutely cannot work on the new Mac OS operating system or they simply need Windows in addition to this operating system. And here many people have a question - How to install Windows on a Mac computer/laptop? You will find out the answer to this question if you read the article.
The simplest and affordable way Installing Windows on a Mac is to use the Boot Camp program. Boot Camp is a special application from Apple for installing WindowsXP/Windows7 by breaking hard drive into 2 partitions, one for each system. Switching from one system to another is possible only by restarting the computer.
In order to install Windows on your Mac, you will need:
1 MacBook Rro/ MacBook Air/ IMac with Mac OS installed;
2 USB storage(flash drive (at least 4 Gb) or external HDD)/ DVD disc(from USB storage device (flash drive or external hard disk) transfer all the information, since in the future everything on the media will be deleted after formatting);
3 Disk with Windows7 operating system or its ISO image;
4 This article and about an hour of free time.
Attention!!! If you are going to install Windows with via USB flash drives on Mac late 2013 and newer (they use all USB 3.0 ports) you need to use a USB 3.0 flash drive. Otherwise, when installing Windows, you will not have active USB ports and a wireless keyboard.
Turn on your Mac and install the latest updates. To do this, click on the apple (left, upper corner) and select "Software Update".
After you have installed all the updates, proceed to the next step, launch Boot Camp. To do this, click on search (magnifying glass icon in the right top corner) and enter it there "Boot Camp", among the found ones, click on "Boot Camp Assistant"".

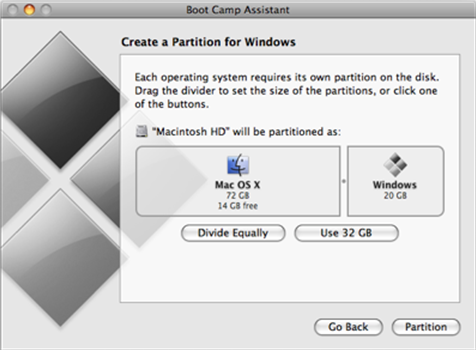
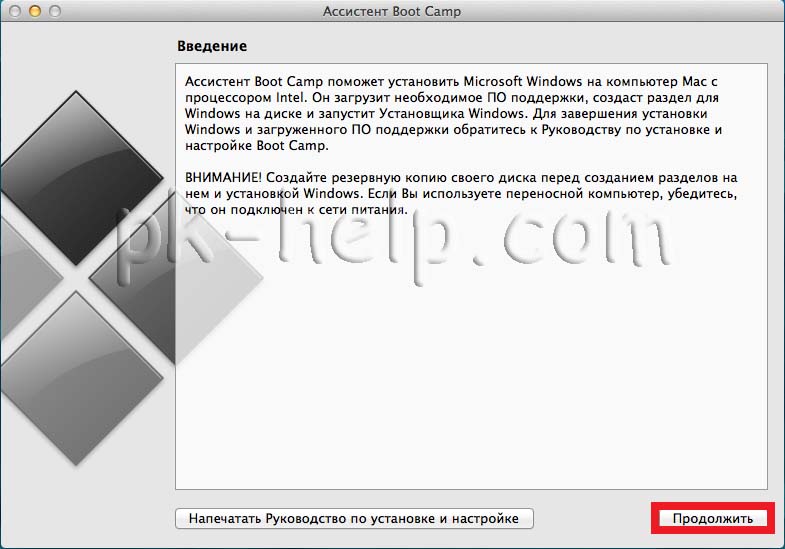
In the window that opens Boot Camp Assistant, read the information and click "Continue".
In the next window, you need to select settings for installing Windows 7, or more precisely, how you will install.
Installation on Mac Windows7 using disk |
Installation on Mac Windows7 using USB flash drive/external hard drive |
|
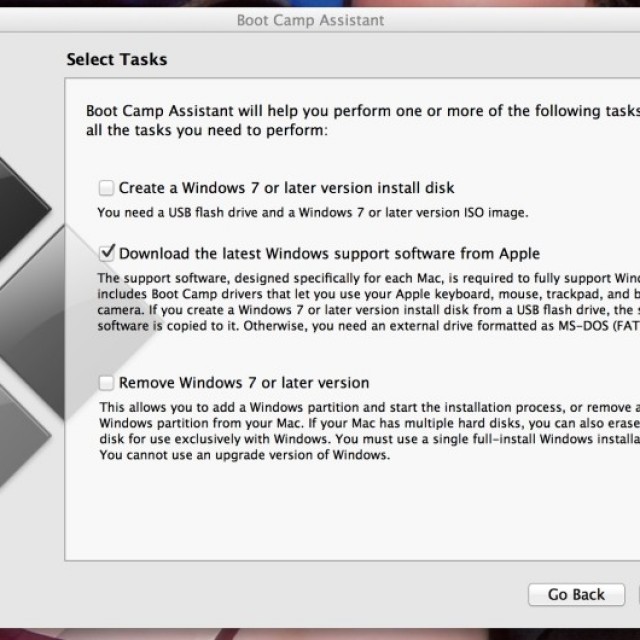
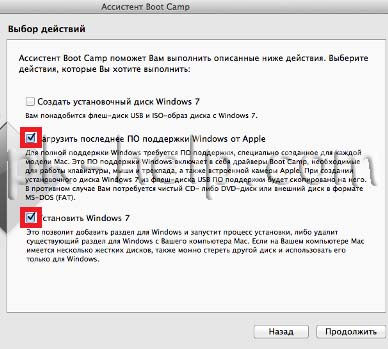
If you have a DVD with the Windows7 operating system, you need to select the last two items, namely Download latest software Windows support from Apple(loads drivers for Windows7) and Install Windows7(allows you to determine the size of the volume where Windows7 will be installed and when rebooting, it boots from the DVD).
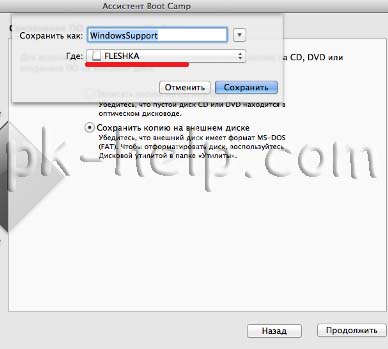
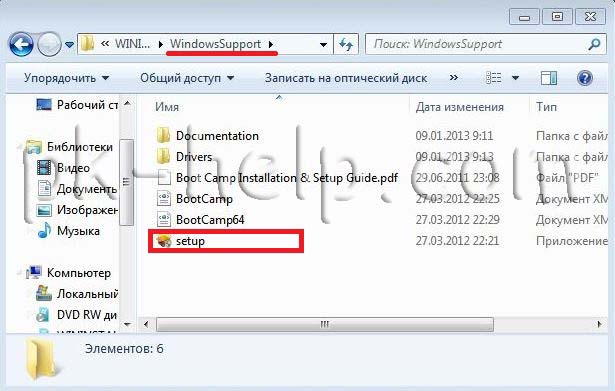
Leave the default folder name WindowsSupport All drivers will be saved in it and we select the media on which all files will be saved (in this example, it is a USB flash drive).
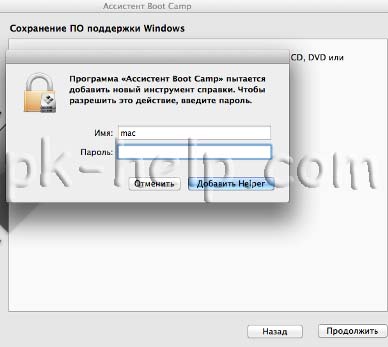
Then enter your computer administrator credentials and click "Add Helper".
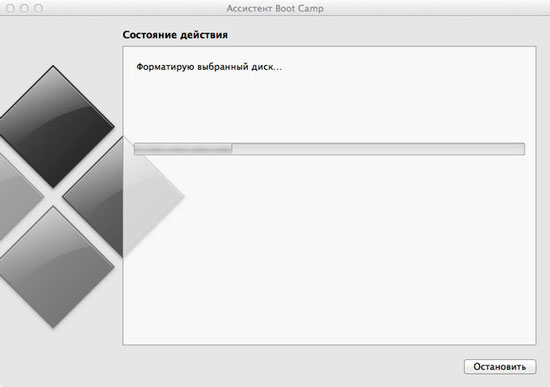
After this, the driver download process will begin. |
If you have an ISO image on your computer, in this case you must leave all the checkboxes. In particular, for MacBook Air this method is very convenient, since it does not DVD drive and installation from a USB flash drive/ USB hard disk will be more reasonable.
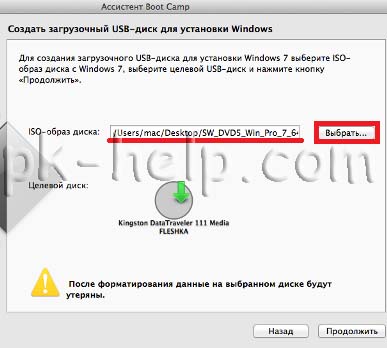
Button "Choose" indicate the path to the ISO image of Windows7.
A warning window will then appear indicating that your drive/ USB device will be formatted and all information will be deleted from it.
After this, the USB drive will be formatted and copied to it. setup files and drivers. |


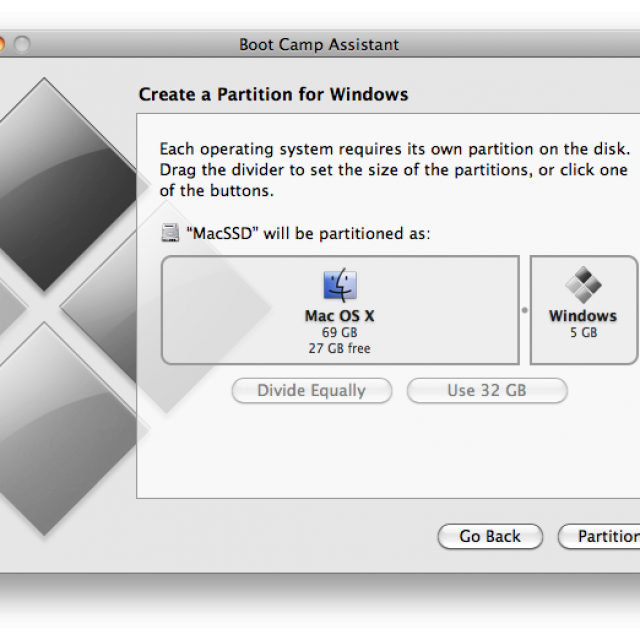
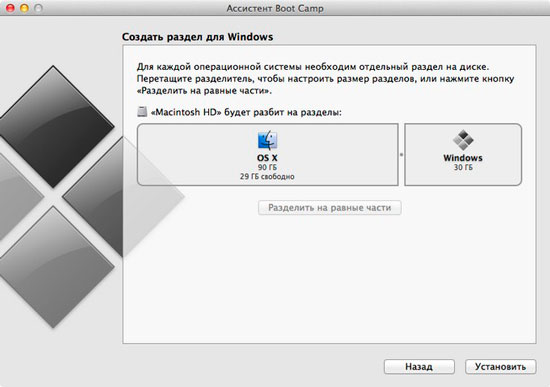
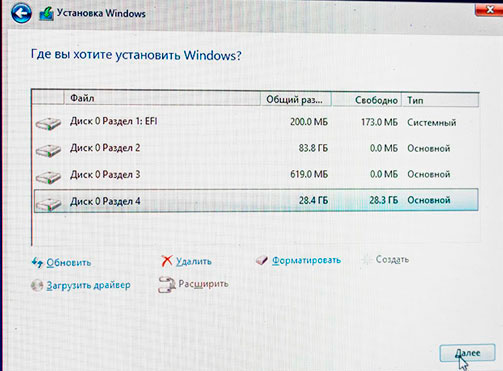
The next step is to specify the amount of disk space under Windows7; to do this, simply move the slider and determine the partition size for the Windows operating system and click "Install".
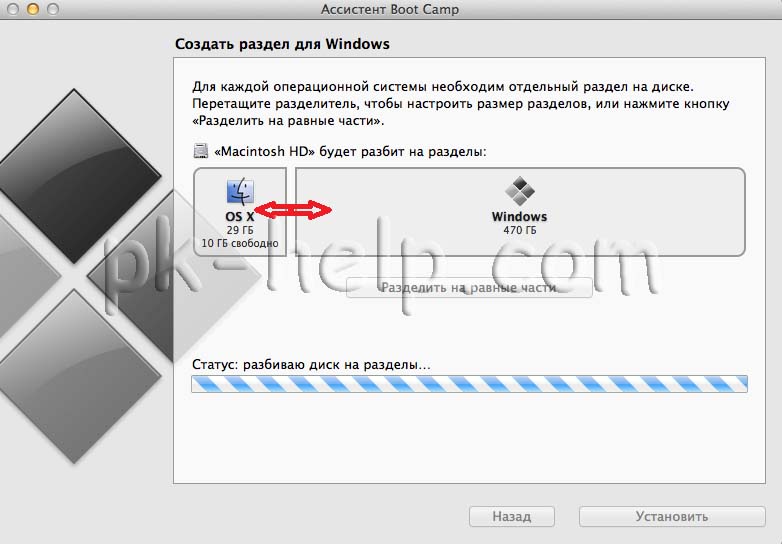
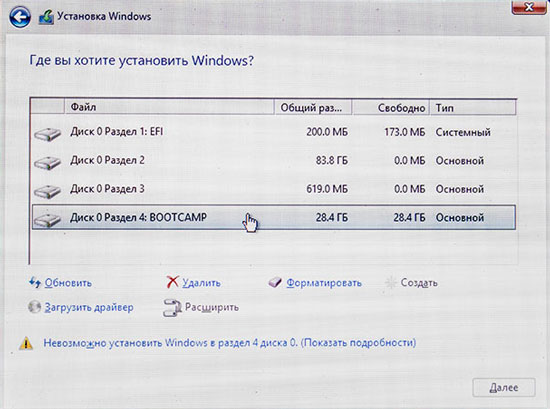
After this, the computer/laptop will reboot and the Windows7 installation process will begin upon loading (it is no different from installation on any other computer).
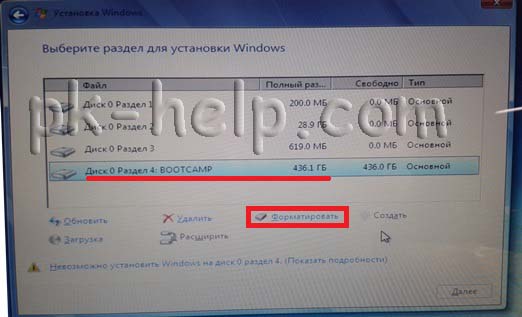
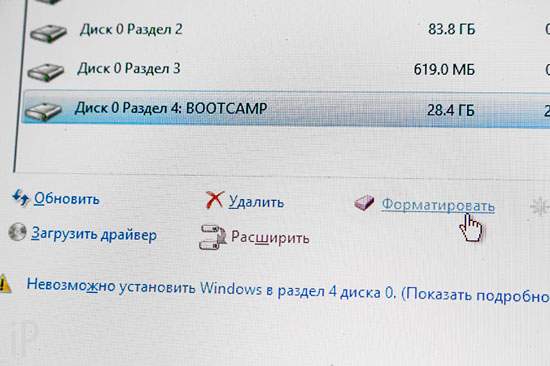
The only thing I would like to add is that when choosing a volume on which the operating system will be installed, be extremely careful not to delete existing sections. Just format the BOOTCAMP partition and start installing Windows7.
After installing Windows7, go to the USB drive, you will see a folder in it WindowSupport(it contains drivers for Windows7), run the file setup.exe.
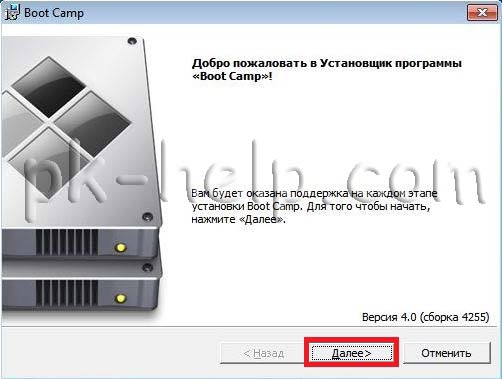
In the next window you read License agreement, accept it and click "Further".

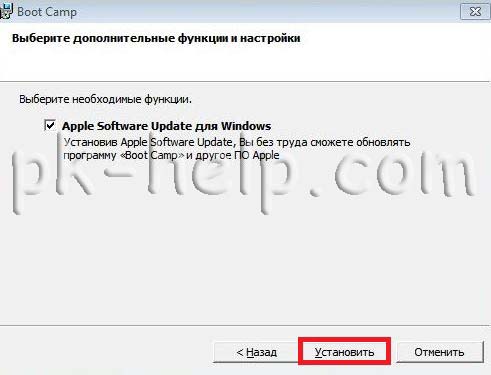
After this, you will be prompted to additionally install Apple Software Update, you can leave a checkmark and click "Install".
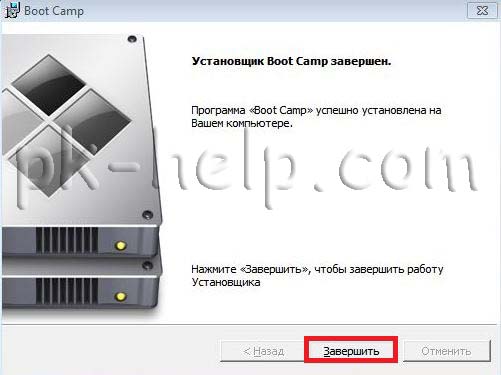
After this, the installation process of all drivers will begin, it does not require your participation, just when it is finished, a window will appear indicating that the installation is complete. Press the button "Complete".
Then there will be a window asking you to restart the computer, click "Yes".
![]()
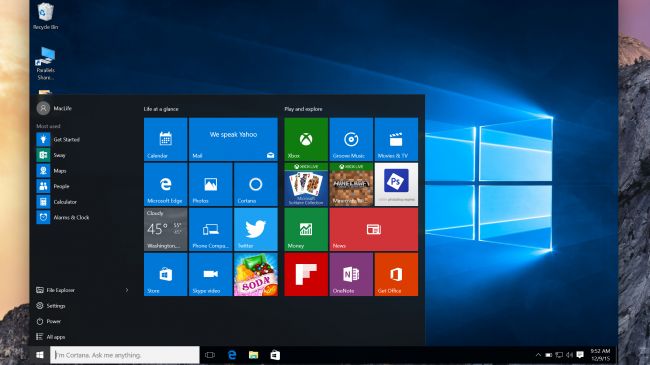
After the reboot, you will have Windows 7 completely ready to use.
Let me remind you that Mac OS, in this installation option, remains (on your device there are two Mac systems OS and Windows7). By default, you will always boot into Windows7, but if you decide to boot into Mac OS, to do this you will need to restart your computer/laptop and hold down the button while booting "Alt". After which you will be asked which operating system to boot your computer/laptop under.
If you want to work in both Windows and MAC at the same time, I recommend reading the article Installation and simultaneous operation of Windows XP, Windows 7, Windows 8, Windows 10 on MAC OS X (MacBook Rro/ MacBook Air/ IMac) .
Video installation of Windows 7/Windows 8 on Macbook PRO, AIR, iMac.
Hi all! In one of the previous articles, we looked at how you can quickly install Windows applications on a Mac using an emulator program, but this method is good only when the need to run programs with the exe extension does not arise often, or for a short time.
In all other cases, it is better to install Windows on a Mac as a second OS, especially since your Apple device has special utility Boot Camp is designed to make the installation process extremely simple and convenient.
But as practice shows, not all users install Windows on a Mac via Boot Camp without a hitch; problems often arise due to seemingly insignificant details. This prompted me to write an CURRENT article on this topic.
A little theory
Before starting the practical part, I’ll tell you in a few words about the very principle of Boot Camp. And this principle is very simple, the program simply takes the required piece of disk space and makes it “edible” for Windows. Before this, she creates a bootable USB flash drive from the image that you kindly indicate to her and “complements” it software which allows Windows and Mac to become friends. Many people mistakenly believe that the utility completely takes care of the installation process; no, you already do this yourself, step by step fulfilling the system requirements.
IMPORTANT: Before starting installation, I strongly recommend that you do backup copy systems, nothing in this world is perfect, and lost data can sometimes be very disappointing. The simplest and reliable way create a backup using .
What you need to know before installing Windows on Mac
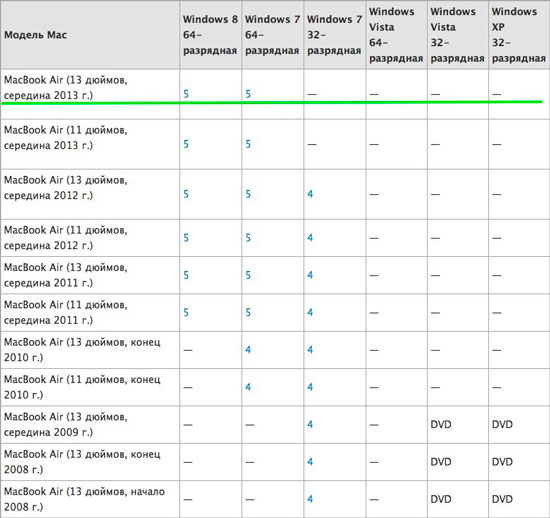
So, in order for our manual to be truly up-to-date, I chose the 13-inch MacBook Air 2013 as a victim of the future symbiosis of two operating systems.
Before we begin any action, we need to find out what versions of Windows we can install on this Mac. Pay attention to the table.
More information and full list You can find the models at this link.
As you can see in the table, our experimental Mac tops the list and we can only install versions 7 and 8 of Windows on it, and only 64-bit ones. I’ll tell you why Apple refused to support 32-bit “windows” with the latest generation of Macs. I’ll tell you a little later. You've probably already noticed numbers 4 and 5, these are Boot Camp versions starting from which you can install one or another version of the operating system. In general, before starting the installation, it’s a good idea to make sure that you have the latest updates for both the utility and Mac OS X itself.
Well, now is the time to open the Boot Camp assistant ( programs > utilities) and get to know him better. On initial stage the program displays the following dialog box:
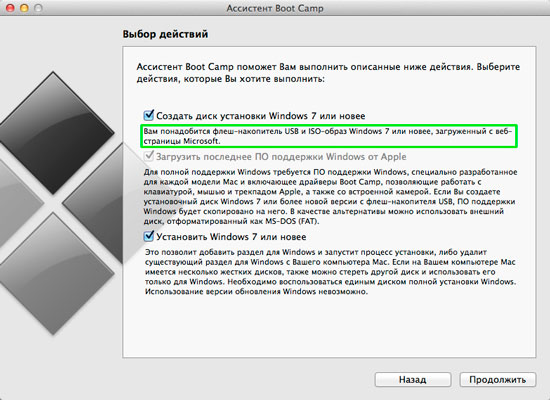
1. Create a Windows installation disk
2. Download the latest Windows drivers
3. Install “seven”. We have nothing to delete yet.
The first point immediately warns us that for further actions you need to have a clean USB flash drive (at least 8 GB) and an ISO image of the Windows we need (in my case, this is only 64-bit “seven” or “eight”). I won’t tell you where and how you can download an ISO image of Windows, everyone has known this for a long time, but if not, then Google will help you.
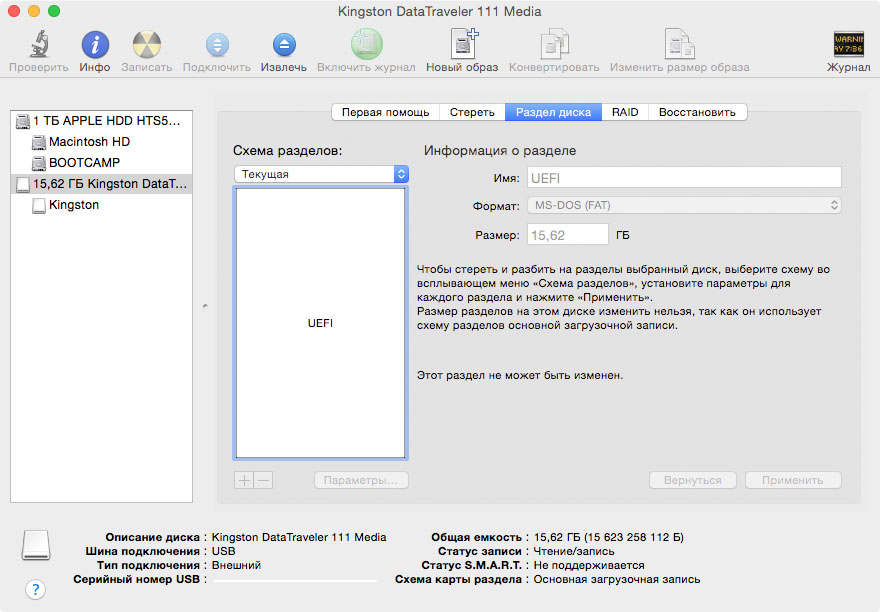
By the way, Apple completely abandoned the BIOS and replaced it in the MacBook 2013 with UEFI, a new specification that has a number of advantages. So, these are currently the only MacBooks that support installing Windows and Mac OS X via EFI. Most likely, along with the BIOS, support for 32-bit systems also fell into oblivion due to lack of use.
Installing Windows on Mac
Now that all the preparatory operations have been completed, let's proceed to the installation itself:
1. Insert clean USB disk, and click continue (before doing this, make sure that all the points that I mentioned earlier are ticked)
2. Select the Windows ISO image (I prefer “seven”) and also click continue.
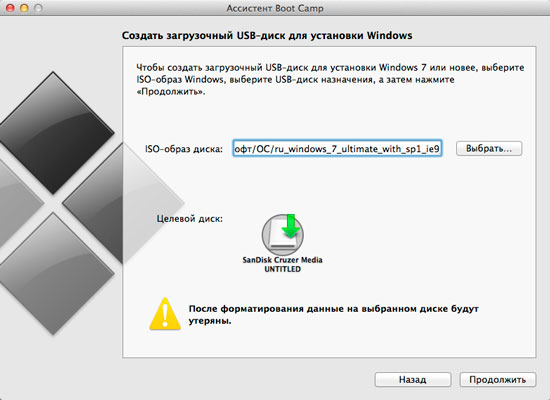
3. Now you need to wait a little while the assistant creates bootable USB flash drive and download the latest software update. The speed of this stage largely depends on the speed of the Internet connection, since the downloaded drivers take up about 500 MB. (it took me about half an hour).
After creating the partition, your Mac will restart and start booting from the flash drive; the further installation process is no different from a regular Windows installation.
When the system is installed, open installation flash drive, it should now be called WININSTALL, find the Boot Camp folder and double-click the “setup.exe” file in it, thereby starting the installation of the remaining drivers.
This is how it happens ideally, nothing complicated, but some still don’t succeed. Therefore, if you have any questions or an emergency situation arises, write in the comments, we will sort it out and supplement the article so that others do not suffer. I almost forgot, in order to select which OS to boot, hold down the alt key when starting the Mac.
P.S. Wandering through various forums, I very often came across the following angry statements from users:
— “Installing Windows on a Mac is a perversion”
- “Why did you buy a Mac if you still use windows,” etc.
I don’t quite understand the people who write this, because everyone has long known that banking and accounting programs, as well as many other applications (for engineers, designers, for example) are available only for Windows. So this does not mean that people, due to their work duties, should deprive themselves of the pleasure of using a Mac. I worked in Windows, rebooted and again found myself in the wonderful world of Mac OS X.
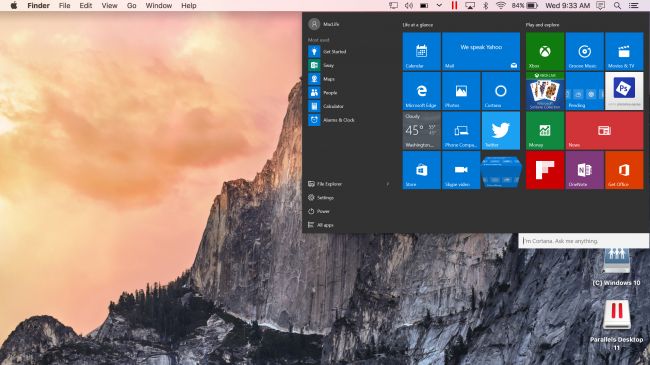
As great as macOS is, Mac owners sometimes still need Windows on hand. More PC-compatible software is available for Microsoft's brainchild, and if you're a gamer, you'll need Windows to run the most popular gaming titles.
There are two simple ways run Windows 10 on Mac, which do not require restarting the computer, which is relevant for Bootcamp technology.
Parallels Desktop
Most in a convenient way using Windows 10 on Mac is considered to be downloading Parallels Desktop for OS X. The application is paid, but includes a free trial period. This is the best option considering the features it offers and ease of use.
Before you can use Parallels, you must obtain a copy of Windows 10. You can download the system image in ISO format. Most users will need 64-bit Windows version 10 in Russian, but your requirements may vary. Download the system file to your Mac.
Next, you should download a copy of Parallels Desktop for OS X. Select the "Try Now" or "Buy" option and download DMG file. After downloading, unzip the archive and go through the installation process. If you decide to purchase Parallels, you can immediately enter license key for full access to all program features. Otherwise, opt for the 14-day free trial.
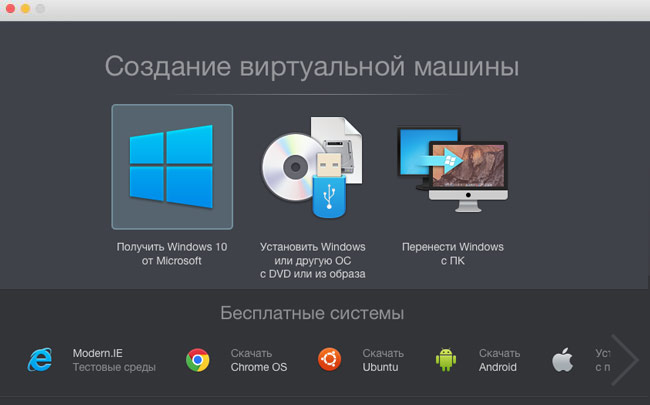
Launch Parallels Desktop and begin installing Windows 10. You will be given three options: get Windows 10 from the Microsoft website, install Windows from a disk or image file, or transfer Windows from another PC. The second option suits us. The program will pick you up ISO file automatically. If this does not happen, select the image location manually.
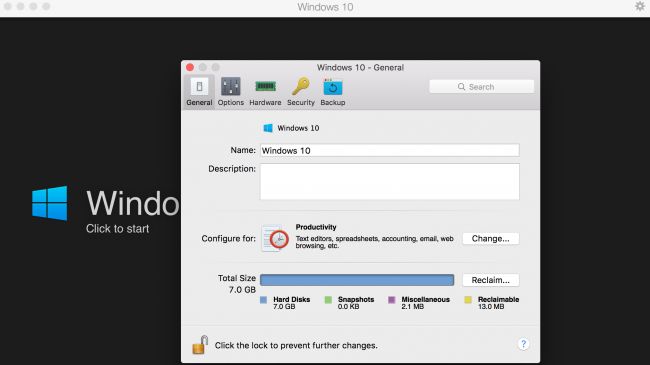
While navigating through the settings pages, disable the “This version requires a license key” option. You will be prompted to select how you want to use the virtual machine and allocate available memory. The settings can be changed later, so don't put too much emphasis on them. You must also select a name and specify a storage location Windows image 10.
After completing all the necessary settings, Parallels will boot into Windows. Select "Home Edition" and begin the installation process. In a few minutes, Windows 10 will be installed on your Mac. Parallels should automatically open Coherence mode, which allows you to use Windows features 10 simultaneously with macOS running. To switch to full-screen Windows display, go to Parallels in the Finder menu and select View -> Exit Coherence Mode.
You can now run Windows 10 compatible apps and enjoy all the features of both systems, including Cortana, Windows Document Quick View (by pressing the Spacebar, just like in macOS), easier file sharing, printing, Mac location services for Windows applications and so on.
VirtualBox
If you don't need as many features as Parallels offers, running Windows 10 on a Mac is fine. free utility called VirtualBox ( copy of Windows 10 will be needed in any case).
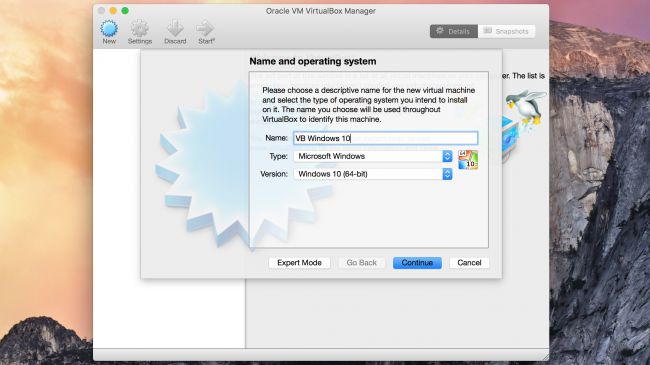
You can download VirtualBox for macOS. Download the DMG file, open it and double-click to install the application. After completing the procedure, launch VirtualBox from the Applications folder, specify the name, amount of allocated physical and RAM memory to create virtual machine with Windows. Then click on the green arrow and perform a “custom” installation of the system.
Congratulations! You now have fully functioning Windows 10 on your Mac.


