Not much time has passed since the appearance of USB Flash drives on the IT product market. Having abandoned the “optical dependence”, practical users, and in large numbers, switched to compact and highly efficient storage devices - flash drives. However, few of you, dear readers, know that a Flash drive can be used as a removable disk with an operating environment preinstalled on it, say, the seventh version from Microsoft. What is needed to implement a portable project? You won't believe it, but there is only one program for burning Windows 7 to a USB flash drive. You will learn about what software we are talking about from the material in this article. At the same time, you will know how to use it. By the way, readers who notice the double meaning in the title will be in for a pleasant surprise: you will definitely find answers to your questions. Detailed instructions and practical recommendations are waiting for you!
Usability system: “Compact USB Windows”
It is human nature to simplify our lives. And in our age of speed and technological achievements, this is especially noticeable. Thanks to the compact flash drive, the process of storing and exchanging data has become much more comfortable than when using a CD/DVD drive. Some modern modifications of USB Flash drives can have quite serious memory capacity. In our case, to “install” Windows 7 on a flash drive, an 8-gigabyte reserve is enough. Once you create a portable version of the OS, you can work on any computer in the environment that is familiar to you. Moreover, the settings, parameters and software you need will become available (in terms of use) literally a few minutes after you insert the Flash drive into the USB connector of the computing device.
Operating system on a flash drive: step-by-step action plan
Before you begin directly following the instructions for setting up and using a USB storage device, please review some technical requirements:
- It is recommended to use a Flash drive with specification 3.0. Since in our case, the speed of data exchange is a very important indicator.
- The required disk space is at least 8 GB. If you are going to use additional software, then the disk capacity should be much larger.

Step No. 1: Download and launch special software
So, to install the OS on a USB drive, you need an appropriate program for writing Windows 7 to a flash drive and the operating system distribution itself. An ideal assistant in such a situation would be free application PWBoot. Despite the fact that the utility has an English-language interface, the process of working with the program is not at all difficult. This software tool does not require installation, and therefore is ready to work immediately after you activate it.
Step No. 2: Working with the program and installing the distribution kit
- In the initial window of the utility, check the first item Install Windows - click Next.
- After you click on the Browse button, you must specify the path to the Install.wim file, which is stored in the Sources folder. As you understand, on initial stage The OS distribution must be unpacked or downloaded to (Daemon Tools).
- In the checkbox below, select the required system edition. Since the described program for writing Windows 7 to a flash drive does not support the Cyrillic alphabet, there is a high probability of an error when performing the next step. Therefore, be extremely careful!
- Specify the Flash media as the data destination and click Next again.
- In the System boot volume checkbox, select the USB drive again.
- After you have checked all the boxes, activate the Install button.
After a short recording process and a Finish service message, your removable Flash drive will be ready for use.

As a supplement
Using the same PWBoot utility, you can install Windows on a USB flash drive and in another way - create virtual disk VHD format. This method, without a doubt, will be in demand by users who in the future plan to use a large number of programs or want to “install” a large OS assembly with the subsequent ability to work with data located on physical disk computer. This method, which may seem difficult at first glance, is actually quite simple to implement. Using tools integrated into the OS, you need to create virtual hard disk. Next, using the same PWBoot, install the Windows distribution kit on a flash drive. The only “but”: this method is only suitable for Ultimate or Enterprise editions of the OS.
Optimization of the “portable system”
Even if you use a Flash drive that supports the USB 3.0 specification, you are unlikely to be satisfied with the speed of the “flash system”. Therefore, it is necessary to make the OS as light as possible: disable non-critical Windows services, remove unused system components, and so on. The issue can be resolved as follows:
- Allocate the required disk space on the physical hard drive of the computer you are using.
- Use special software solution DiskMode.
In general, after you manage to install Windows 7 on a USB flash drive, carry out the full process of optimizing it.

Multiboot USB Flash Drive: Promised Understatement
If at some point your OS stops starting or another kind of emergency situation arises, then you are unlikely to be able to do without “saving” software tools. At the same time, we should not forget that using the same USB drive, you can carry out a comfortable process of restoring a crashed Windows system or perform what is called a clean installation of the required OS edition. Well, first things first.
How to make Live USB
By the above name it should be understood that this is not only a full-fledged mini-operating system on a flash drive, but also a number of different software diagnostics and recovery that are integrated into the boot environment. In order for you to need: the MultiBoot USB utility, the necessary Windows distributions and, if desired, setup files additional software.

Launching and working with the program
- Click on the installation EXE file.
- Once the MultiBoot USB menu appears on the screen, select the first item HP USB Disk Storage Format Tool.
- After you format the disk space of the Flash drive, close the utility window.
- Now click on the Grub4dos Installer link.
- In the bootloader window, check the Disk checkbox, your removable drive should be displayed in the Refresh field - click Install.
- After the message in the command editor successfully... - use the Enter key.
- Exit the bootloader - Quit.
- Activate the WinsetupFriomUsb item.
- Now you need to “upload” the Windows 7 distribution onto the USB flash drive.
- In the marked Win/7/Server 2008 checkbox, specify the operating system installation ISO file.
- The final action is to press the GO button.
If you want to install additional programs and recovery utilities, then use the current build of Alkid.live.cd.

Integration process of the above software package
After you have downloaded the Alkid.live.cd image to HDD your computer, mount it using DaemonTool on one of
- Copy the extracted files to the root of the USB drive.
- The folder called A386 must be renamed to minint.
- After that, you need to copy the NTDETECT file from its directory to the root of the Flash media.
- The next stage, so to speak, is creative. Using a standard Windows notepad, open the menu.lst file located in the root of the disk.
- Enter the following entry: title Alkid Live(without SCSI/RAID)
find --set-root /minint/setuplns.bin
chainloader /minint/setuplns.bin
title Alkid Live
find --set-root /minint/setupldr.bin
chainloader/minint/setupldr.bin. - Save your changes and exit the text editor.
So, you not only installed Windows 7 on a USB flash drive, but also created a full-fledged recovery Flash drive.

The most convenient tool for reinstalling the seventh OS
If the user absolutely needs to do something with Windows distribution 7, and there is no desire to “bother” with the multifaceted multimedia scenario of the MultiBoot USB program, then you can use the incredible in a simple way, which will be discussed below.
Rufus is the most correctly working utility.
- Download and run the above software.
- The program automatically detects a removable drive inserted into the USB connector.
- If this does not happen, specify the path to the Flash storage device.
- Next to the “ISO image” checkbox, activate the button in the form of a disk.
- Specify the directory in which the OS distribution is located.
- Then feel free to click on the “Start” button.
This program for burning Windows 7 to a flash drive does an excellent job of its task. However, the functionality this application can be used for other versions of Microsoft OS, including the new G8.
Before we finish: the new WTG technology in action
Perhaps some of you, dear readers, are thinking about how to “switch” to a new operating system Windows 8. But it was in this OS that a new opportunity appeared to create an operating system image specifically for USB drives. In other words, now G8 owners can use standard Windows tools to create bootable Flash media with the necessary set of programs. However, the capacity of the USB drive must be at least 32 GB.
How it works
- Press the Win+W key combination and enter Windows To Go in the search box.
- After activating the found service, a special configuration wizard will be launched.
- In the initial window, you need to select the USB drive on which the system image will be installed.
- Next, you will need to specify the directory of the image, which should have the WIM extension.
The subsequent steps in the wizard are simple to the point of primitiveness, so they do not need description. Any user can easily cope with this task.
Finally
We hope that the question that interests you is: “How to record Windows image 7 to a flash drive? exhausted. Of course, the article includes only the most common, and at the same time the most reliable methods, when implemented, almost any USB drive can be used as the main bootloader of the operating system. However, on the Internet you will definitely come across more than a dozen such solutions. Whether it is advisable to use them is up to you to decide. After all, the choice is always yours. Well, let's hope everything works out for you. All the best to you and remember: you cannot overload the flash drive!
Since almost no one uses CDs and DVDs these days, it is logical that it is best to burn the Windows image for further installation onto a USB drive. This approach is indeed much more convenient, because the flash drive itself is much smaller and is very convenient to store in your pocket. Therefore, we will analyze all the most efficient methods for creating bootable media for further installation of Windows.
For reference: creating bootable media means that an operating system image is written to it. From this very drive, the OS is subsequently installed on the computer. Previously, when reinstalling the system, we inserted a disk into the computer and installed it from it. Now you can use a regular USB drive for this.
To do this, you can use proprietary Microsoft software, the already installed operating system itself, or other programs. In any case, the creation process is not difficult at all. Even a novice user can cope with it.
All the methods described below assume that you already have a downloaded ISO image of the operating system on your computer, which you will write to a flash drive. So, if you haven't downloaded the OS yet, do so. You must also have a suitable removable media. Its volume should be sufficient to accommodate the image you downloaded. At the same time, some files may still be stored on the drive; it is not necessary to delete them. All the same, during the recording process, all information will be irretrievably erased.
Method 1: Use UltraISO
There is a detailed description of this program on our website, so we will not describe how to use it. There is also a link where you can download it. To create a bootable USB flash drive using Ultra ISO, do the following:

If any problems or errors appear during recording, most likely the problem is in a damaged image. But if you downloaded the program from the official website, no difficulties should arise.
Method 2: Rufus
Another very convenient program that allows you to very quickly create bootable media. To use it, follow these steps:

It is worth saying that Rufus has other settings and recording options, but they can be left as they are originally. If you wish, you can check the box "Check for bad blocks" and indicate the number of passes. Thanks to this, after recording, the installation flash drive will be checked for damaged parts. If any are detected, the system will automatically correct them.
If you understand what MBR and GPT are, you can also indicate this feature of the future image under the inscription “Partition scheme and system interface type”. But doing all this is completely optional.
Method 3: Windows USB/DVD Download Tool
After the release of Windows 7, developers from Microsoft decided to create a special tool that allows you to make a bootable USB flash drive with an image of this operating system. This is how a program called . Over time, management decided that this utility could well provide recording for other operating systems. Today, this utility allows you to record Windows 7, Vista and XP. Therefore, for those who want to make media with Linux or another system other than Windows, this tool is not suitable.
To use it, follow these steps:

Method 4: Windows Installation Media Creation Tool
Microsoft specialists have also created a special tool that allows you to install on a computer or create a bootable USB flash drive with Windows 7, 8 and 10. The Windows Installation Media Creation Tool is most convenient for those who decide to record an image of one of these systems. To use the program, do the following:

In the same tool, but for Windows 10, this process will look slightly different. First, check the box next to the inscription "Create installation media for another computer". Click "Further".
But then everything is exactly the same as in the Windows Installation Media Creation Tool for version 8.1. As for the seventh version, the process there is no different from that shown above for 8.1.
Method 5: UNetbootin
This tool is intended for those who need to create a bootable Linux USB flash drive from Windows. To use it, do this:

Method 6: Universal USB Installer
Universal USB Installer allows you to burn images of Windows, Linux and other operating systems to drives. But it is best to use this tool for Ubuntu and other similar operating systems. To use this program, do the following:

Make a bootable USB flash drive with Windows 7
Where to download the Windows 7 image - watch the video below
Very often when reinstalling windows A bootable USB flash drive with Windows 7 is required. How to do it? The process itself is not complicated, but let's try to figure it out.
2 very different ways method in order to create a bootable USB flash drive from an iso image.
We will analyze everything from beginning to end, we will try to clarify all the details of creating a bootable installation flash drive with Windows 7
We also recommend reading the article on how to properly install Windows from a flash drive; sooner or later it may come in handy. All programs used here work perfectly under Windows 7, 8, 10.
The 2nd method is also very noteworthy; with it we will make a bootable Windows 7 flash drive without any programs, using command line windows, although it is noticeably more complicated.
It's important to keep in mind that usb ports should be fine (or at least one of them we need). The fact is that if we use a faulty USB, then there may simply be a loss of contact and nothing may work out. Plus, of course, the flash drive should also be in order, in general, keep this in mind.

Original Windows 7 images for flash drive here: http://nnm-club.me/forum/viewforum.php?f=504
Let us clarify the following points when creating a bootable USB flash drive with Windows 7:
- First we need to find a windows iso image(to do this, in any search engine we write - download Windows 7 torrent, download one of the proposed options using the free torrent program. However, do not forget that you have a good antivirus, plus you can download only from trusted sites, ask your friends and acquaintances about such ). We will assume that we have found
- Let's move on to the flash drive, we will completely clear it, so copy all important data from it in advance
- Also, don’t forget about the size of the flash drive.. You need at least four GB, although more correctly it is no less than the size of the iso image
How to make a bootable USB flash drive for Windows 7-10? Step-by-step instruction
Now let's prepare the flash drive, for this we need to format it. We do it like this:
- We go to “My Computer”, find the flash drive we need there
- Right-click on it
- Select "Format"
- In the window that appears, you can also check the box for “Quick, clearing only the table of contents” - this will be quite enough in most cases
- That’s it, click “Start”, an additional warning may appear, we agree
- We wait for the process to complete (usually no more than a minute)
- When finished, the flash drive is ready for further actions, it's completely empty

If you have any questions with formatting or would like to learn more about this important and useful process for information storage devices, we recommend that you view the corresponding section. In which, by the way, you can also select a program for formatting a flash drive if it does not want to succumb to this process in a standard way(as described above), plus using additional programs formatting a flash drive, you can improve its technical condition.
Now we are almost close to the creation process bootable flash drive with Windows 7, for this we will consider a very interesting and simple program .
Download the original ISO image of Windows 7
The simplest, most convenient and free program to solve our problem is Windows 7 USB/DVD Download Tool
Very convenient, bootable fleshka is done in just 4 clicks, and it can also be made into a boot disk.
Or you can do it from the official website using this direct link http://wudt.codeplex.com/ (copy, paste into the address bar of the browser and press enter).
The system also requires Microsoft .NET Framework_Online_Setup (completely free, online downloader, which means the Internet must be turned on), usually this utility is already installed in different assemblies windows. In general, this is an official application from Microsoft, it is also important for the operation of other programs and games.
And so, you downloaded Windows 7 USB/DVD Download Tool. Now install it.
Open the program. We see this window.

Click on “Browse” and look for the Windows iso image we need on the computer.

Now if you specified an iso image, click “Next”. Now click on “USB device”.

Here we click on “Begin copying”.

And so the recording process began Windows iso image 7 per flash drive. We are waiting for the end.
The Windows 7 bootable USB flash drive is ready.
We recommend that you read the article on how to properly install Windows 7 on a netbook. So you will know what to do if the question arises of reinstalling Winows 7 on a netbook, laptop or computer without disk drive.
The second method is not simple. It is interesting for those who do not want to install any additional programs on their computer
This method uses the command Windows string, through which, by the way, you can do many more interesting things.
And so, let's go. We connect the flash drive to the USB port. Please note that a 4 GB flash drive will be used here. Open the command line like this, “Start” - “Run”:

Enter the command “cmd” and press “Enter”:

This is what should appear:

The first command we enter is “diskpart”, a special editor that gives us the ability to manage disks, press “Enter”:

Now we write “list disk” and press “Enter”, thereby getting a list of devices:

Now you need to determine without errors where your flash drive is located, in our case it is “Disk 3”. It most likely will not match yours, just make sure that you have found your flash drive correctly. If you have, for example, a flash drive “Disk 1”, then write it in the line and press “Enter”.
Attention! If you do not correctly identify the flash drive, you can format one of your hard drives and lose all the information on it.
- So, enter “select disk 3″, press “enter”
- The program detects our flash drive
- Now enter “clean”, which will delete files on the flash drive, press “enter”
- Next, enter “create partition primary”, press “enter”
- With this command we created a section
- Now enter “select partition 1”, press “enter”
- Now enter “active”, again “enter”
- Now we need to make the format file system for an NTFS flash drive by formatting it using “format fs=NTFS” or for quick formatting enter “format fs=NTFS QUICK”, press “enter”
- We are waiting for the completion of the formatting process
- All is ready
- We write “assign” and the flash drive will automatically receive a letter, for us it is J
- Upon completion, a window with the flash drive will automatically open
- Now we need to exit using the “Exit” command
- That's it, the bootable USB flash drive has been created, now you need to copy all the files from the installation operating system to it
It’s just important to understand that it’s not the iso image that should be copied in one file, but all the folders that are included in this iso image. To do this, you just need to mount it with some program, for example DAEMON Tools.
That's all, we have looked at the question of how to create a bootable USB flash drive with the Windows 7 operating system.
Before installing the system, you need to understand how to burn a Windows 7 image to a USB flash drive, then configure the computer for Windows installations 7, and begin the installation process. If you visited this page, then you are having difficulty creating a bootable USB flash drive or disk. Here you will find answers to all questions.
To burn a Windows 7 image to a flash drive, you will need specialized tools. There are quite a lot of them, but we will describe them all. As an example, we'll talk about UltraISO, USB/DVD Download Tool and many others.
Step 1: What you need to burn a Windows 7 image
Any operating system image or programs is a common format that is recognized by most utilities. The most popular image format is ISO. It can be recorded on flash drives, hard drives, CD-DVD media. The format is somewhat similar to archive ZIP or RAR. In general, this is an optical disk image and is a single file or archive containing any other type of file. Modern operating systems already have built-in tools for working with the format. You can also use third-party software: UltraISO, DAEMON Tools, Alcohol 120%, PowerISO, ImgBurn, ISO Master and many others.
Before choosing an OS image, you need to understand in advance the bit depth and the volume that it will occupy on the media. There are 32 bit systems(86x) and 64-bit (64x). Here you can learn about the differences between these bit depths. The volume of the systems also differs. Below is a table of all editions of Windows 7 with system requirements:
| Editorial | RAM | Processors | CoresCPU | ||
| 32x | 64x | 32x | 64x | ||
| Windows 7 Ultimate |
4 GB |
192 GB |
|||
| Windows 7 Professional | |||||
| Windows 7 Enterprise | |||||
| Windows 7 Home Premium |
16 GB |
1 | |||
| Windows 7 Home Basic |
8 GB |
||||
| Windows 7 Starter |
2 GB |
||||
Using these characteristics, you can choose the system for yourself. In this material we will look at two programs, using which it is possible to write a Windows 7 image to a flash drive: UltraISO, USB/DVD Download Tool.
You can download tools from virus-free resources from here:
- USB/DVD Download Tool.
- UltraISO.
- Command line.
Step 2: How to burn a Windows 7 image to a USB flash drive using UltraISO
Download the program from the link above or from your source and install. Using the trial version of UltraISO you can complete the intended task, so there is no need to look for a version with a key. After downloading and installing, perform the following steps (I also recommend reading the article if you work with optical media:)
- Let's launch the program. If it is not complete, then we use a trial period.
- Insert a flash drive with a capacity of 4 or 8 GB into the USB port, preferably larger.
- In the program, click on the tab with the mouse "File" — "Open" and select the Windows 7 Ultimate (Maximum) image file or any other version.
- The files will be automatically loaded into the program window, which are displayed in the right section. Now you need to click on the “Boot” tab and select the option “Burn Hard Disk Image”.
- At the next step, select a flash drive (Disk Drive), an image file that has already been registered, a recording method USB-HDD+. It is worth noting that files that are already on the flash drive will be destroyed.
- Click on the button "Record".

- A message will appear indicating that the information on the disk will be erased. We agree using the “Yes” button.

- Preparation for recording begins, and then the process itself, which does not take much time.

- The completion of the operation is accompanied by a message “Recording complete!”.
The finished flash drive can now be used for its intended purpose.
Step 3: How to Burn Windows 7 Image Using USB/DVD Download Tool
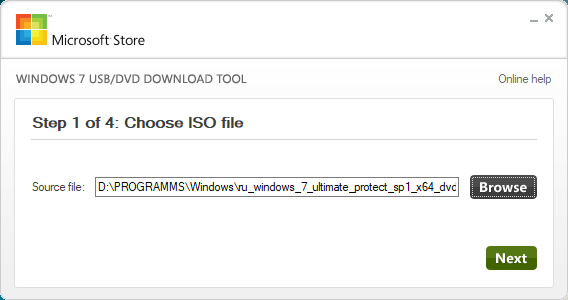
- We launch the program from the desktop. A window will open asking you to complete four steps. The first step is to select an ISO image of the operating system. Click the Next button.
- Next, select the media type, in our case USB Device.

- Select the media and click “Begin Copy”.

- Next, formatting the flash drive and copying files will begin.

After copying, the flash drive is ready to install Windows 7. It is worth noting that using the USB/DVD Download Tool you can burn the image to a DVD or Blu-Ray disc.
Step 4: How to burn a Windows 7 image to a USB flash drive using the command line
If there is an operating room at hand Windows system Using its capabilities, you can create a bootable USB flash drive. We will use the command line. Run this tool as administrator and follow these steps:
- In the command line (CMD) enter the command to work with disks: diskpart. Using it, we will format the media and write to it ISO files image.
- After entering the command indicated above, the user will find himself in the disk utility, which is characterized by the line “DISKPART>”.
- The next step involves displaying all drives connected to the computer. There is a command for this list disk.
- You need to select the media that will be used as boot. Here we focus on volume. For example, now a 30 Gb flash drive is connected here, in the “Size” column this volume is indicated. To choose this disk, you need to register select disk N(your carrier number). When choosing, be very careful, because it is very easy to make a mistake here.
- Let's move on to copying files to a flash drive. We mount the system image (so that it appears in the “My Computer” directory) and in the command line go to the created image disk.
- Using the commands, go to the boot directory and execute the command bootsect /nt60 N. Where N is the letter of the flash drive intended for installing Windows
- Copy the image files to the USB flash drive.
- Installing Windows 7.
Some users may find using the command line a little difficult because there are a lot of commands to enter. The likelihood of making a mistake here increases many times over. Therefore it is recommended to use UltraISO programs or USB/DVD Download Tool. The following articles will discuss other utilities:
Using all these tools, the user will quickly figure out how to burn a Windows 7 image to a flash drive. In this material, third-party and standard tools for creating such a medium were analyzed. The next material will be about how to create a bootable DVD disc with Windows 7. This use case is losing popularity every year, as DVD drives are built into computer systems less and less often, but instead optical disks Flash media arrives.
A bootable Windows USB flash drive is very easy to make. This article will describe three simple quick ways creating a bootable USB flash drive from a ready-made ISO image. All methods are free and popular, although among them there are simpler and more complex options, using different software. Also, all utilities work fully in Windows XP.
If you have a new laptop or computer with BIOS UEFI, and whose hard drive is used GPT style placement of tables, then on such a computer you can also install Windows 7 using a different algorithm. Also, if the device, computer, laptop, netbook, etc. has a USB 2.0 port and USB 3, and you decide to install from a bootable USB flash drive to such Windows device 7, then undoubtedly you should connect the flash drive to USB 2.0 port because Windows 7 itself does not support the USB 3 port type, which are usually marked in blue.

If the bootable USB flash drive is connected via USB port 3, then the attempt to install Windows 7 will end with the following error:
“A required optical drive driver was not found. If you have a flash drive, floppy disk, DVD or CD with such a driver, please insert this media."
Creating a bootable USB flash drive
Now the first thing you definitely need is ISO image operating system. Secondly, this is the need to take care of the flash drive itself. Since this media will be formatted, the data from the flash drive must be moved to a safe, secure location. It is also important to note that the size of the flash drive must be strictly at least 4 gigabytes.It is imperative to check and make sure that a specific motherboard definitely supports loading such a plan (from a flash device).
- Creating a bootable USB flash drive using means (recommended last, since it is not a very effective method);
- Created by ;
- Utility;
Creating a bootable USB flash drive using UNetBootin
You need to download the program and run it (the program is portable and works without installation).
You need to check the box called ISO image, and then select the letter of the USB drive.

The location of a specific image must be specified manually.

Next, click open.

Now just click OK.

There is a short process of copying system files to the flash drive.

After a short extraction necessary files our bootable flash drive is completely ready.

Creating a bootable USB flash drive using UltraISO
A slightly complicated solution, unlike the one described above, is to use the program Ultra ISO. However, you can quickly understand the program by following the instructions. The functionality of the program is written in understandable Russian, and the trial period under the license is completely functional and suitable for our purposes.
Next, you need to select the Russian language and download the program, which is very simple. Run as administrator, then select a trial period of use.

In front of us is a regular program window.

The next step is to find our ISO image on your hard drive, which contains the operating system. It is worth recalling that such an image can be created by any other program, and then specified here. In the main UltraISO window, you need to right-click on the file, and in the menu that opens, select the open option.

Next, we indicate our image with the system, in our case it is a Windows 8.1 image, which is located in the installation folder. Find the image in your place and click open.

You can also now place a flash drive in the slot of a netbook or laptop. You must select the Boot menu in the main window of our program and click on record image hard drive. The inserted flash drive should be present in this window.

Next, click record.

A prompt will appear indicating that your flash drive will be erased, we agree.

Next, we wait for the recording process to finish.

Now you can carry our operating system in your pocket.


