There are now more than a billion computers in the world. Each computer runs on a specific OS, be it a system Linux or system Windows. Many system administrators and advanced users are faced with replacing the OS with a large number of computers. Therefore, each system administrator has at hand several disks and bootable flash drives with different operating systems.
In this material we will try to simplify the life of a system administrator or an experienced user. We will describe the installation process multiple OS images per one bootable USB flash drive . That is, after reading the article you will be able to do bootable USB flash drive with different operating systems.
The first way to create a multiboot drive
For the first method we will need two utilities RMPrepUSB And Easy2Boot. You can find them on their official websites www.rmprepusb.com and www.easy2boot.com. Immediately after downloading, install the utility RMPrepUSB. To do this, run the installer.

Now click the main button Install, after which the program will install and immediately notify you about this in the final installation window.
Close the installer window and paste USB drive. Then launch the utility from a shortcut on the Desktop.
Before creating a bootable USB flash drive, we will need for an example iso images systems Window 7, Windows 10 And Windows XP. You can make them from licensed disks using utilities Alcohol 120% or CloneCD. If the iso images are ready, you can immediately begin directly preparing the multiboot drive. To do this, check all the radio buttons as shown in the figure and specify the path to the archive with Easy2Boot.

Having placed all the switches correctly, feel free to press the button Prepare disk. The process of writing the necessary data to the drive should begin.
Now let’s go to the USB drive in the “_ISO\WINDOWS” folder and write iso images of our systems to the appropriate folders:
- Windows XP in "_ISO\WINDOWS\XP";
- Window 10 in "_ISO\WINDOWS\WIN10";
- Window 7 in "_ISO\WINDOWS\WIN7".
After the images are written to USB drive, you need to do the last operation by pressing the key combination Ctrl + F2. In a couple of minutes, your multiboot drive will be ready. You can check its performance in the built-in emulator RMPrepUSB. To launch it, press the F11 key. After pressing the button, the emulator will start loading with your drive and after a few minutes you will see the bootloader menu.

As you can see from the example, this method of creating a multiboot USB storage may seem a little complicated. But if you follow the instructions, then after just a few tests of this method it will be very simple for you, like any other. In addition, with its help you can make a boot menu with different pictures. For example, like in the picture below.

Also ready-made pictures you can find it at www.rmprepusb.com.
The second way to create a multiboot drive
For this method we need the utility WinSetupFromUSB. You can download it from the official website www.winsetupfromusb.com. The utility is distributed as a self-extracting archive. Therefore, you just need to download it and unpack it to a place convenient for you. If we compare this method with the previous example, this one will be much simpler and especially suitable for beginners. Before creating, also prepare two OS images of Window 7 and Ubuntu 14. Install the formatted flash drive into your computer and run the utility.
Now select the OS ISO images as shown in the image below.
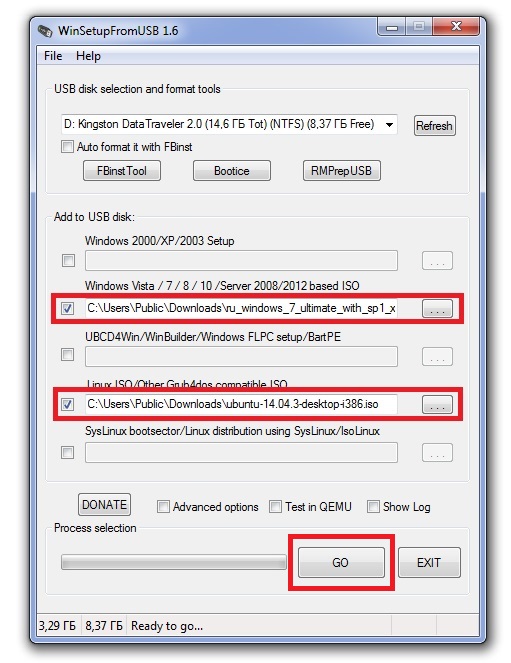
At this point, all the settings for creating a bootable drive are ready and you can press the GO button, after which the recording of a multiboot USB drive will begin.
If you want the created multiboot USB flash the drive has booted into virtual machine, then before pressing the GO button, check the box “ Test in QEMU».
The example shows that any user can handle this application. But in WinSetupFromUSB There are also options for advanced users. To use them, check the box " Advanced options».
If you want to burn another similar operating system onto the media, for example, Windows 7, then do the same operation with the image Windows 7 in the considered example on the same flash drive. After completing these steps when booting from a drive, you will receive two versions of the system Windows 7.
An example of launching a multiboot flash drive in a laptop
For example, we will use the disk we just created using the utility WinSetupFromUSB and laptop Lenovo IdeaPad Z570. In order for our laptop to see the bootable USB flash drive, we need to boot from it. To do this, before booting the laptop, press the F11 key, which will launch the selection utility bootable media.

Select our media and press Enter. This will launch our drive menu.

For example, let's choose to install Ubuntu 14 and press Enter. The installation process will begin Ubuntu 14.

The seven installation process is similar Ubuntu 14.
As you can see, launching the media on a laptop is quite simple and even a novice user can handle it. The process for starting the drive on other laptops and desktop computers may be slightly different. You can find out how to load the boot media selection menu in the manual that came with your laptop or motherboard.
Summarize
In our material, we looked at the most popular utilities for creating multiboot drives. In addition to the two programs RMPrepUSB and WinSetupFromUSB, there are also such utilities as:
- SARDU;
- YUMI;
- XBoot.
Each of these utilities has both pros and cons. These utilities are not as popular as RMPrepUSB and WinSetupFromUSB, so we did not include them in the review. If you have a desire, you can always familiarize yourself with them, since there are a lot of materials on the Internet with reviews of these programs. Another advantage of these utilities is the ability to install images boot antiviruses or program images backup. Therefore, using a multiboot flash drive, you can always scan your hard drive for viruses and make backups before installing the OS.
I would also like to note that we have described only part of the functionality. RMPrepUSB And WinSetupFromUSB. Therefore, if you want to gain advanced skills in the functionality of these utilities, we recommend visiting their official websites. Here you will find all the necessary manuals that will help you create a multiboot flash drive that meets your requirements.
We hope that this article has helped resolve any issues that have arisen.
Video on the topic
Today, people who are just starting to get acquainted with computers have heard about the boot disk. But only a few can answer the question of how to create a multiboot flash drive. This guide details the step-by-step process of creating a multi-tasking drive.
Today, there are a huge number of programs, thanks to which you can create a multifunctional and universal device from a regular flash drive for installing files of various subjects and directions.
It is beneficial and safe as it cannot be damaged or broken like a regular one installation disk. The decisive argument in favor of just such a device rather than a standard installation kit will be that modern technologies have long developed computers that do not require disk drives or disks with installation programs.
Any user, if desired, can convert a regular flash drive into a multiboot one. To do this you will need certain software, a flash drive (preferably larger than 8 Gb) and virtual images Windows operating system in ISO format. How to make a multiboot flash drive with Windows XP, 7, 8?
Format the flash drive. To work, it must be formatted in several ways: in NTFS or in FAT 32. The option with NTFS is better, since loading will be much faster. It must be remembered that during this operation all information will be lost, so all the most important things must be copied in advance.
Download and install MultiBoot USB. Using it, our universal drive will be created. After downloading, we begin the installation; to do this, you need to open the installation file.
Download and install UltraISO program. This can be omitted if the computer already has a CD and DVD emulation and recording program (for example, ALCOHOL 120). After downloading the file, we begin the installation. When starting, click “Trial period”.
Install the bootloader on the flash drive. For this operation we will need the MultiBoot USB program, which is already installed on the computer (point 2). Select the Grub4Dos section in it. A window opens in which you need to define the parameters: Disk (15319M), that is, a flash drive, for example, 16 Gb. Next, click Install.
A window appears notifying you that the information has been successfully recorded. Press the ENTER key to complete the operations and close the window, and then the Grub4Dos Installer itself.
Installing operating systems on the drive
Install Windows PE/XPE. This is very important stage, if you are installing a multi-component Windows XP with a large assortment of system recovery utilities.
Let's start working in Windows XPE in a virtual drive (UltraISO). We find it in the MultiBoot USB folder. Select PeToUSB. A window opens in which we find our flash drive from the entire list. Next, in the Source Path To Built BartPE/WinPE Files section, click virtual drive. Place a checkmark on Enable File Copy and click “Start”. Once the download is complete, close the PeToUSB window. Windows installation XPE went well.
Install Windows 7/8 and Windows XP. This item is not necessary. Your computer must be prepared Windows image XP. If it is missing, then download it. Mount the Windows XP image. In the MultiBoot USB utility we find winsetup from usb. IN open window select a flash drive. In the Add to section USB disk select Windows 2000/XP/2003 Setup and select virtual disk, where the Windows XP image was mounted. Click Go. Now you can boot Windows XP using our drive.
 This installation method can be done with Windows 7 or Windows 8. In the WinSetupFromUSB window, find Vista/7/Server 2008 - Setup/PE/RecoveryISO and select the virtual disk where our desired image was mounted. After completing the operation, close the window.
Installing additional utilities. To make the flash drive multiboot, install on it additional programs. Choose 5th point"Copying files and utilities." Using the “Browse” button, point to our memory card and click “Remove”. When the operation is completed, the window will close itself. A multiboot flash drive has been created.
Checking the multiboot flash drive. We select the line WinSetup From USB, in which a window appears where we point to our flash drive. Next, from the entire list, find Test in QEMU and click Go. A window will open in which you can use several applications. Some of them will be available after downloading from a flash drive.
A few comments on how to use a multiboot drive
If any files of the .ISO format are loaded inaccurately, then you need to change their extension to .isoask, then when you enable this ISO file From the boot list of the flash drive, it will be possible to select different versions of its launch and determine the one you need.
You can add “fresh” or delete “ancient” images from the flash drive whenever you want. Just remember to use the CTRL+F2 (Make All Files on Drive Contiguous) command in RMPrepUSB.
There is no need to be surprised if booting Windows 7 or Windows 8 you will be asked for a key. You can enter it yourself, use a key from Microsoft, or download without entering the key (you will need to activate it later).
You may notice that creating a multiboot flash drive with Windows 7.8, XP is very fast and easy.
You just need to adhere to all points. Then the multitasking drive will be ready for use.
This memory card will be able to meet very high requirements. And you can always put it in your pocket, rather than carrying a huge amount of information on boot disks.
You can easily write the desired program or operating system onto it. But what to do if you have several computers or laptops at home with different operating systems installed. Or friends often ask to reinstall Windows or install it new version. Of course, you can create a bootable USB flash drive every time. You can also buy several flash drives and install various programs on them. But it is much easier to choose this option - creating a multiboot flash drive with different versionsWindows and utilities. This will be discussed in this article.
So, what do you need for this? Of course, you must have all the necessary ISO images that you want to burn onto it: various operating systems and programs. This could be Windows XP, 7, 8 and others; Dr.Web LiveCD or Kaspersky Rescue Disk – to scan your computer for viruses, Victoria – to fix errors hard drive, Acronis Disk Director - for dividing the hard drive into partitions and others. You can download them from the Internet, or you can read about it by following the link.
You will also need special program, with which we will create a multiboot flash drive, and, naturally, the flash drive itself. Choose its volume based on what you will record on it. If this is a set of different programs, 1-4 GB will be enough. If you want to make a multiboot flash drive with multiple OSes and add programs to it, take a flash drive with a memory capacity of 8 GB or more.
As an example, in this article we will make a multiboot flash drive with Windows 8 and the Victoria program. I took a 4 GB flash drive. We will use free program WinSetupFromUSB.
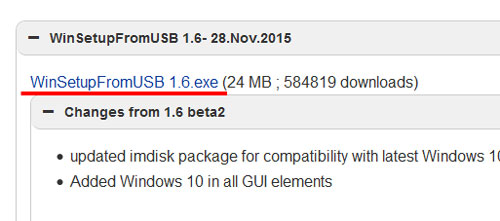
You can download the program from the official website. Write “WinSetupFromUSB” in the search engine and follow the link shown in the figure below.
We will download the latest version of the program at the time of writing. Follow the appropriate link.
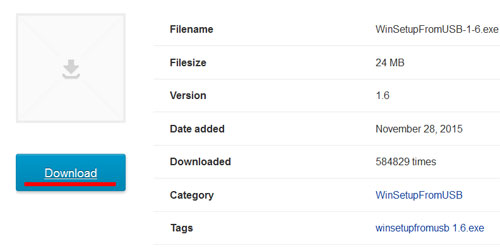
Click on the blue “Download” button.
The next thing we will do is that we will have a boot one. Copy from it necessary files, since all information from the flash drive will be completely deleted.
Insert it into your computer or laptop, and you need to use a USB 2.0 port. Go to “Computer”, right-click on it and select from context menu "Format".
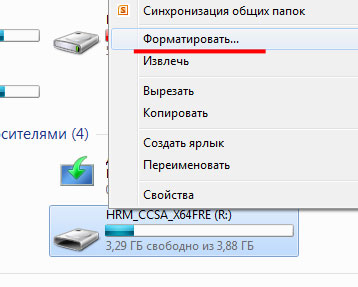
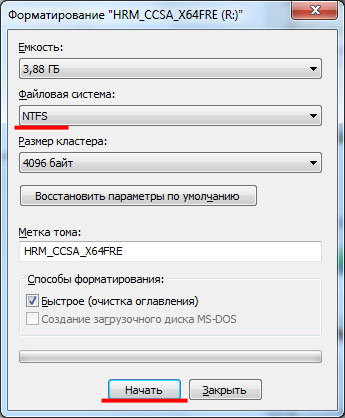
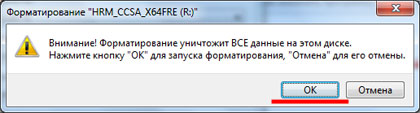
An information window will appear informing you that all data will be destroyed, click OK.
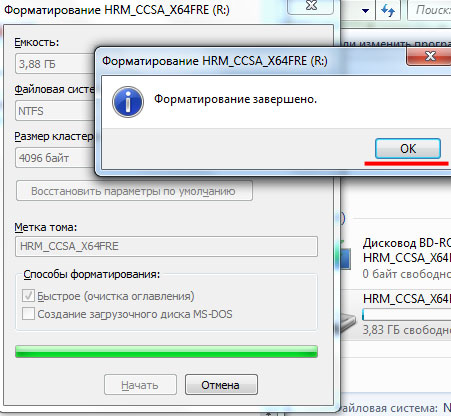
When the flash drive is formatted, a corresponding window will open. Click “OK” in it and close the format utility.
Unpack the downloaded archive with the WinSetupFromUSB program and run the file “WinSetupFromUSB_1-6”.

First thing, Let's write an image with the Windows 8 operating system onto our multiboot flash drive.
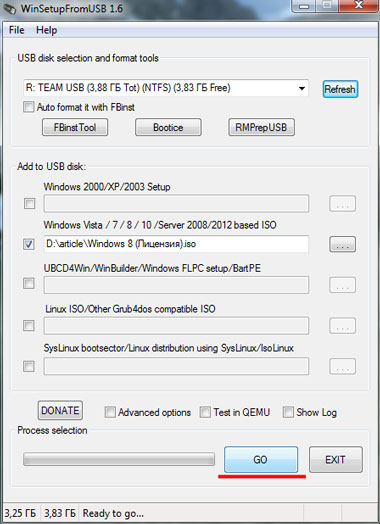
In the program window, in the section, select the flash drive that we formatted. In the “Add to USB disk” section, check the box "Windows Vista/7/8/10/Server 2008/2012 based ISO"
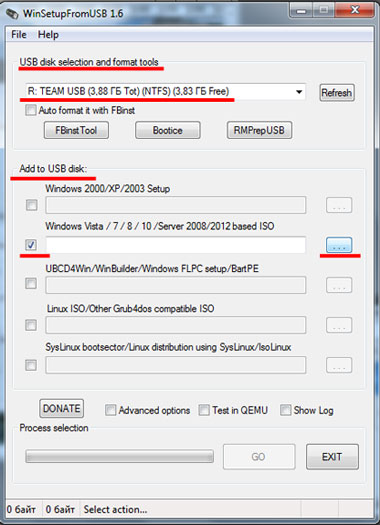
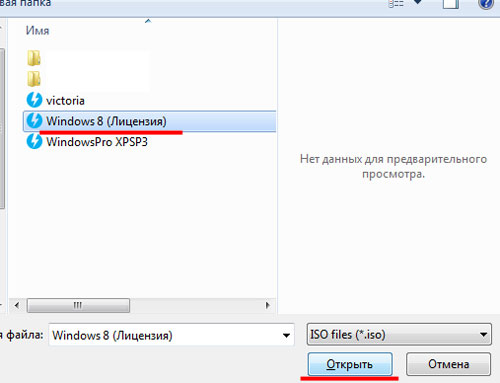
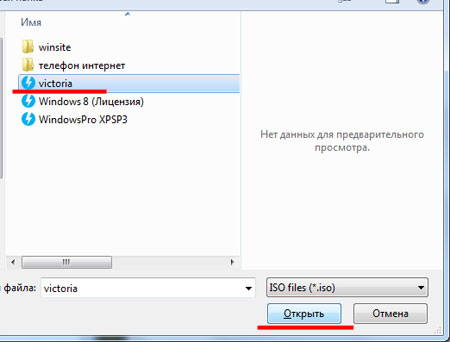
An Explorer window will open. Find the desired image on your computer, in the example this is the image of the Windows 8 operating system, and click “Open”.
Click "GO".
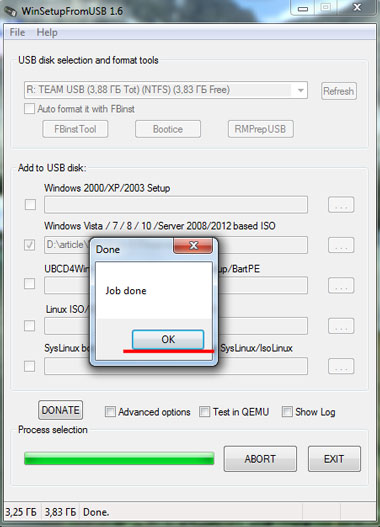
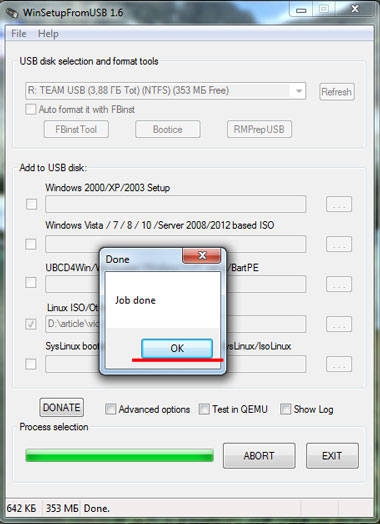
After the process is completely completed, the “Job done” window will appear.
I only have a 4 GB flash drive, so I can write a lot on it operating systems will not work. If you need add to multiboot USB flash drive Windows Vista, 7, 10– repeat all the steps described above. To add Windows XP, in the “Add to USB disk” section, check the box "Windows 2000/XP/2003 Setup". Each time, select the same flash drive on which you recorded images earlier.
Now let's add the program to the multiboot flash drive for checking and correction hard errors disk Victoria.
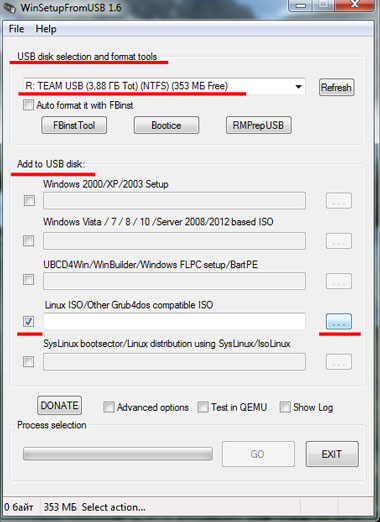
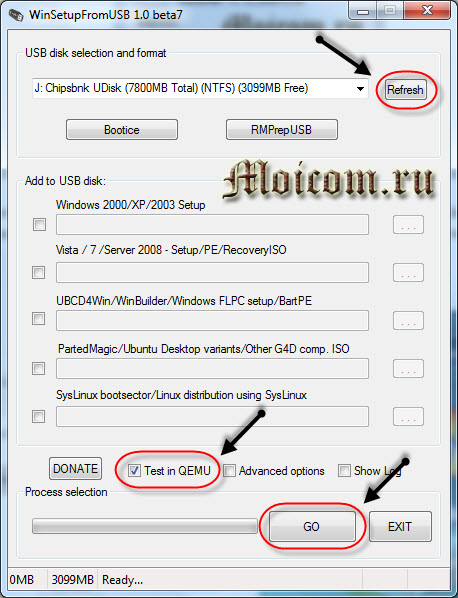
Run WinSetupFromUSB and in the section "USB disk selection and format tools" select our flash drive. Next, in the “Add to USB disk” section, put a tick in the box "Linux ISO/Other Grub4dos compatible ISO" and click on the button with three dots.
Through Explorer, find the program image on your computer and click Open. Then an information window will appear, click “OK” in it, or it will disappear itself after 10 seconds.
Click “GO” and wait for the program to be written to the flash drive.
To add other programs you need to the multiboot flash drive, repeat all the steps described above. Select the desired program image each time.
After you add all the images of operating systems and programs to the flash drive, let's look at the result - open the boot menu of the flash drive in the QEMU virtual machine.
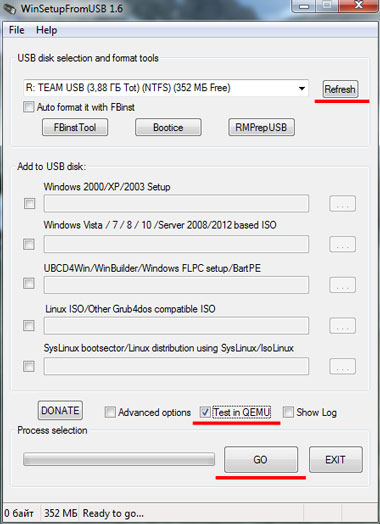
To do this, in the program window, click on the “Refresh” button, then check the “Test in QEMU” box and click “GO”.
You can see what the boot menu looks like after each addition of an OS or program to the flash drive.
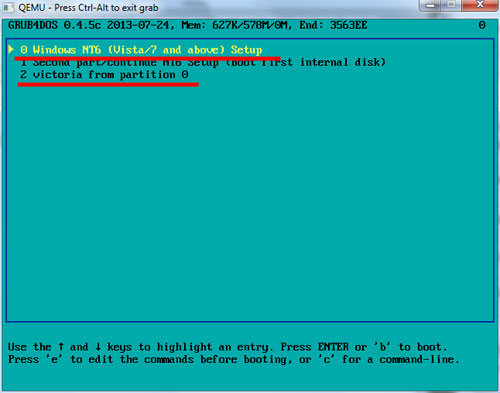
In the example, the boot menu of the flash drive looks like this. The flash drive contains Windows 8 OS and Victoria program. You will see a different list depending on what you upload to it.
Now you know how to make a multiboot flash drive with Windows and various utilities. Change the boot priority in the BIOS and select from the flash drive what you need to install on your computer or test it.
A multiboot flash drive is a special tool that allows you to diagnose your computer or reinstall Windows from the MS-DOS environment. There is only one question left: how to create a multiboot windows flash drives 7 so that you can install an operating system from it? This is exactly what this article will discuss.
To create such a flash drive you will need:
A flash drive with a capacity of at least 4 gigabytes, preferably 8.
- Download MultiBoot USB program
- Download FiraDisk Integrator program
- Download the desired Windows distribution
A multiboot Windows 7 flash drive is created from a storage capacity of 4 gigabytes or more. This is the minimum size that the operating system installer takes up, and there will be practically no space left for additional programs. Therefore, it is better to use a larger flash drive.
The first thing we must do is insert the flash drive into the computer.
Advice
Make sure there is no important information, since in the process of creating a multiboot flash drive it will be formatted.
Preparation
The first thing you need to do is download the image of the desired operating system and the FiraDisk Integrator program. Put them in one folder, then run the program. It will add the necessary files to your image, thanks to which your Windows 7 multiboot flash drive will work normally. When everything is ready, you can move on to the next stage.
Creating a multiboot Windows 7 flash drive
Open the MultiBoot USB program and select HP USB Disk Storage Format Tool. This program will format your flash drive. In the highlighted window, select your flash drive and check the box next to “Quick Format”. After this, press the “Start” button.


A window will appear in which there will be a warning that all information from the flash drive will be deleted. Click “Yes”.


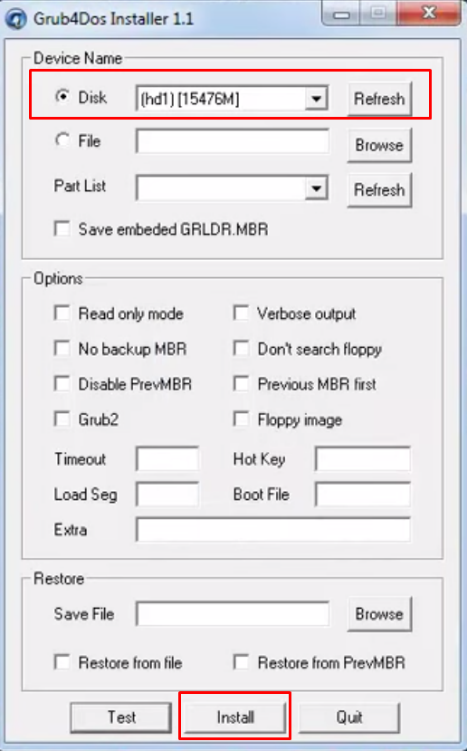
Next, in MultiBoot USB, run the Grub4Dos Installer 1.1 program. It will install the necessary files that will later be needed for correct operation flash drives. Make sure that the size of the selected disk matches the size of the flash drive, then click the “Install” button
After installing Grub4Dos Installer 1.1. you need to copy the files that come with the program to a flash drive. To do this, in MultiBoot USB, select the “Copy files and utilities” item. The file copying process will begin. If you receive an offer to replace files, feel free to agree.
The flash drive is ready. Now you need to add a Windows distribution to it, which will be installed from a flash drive.
Adding a Windows distribution
After we have downloaded and prepared the required Windows distribution, we need to copy it to a flash drive. To avoid confusion, rename it as convenient for you. "Image name" and copy it to the boot folder located on the flash drive.
You can add several windows distributions, pre-processing them with the FiraDisc Integrator program. All you need to do is just give them names and change the following items in the menu.lst file

Mar 12 2014
Creating a multiboot flash drive from scratch with your own hands
Hello everyone, I continue the series of articles about bootable USB media. In the last episode I told and showed in four different ways.
There will be a lot of interesting things, so read the article to the end, repeat all the simple steps and you will have your own multi-boot usb device. At the end of the article I wrote it down and posted it detailed video lesson on this topic.
Perhaps some of you will think that the information is very chewed, but not all people understand computers, and even more so in matters of creating such portable usb devices.
In today's review:
- Preparations
- Creating a bootable USB flash drive
- Adding Windows XP and Windows 7
- Copying files and utilities
- Adding required programs
- Kaspersky Rescue Disk
- Doctor Web Live CD
- Working with a graphical boot list
- Changing and creating a background image
The last point is optional, since the image will already be by default.
Preparations
The entire process will take a different amount of time for each person. If all the program distributions and images are already at your fingertips, then you will need much less of it. If you are making a bootable or multiboot flash drive for the first time, it can take a lot of time. So get ready and be patient, we'll need it today.
The first question that may arise in your mind is: What kind of flash drive should I buy? To create a regular multiboot flash drive with a minimum set of programs, 1 Gigabyte should be enough.
If you want to add operating system distributions, hard disk programs, boot shells, utilities for changing passwords and programs for treating your computer from viruses. It is advisable to have a USB drive with a capacity of 8 GB or more on hand.
In the examples, I will have an 8 GB flash drive, you may have a different size, or even a portable USB HDD.
If you have any data on your usb device, then save it somewhere else as we will be formatting our usb storage device.
Create a bootable USB flash drive
To create a multiboot flash drive we need additional software. There are many programs for creating multiboot devices, but unfortunately most of them are in English.
I decided to use the MultiBoot USB program, which is in Russian. It’s more pleasant to work with; anyone who gets confused or doesn’t understand something can use the instructions for use.
To unpack this archive you will need the 7Zip program. Perhaps your archiver programs will not be able to open some of the archives presented in this review, then I recommend using 7Zip.
After downloading the program, install it on your computer. A “MultiBoot USB” shortcut should appear on your desktop.
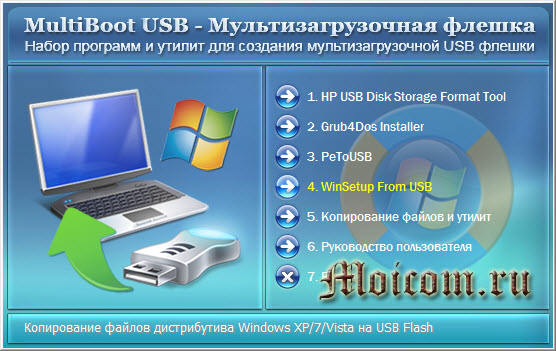
We go into it and a small menu opens in front of us with a characteristic welcome sound like on Windows, with 7 seven tabs.
Formatting a flash drive
We connect the pre-prepared flash drive to the computer and format it. Go to the first menu item HP USB Disk Storage Format Tool.
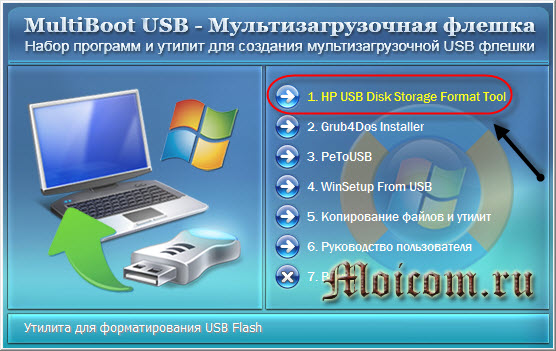
The formatting utility starts, under the word Device we indicate our flash drive. I have this Chipsbnk UDisk, volume (7800 MB), you may have a different designation and size.

Choose file system. If you have a flash drive with a capacity of up to 4 gigabytes, you can install

In the Format options, check the box next to Quick Format, thereby indicating quick formatting and click Start.
We are asked, do you really want to start the formatting process, we answer Yes. This process shouldn't take much time.

After the program formats the flash drive, the following HPUSBFW window will appear, in which we click OK.

If an error appears - the device is being used by another program, use normal formatting.

You can also format a portable USB device using Windows. Go to My Computer >>> right-click on the flash drive >>> Format >>> Quick (cleaning table of contents) >>> Start.
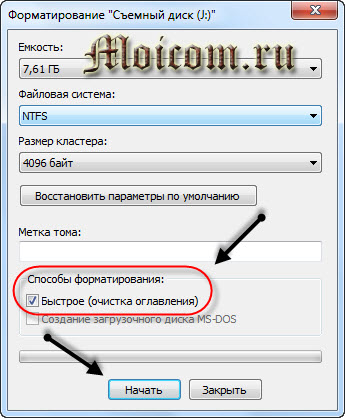
Warning window - click OK.
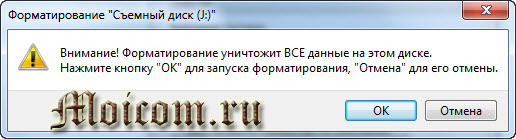
The following window may appear - This disk is being used by another program or process. Click Yes to format it.

This message may appear after the flash drive is already bootable. In the first steps of creating a multiboot USB device, such a window should not appear.
Installing the bootloader

The Grub4Dos Installer 1.1 window appears. In the top Disk Name tab, put a dot next to Disk, indicate the usb device and click Install.
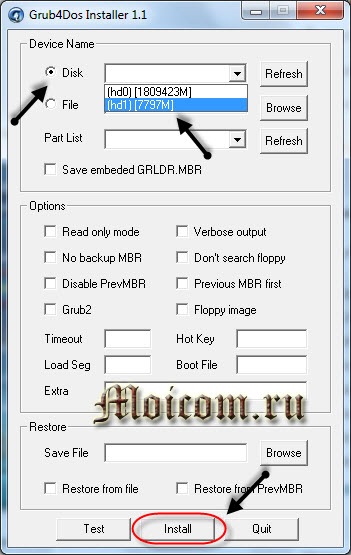
I have two disks on my computer, this is the main 2 terabyte hard drive and an 8 GB flash drive, we select the second one. This program will install the bootloader on our device.
When choosing a disk, do not make a mistake and indicate exactly your flash drive; if you make a mistake and select the main hard drive on which the operating system is installed, then the next time you turn it on Windows computer won't start.
When the operation is complete, the The MBR/BS has been successfully installed window should appear. To continue please click

Adding operating system distributions
Let's move on to the fourth point WinSetup From USB.
I will add two operating systems Windows XP and Windows 7 to the flash drive. You can add others by clicking on the appropriate items.
Windows XP
If you do not have a disk image with the operating system distribution, you can find it yourself on the Internet. I can suggest downloading the licensed product Windows XP Prof SP3.
Then we mount the operating system disk image into a virtual drive, I will use Daemon program Tools, yours may be different.
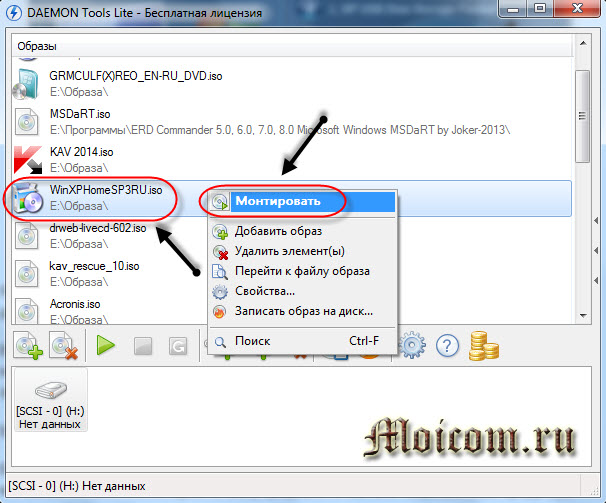
We mount Windows XP Home, you can use Windows XP Professional.
Click on WinSetup From USB, which will help us copy the distribution files of the required operating systems.

In the window that appears, select the desired portable device usb and check the box next to Windows 2000/XP/2003 Setup.
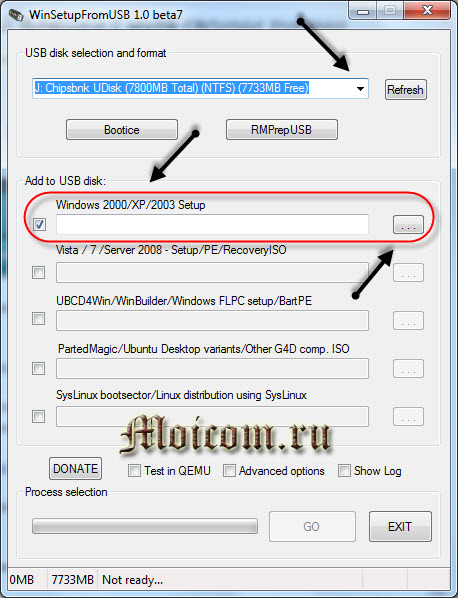
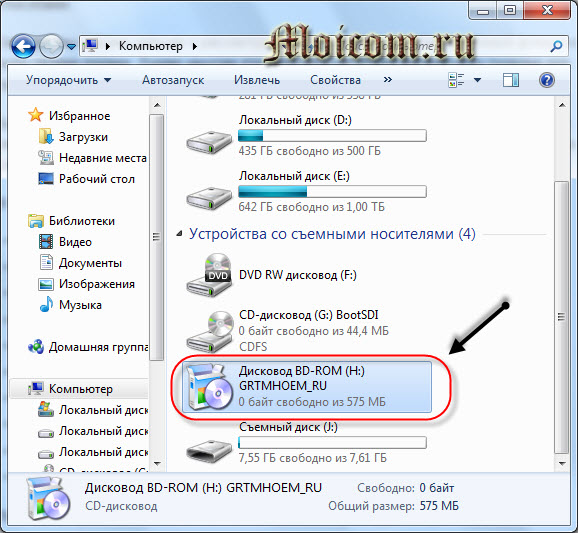
Click the browse button (three dots) and select a disk image prepared in advance and already mounted in the virtual drive. Mine is a BD-rom drive (H:), yours may be different.


We are waiting for completion, at the end a small window should appear with the inscription Job done - the work is done.

This process took me about 20 minutes.
Windows 7
If you do not have a disk or image of the seven, then you can download Windows 7 from the link below:
In order to add Windows 7 or Windows 8 to our flash drive, you need to do almost the same as for Windows XP, only when you select Add to USB disk: you need to check the box next to Vista / 7 / Server - 2008 Setup / PE / Recovery ISO .
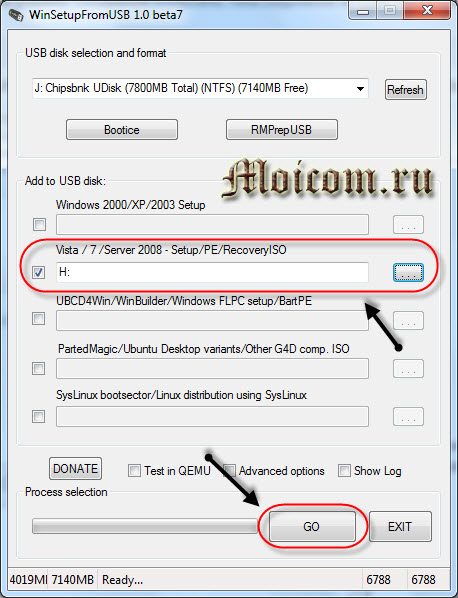
Select the mounted disk image, start the process and wait for it to complete.
Making a multiboot flash drive
We return to MultiBoot USB and go to the fifth point: Copying files and utilities.

The multiboot flash drive window opens, click the browse button.
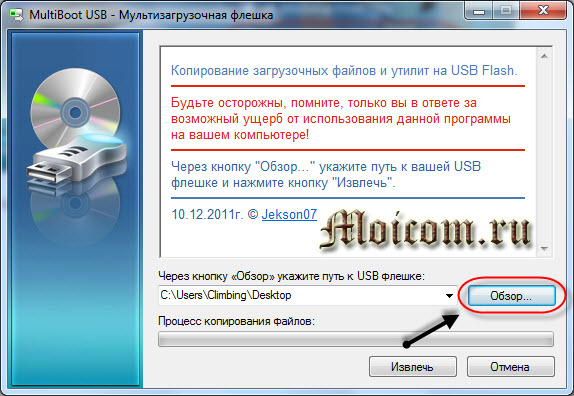
Select our portable USB device and click OK.
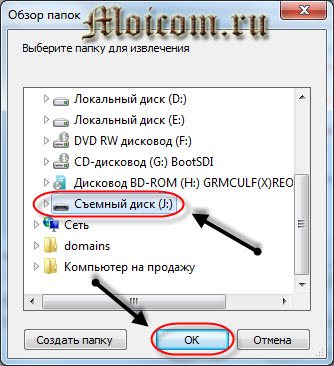
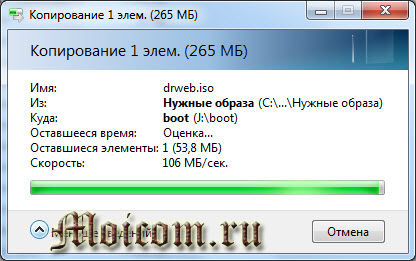
Then click the Extract button to begin the file copying process.

A small window appears confirming the replacement of files, replace existing file usbdrive.tag, click Yes for everyone.
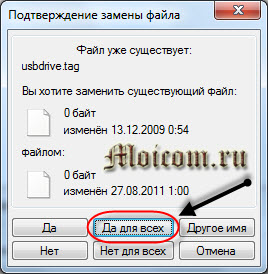
We perform the same action for all subsequent files that we are asked to replace.
If you want to see what came out of this, then go to the fourth item WinSetup From USB, click the button
This is what your boot menu should look like.

There are points here that need to be edited a little, and some that need to be removed altogether.
Adding the necessary program images
I decided to remove Symantec Ghost and Windows XPE - full version, since I don’t need them, but we’ll come back to this later.
First of all, let's add an image following programs that are on the list, namely Acronis, Windows XPE - mini version and Windows 7PE - mini version. You can download images of these three programs from the links below:
Now you have downloaded all three images, now we need to replace empty files to working images. To do this, go to the multiboot flash drive, to the folder
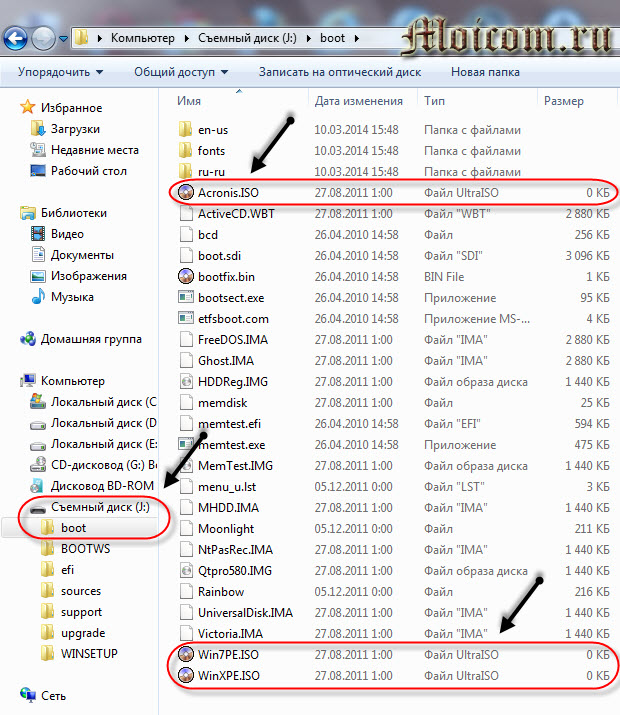
Alternatively, you can not delete them, but simply replace them with working images, but to do this, the downloaded file Acronis Disk Director 11 Acronis Home 2011 - LiveUSB must be renamed Acronis.iso.

I put these three images in a separate folder in advance, so that later I could copy and paste them on a flash drive in a folder
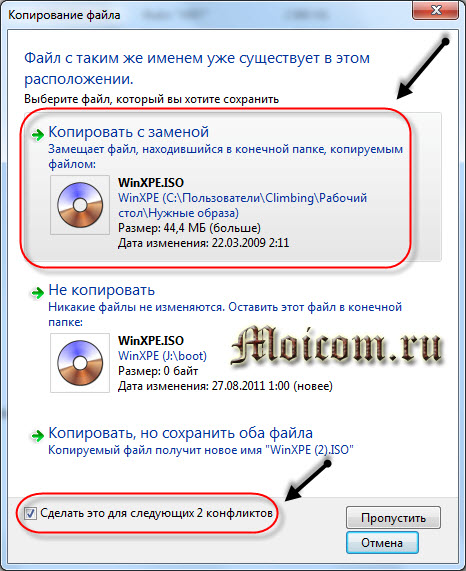
You can also check the box below - Do this for the next two conflicts, thereby all three image files will be replaced with working ones.

ERD Commander
Now I suggest adding it to a multiboot usb device useful program ERD Commander, for changing passwords in operating systems of the Windows family.
Why does she need it you ask me? I'll answer you. ERD Commander can be used if you forget the password for your account Windows. Boot with this utility, select the desired operating system and change the password.

Especially for you, I found on the Internet a set of ERD Commander programs that work in Windows XP, Vista, 7 and 8.
After downloading the program image, copy it and paste it onto the flash drive in the folder

Boot disk from Doctor Web
Surely each of you or someone you know has encountered the problem of viruses, various banners and similar hacker things. So, if your operating system does not boot or you cannot log into Windows, then I recommend using boot disk from Doctor Web.

With it, you can boot and scan your computer for viruses, even if you cannot log into Windows normally.
To do this, we need to go to the official website of the Web (I call it Doctor MOM), go to the Download section >>> Treatment utilities >>> Dr.Web Live CD and download the image to your computer. Anti-virus databases are updated daily.
We downloaded the image, okay, now we need to rename it from
Then we also copy the renamed image to the flash drive in the folder
Kaspersky Rescue Disk 10
Everyone has heard that there is Kaspersky anti-virus, some of you have used it or are still using it. I like and am quite satisfied with this antivirus, so I have been using it for more than 5 years.

Kaspersky also has an emergency disk Windows recovery, like Doctor Web. It's called Kaspersky Rescue Disk 10, it's antivirus databases are updated regularly, so Kaspersky can help you if viruses appear on your computer and logging into the system is not possible.
Download the image, rename it from
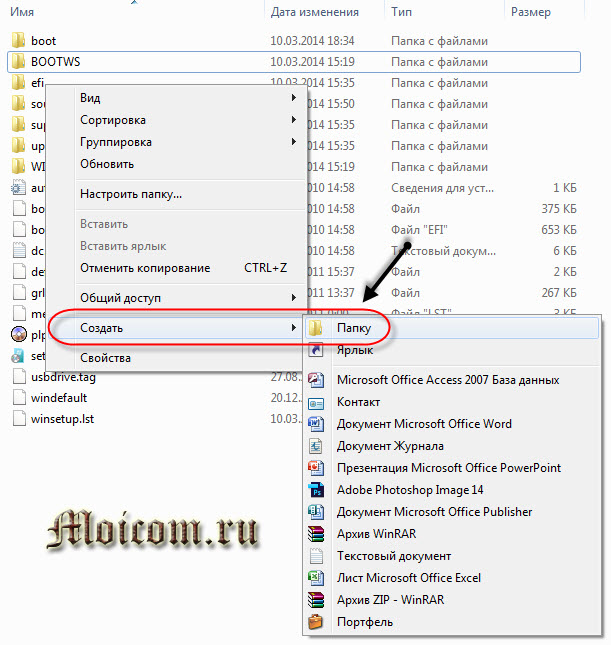
We go to the root of the flash drive, create a new folder in it and call it

Then copy the renamed image

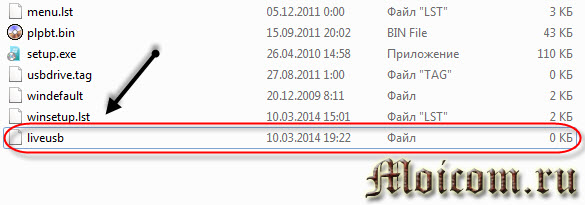
That's not all. We return to the root of our portable usb device and create a new text document in it.
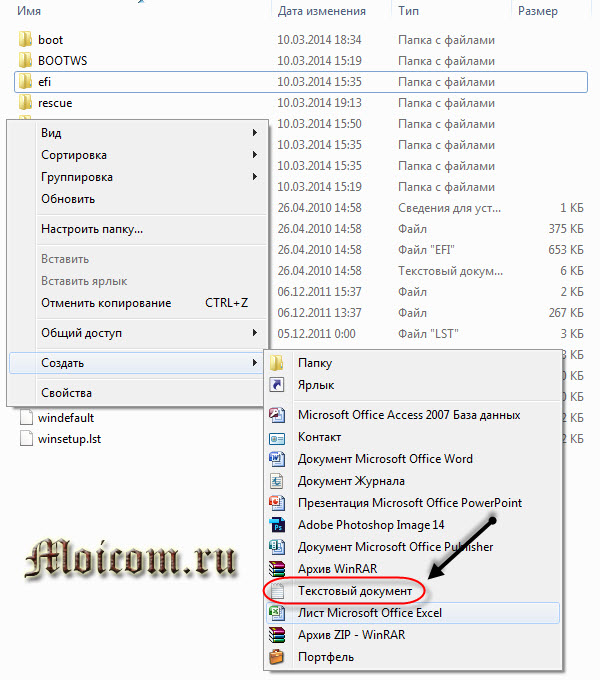
Rename<Новый текстовый документ.txt>V
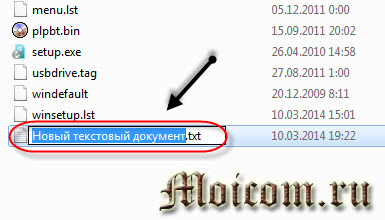
Removing the extension<.txt>and press enter.
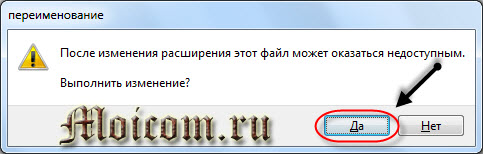
We are warned that after changing the extension the file may not be accessible, click<Да>.
Working with the graphical boot menu
We've finally added everything necessary programs and file images to our bootable USB flash drive. Now we need to edit the graphical boot menu that will appear when selecting our distributions, programs and utilities.
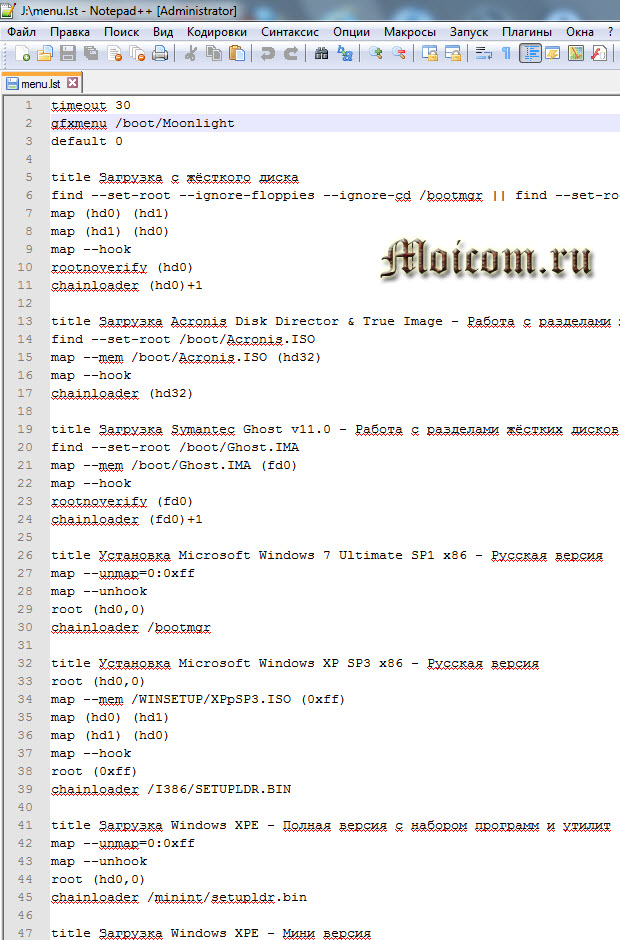
Go to the flash drive, go to the root, find the file
Just in case, I’ll show you how to open the menu sheet using Notepad if you don’t have Notepad++. Right click on the file
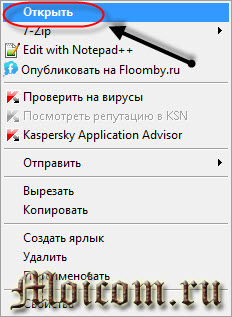
The window Could not be opened appears. this file. We put a point near<Выбор программы из списка установленных программ>and press


If it is not there, then you need to double-click on Other programs or on the right on the small downward pointer.

In the list that appears, find Notepad or WordPad, select it and click OK.

I'm used to working through convenient

A list of all items appears in front of us, which is displayed in the graphical menu of our bootable USB device.
First of all, I propose to remove (delete) the unnecessary and unnecessary items mentioned earlier, Symantec Ghost and Windows XPE - full version.

The unnecessary stuff has been removed, now I propose to edit our list in accordance with the contents of our flash drive. Depending on the names of the images on the usb device, you need to rename these names in the menu sheet, that is, make them the same for everything to work.
I will write the names of my images, you may have others, but remember one thing, if you make a mistake in even one letter, the required distribution or program will not start.
Previously, we added operating system distributions Windows systems XP and Windows 7, via the WinSetup From USB utility. We find the corresponding items in our menu and change their names to new ones.
Windows 7 all

In my case I clean

Windows XP Home
Then we will rename the name of the Windows XP boot loader. On this moment in the menu sheet<Установка Microsoft Windows XP SP3 x86 — Русская версия>.


In order to see the name of your image, just go to the folder on the flash drive
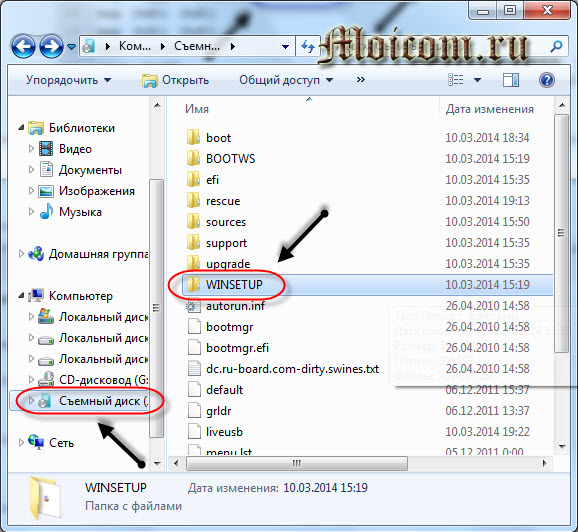
There will be a disk image and its name, which we wrote above in the list menu.

ERD Commander
We also inserted an image of the ERD Commander program; we need to add an entry about it to our download list.

To do this, copy the entry from Acronis, change the name to ERD Commander and the two paths of the image file to
Doctor Web
With Doctor Web everything will be a little more complicated. Paste the following text into the sheet menu:
title Dr.Web LiveCD - anti-virus utility
partnew (%@root:~1.3%,3) 0x00 /Boot/drweb.iso
map /Boot/drweb.iso (0xff)
map --hook
cat --skip=85 (0xff)/boot/config | set ID=
kernel (0xff)/boot/vmlinuz %ID% root=/dev/ram0 init=/linuxrc init_opts=4 quiet vga=791 splash=silent,theme:drweb CONSOLE=/dev/tty1 BOOT_LANG=ru_RU.UTF-8
initrd (0xff)/boot/initrd
And place it in any place convenient for you on our download list.
Kaspersky Rescue Disk 10
In order for the Kaspersky utility to work, you also need to insert special text which I posted below:
title Download Kav Rescue 10 – Disaster Recovery Utility
map (hd0,0)/rescue/rescue.iso (hd32) || map --mem (hd0,0)/rescue/rescue.iso (hd32)
map --hook
root (hd32)
chainloader (hd32)
We also place it in any place we like on the menu list.
So we edited the file
If you want to change the name of the items to your own, then in the line