In practice, there are two ways to install Windows on Apple computers Macintosh with Intel processors: Using a virtual machine or using Boot Camp Assistant. The first method is most often chosen if you plan to use Windows to install games. The advantage of Boot Camp is that this program is a standard tool for the latest versions of Mac OS.
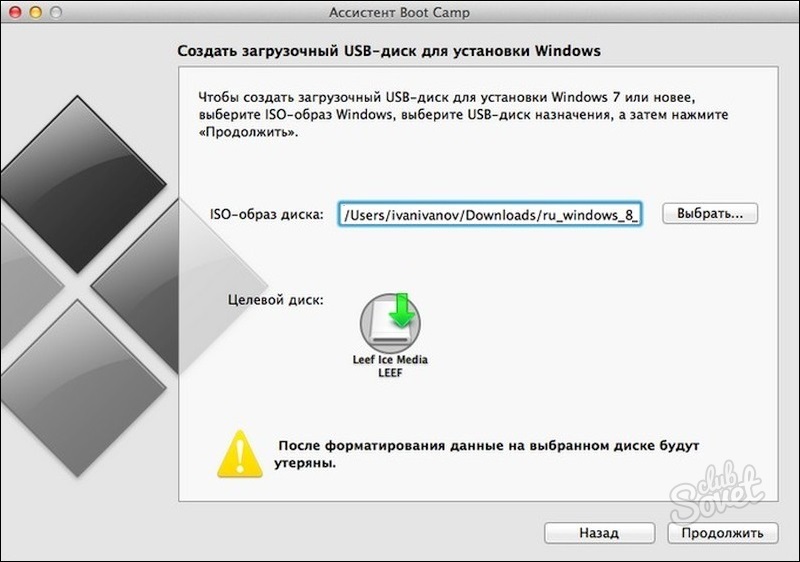
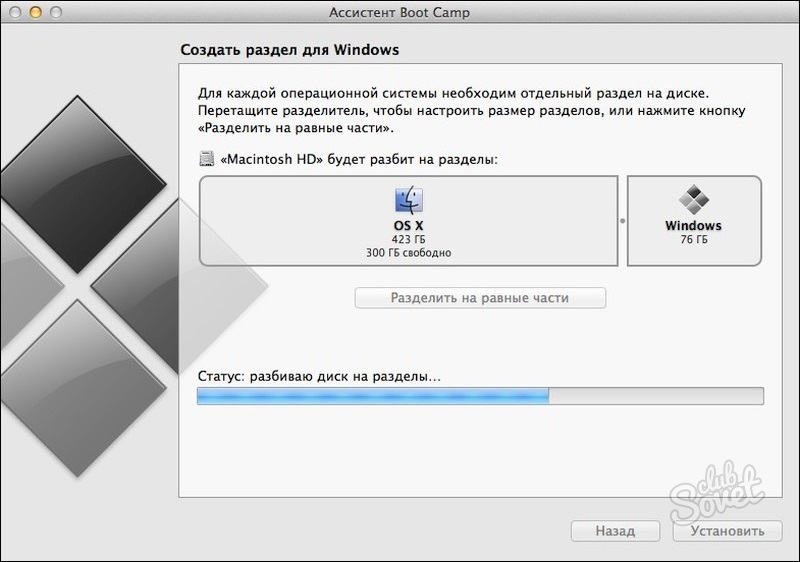
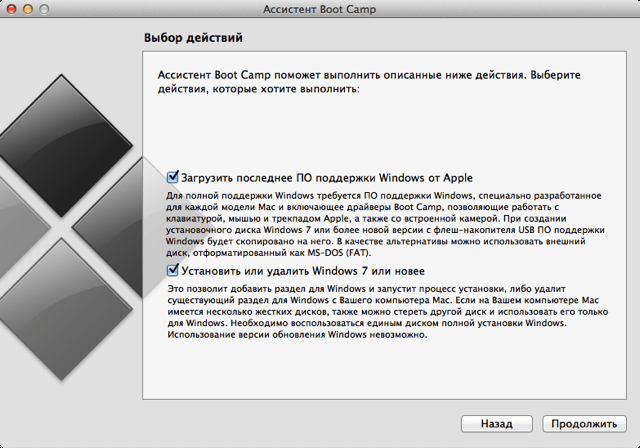
Let's look at the sequence of operations for installing Windows using the “Boot Camp Assistant” (BCA). We log into the computer using the system administrator account and launch the Assistant, which is located in the “Programs” → “Utilities” folder. Windows installation is performed using a drive optical disks or from a flash drive. If the system reports that the drive is missing (text with a triangle yellow color), but you need it - close the program, disconnect all external devices and start BCA again. If you plan to install from a flash drive, ignore the message and click the “ Continue».

Using the Boot Camp Assistant program to install Windows does not require any special knowledge and can be done by almost any user.
The Apple brand in the USA is strongly associated with stylish, convenient and reliable computers. Having entered the Russian mass market with iPods, Apple is building on its success. You can increasingly see Mac computers and laptops in store windows. Intel processors. They attract with their spectacular appearance and the treasured logo. But often the counterargument to purchase is the Mac OS X operating system, or rather its incompatibility with Windows. It is here that we should remember that along with the transition to new processors, Macintosh computers gained the ability to work under the operating system Windows family! Let's see how you can run Win applications on a Mac.
Alternatives
There are two fundamentally different approaches to installing and working with Windows on a Mac.
The first is to install Windows XP in parallel with MacOSX, and, if necessary, reboot the computer into the required OS. This opportunity is provided by Apple through Boot Camp technology.
The second is to install a PC emulator under Mac OS X. Install Windows on a virtual machine and be able to run programs written to run on Windows directly from Mac OS X. To do this, you will need Parallels Desktop for Mac software.
Let's consider both options, their advantages and disadvantages.
Parallels Desktop for Mac is software for software computer emulation, in which the devices of a real PC (host computer) are virtualized and provided for use in a virtual machine (guest). Each virtual machine gets its own processor, memory, CD drive, I/O devices, HDD- all the resources of a real PC. Parallels Desktop for Mac virtualizes all devices, including video and network adapters, and provides direct access (pass-through drivers) for LPT and USB.
Since all guest machines use the same virtual devices and drivers, regardless of the real devices on the host computer, different virtual machines are easily portable from computer to computer. For example, a running virtual machine can be stopped, moved to another physical PC, and started again.
Features and Features
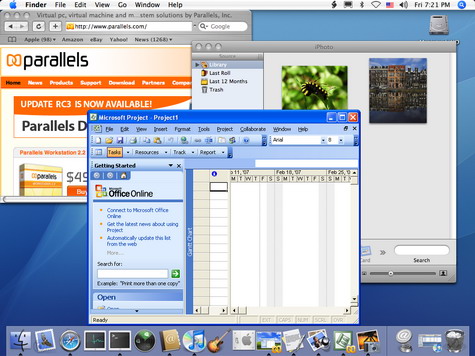
When working with Parallels Desktop, guest, the operating system opens in a separate window in Mac OS. The user gets access to USB devices(for example, iSight cameras), CD/DVD drives (including the ability to burn discs from a virtual environment), and hard drives. A shared clipboard is also implemented and drag-and-drop technology is supported between Mac OS X and guest OS.
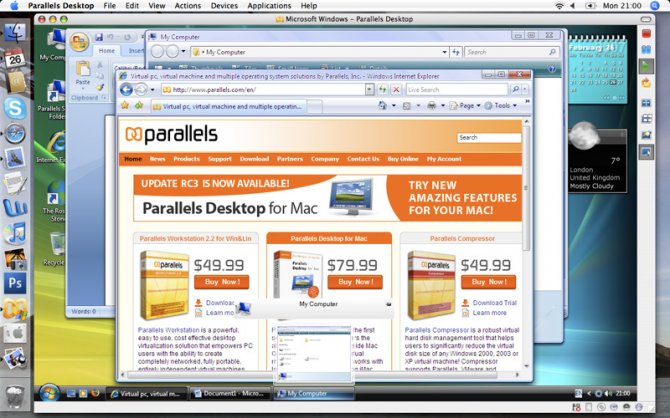
The latest version adds the Coherence function, which removes the working Windows table and a virtualization frame, leaving only the Windows application window, creating a more transparent Win - Mac OS environment and interaction.
Parallels Desktop is compatible with Boot Camp technology, allowing you to have just one installation of Windows on your Mac for all your needs.
Parallels Transporter technology allows you to migrate to Mac from an existing Windows installation or from VMware and MS Virtual PC virtual machines.
OS support
Parallels Desktop requires Mac OS X 10.4.6 "Tiger" or higher.
All non-64-bit versions can act as guest OS Microsoft Windows, various Linux versions, FreeBSD, OS/2, Solaris and MS-DOS.
Restrictions
- 64-bit OS not supported
- It is impossible to assign several CPUs to a virtual machine, and as a result, it is impossible to use computing resources 100% multi-core processors surrounded by guests
- 3D accelerators and Direct X are not supported (in current version, planned to be added), as a consequence - the inability to run 3D games and lack of support for the Aero Glass interface in Windows
Bottom line
Users modern computers Macintosh have the ability to convenient tools for use in Windows OS. Even without discounting the limitations of both Boot Camp and Parallels Desktop, both technologies already provide a comfortable and reliable experience with Windows on a Mac.
Update from 04/03/08
A year has passed since the article was published. During this time, both products for Windows startup Mac has undergone some changes that are worth mentioning.
Boot Camp 
The final version of Boot Camp was included in the Mac OS X Leopard operating system released at the end of 2007. The final version adds official support and device drivers for Windows Vista 32 bit. Those using the beta version of Boot Camp are encouraged to simply update device drivers from the Leopard OS DVD.
Parallels Desktop for Mac
On this moment Version Parallels Desktop for Mac 3.0 is available, which implements a number of improvements, the most significant of which is the promised support for DirectX and OpenGL 3D graphics. A list of supported games and software is available here.
Long-time experts in the field computer technology note the priority of Apple in the field of personal computer development.
From the mid-70s of the last century to the present day, Apple has been confidently competing with IBM in the creation of computer technology. In the old fashioned way, their computers are called “Macs,” despite the fact that real Macintoshes are already of museum value.
Their technical solutions famous manufacturers shamelessly copy them. Macs are reliable and functional. At the same time, the Windows operating system is more familiar, so a number of users need to install Windows 7 on MAC OS.
Popularity of Apple computers
The main differences between Apple's developments:
- “closedness” of architecture;
- high reliability and ease of use;
- ease of working with graphics and printing;
- leader of new products in the computer industry.
The MacBook belongs to the family of popular laptops developed by Apple. The latest version of the MacBook laptop is distinguished by functionality, compactness and quiet operation. The dimensions are amazing: thickness about 13 mm, weight up to 1 kg. The developers were able to abandon the use of fans in the design and create a new motherboard with a high density of elements.
The keyboard has a highly stable press locking mechanism, and the keys have individual backlighting. Retina display 13" diagonal is exceptionally thin and produces high-resolution images. The touchpad panel is very sensitive to touch, capable of varying the degree of pressure when touched. The battery capacity has been increased by optimizing the housing design.
Aluminum parts create a strong and reliable mechanism for fastening the rotating part of the housing. The use of a new USB-C connector for charging, video and sound playback, and data transfer also makes it possible to ensure the declared geometric parameters of the product.
Two installation methods
There are two installation methods: using Apple's own Boot Camp software and using virtual machine Virtualbox.
Boot Camp offers the user the following sequence of operations to install the Windows operating environment:
The virtualbox machine emulates the work:
- BIOS;
- random access memory;
- hard drive;
- peripheral devices.
 For computers designed for the Windows platform, used to install a system other than MAC OSX. The program is distributed free of charge.
Installing Windows 7 on MAC OS X via Boot Camp
Installation requirements:
- the hardware platform must have a connection to the Internet;
- an OS X administrator account is used to access the “Boot Camp Assistant” program;
- have a working keyboard, mouse, trackpad;
- 2 GB or more of RAM and 30 GB or more of disk space must be available for the initial installation of Windows to update early Windows versions you will need from 40 GB;
- An installation disk for Microsoft Windows is required when installing via a built-in or external DVD drive;
- You may need a USB flash drive with a capacity of at least 8 GB to install drivers.
What is necessary?
Installation requires:

System update
Installing Windows 7 OS usually requires version 4 of Boot Camp Assistant (BCA) on a 32-bit platform and version 5 for 64-bit platforms. Update your Boot Camp software to have the latest Windows drivers to your Mac computer.
This can be done in two ways:
Logging into the BCA program may require knowledge of an account with administrator rights.
Video: Installing Windows 7 on Mac
Installation steps
The installation is lengthy and will require connecting a source adapter. We proceed from the fact that full installation updates have been made. Seven requires the use of the NTFS file system.
First remove all disks with lower numbers if the installation is not on the first disk.
Once the OS installation is complete, the data disks can be recovered. If you have installation problems, use disk utilities recovering and erasing data with restarting the BCA.
Installation procedure:

Install OS using VirtualBox
To install, you need to download the program file and run it on your computer.
Installing the program
Installing VirtualBox is carried out by performing the sequence of operations 1-15:
Windows OS Installation Steps
Installation can take place via an installation disk or its ISO image. If the installation takes place using an installation disk, then it should be inserted into the DVD drive, in the “Attributes” column, select the “Drive” item from the drop-down list, and also check the “Allow direct access” checkbox.
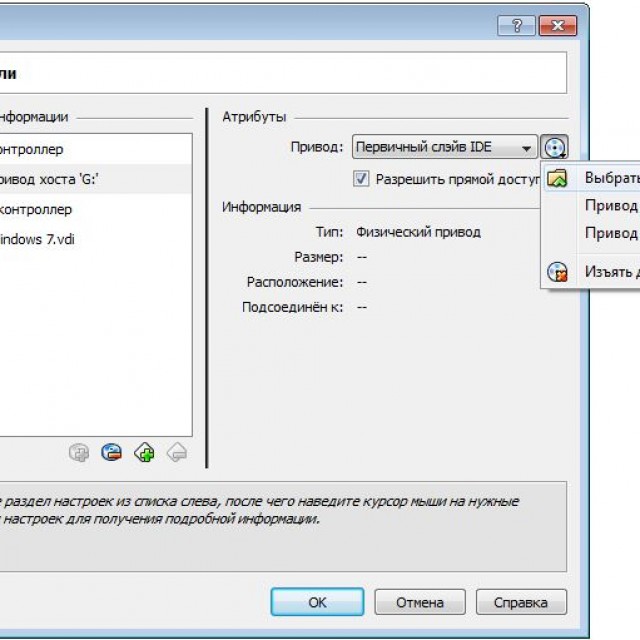
Photo: Checking the Allow direct access checkbox
If there is an ISO image of the program installation disk, then the “Attributes” column is filled in through the “Virtual Media Manager” as follows:
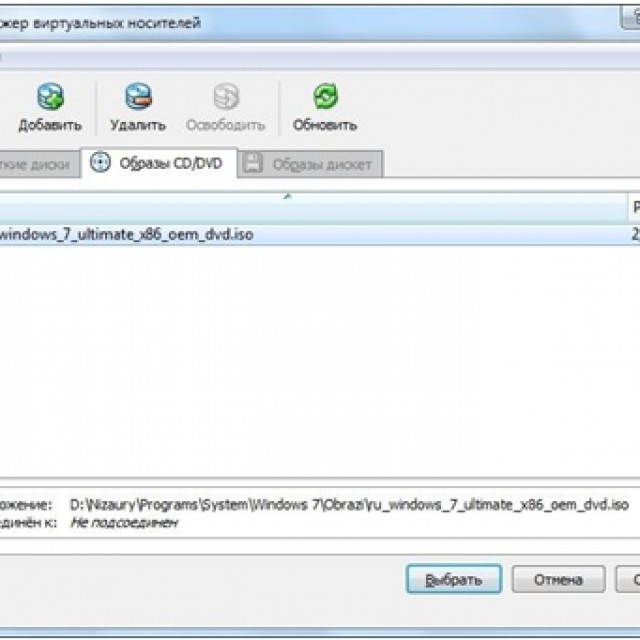
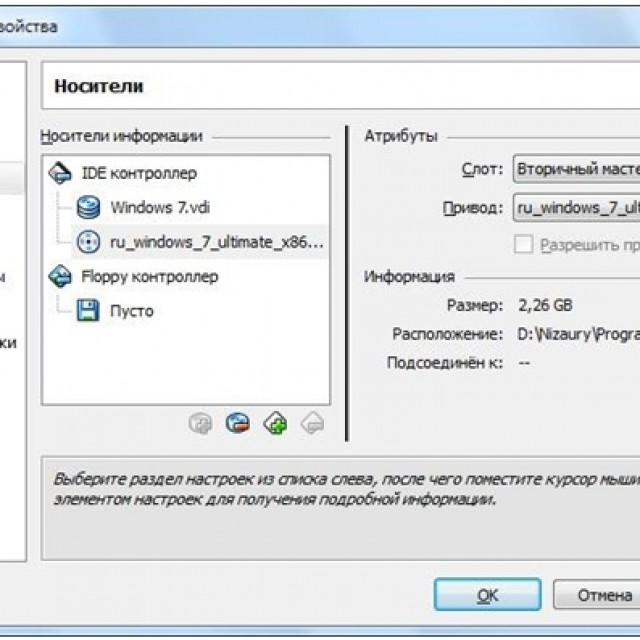
Photo: Media item in Windows properties section
Next, you should exit to the main program window, where you click the “Start” button. When information windows appear, click the “OK” button. On the virtual machine screen, click the mouse and press the “Capture” button. Further installation of the OS on the VM does not differ from normal installation.
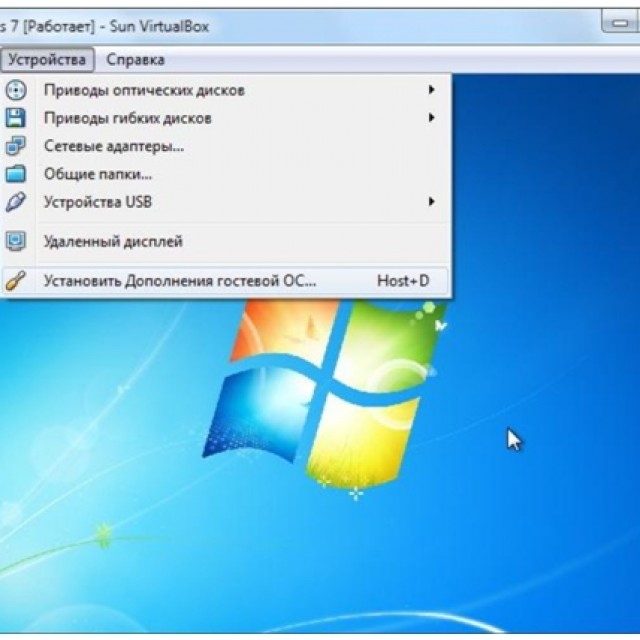
Once the installation is complete, VirtualBox will immediately launch the operating system. The VM blocks mouse and keyboard use when used in a host environment. Switching between VM windows and the main OS window is done using the Right Control host key. If you exclude the capture of the mouse cursor and keyboard of the VM, then you can use the mouse cursor in the virtual and main operating systems, and also have a common clipboard. To do this, use the "Devices" menu VirtualBox machines go to the “Install Guest OS Additions” item.
Apple is a world-famous electronics brand that produces specific products - iPhone, iPad, Mac ( personal computers), MacBook (laptops and netbooks), which are distinguished by their popularity and high level of reliability. Fans of Apple products are faced with the above-mentioned specificity: they can’t play most games, they can’t install the usual software - everything is done through dancing with tambourines. And Windows technical support is much clearer and more familiar to Russians. At such moments, the question arises: how to install Windows on a Mac, on an Apple laptop?
Installing Windows on a Mac is easy
Before moving directly to the instructions, it is worth mentioning that installing Windows on a Mac is only one solution to the problem. And you shouldn’t rush to do this right away if your MAC is frozen. Remember that the more careful you are with the sites you visit, the more often you update programs, the longer the operating system of any version will last you.
If you can’t bear to put up with iOS glitches or the architecture and specifics of the system are simply terribly unusual, then there is a Windows emulator on MAC. Thus, you will retain your native system on your Apple device and get access to familiar and familiar entertainment. Virtual Box; Parallels Desktop, Vmware Fusion are the most popular emulators, or, as they are most often called, “OS virtual machines”.
These wonderful programs will make it possible to create virtual computer with virtual ones technical characteristics(hard drive capacity, number of cores and processor frequency, RAM size, etc.) right inside MAC OS. Thus, the user will be able to switch between favorite programs for different systems without losing speed or restarting the computer.
If the situation when the MAC freezes makes you angry, and you still decide to install Windows for Mac, then here step-by-step instruction how to install windows on mac.
WATCH THE VIDEO
What you need to install Windows on Mac
Of course, we will need a Macintosh and a boot disk with Windows versions that can run on a Mac, including:
- Windows XP (Home or Professional with SP 2 or 3)
- Windows Vista (Home Basic, Premium, Business, Ultimate)
- Windows 7 (Home, Professional or Ultimate (version 4 or 5.1)
Modern Mac devices work very easily with these outdated systems, but running Windows 8 and 10 on them will have problems. Naturally, before you start installing Windows on Mac, you should pay attention to whether the software computer and its firmware.
The computer must be connected to the Internet; for Windows to function properly (especially starting with Vista), you need 2 GB of RAM or more, approximately 30 GB of free hard disk space, and a disk or Flash drive(a flash drive with a size of 16 gigabytes or more is best) with all the drivers needed after installation. When you are sure that everything listed is ready, feel free to proceed with the installation.
Step-by-step installation of Windows on Mac
Finally, it's time to learn how Windows is installed on a Mac. Using these instructions you will install windows 7 on macbook pro including, like any other device.
We turn on our device (laptop, Macintosh PC, Apple netbook);
We connect a flash drive (a 16 GB or larger flash drive is suitable), which we leave connected until the end of the work.
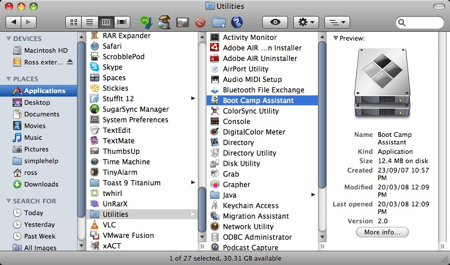
We launch the Boot Camp program, which is located in the Mac OS system (can be found in the “Utilities” section). (Fig. 1)
- The built-in iOS Finder is also suitable for searching - a useful analogue of the search function in Windows OS. In Findere, you can find Boot Camp in the Applications tab - Utilities section.
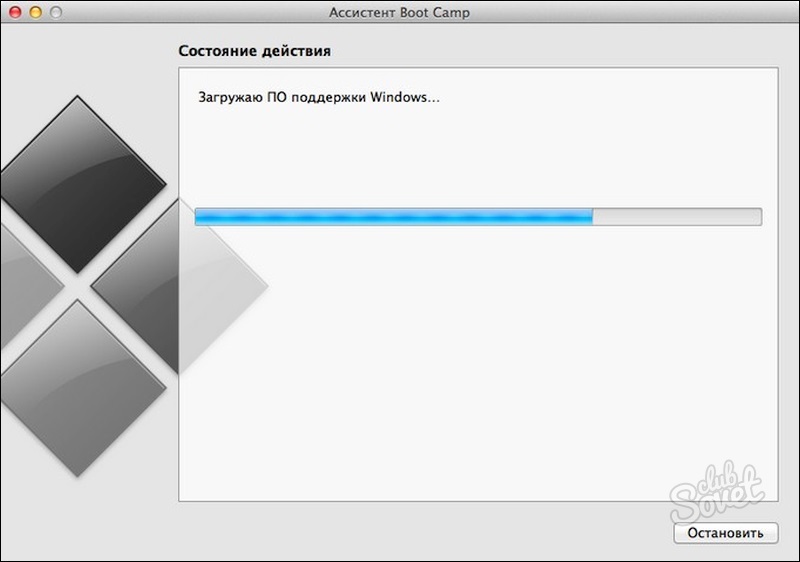
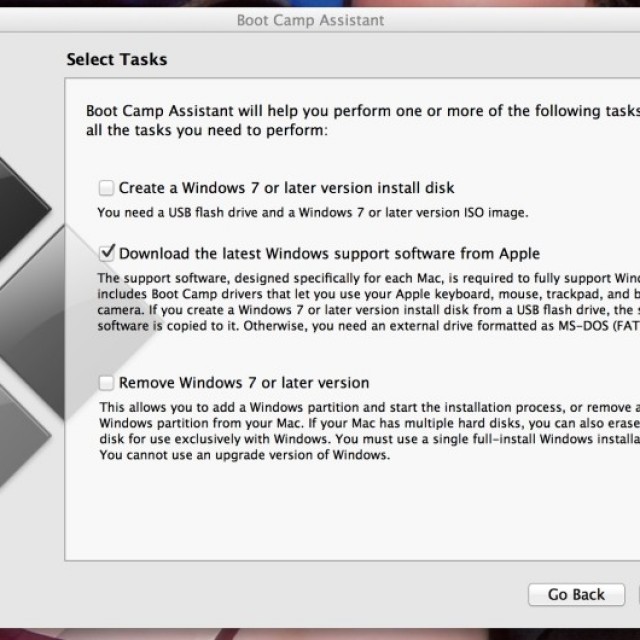
- In the program window that opens, select required parameters: create an installation virtual disk with Windows, check the box next to the “Download the latest software” option. Click “Continue”. (Figure 1.)
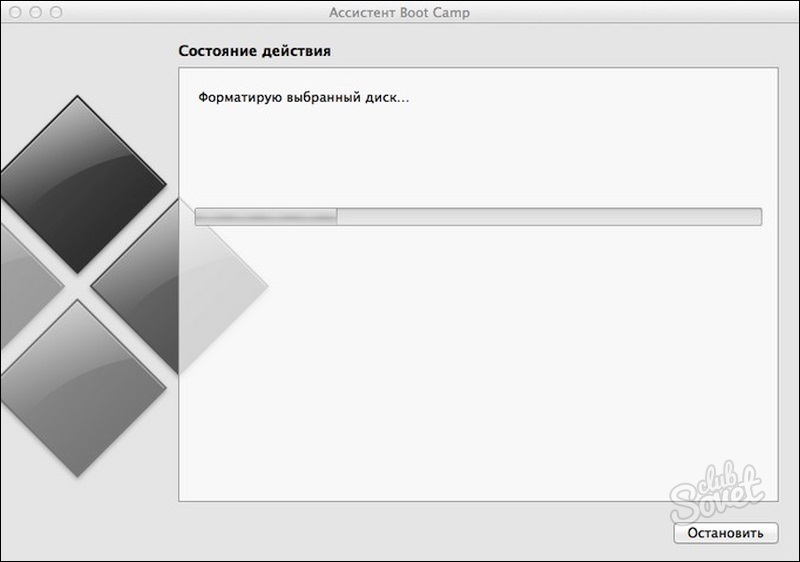
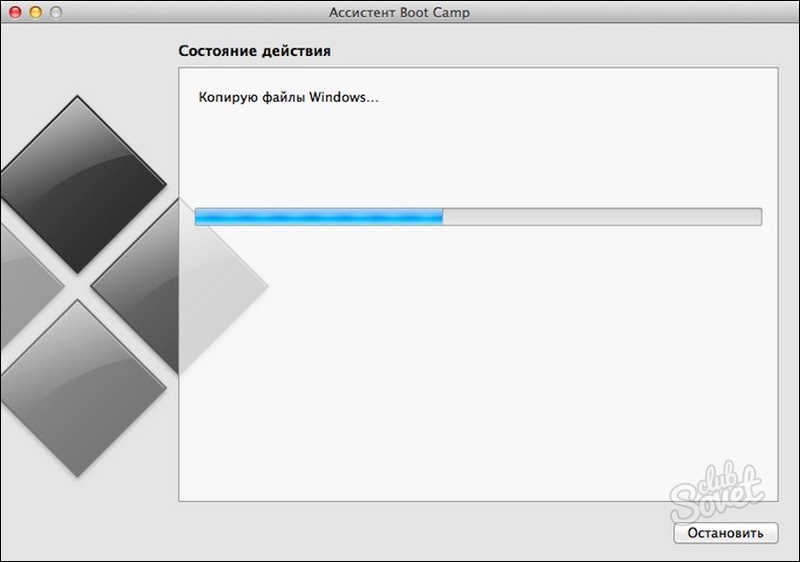
To install Windows 7 on a Macbook, insert the disc with the operating system. Boot Camp Assistant will independently prepare the flash drive for installing Windows 7, and after the process is complete, you can safely exit the program.
- We are looking on the Internet for drivers that are suitable for Windows and for Apple devices. When the drivers are downloaded, for the correct functioning of the image, we create an archive that will include everything specified files($WinPEDriver$ (folder); AutoUnattend.xml; BootCamp (folder)), and put it on the prepared flash drive.
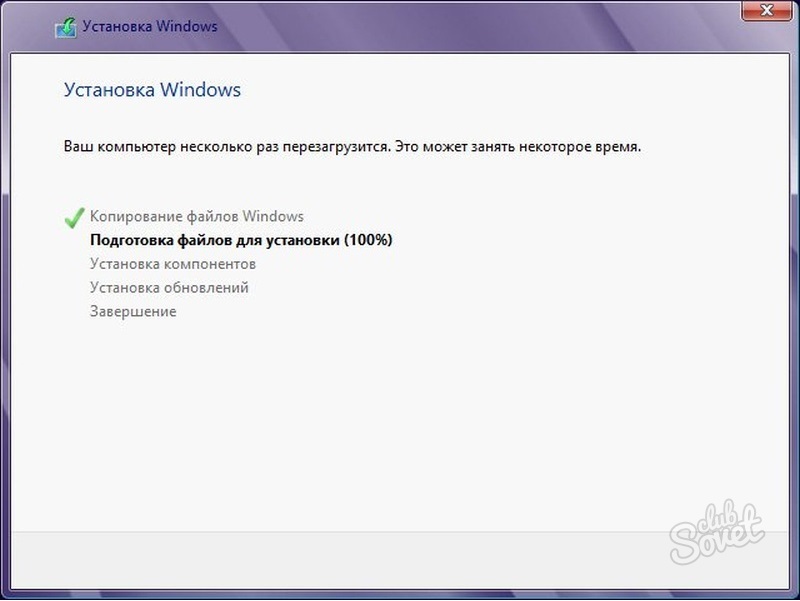
The process of installing Windows is no different from installing it on another device. If you are not familiar with this process, you can read. After the installation is complete, the drivers that we downloaded and threw into the virtual disk in advance will be automatically installed. The same algorithm is used for .
This way the problems with Windows operation on Apple devices, with launch Windows programs on Mac. Now you know how to install Windows on a Mac.
Installing Windows on Apple computers may be required for various reasons, but the most common one is the unavailability of some software for Mac. We'll look at two ways to install Windows on a Mac. The installation is equally suitable for Windows 7, Windows 8 - 8.1, Windows 10. If you really want, you can also install Windows XP, but the installation method for this version is only available using a virtual machine - we will consider it later in the article.
Installing Windows Using Boot Camp Utility
The first method we will consider is installing the Windows operating system using the utility already built into Mac OS Boot Camp. Apple developers were well aware that the OS X system could not fully cover all user needs. Some software simply isn't made for the Mac. Here you can object - there are analogs that are not only no worse in functionality, but most often, on the contrary, much better, but if the software is required for work, then you are unlikely to have enough time to learn the new interface and settings.
I will give an example from my experience. While studying computer graphics I'm facing a row graphics programs, such as Photoshop, After Effects, Dreamweaver, and my main specialty is 3D Max, but it is not available under OS X - that’s why I have to install it in parallel or as a second Windows system. Of course, I tried to try analogues such as Cinema 4D, Maya, and each of these programs has something good, but constantly encountering difficulties in basic operations, it was very difficult for me to complete the entire project from beginning to end. Somewhere it’s better to render, and somewhere it’s more convenient to model. Therefore, it is much easier for me to install a second system than to lose several years on retraining.
But I digressed a little from the topic, let's continue. Installation using the utility Boot Camp allows us to put on Mac a full-fledged second system, the choice of which will be available to us when booting a computer or laptop made by Apple.
The advantage of this utility is that by installing the program through it, all the resources of your PC will be available to Windows, this will allow you to use the Mac’s performance to the maximum. The computer will easily play the latest games and perform complex tasks.
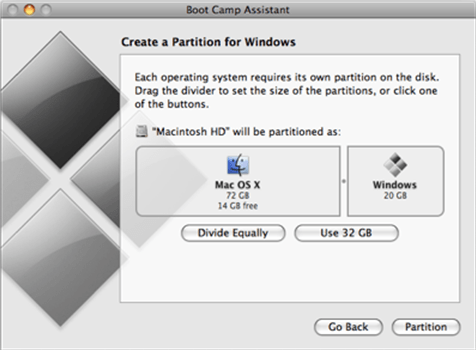
Before installing an additional OS, keep in mind that it will take up a lot of space on your hard drive. Make sure it has the required gigabytes. On average, we may need about 15 GB for Windows itself, and we will also need space to install software. It is recommended to use at least 30 GB.
For installation we will need:
- Windows operating system image. Boot Camp supports Microsoft versions not lower than Windows 7;
- Flash drive 8GB or more;
- Internet access;
First, let's launch the utility . There are two ways to launch it through the Finder top menu. Go to -> Utilities and launch Boot Camp Assistant.
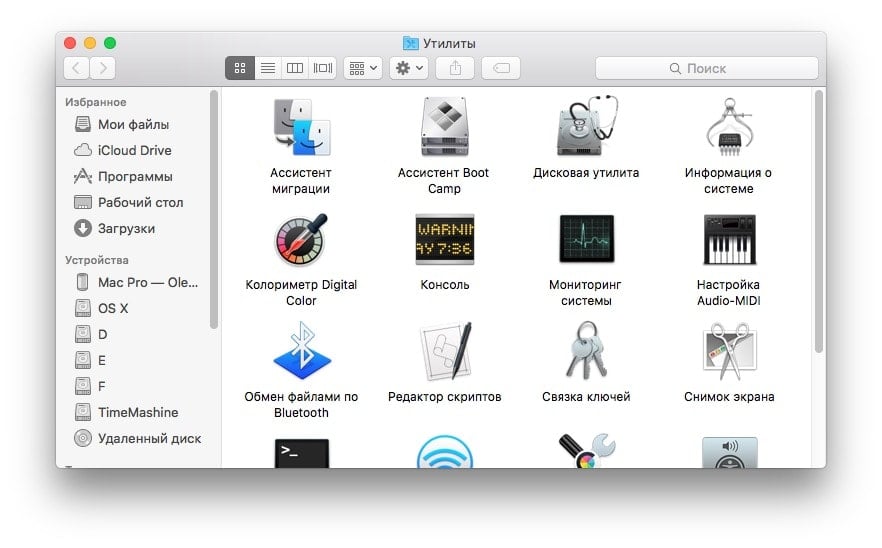
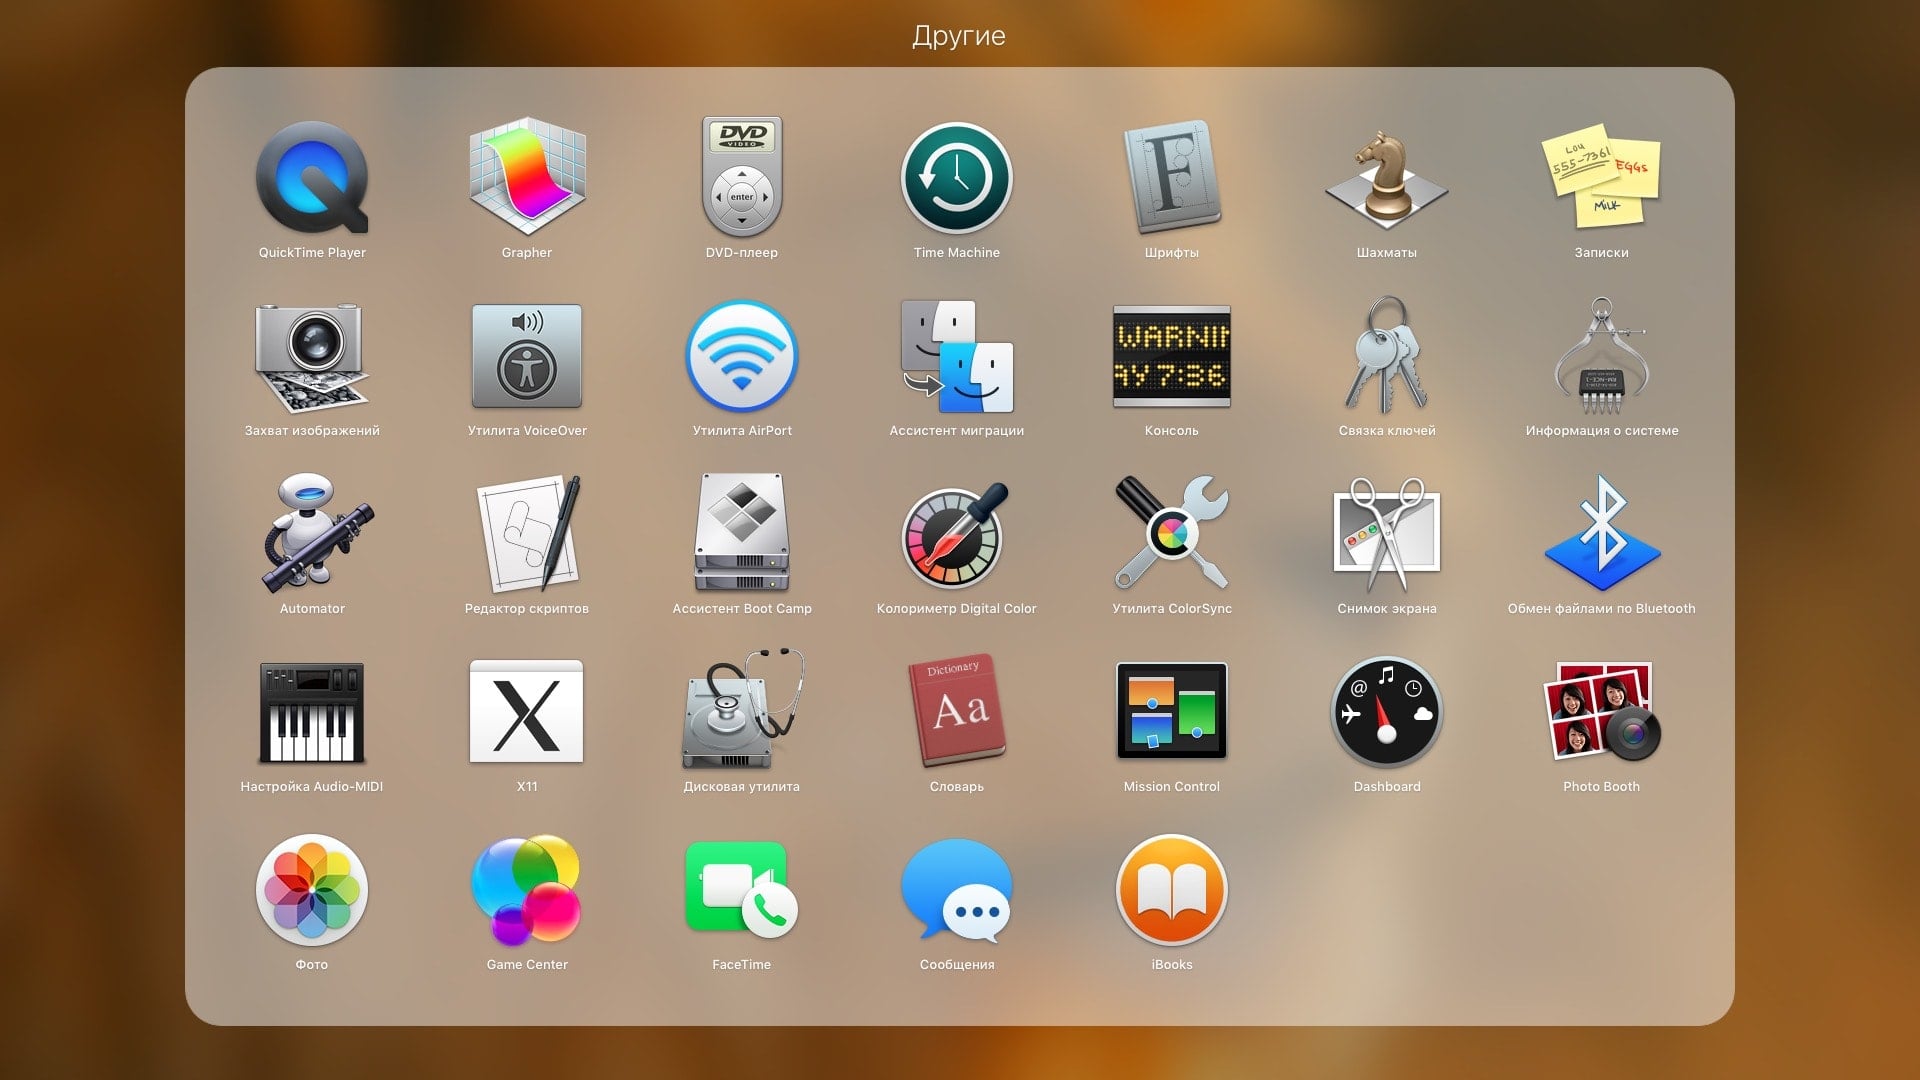
The second method is via launchpad mac, if you have not made any special rearrangements or movements, the shortcut will be available in the folder Other.
Before you begin installing the operating system on your iMac or Mac, check and prepare Boot camp. First, make sure that all updates from Apple are installed on it. To do this you need to do the following:
When you launch the utility, you will have the opportunity to select the location where OS Windows will be installed. Before starting the software, you should close all open applications and programs.
Once the utility and flash drives for copying information are ready, you can proceed to the first steps:
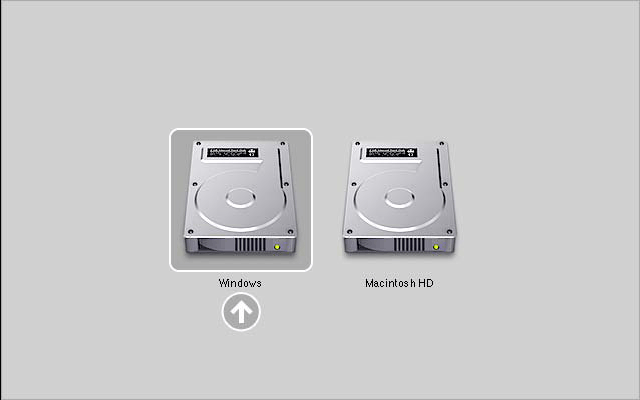
After copying all Mac files will automatically begin rebooting. Next, to display the boot manager, press and hold the Alt key. On the Mac, the disk menu will open, mark the partition with the name of the operating system. This will be followed by launching the OS and setting the parameters.
To install Windows you need to do the same. Only in the window Selecting Actions"You should check the boxes next to the items " Download latest software" And " Create a disk to install Windows 7 or later».
Installing Windows on a Mac, or rather, setting up the program, begins with choosing a language. Select the correct language right away, otherwise you will have to do all the steps again. Having selected all the parameters in this window, click the Next button, which is located in the lower right corner.
To install the Windows operating system on a Mac, carefully follow all the instructions provided. Do not restart or turn off your computer during the process. The procedure cannot be interrupted in any way.
After your iMac restarts a second time, you can begin installation. necessary drivers. To do this, download them back from the flash drive, install and run the installation program.
Installing Windows via Bootcamp using a USB flash drive
Installation can be carried out either using a disk with the operating system or via a USB drive. To load a program from a flash drive onto a Mac, you must first download it. Windows system must be in iso format.
This installation option on Mac and iMac is no different from the previous one. Before you begin, you should also check the boot camp for updates and save all the necessary data. The following instructions will help you complete the task:
But it happens that when installation media is a flash drive, the utility requires you to insert a disk with the program and refuses to continue downloading the software to the iMac. In this case, you can download the driver Daemon Tools Lite iMac. With its help we install Windows iso image, he will serve virtual drive and then Bootcamp will complete the installation process of our OS without any problems.
Installing Windows on Mac OS X using a virtual machine
This method is suitable not only for installation Windows, and for Linux, Ubuntu, Chrome OS And Android. The virtual machine can be installed on both Apple computers and Hackintosh (processors that support virtualization).
Operating systems installed on a virtual machine do not require additional driver installation, as they use Mac OS settings.
Working with a virtual machine is essentially another one running in parallel operating system, using the program and it works simply in a separate window, like Photoshop or iTunes. The most popular at the moment is Parallels Desktop.
The disadvantage of this method is that it increases the consumption of computer resources, which can cause slowdowns and, at times, freezing of the system when processing complex tasks, such as heavy games, 3D and Video rendering, etc.
A huge advantage of a virtual machine on mac os is direct access to any of the systems simultaneously without rebooting.
Installation using Parallels Desktop
For installation we will need:
- Parallels Desktop program. You can download it from the developers’ website www.parallels.com or you can search for it on the Internet.
- Image boot disk Windows 7, 8, 8.1, 10. To install Windows 10, it is recommended to use latest version Parallels Desktop, as some features may not work correctly on Windows. Keyboard shortcuts, symbols and combinations with the Shift and CTRL keys and much more may not work correctly.
First of all, install the Parallels Desktop program. There shouldn't be any difficulties at this stage. We agree to the license, activate it if necessary, agree or refuse to help developers track faults and errors.
After installation, we are taken to the installation wizard, where we will be offered a choice:
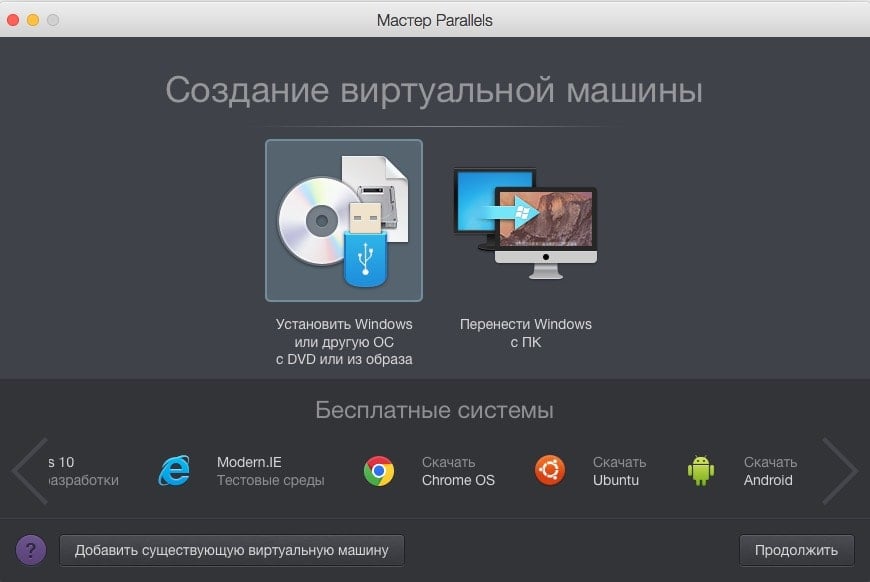
Download free OS from the Internet;
Add an existing virtual machine - a virtual machine file that was previously installed on your computer or created by other users. In this case, the PC configuration does not affect performance.
Transfer Windows from PC - this will require network connection with a computer on which Windows is installed or external drive, to transfer data using the Parallels Transporter Agent utility.
Install Windows or another OS from a DVD or image. This is the only option that suits us for Windows, so we select it and click continue.
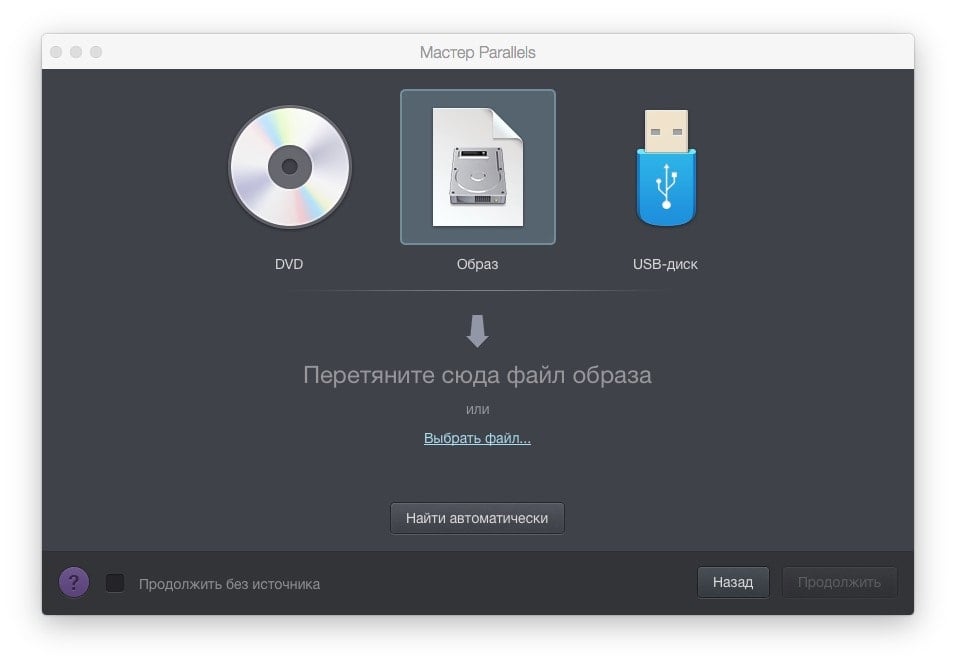
Select a disk image file or Windows bootable flash drive
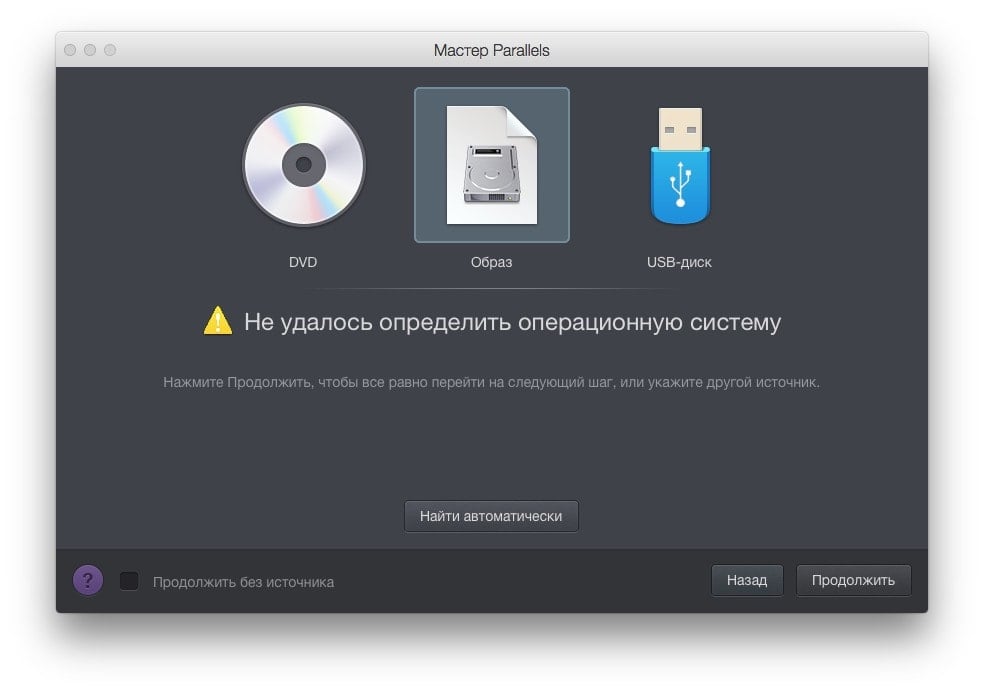
If the image was downloaded from the Internet, then we can see such a message. There is no need to panic, turn off the installation and rush to look for new images - this message only warns that the Parallels Desktop program could not automatically detect the version of Windows being installed and we will need to select it further from the list.
After we click continue, a drop-down list with a choice of operating system version will become available to us.
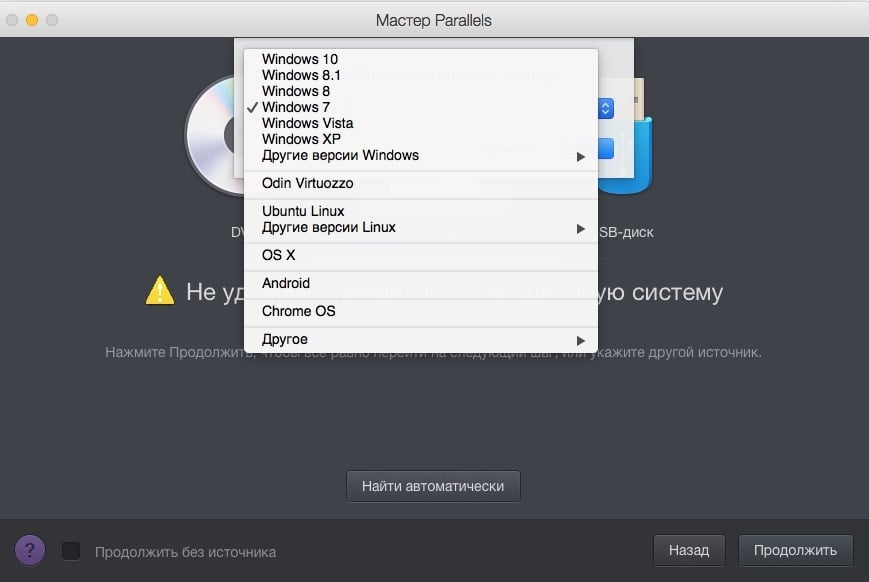
Select the Windows version. which is in our image and we move on...
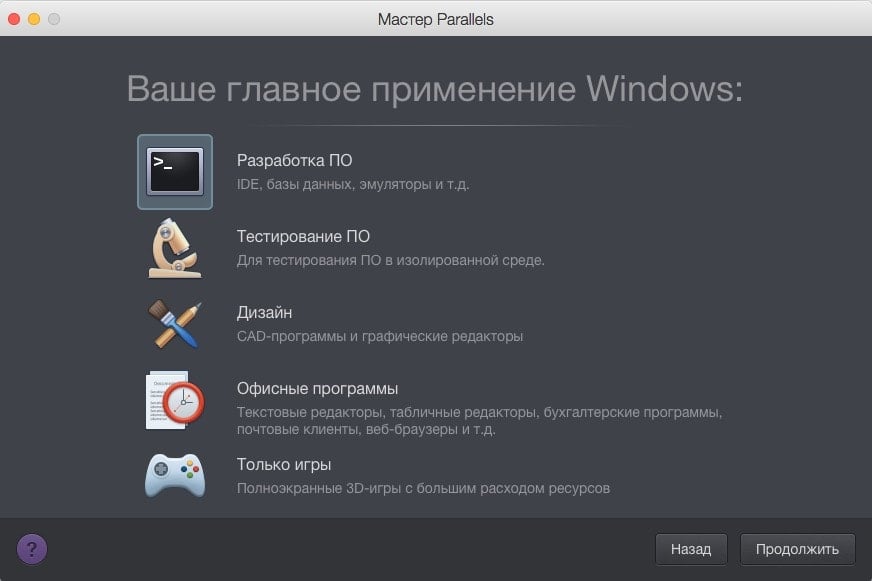
The program will prompt us to automatically configure the virtual machine to suit our needs. Everything is in Russian. therefore, there should be no problems with the choice of application, we will adjust all these settings even later, and they will also be available for change at any time when working with the program.
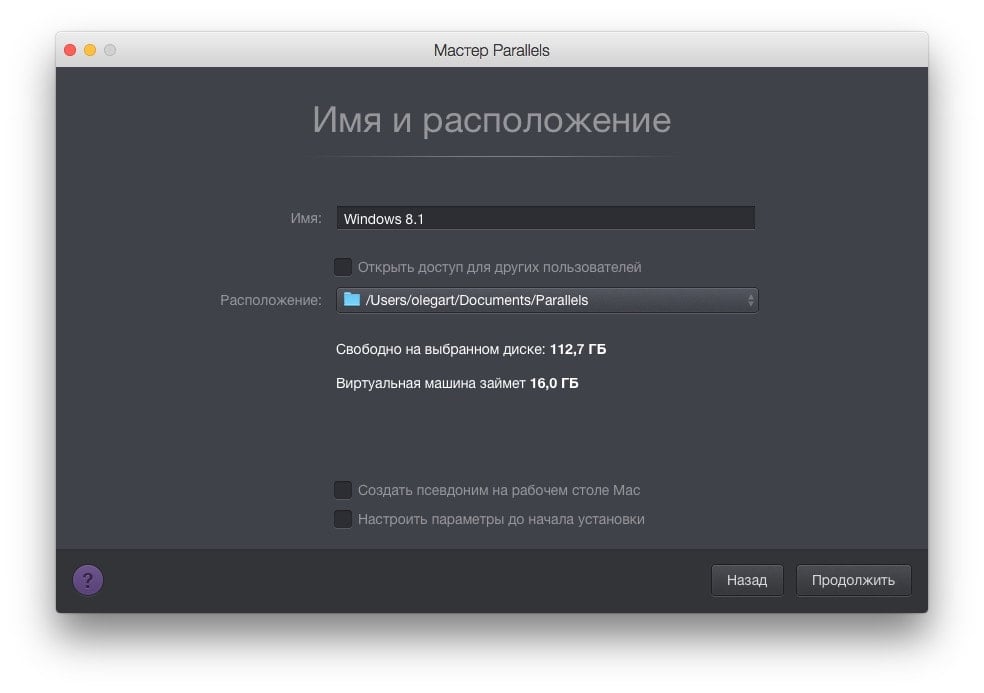
In this window, select the partition where the virtual machine file will be located. which, when installing Windows starting from Windows 7, will take up about 15 GB, so if you don’t want to increase it, I advise you to choose a location other than the system one if possible hard section disk.
At the bottom of the window we have access to the following settings:
Create an alias on your Mac desktop - if you check this box. then after installation, a shortcut will appear on the Mac desktop to launch this particular virtual machine, since there can be a huge number of virtual machines with different systems, sometimes it helps not to waste time selecting from the list.
Configuring the settings before starting the installation is a very important point to be noted. This will give us access to edit the virtual machine settings that were automatically set by Parallels Desktop when selecting the usage type.
We mark, click continue and get into the settings window. There are quite a few settings, so we will consider the most important ones for comfortable work and high performance.
Hardware -> CPU and Memory
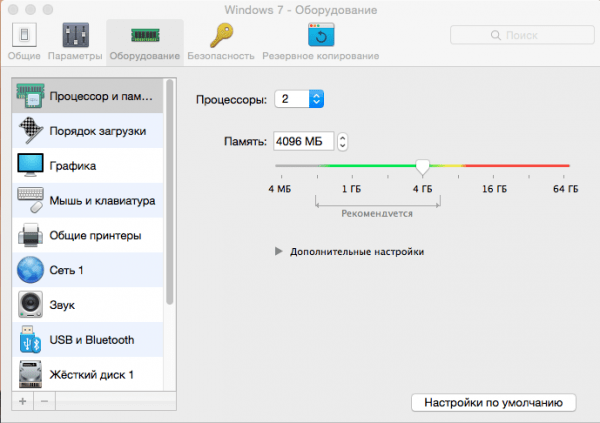
One of the most important points that affects the performance of a virtual machine. The processors item indicates the number of cores that the virtual machine will use for Windows. The default is always half the number of cores of your processor. For best performance You can select the maximum available quantity.
When considering the amount of shared memory, it is worth specifying 1.5 - 2 GB less than the full amount so that Mac OS X always has enough memory to work.
For example, I have 8GB, which means I can give 6-6.5 GB for sharing. I have 4 nuclear processor— for a virtual machine I select all 4 available cores, since I will work with 3D graphics and performance is very important to me. I would set the same settings using virtual Windows for Games.
Equipment -> Graphics

We indicate the available memory capacity of the video card. Accordingly, for programming and testing software that does not require large resources of the video card, you can leave it by default. For games and software with high consumption, we set the volume access in the yellow zone - this is the most balanced value. And OS X is not deprived and Windows is happy.
Equipment -> Network 1
Internet access. You can turn it off or off.
Options -> Optimization
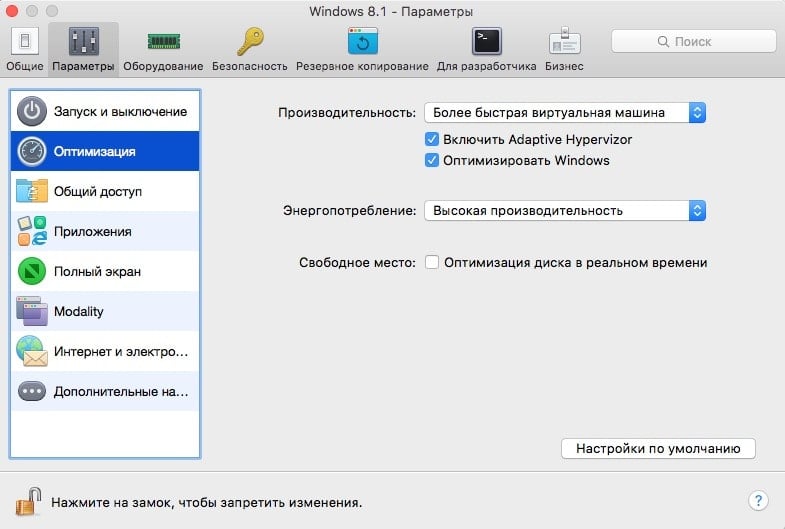
Allows us to balance the consumed computer resources for comfortable work. Here we can give priority to Mac OS or Windows. It should be understood that if we select “Faster virtual machine” and start video processing, rendering or a heavy game, then Mac OS may slow down significantly.
Options -> Sharing
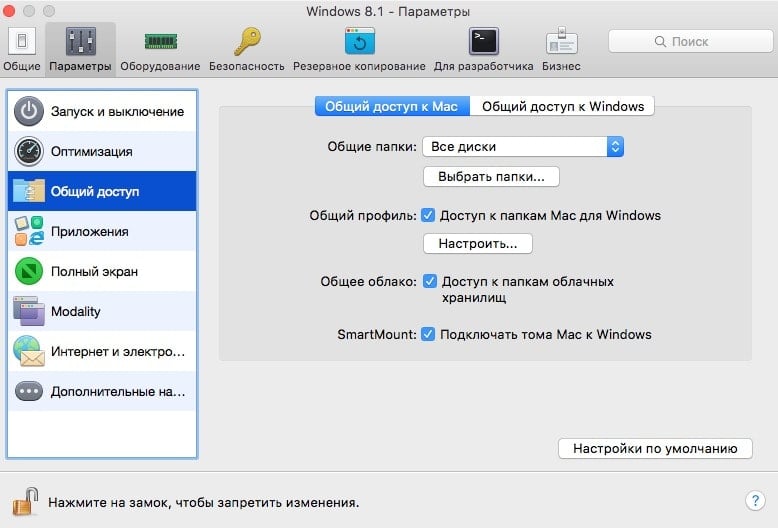
An option that allows you to choose which folders or partitions of a Mac OS X drive will be visible to Windows. If I select “All drives,” all partitions on my computer will be visible, but if I select “Home folder only,” then only the Documents folder will be available.
Settings -> Startup and shutdown
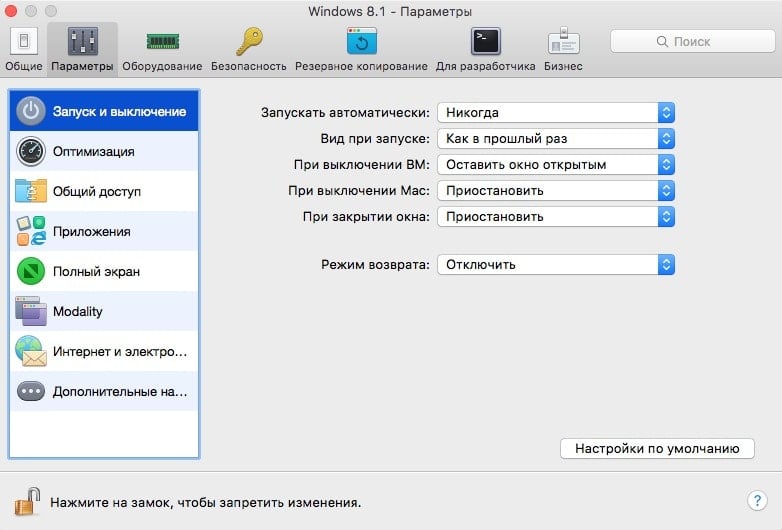
In this window we can configure how Parallels Desktop will behave when turning Windows on and off. Here we can configure. so that the program closes when Windows is turned off, and also so that our virtual machine starts automatically when Parallels starts. It is recommended to return to the window settings at the very last moment, after installing the OS. With these basic settings in place, we proceed to the installation.
The installation is absolutely similar to installation on a regular PC. Follow the instructions Windows installer and wait for complete completion.
What you must do after installing Windows on Parallels Desktop
Install Parallels Desktop Tools on Windows
Installing Parallels Tools resolves most problems that may arise when using Parallels Desktop.
Parallels Tools provide maximum convenience and efficiency for working on Windows. With Parallels Tools you can:
- Move cursor smoothly between Windows and Mac OS X
- Synchronize date and time settings between Windows and Mac OS X
- Share Mac OS X drives from Windows
- Copy text and drag objects between Mac OS X and Windows
To install Parallels Tools:
Disable password at Windows startup
Since Windows runs from Mac OS under your account, for which a login password may already be set, there is no need for an additional password in Windows. Therefore, if you do not have any reason to use an additional password, you should disable it. .
Disable Windows Lock Screen
Beginning with Windows versions 8 Lock screen is enabled by default. On a parallel machine there is no need. So feel free to turn it off. .
Improve performance and performance
Additional Windows services will increase the load on the processor and increase the consumption of PC resources. The need for many Windows services disappears when using a virtual machine, so it would be logical to disable all unused services in order to increase the performance of the virtual machine, as well as minimize the load that will slow down our Mac OS.
Now we install the desired programs on Windows and work for our own pleasure.


