Today I will tell you how to make a multi bootable flash drive with Windows XP, Windows 7 and 8.1. Creating such a flash drive is not at all difficult with the help of the already well-known WinSetupFromUSB utility.
For a long time I was going to clean up my admin tools and the best time for this is the New Year holidays. Previously, you had to lug around with a small box of CDs that contained everything you need for recovery. operating systems and the installation disks themselves, but progress does not stand still...
Let's get down to business. I noticed that flash drives with distributions of different OS began to multiply in my pocket, which was not at all pleasing. I even began to forget on which flash drive which installer was recorded. So I decided on holidays to make myself a universal installation flash drive with Windows XP, Windows 7 and 8.1, but on weekdays I did not find time to deal with this issue.
We will create a multiboot flash drive with the already well-known utility WinSetupFromUSB. Earlier I told you how to use this program.
Let's put it on a flash drive first. windows installer XP and Windows 7. This is done in the same way as we created the installation USB flash drive with Windows XP, only we additionally indicate the path to ISO image at the Windows 7 disk. It remains to press the "GO" button and after a while we will receive an installation USB flash drive with two operating systems.
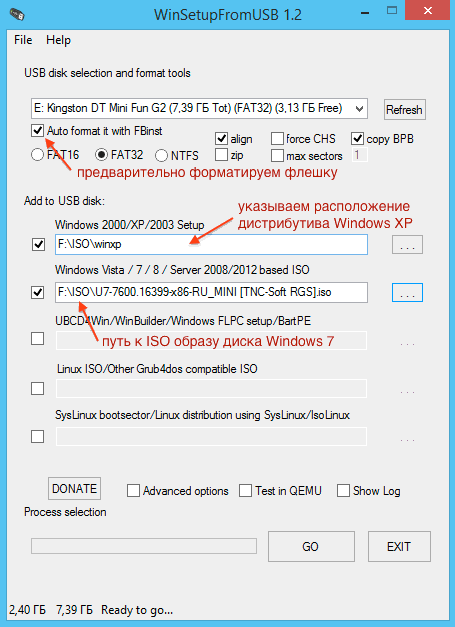
The process of adding additional images of installation disks to a USB flash drive is not at all complicated, which is probably why the developers of WinSetupFromUSB decided not to bother with explanations. But in vain ... many of those who used this utility simply do not know about the possibility of adding, for example, different Windows versions 7 (Pro, Ultimate, 32 and 64-bit) on the same flash drive. Moreover, the menu is created automatically.
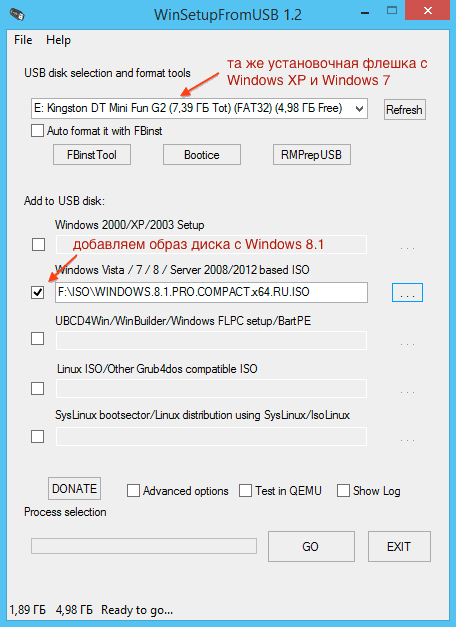
It remains to add Windows 8.1 to our super flash drive. We put a new checkmark on the corresponding item and specify the path to the new ISO image, now already Windows 8.1. After that, it remains to start the process again with the "GO" button. If you look closely, there is an “Advanced options” switch at the bottom ( additional settings), where you can set your own name for the menu item, but I preferred to leave it as it is, especially since everything is created and so very correctly.
In fact, the capabilities of WinSetupFromUSB are much more than those described in the article. In addition to Windows XP / 2000 / Win7 / 8 / 8.1 (32 and 64-bit), you can safely add server OS - Windows Server 2008/2012, most ISO images of known Linux systems, Antivirus Rescue Disks, Acronis and Paragon utilities.
The full list can be viewed on the developer's website. In practice, we are only limited by the size of the flash drive and common sense.
If you find the article helpful,
Feel free to like and share with your friends.
You can easily write to it desired program or operating system. But what if you have several computers or laptops at home with different operating systems installed. Or friends often ask to reinstall Windows or install it new version. Of course, you can create a bootable USB flash drive every time. You can also buy several flash drives and install various programs on them. But it is much easier to choose this option - creating a multiboot flash drive with different versionsWindows and Utilities. This will be discussed in this article.
So, what is needed for this. Of course, you must have all the necessary ISO images that you want to write to it: various operating systems and programs. It can be Windows XP, 7, 8 and others; Dr.Web LiveCD or Kaspersky Rescue Disk - to check your computer for viruses, Victoria - to fix errors hard drive, Acronis Disk Director - for dividing a hard disk into partitions and others. You can download them from the Internet, or, you can read about it by clicking on the link.
You will also need special program, with which we will create a multiboot flash drive, and, of course, the flash drive itself. Choose its volume, based on what you will write to it. If this is a set of different programs, 1-4 GB is enough. If you want to make a multi-boot flash drive with multiple operating systems and add programs to it, take a flash drive with a memory capacity of 8 GB or more.
As an example, in the article we will make a multiboot flash drive with Windows 8 and the Victoria program. I took a flash drive with a capacity of 4 GB. We will use free program WinSetupFromUSB.
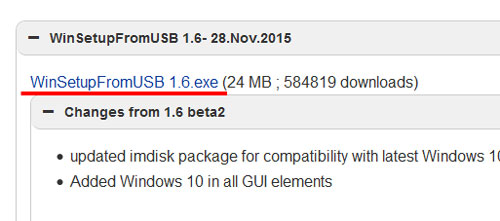
You can download the program from the official website. Write in the search engine "WinSetupFromUSB" and follow the link shown in the figure below.
We will download the latest, at the time of this writing, version of the program. Let's go to the appropriate link.
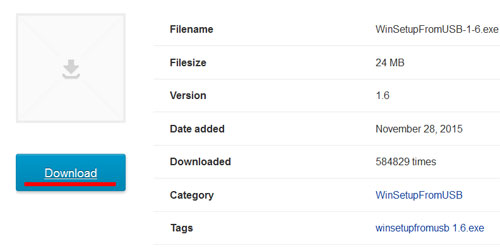
Click on the blue button "Download".
The next thing we will do is, which we will have bootable. Copy from her necessary files, since all information from the flash drive will be completely deleted.
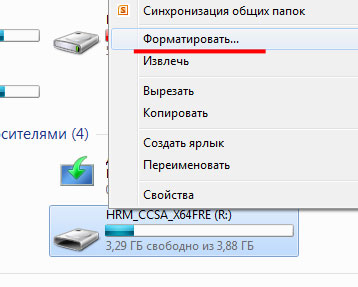
Insert it into a computer or laptop, and you need to use a USB 2.0 port. Go to "Computer", right-click on it and select from context menu "Format".
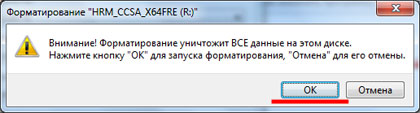
An information window will appear that all data will be destroyed, click "OK".
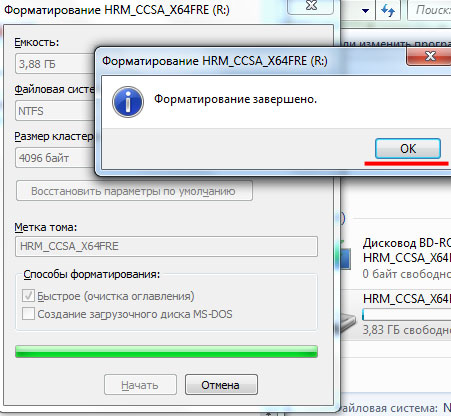
When the flash drive is formatted, the corresponding window will open. Click "OK" in it and close the formatting utility.
Unpack the downloaded archive with the WinSetupFromUSB program and run the file "WinSetupFromUSB_1-6".

First thing, write an image with the Windows 8 operating system to our multiboot flash drive.
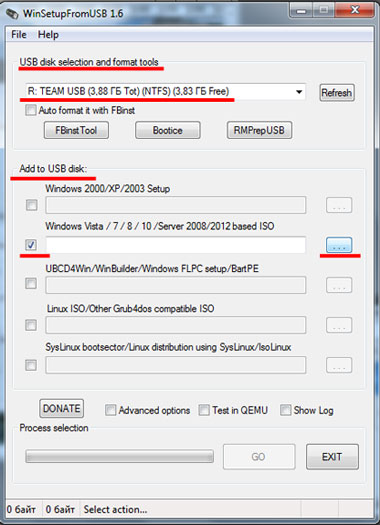
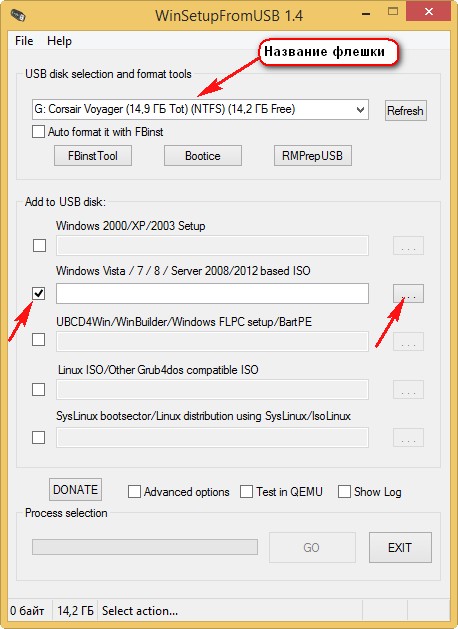
In the program window, in the section, select the flash drive that we formatted. In the "Add to USB disk" section, check the box "Windows Vista/7/8/10/Server 2008/2012 based ISO"
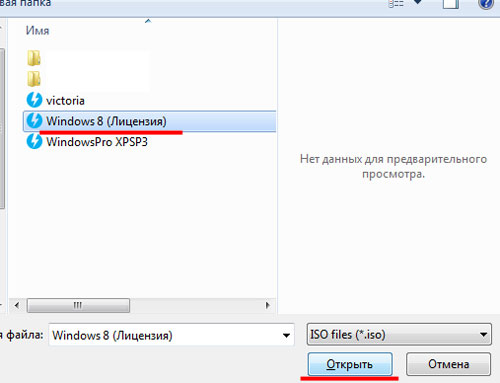
The Explorer window will open. Find the desired image on the computer, in the example it is the image of the Windows 8 operating system, and click "Open".
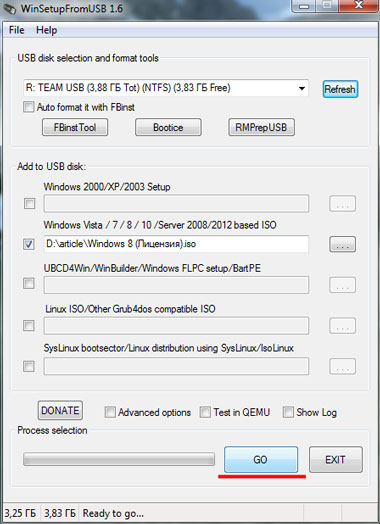
Press "GO".
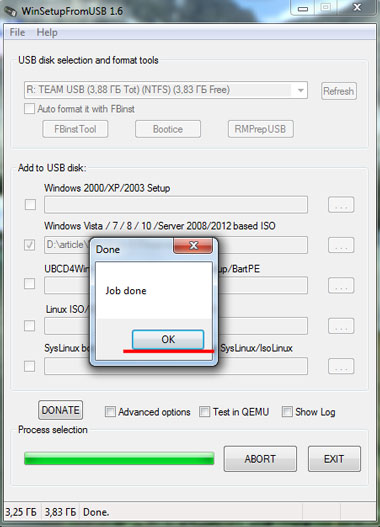
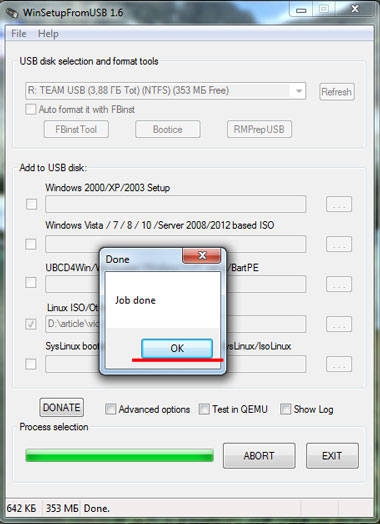
After the process is completely completed, the "Job done" window will appear.
I have a flash drive of only 4 GB, so it will not work to write many operating systems to it. If you need add to multiboot Windows flash drive Vista, 7, 10- Repeat all the above steps. To add Windows XP, in the "Add to USB disk" section, check the box "Windows 2000/XP/2003 Setup". Each time, select the same flash drive on which the images were recorded earlier.
Now let's add a program to the multiboot flash drive to check and correct hard Victoria disk.
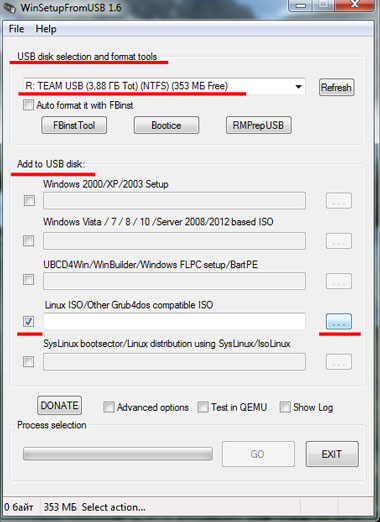
Run WinSetupFromUSB and in the section "USB disk selection and format tools" choose our flash drive. Further, in the section "Add to USB disk", check the box "Linux ISO/Other Grub4dos compatible ISO" and click on the button with three dots.
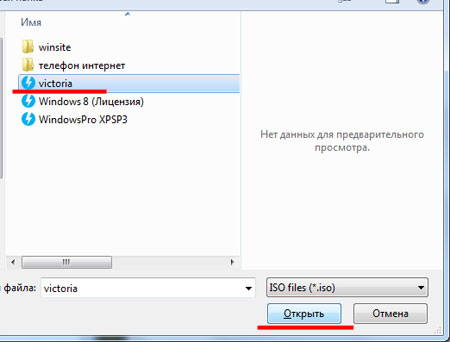
Through Explorer, find the program image on your computer and click "Open". Then an information window will appear, press "OK" in it, or it will disappear by itself after 10 seconds.
Press "GO", and wait for the program to be written to the USB flash drive.
To add other programs necessary for you to the multiboot flash drive, repeat all the above steps. Choose the desired program image each time.
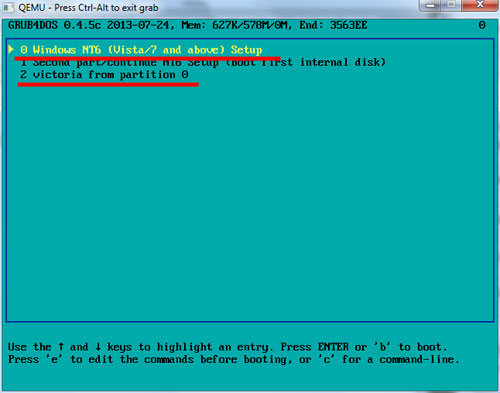
After you add all the images of operating systems and programs to the flash drive, let's look at the result - open boot menu flash drives in virtual machine QEMU.
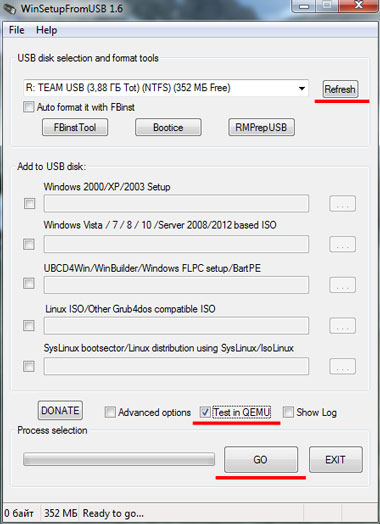
To do this, in the program window, click on the button "Refresh", then check the box "Test in QEMU" and click "GO".
You can see what the boot menu looks like after each addition of an OS or program to the flash drive.
In the example, the boot menu of the flash drive looks like this. The flash drive contains Windows 8 and Victoria program. You will see a different list depending on what you upload to it.
Now you know how to make a multiboot USB flash drive with Windows and various utilities. Change the boot priority in the BIOS and choose from the flash drive what you need to install on your computer or check it out.
Hello admin! Can't wait for your article creating a multiboot flash drive Windows XP, Windows 7 and Windows 8 and tried to create it myself, but apparently there is not enough knowledge and in the end nothing happened, the flash drive turns out to be non-bootable. I have new computer with BIOS UEFI, I want to install on a separate hard Windows disk XP, as there are several programs and games that do not run on Windows 7 and Windows 8. When will the article you promised come out?
How to create a multiboot USB flash drive with Windows XP, Windows 7 and Windows 8 operating systems
Hello friends! Users have asked a similar question countless times on the site and I understand you, it’s pretty good to have such a flash drive on hand (with three operating systems at once), especially since creating such a flash drive is not at all difficult and in this article I will tell you how to do it. We will use the WinSetupFromUSB program already familiar to us, we definitely need the final version of this program 1.3.
Note: WinSetupFromUSB creates a UEFI flash drive, BUT using such a bootable USB flash drive you can install Windows 7 and Windows 8 not only on a computer with UEFI BIOS, but also on a computer with simple BIOS. I will also remind you, if you are installing Windows 7, then insert the USB flash drive into USB port 2.0, since Windows 7 lacks USB drivers 3.0 (blue). To create a multiboot flash drive for Windows XP, Windows 7 and Windows 8, I used a 16GB flash drive.
So, in order to create such a wonderful flash drive, first of all you need to boot into the Windows 7 64 bit or Windows 8 64 bit operating system, for example, I will use Windows 8 64 bit, it is in it that I will create such a multiboot flash drive with operating systems Windows XP 32 bit, Windows 7 64 bit (32 bit is also possible), Windows 8 64 bit.
Create a bootable USB flash drive for Windows XP
To begin with, you must have a Windows XP image with integrated SATA drivers, otherwise, when installing Windows XP from a USB flash drive to a computer with modern motherboards You'll get blue screen with an error. Read more in our other article.
We go to the official website of the WinSetupFromUSB program.
Select WinSetupFromUSB1.3.exe (22 MB).
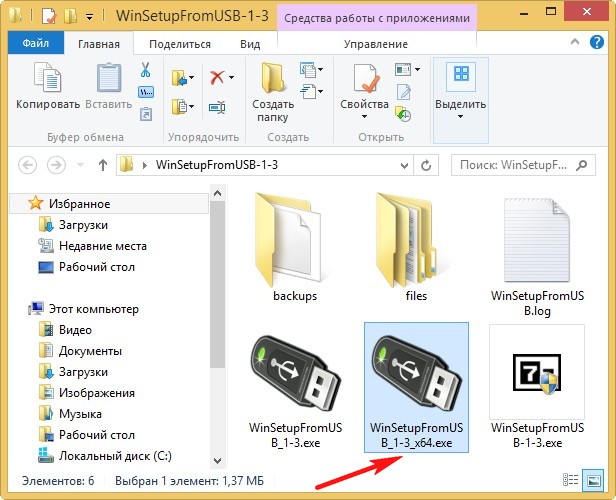
Download, unzip and run our program. I am on Windows 8 64 bit operating system. Our WinSetupFromUSB program can run on both 32-bit and 64-bit operating systems. To run WinSetupFromUSB in Windows program 8 64 bit double-click on the WinSetupFromUSB_1-3_x64.exe file.
Attention: Friends, if you need bootable UEFI flash drive with XP, Windows 7 and Windows 8, then you will have to format the flash drive to the FAT32 file system, but it follows that the image of your Windows 7 and Windows 8 should be no more than 4 GB, since file system FAT32 does not work with files larger than 4GB. Immediately go to the very end of the article, there is detailed information for you.
And yet, do not forget, otherwise you will not install Windows XP on a new computer or laptop, since the XP installer simply will not see HDD.
Most users do not need a multi-boot UEFI flash drive, but need a regular bootable USB flash drive with operating Windows systems XP, Windows 7 and Windows 8, which means that the image of your Windows 7 may well be more than 4 GB, in which case the multi-boot flash drive we created with three operating systems will be in NTFS format!
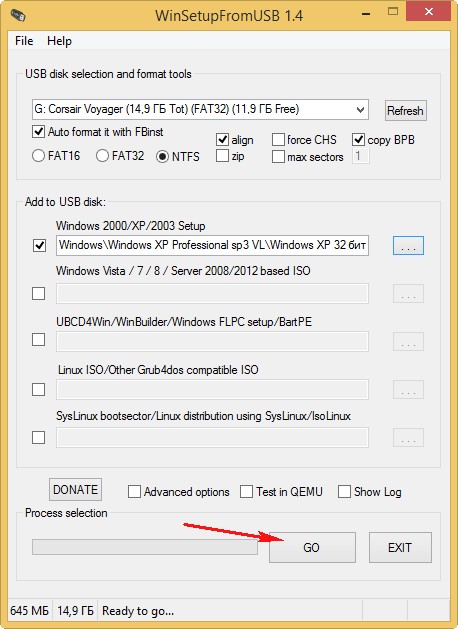
In the main window of the WinSetupFromUSB program, you can see the name of our connected flash drive.
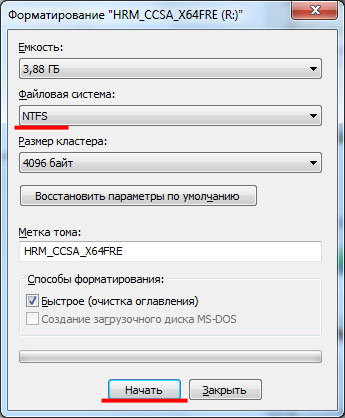
Put a tick on the item Auto format it with FBinst and mark the item NTFS
Below, tick the Windows 2000/XP/2003/Setup item and press the button on the right to open the explorer window .

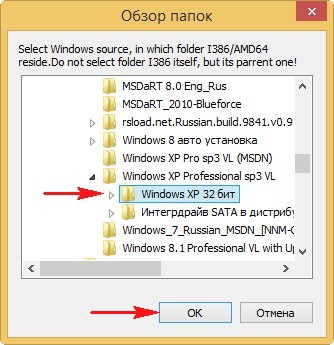
In the explorer, you must specify a pre-prepared folder with files Windows distribution XP 32 bit.
if you have installation disk with Windows XP 32, then open it and copy all the files contained inside to some folder and name it for example Windows XP. If you have an XP ISO image, open it for example in a free (for personal use) program and also copy all the files of the Windows XP distribution to a folder.
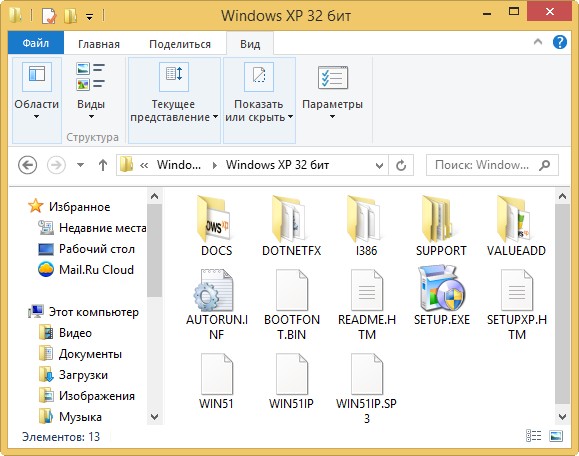
So the folder with Windows files XP 32 bit indicated, click OK.
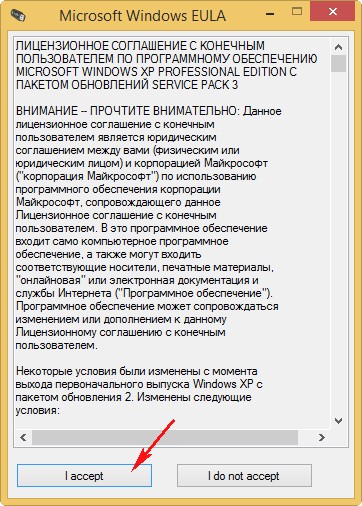
We accept the license agreement.
Press the GO button

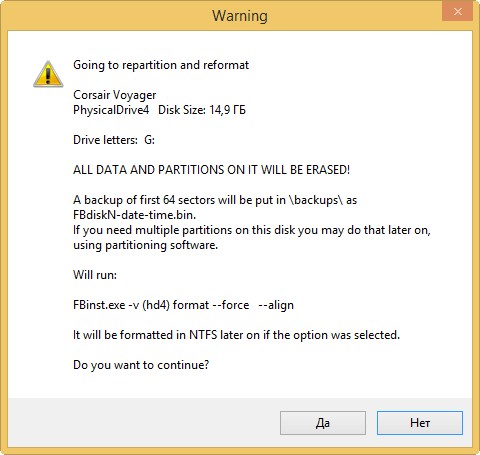
And the first phase of creating our multiboot flash drive begins, which ends successfully.
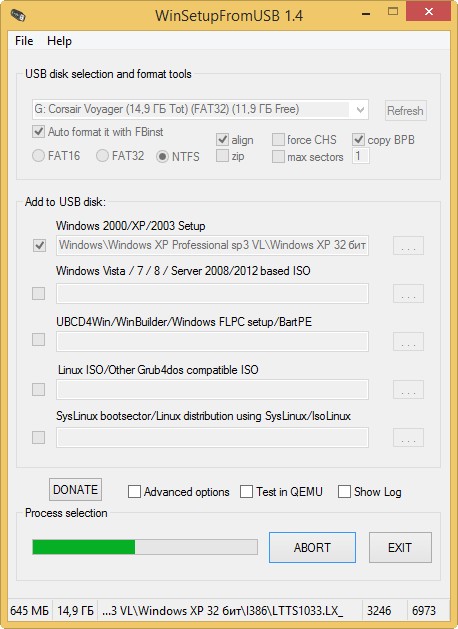
OK. Bootable Windows XP 32 bit is ready.

We add to our bootable flash drive Windows 7 64 bit
Now we add Windows 7 64 bits to our bootable flash drive, or if you want Windows 7 32 bits, then we will also add Windows 8 64 bits.
We go to the WinSetupFromUSB program folder and run the WinSetupFromUSB_1-3_x64.exe file.
In the main window of the program, we see our Corsair Voyager flash drive automatically detected.
In no case do not check the box Auto format it with FBinst!
Check the box below Vista/7/8/Server 2008/2012 based ISO and click on the right button to open the explorer window.
Find the ISO image of Windows 7 64 bit, select it with the left mouse and click "Open"
A multiboot flash drive is a set of programs, operating systems, or recovery utilities. This flash drive is an indispensable tool for any system administrator and, if you have basic skills, a useful tool for the average user.
Thanks to the multi-boot function, you can easily, using just one flash drive, check the performance of the RAM, HDD, install several operating systems to choose from, and so on. Accordingly, in case of problems with the computer, it is better to have such a tool for restoring and diagnosing the system and equipment.
For example, if you have enough memory on your device, you can:
- Burn Multiple Windows OS various versions and even together with Linux;
- Add MemTest, Kaspersky Rescue Disk;
- A package of recovery utilities, for example: Hiren BootCD;
- Driver Pack Solution.
Having such a software package available, you can cover the needs of 90% of cases of computer malfunction. It will allow you to reinstall the OS and drivers on it or restore a faulty system. Before we start creating a flash drive, you need to download the images or installation files that are important to you.
Before you make a multiboot flash drive with Windows, you should decide on the program with which we will do this. There are quite a lot of them, but WinSetupFromUSB or Sardu can be a complete solution to all the tasks. It is possible to use other applications, but for example, consider these.
Creating a multiboot flash drive via WinSetupFromUSB
First, let's look at creating a flash drive using the popular solution from WinSetupFromUSB, thanks to which many similar devices have already been created and a myriad of problems with the system have been solved.
You can download the utility simply from the official site for free, link http://www.winsetupfromusb.com/files/download-info/winsetupfromusb-1-7-exe/. After that, start the unpacking process. After its completion, you should follow the selected path and find the utility in the appropriate folder by launching the shortcut that matches your x32 or x64 OS.
Similar to UltraISO.
In my opinion, multi-boot, as a program for creating flash drives, is better than ultraiso.
The only thing is that she does not know how to make boot disks.
After downloading, run the installation and after installation it will start.
This is the window that appears after starting the program.
2.
Click on the first line HP USB Disk Storage Format Tool, to format our future bootable USB flesh.
We select in the first line our flash drive and the system for formatting.
Some fresh beeches do not see flash drives in ntfs, but only in fat32.
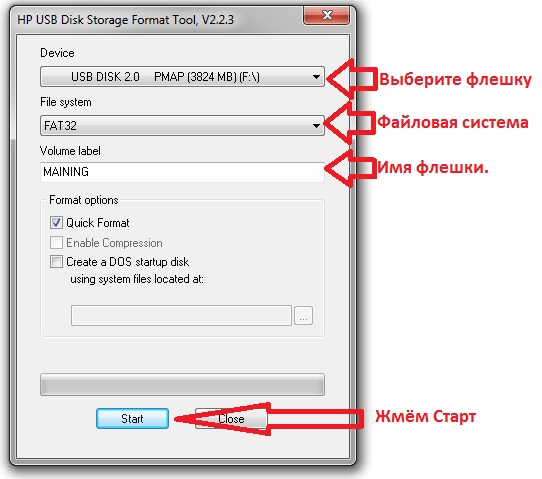
Press the start button and YES.
After the format, the program will tell us how big the flash drive is.
3.
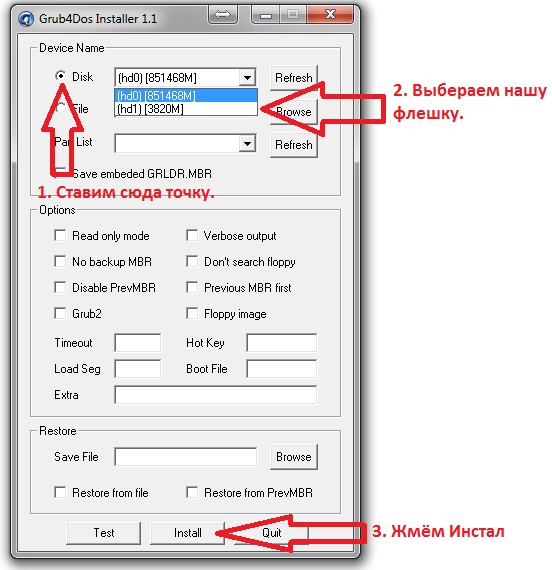
We press point two, put a dot on top against the inscription Disk and select our drive.
And click install.
We wait 2-5 seconds and a window appears with the inscription press inter.
Press inter on the keyboard or close with a cross.
4.
If you need to install WINDOWS PE then click on 3, if not, go to the fourth point.
5 .
To further create our bootable USB flash drive, your computer or laptop must have DAEMON program Tools Lite.
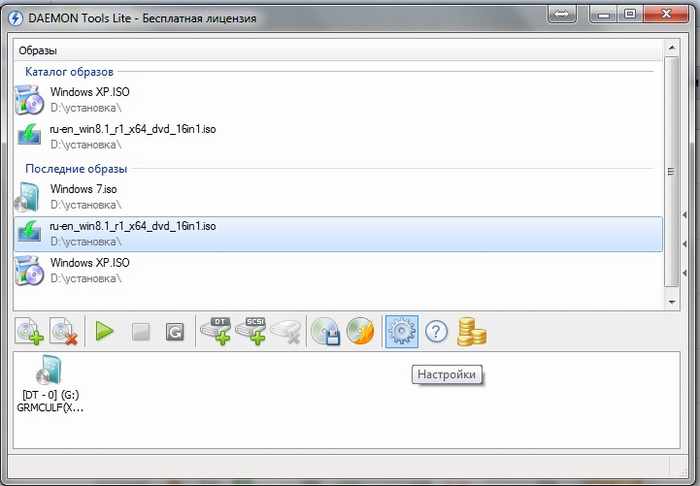
This is a program for working with a virtual drive and an ISO image.
6.
themselves WINDOWS image 7, XP, and 8 can be downloaded for free from http://rutracker.org or the links below.
7.
Install in virtual drive ISO image of XP and click on the fourth item.
We select our flash drive from above, put the first checkmark and indicate the path to the virtual wire.
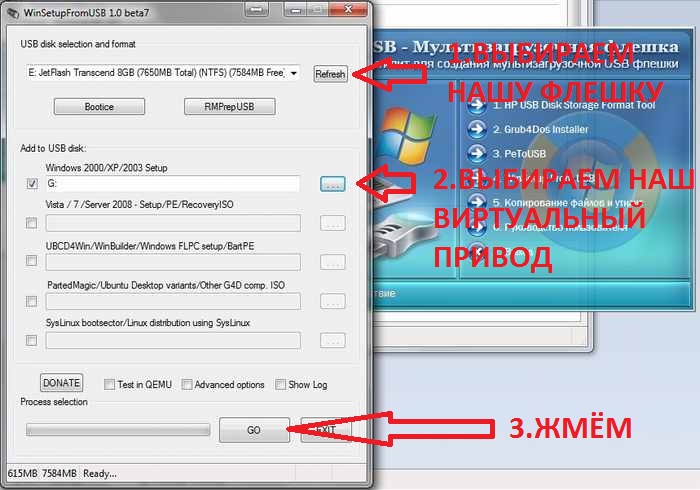
We press the button GOU and the copying of files to the USB flash drive begins. It took me approximately 25 minutes.
At the end, the inscription JOB DONE appears, which means everything is fine.
You can press OK.
8.
For WINDOWS installations 7, ISO 7 must be installed in the drive.
And set the second checkbox and also specify the path to the disk.
And press GO.
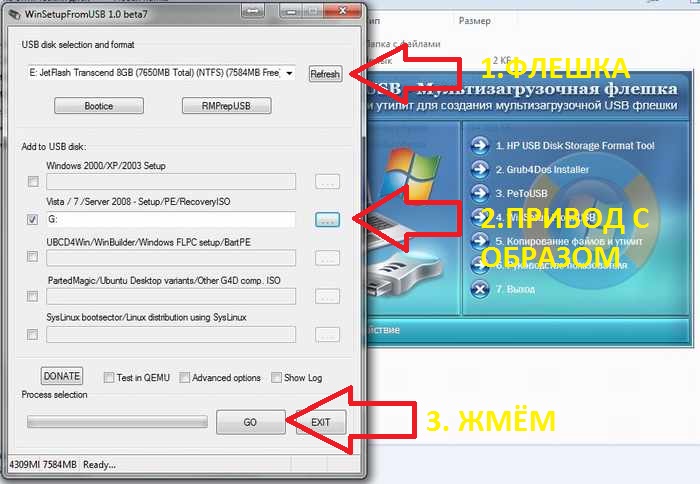
After about 10 minutes, all the Windows 7 installation files were written to the USB flash drive.
If you need to install Windows 7 in parallel with Windows 8, then you HERE -How to make a bootable flash drive to install on GPT via UEFI.
In the second paragraph, we specify the drive with the Windows 8 image and click go.
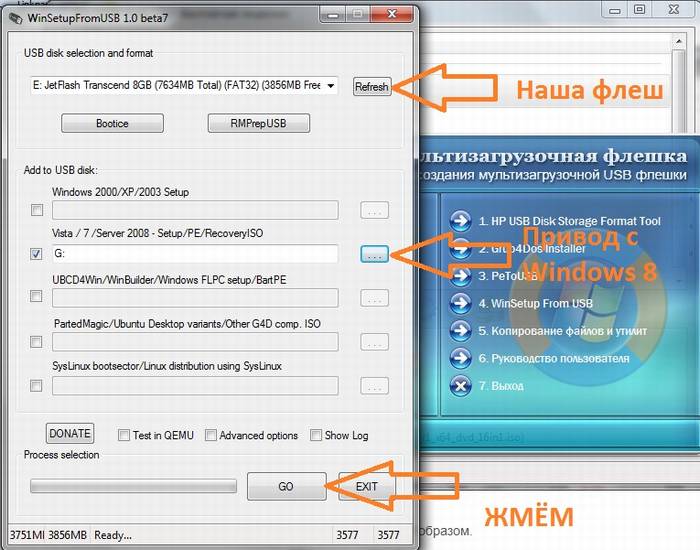
Installation took approximately 25 minutes.
10.
After installing all operating systems on a USB flash drive, go to step five.
Select our USB flash and click Extract.
The answer to the question is Yes to all.
And the program writes the required files to start the flash drive when loading a laptop or personal computer.
11.
Let's check our flash drive.
W skip point number four and press the TEST button.
This is a system startup emulator and if you did everything correctly, a blue screen will appear with Windows installation items.
If something doesn’t work, watch the video instruction on how to create a bootable USB flash drive yourself.
In that video, I will show you how to create a bootable USB flash drive with Windows 7, XP or 8 yourself.


