To create a terminal, file (FTP) or mail server on Linux, you need to be able to work in this operating system. Otherwise it will be difficult to figure it out. No OS needed powerful computer. Because it does not waste extra resources on graphic design. Linux distributions can be deployed even on an old PC. Therefore, Linux or Ubuntu Server is often used to create various servers.
A lot of different literature has been written about this. Some books about Linux are a thousand pages long. You will have to work through the terminal and enter all commands manually. But you can still make a small Linux server with your own hands, which will include file storage, Web services and a mail protocol.
Ubuntu Server is based on the operating system Linux systems. Not needed for it to work modern processor, good video card or large volume random access memory. With Linux, you can deploy a server even on an old laptop. And it will have all the necessary components: mail, FTP, Web.
You can download a Linux disk image from the Ubuntu.ru website. Choose any version with Server (not Desktop!). The download will take place through a Torrent client. This image must be written to a disc or flash drive (using LiveUSB). You can also use a virtual drive.
Ubuntu has a simplified interface. There are no graphic excesses in it. This OS is perfect for making a DIY Linux server. With it, computer resources will be used for the needs of the domain. After all, she needs very little to work.
Its installation goes like this:
- Select the language and region you live in.
- Create an administrator name. It is used to manage the server.
- Also enter a username in the “Username for your account” field. Under this account you will communicate with Ubuntu technical support.

Specifying the username in Ubuntu
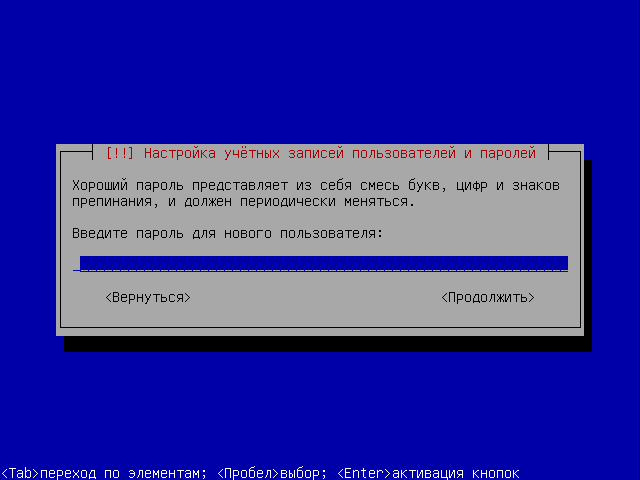
- Enter password. Confirm it.
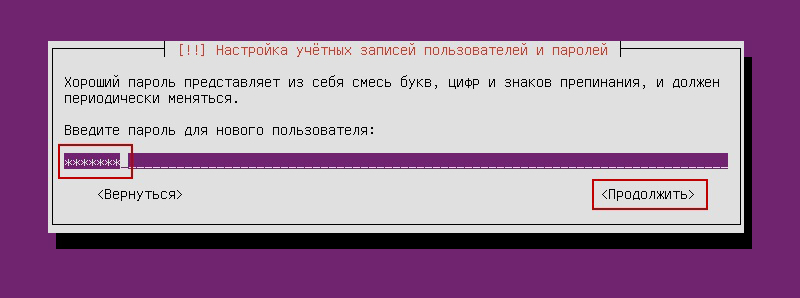
Enter the password account
- Specify the domain if you have one. It will contain all services: file (FTP), email, website hosting, and so on.
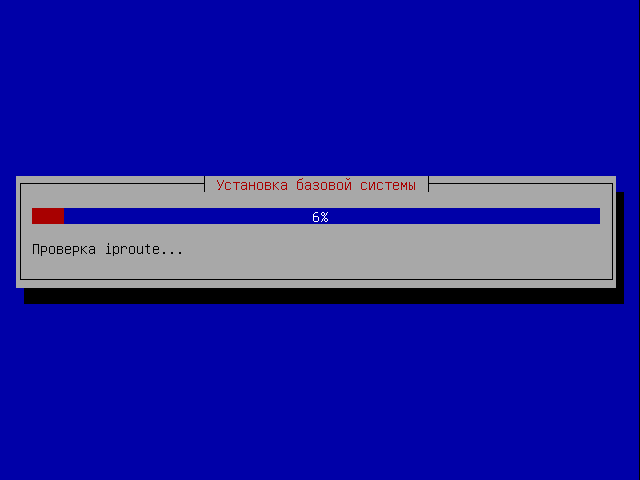
- Wait while the system installs.
- After that, she will offer additional components.
Here is a list of what is needed for a Linux server and its full operation:
- Open SSh. Is used for remote administration. This will come in handy if you decide to manage the service from another computer. Then on a Linux PC you can disable the monitor and video adapter.
- LAMP. A set of Linux utilities that includes Apache (Web server). MySQL (database) and PHP (programming language for CMS). These components are needed to create a control interface.
- Samba file server. Allows you to configure file sharing between computers. If you need an FTP server, select this option.
- Virtual Machine host. Install if you are going to use virtualization capabilities.
- Print server. Network printers.
- DNS server. Domain Name System. With it you can recognize the IP address by the computer name and vice versa.
- Mail server. Mail server.
- PostgreSQL database. Object-relational databases.
Select what you need and confirm installation. When you first start, you will need to enter your administrator login and password. The console will open. It is similar to the Windows command line or the MS DOS operating system interface.
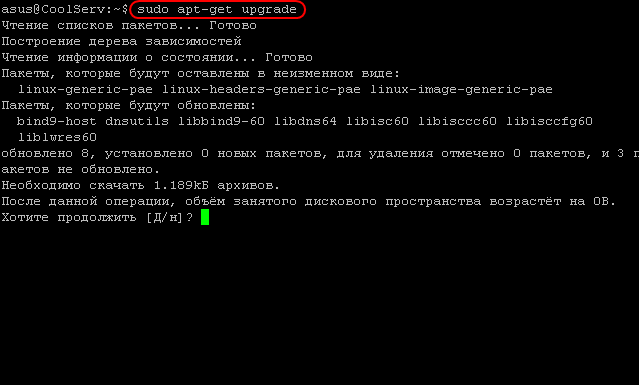
Initially, you will need to check for updates. Type the command “Sudo apt-get update” or “Sudo apt-get upgrade” without the quotes. After the update, you can start setting up all server components: FTP, mail, Web.
There is a pseudo-graphical interface for Ubuntu - Midnight Commander. This is an analogue of the Norton Commander shell, which was developed for the MS DOS system. It’s easier to work with such an interface - everything is clearer than in the console.
Launching the Linux Terminal
Modern Linux uses a terminal instead of a console. To enter it:
- Open Applications.
- Click "Standards".
- There will be a "Terminal" there.

You can enter commands into it just like in Ubuntu Server.
- To install LAMP components (if they do not already exist), you need to sequentially enter the commands “sudo apt-get update”, “sudo apt-get install tasksel” and “sudo tasksel install lamp-server”. After each one, press Enter.
- To download Open SSh, type "sudo apt-get install openssh-server".
- To install Samba file server, write “sudo apt-get install samba”.
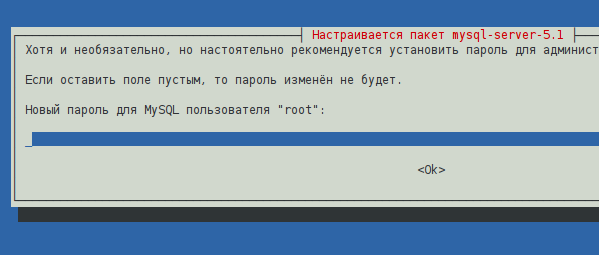
When installing MySQL from the LAMP package, you will need to set an administrator password for SQL.
Local Web server
For Web creation the server must have its own dedicated IP. Then after installing LAMP at this IP address it will be available test page Apache. This is the future Web. In the future, it will be possible to install FTP, databases, and a mail protocol on it. To configure the Web server:
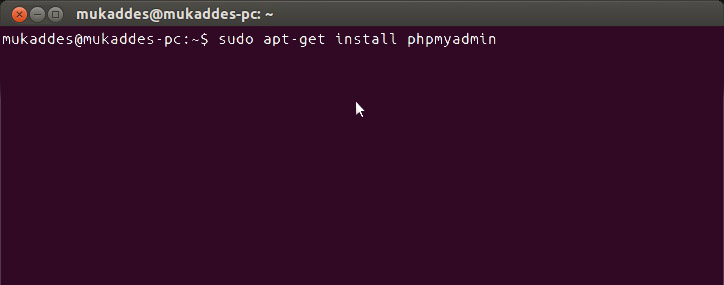
- Install phpMyAdmin. To do this, in the terminal or in the console, type one after another, enter “sudo apt-get install phpmyadmin”
- And then “sudo service apache2 restart”.
- The component will load. Apache will be restarted. Further actions depend on the operating system version.
If you have Ubuntu 13.1 and above, use the commands:
- sudo ln -s /etc/phpmyadmin/apache.conf /etc/apache2/conf-available/phpmyadmin.conf
- sudo a2enconf phpmyadmin
- sudo /etc/init.d/apache2 reload
Enter them sequentially one after another, after each press Enter.
On Ubuntu 16.04, other instructions are needed:
- sudo apt-get install php-mbstring php-gettext
- sudo phpenmod mcrypt
- sudo phpenmod mbstring
- sudo systemctl restart apache2
After entering them and automatically restarting the service, the web interface will be available at http:///phpmyadmin.
- The configuration and data about it are located in the Apache server folder “etc/apache2/”. Apache2.conf - configuration file for the distribution
- The “mods-available”/“sites-available” and “mods-enabled”/“sites-enabled” directories contain mods and sites.
- Ports.conf lists the listening ports.
- If you add the word "Stop" after the command "sudo /etc/init.d/apache2", Apache will pause. If “Start” it will start again. If “Restart” - it will reboot.
- To independently choose the path for saving sites, sequentially enter “sudo a2enmod rewrite” and “sudo a2enmod userdir” into the terminal.
Each time after making any changes, you must restart the service with the “Restart” command.
Mail server
To create a mail server on Linux, you must already have a domain registered. You also need to have a static IP.
- Install the Postfix component. To do this, type “sudo apt-get postfix” in the console.
- When it boots, write the command “sudo /etc/initd/postfix start”. The service will start working.
- Postfix already contains the parameters that are needed to fully work with the SMTP protocol. But still, a little tweaking wouldn't hurt.
- Open the /etc/postfix/main.cf file.
- Find the value “mydomain =” in it. After the “=” sign, write the domain name.
- Then look for “myhostname =”. And enter the machine name.
- Now the mail server can send letters to other computers that are on the same network. So that it can send correspondence to other domains on the Internet, in the “main.cf” file, find the line “inet_interfaces =”. Place the word “all” after it.
- In the “mynetworks =” variable, enter the range of addresses of all computers on your subnet (for example, 127.0.0.0/8).
If the service is configured correctly and all conditions are met (permanent IP address, registered domain), then the Server will be able to receive and send correspondence. If your domain's MX record refers to your host.
To view resource logs, use the command “tail -f /var/log/mail/info”. To receive a message from him, enter "mailq".
File server
You may need a Linux FTP server to exchange documents and upload files. There are several versions of such resources: vsFTPd, Samba, proFTPd.
Let's take a closer look at vsFTPd. It can be installed and launched with one command - “sudo apt-get install vsftpd”. Further settings depend on your preferences and what kind of service you want to make. Administrator rights may be required to change settings.
- Immediately after downloading the program, the system creates a new user and adds a folder to the home directory that is intended for working with server storage. Also in the “etc” directory there is a file “ftpusers”. There you can add users who are denied access to files.
- After installation, it is better to change the directory in which the files should be located to the “var” folder. To do this, as an administrator, write the command “usermod -d /var/ftp ftp && rmdir /home/ftp”.
- Create new group users. For example, "userftp". Type “addgroup userftp” into the console.
- Add a new account to it (for simplicity, we will name the user and group the same). Use the command "useradd -a /var/ftp -g userftp userftp". It also creates a user. To include an existing nickname in the group, instead of “useradd” write “usermod”.
- You need to come up with a password for the new user. Enter “passwd userftp” in the terminal.
- Type "chmod 555 /var/ftp && chown root:userftp /var/ftp" to give the account access to the file server root folder.
- Now create a public directory. Sequentially enter “mkdir /var/ftp/pub” and “chown userftp:userftp /var/ftp/pub”.
Initially, FTP starts in offline mode. She has a script that plays the role of a demon. With this functionality, several commands are available. They are entered after the line “sudo service vsftpd”.
- Stop and Start. Disable and enable.
- Restart and Reload. Restart. Needed to apply new settings. The difference between the commands is that in the second the reboot occurs without a complete shutdown.
- Status. Status information.
Further configuration of the server involves rewriting the configuration file, which is located in etc/vsftpd.conf. It has a simple and understandable structure. It's quite easy to understand. Although this requires certain knowledge. Before changing this file it makes sense to do it backup copy. So that if errors are detected, everything can be restored. Enter the command “cp /etc/vsftpd.conf /etc/vsftpd_old.conf” and the information will be saved.
After this you can start editing.
- In the “listen=” parameter write “YES”. Then the server will work in independent mode.
- "Local_enable" allows local users to log in.
- "Write_enable" gives them access to their home directories.
- "Anonymous_enable". You can limit rights anonymous users, if you put “NO”. There is also an option “no_anon_password” - anonymous logins without a password. It can also be banned.
If you want to make a public server, then after the “listen” line you need to add several additional parameters.
- "Max_clients". Number of simultaneous connections.
- "Idle_session_timeout" and "data_connection_timeout". Session timeouts.
- "Ftpd_banner". Welcome message for visitors. You can write, for example, “Hello!”
Terminal server
A Linux terminal server is intended for enterprises and offices, where all computers are connected into one network. It is very convenient when you can access the terminal from any PC (if it has access) of the organization. This opens up great opportunities for remote administration.
LTSP - Linux Terminal Server Project - is suitable for this task. The program is included in the standard Ubuntu package. To install it:
- Enter the command "ltsp-server-standalone".
- Then write “apt-get update && apt-get install ltsp-server-standalone”.
- Wait for everything to download and update.
- Now we need to install the client system. Type "ltsp-build-client".
- Then "ltsp-build-client -dist trusty -arch i386 -fat-client-desktop lubuntu-desktop".
- Use the "debootstrap" command and the distribution will automatically expand to the "opt/ltsp/i386" directory.
Linux Server can work even on weak PCs. Therefore, it is very often used to create servers and remote administration. Mail services, FTP storages, and terminals are made on this operating system.
Peculiarities:
- The distribution is based on Red Hat Enterprise Linux
- Stable
- Reliability
- Lack of official support
The strengths of the CentOS distribution are reliability and compatibility with Red Hat Enterprise Linux. Weak sides– poor localization (compared to ALT Linux and ASPLinux), lack of some programs typical for our region (SIM, xxkb). It is not possible to obtain support from the manufacturer in our region; There is no non-commercial support in Russian and Ukrainian. The system works great on clusters.
Fedora
Peculiarities:
- Widespread
- Excellent community support
- Good protection
- Many different applications
- Russification is not fully present
- Constant updates
More suitable for a PC than a server due to possible instability. But it all depends on the ability to use the distribution correctly.
openSUSE
Founded by the German company of the same name, which was later acquired by Novell. A distinctive feature is the presence of its own YaST2 software package, which allows you to install and configure any system components.
Peculiarities:
- Professional approach to detail
- Easy-to-use YaST configuration utilities
- Russification suffers (part of the menu may be in English, part in Russian)
- Easy equipment setup.
- Excellent documentation in Russian
- There is a set of drivers out of the box
- Large selection of packages through the use of RPM and plug-in repositories.
- OBS build system
ALTLinux
Russian distribution developed by ALTLinux. It grew out of Linux-Mandrake Russian Edition. Much attention is paid to safety.
Advantages:
- Russification of documentation and applications.
- A simple graphical installer (in most cases does not require dancing with a tambourine).
- A large number of graphical system configuration utilities.
- Stability and reliability (best suited for servers).
Peculiarities:
- Excellent Russification
- Technical support
- Wide selection of software
- Produced by a Russian company
ASPLinux
Russian-language distribution, created based on packages from Fedora Core, but with security fixes. Includes quite a few "additional" (compared to Fedora Core) packages. The kit includes binary drivers (ati, nvidia, slmodem), video codecs and some other not entirely open programs.
For now, work on this distribution has been suspended.
Distributions based on Debian or using the Deb package format:
Debian
An operating system consisting of both free software and open source source code, and from closed components. In its primary form, Debian GNU/Linux - one of the most popular distributions Linux, which has a significant impact on the development of this type of OS as a whole. There are also projects based on other kernels: Debian GNU/Hurd, Debian GNU/kNetBSD and Debian GNU/kFreeBSD. Debian can be used as an operating system for servers and workstations.
Peculiarities:
- 100% free
- Excellent website and community resources
- Well tested
- Excellent Aptitude software installer.
Ubuntu/Kubuntu/Xubuntu
Built on the basis of the test tree of Debian GNU/Linux packages, and is essentially a Debian assembly containing the latest software for home or office use. The fastest and most actively developed distribution.
Peculiarities:
- Simple, intuitive multilingual interface
- Frequent and easy updates online and offline Package repository
- Powerful community of users and developers, incl. in Russia
Distributions using other package systems:
Gentoo
Gentoo is a typical representative of source-based distributions, that is. All software presented in the form of source codes for installation. This distribution is most likely not suitable for a novice user, but Lately it gained quite wide popularity.
The following advantages of Gentoo Linux can be highlighted:
- Possibility of fine-tuning and optimization for a specific computer, since all packages are assembled (compiled) on the end user’s machine.
- A convenient system for installing and uninstalling programs, based on the “ports” system. Connecting remote repositories.
- New versions of packages appear in repositories at high speed (several weeks, or even hours after their official release)
- Ability to install Gentoo from working system without interruption from work.
Flaws:
- Russification (locale, fonts, etc.) will have to be carried out manually, by running scripts.
- Documentation in English
- If problems arise with software installation, the solution may not be trivial and may require technical knowledge.
Peculiarities:
- Painless installation of individual packages
- High relevance
- Excellent documentation
- Creation of a distribution kit in “geek style”, specially adapted to the needs of the user
- Graphic installer
- Long and tedious system installation
Gentoo Linux is a very flexible distribution. Allows you to work with almost any equipment configuration and make the system as workstation, and the server. Of course, creating a personal configuration requires some skills and understanding of the operating principles of the Unix family of operating systems.
Calculate Linux
Calculate Linux- a family of distributions designed for small and medium-sized businesses that use roaming profiles and centralized software deployment. Created based on the Gentoo Linux project and fully compatible with it.
Peculiarities:
- Ready-made client-server solution.
- Rapid enterprise deployment.
- Complete work in heterogeneous networks.
- Rolling-release update model.
- Includes specially designed Calculate utilities for system configuration, assembly and installation.
- Interactive system assembly is supported - preparing an ISO image of the system for your tasks.
- Ease of administration.
- Possibility of installation on USB-Flash or USB-HDD with ext4, ext3, ext2, reiserfs, btrfs, xfs, jfs, nilfs2 or fat32.
- 100% Gentoo compatible with support for binary update repositories.
So, the network is up and the switch is vigorously blinking its diodes. It's time to set up our small but proud server running Ubuntu Server 10.04 LTS. Using a disk image (it can be via HTTP or via torrent, - 700Mb.) we write it to a disc. For these purposes, I recommend using " Daemon Tools Lite" or "" since both of these programs are free and fully meet our requirements.
We exhibit in bios boot from CD or DVD and reboot.
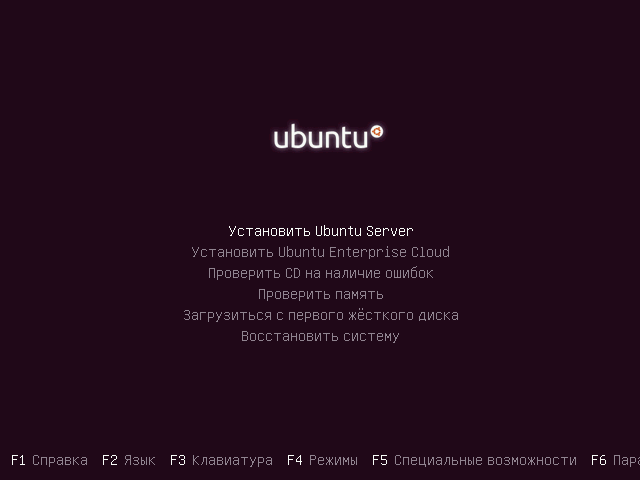
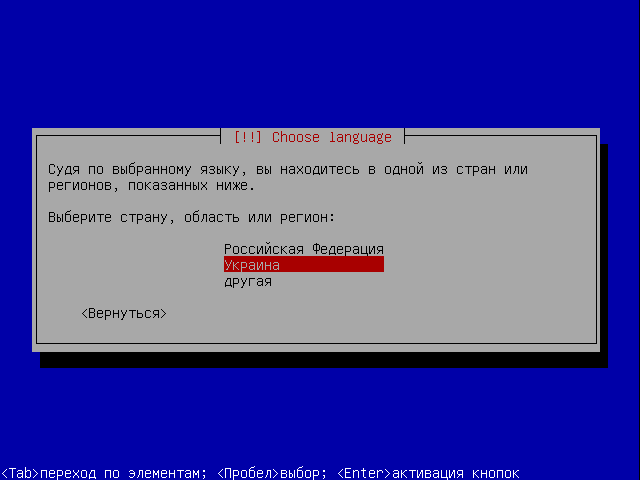
To begin with, we will be asked to select the installation language. Let's choose Russian.
Clue: Pay attention to the line at the very bottom of the screen. It lists the function keys that you use to navigate menus, select options, access help, and so on. This is a feature of nix systems.
We find ourselves in the disk boot menu. Select “Install Ubuntu Server”.
We will be asked where we will use our server, this will affect the choice of update mirrors (repositories). Since Internet providers usually provide access to IX (UA-IX, MSK-IX and similar segments) for more high speeds, choose our location. Since I live in Ukraine, I chose “Ukraine”.

In the list of countries, select “Russia”:
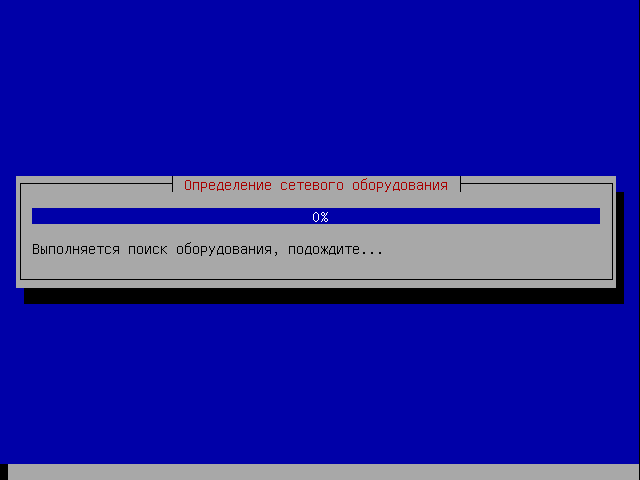
After this the search will begin network devices For additional features installations.
So, after a thorough search, two were found (in the Linux environment they are designated as eth0 and eth1 - ethernet). We need to select the one that is connected to the Internet (router or modem on our local network).
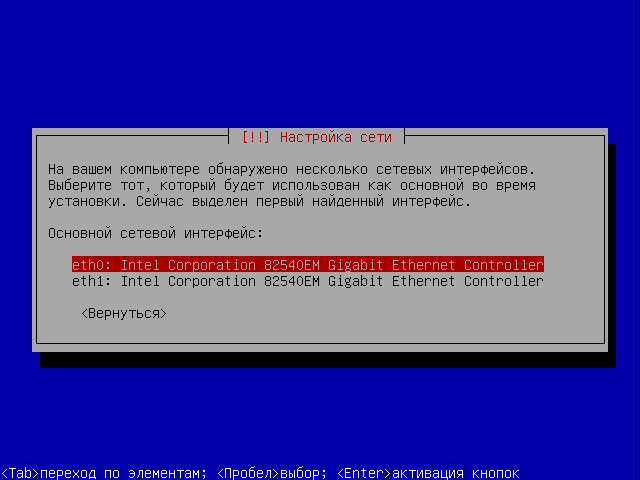
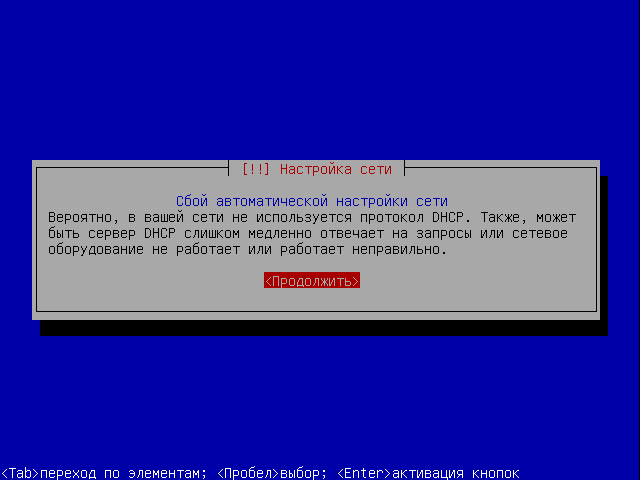
If DHCP was configured on the router ( DynamicHostConfigurationProtocol- automatic assignment protocolIPaddresses), the network card will receive the appropriate settings automatically. In my case, the DHCP server was not configured, which the installation program informed us about. It doesn’t matter, because you can configure everything manually later, accept the failure and continue with the installation.
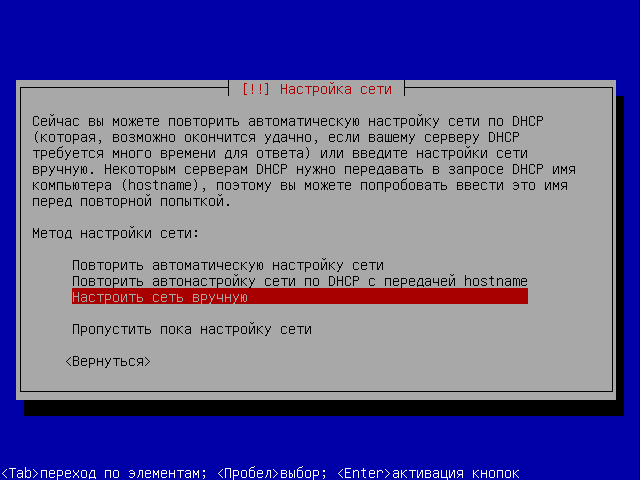
So we were offered to enter the connection settings manually or try again, skip the network setup or go back and select another network card. Select “configure the network manually”.
- IP: 172.30.2.3
- Netmask: 255.255.255.0
- Gateway: 172.30.2.1
- DNS: 172.30.2.1
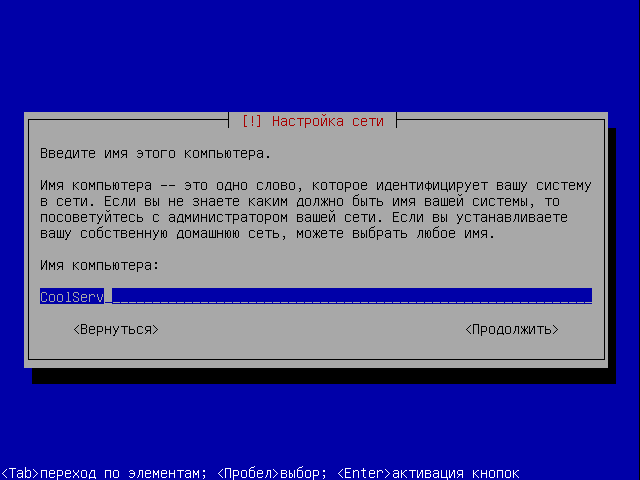
After setting up, we will be asked what our new server will be called? I called him " CoolServ" The name should contain only Latin letters, numbers, dashes or underscores, otherwise unforeseen troubles may arise.
In general, it is better to follow three rules for naming variables in programming languages, namely: the name should not begin with a number, there should be no spaces in the name, and you cannot use reserved words (special constructs, for example if, else, for, goto, etc.) There is also a fourth thing - do not use characters from national alphabets other than Latin, for example: Russian, Japanese, Ukrainian, etc. If you adhere to this rule, you will never have problems with the operation of programs and the display of file names.
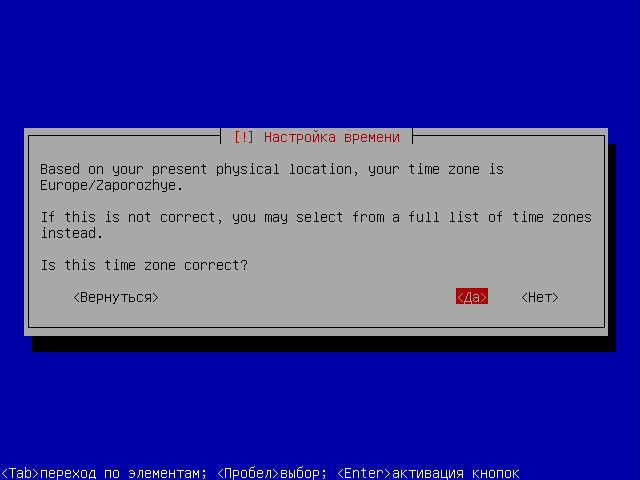
The OS has determined that we are in the Europe/Zaporozhye time zone, those are GMT+2, everything is so. Accordingly, you will have your own time zone if you do not live in Ukraine.
Now comes the worst part of any OS installation - the markup for its installation. But friendly The OS (this is how the word “ubuntu” is translated from the language of some banana republic tribe) will help us do everything quickly and efficiently. We have two marking options: automatic or manual. Since we are not looking for easy ways, we choose manual marking.
![]()
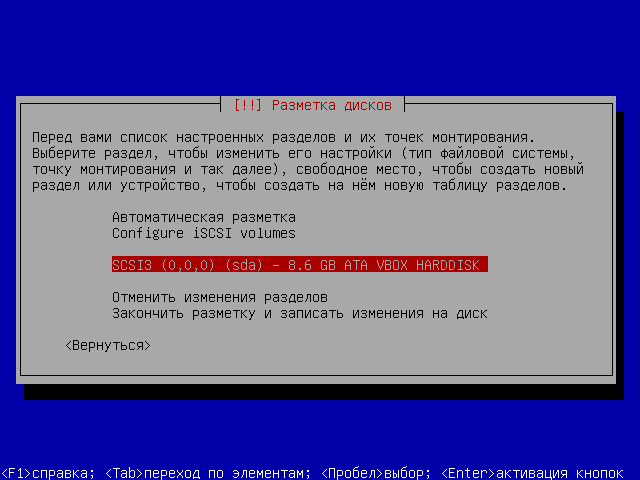
The photo below shows the connected drives. In our case, this is one 8 GB SDA disk under the name (WD, Seagate, etc. In my case this is - virtual disk Virtual Box). Let's choose it.
Note: In *NIX-like OSes, drives do not have the usual Windows names, such as “C” or “D”. Instead, they are referred to as HDA (for an IDE channel) or SDA (in the case of SATA or SCSI drives).
The last letter in the name (A) indicates the disc in alphabetical order. Those. - the next SATA drive will be called SDB, SDC, and so on. But this is only the naming of physical disks, and their logical partitions will look like SDA1, SDA2, SDA5, etc. Moreover, numbers from 1 to 4 mean the primary partition, from 5 and above - logical. Don’t be confused by such a strange name; over time, I hope, it will become as easy and familiar as in the MS Windows environment.
The ominous inscription in the screenshot below informs us that everything that was on the disk may be lost during re-partitioning, but we are not afraid of anything and click “Yes”.

After this, a partition table will be created, which needs to be “filled” with the partitions themselves. Select an empty space and click next (Spacebar).
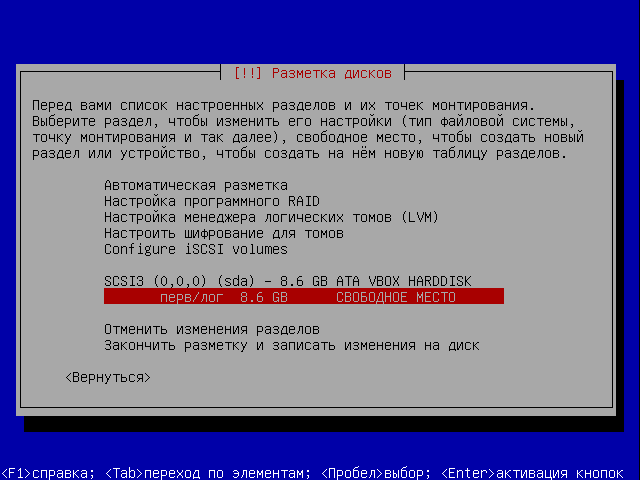
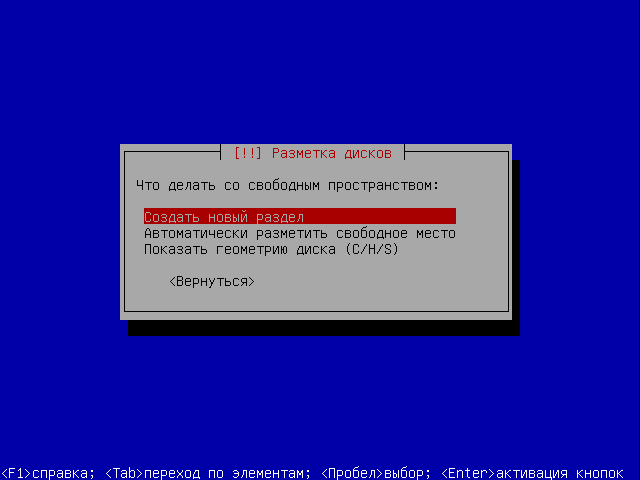
In the next screenshot, select “Create a new partition”, although everything can still be done automatically, we will stubbornly set it up manually :)
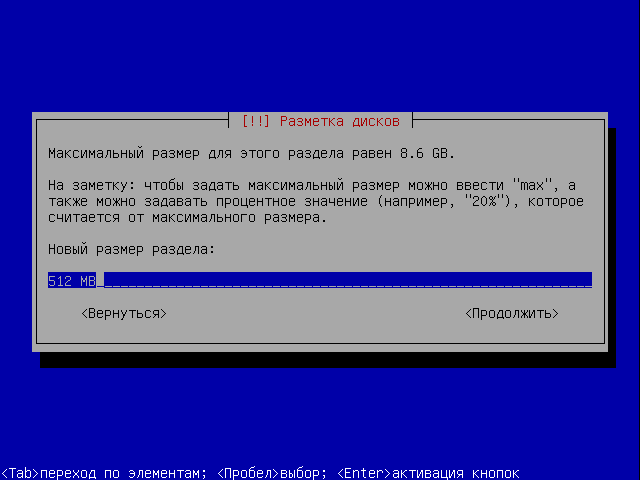
We enter the size of the new disk in MB or GB, first we will create a swap (analogous to a paging file in MS Windows), 512 megabytes in size. Although it is recommended to make a swap size one and a half times larger than the size of the total amount installed, we will make it equal to this value.
Note: *NIX operating systems (Unix and Linux) use the page file more correctly (especially in versions without GUI), here the swap will be loaded extremely rarely. For example, on my server, out of a 1Gb swap, a few megabytes were used as much as possible, and that was due to a really heavy load and uptime for about a month. In any case, there is no point in doing more than a gigabyte, as you will simply lose space, which is always missing.
Select the partition type. I chose primary (i.e., the full name of this partition will be SDA1)
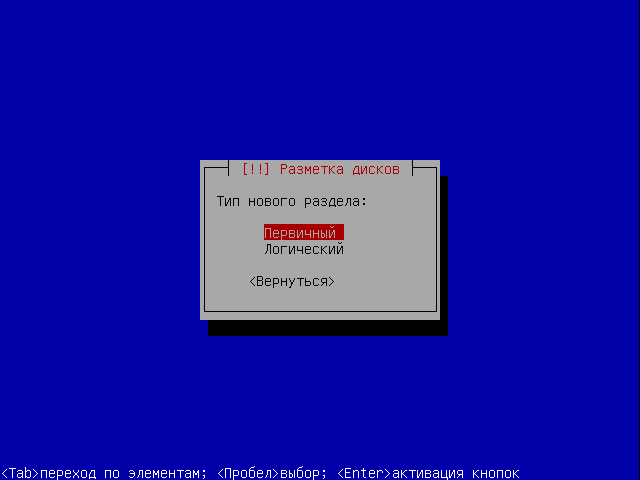
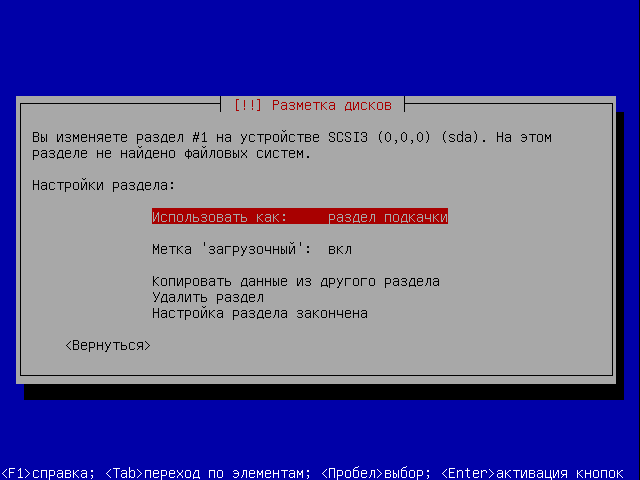
In the next screenshot we will need to explicitly indicate that this will be a swap section. To do this, in the partition settings, select the “swap partition” option, check the “boot” label and finish setting up the partition.
Now again we select a free area, create a disk, but now we will select the “logical” type. Let's set the size to 15 GB, file system type: EXT4, mount point: / (root) and that's it for this section.
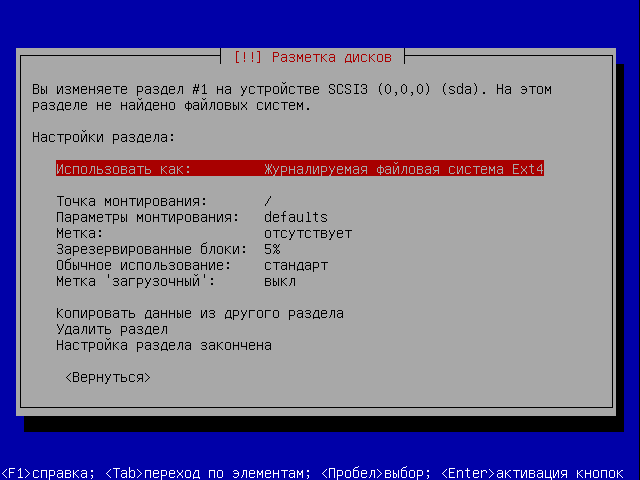
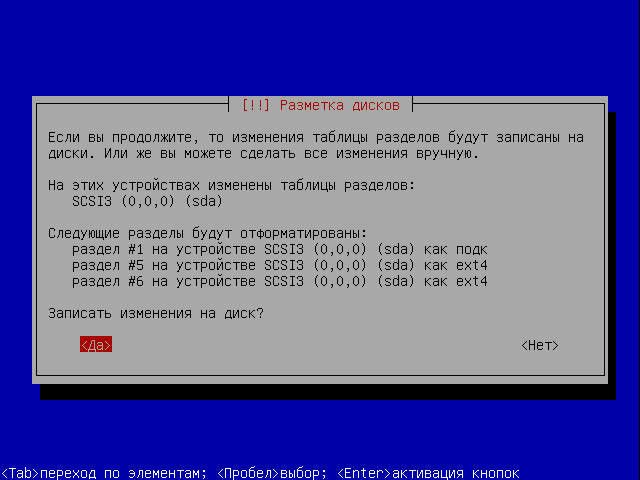
For the remaining space, we create a logical partition with file system EXT4 and mount point /home, this will be the home directory of all users (analogous to the “Documents and Settings” directory in MS Windows). This is where we finish setting up the disks. As a result, you should get something like the following.

If everything is correct, then select “Yes” (as shown in the screenshot below). This is the last moment before writing the partition table to disk (so far all the settings we have made have been written exclusively to RAM PC). Well, here we go!
After recording the table, the installation of the Ubuntu Server 10.04 LTS OS itself will begin, it will take 5-7 minutes.
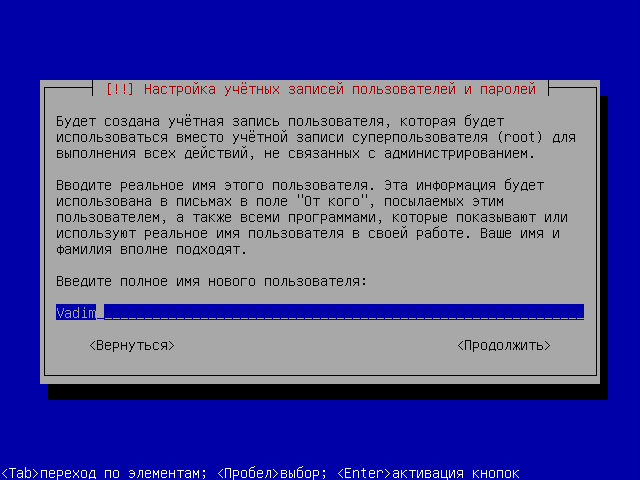
After the process is completed, we will be asked to enter the name of the future user. I'll enter my name. It will be used to send mail on behalf of this user.
After entering the name, we need to come up with an account name, the user under which we will log in. I used asus(this is not an advertisement :))

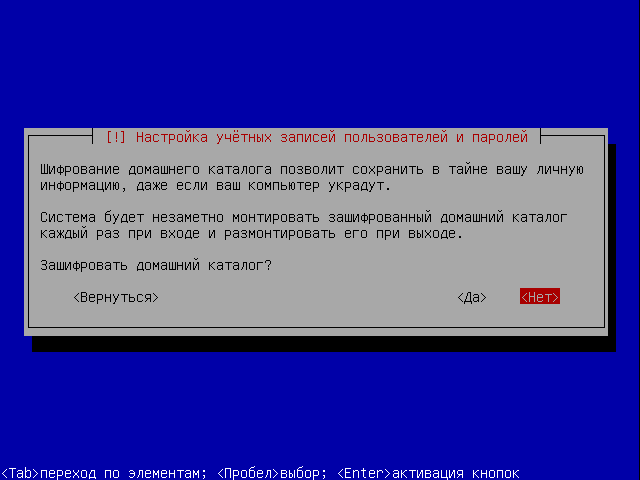
For security purposes, we will be offered to encrypt our home directory for free. We have nothing to hide, so we will refuse.
Note: When encrypting, there is a risk that in the event of problems with the hard drive, it will be difficult to recover the encrypted information.
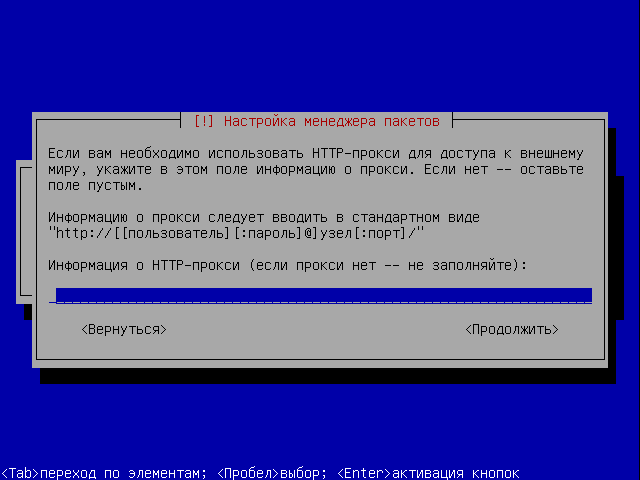
We are asked to enter information about the proxy server to gain access to the Internet. Since we don’t have it yet, we’ll just leave the field empty. Select “Continue”.
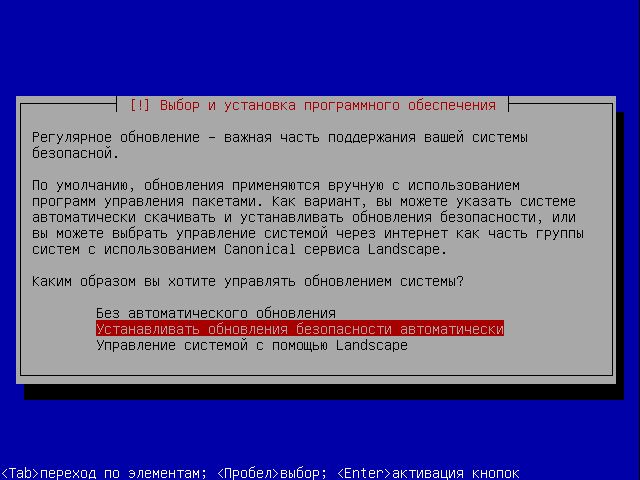
Unlike money-hungry MS Windows, Ubuntu offers completely free and timely updates via the Internet. Let’s select the “install security updates automatically” option so as not to have to do this manually later.
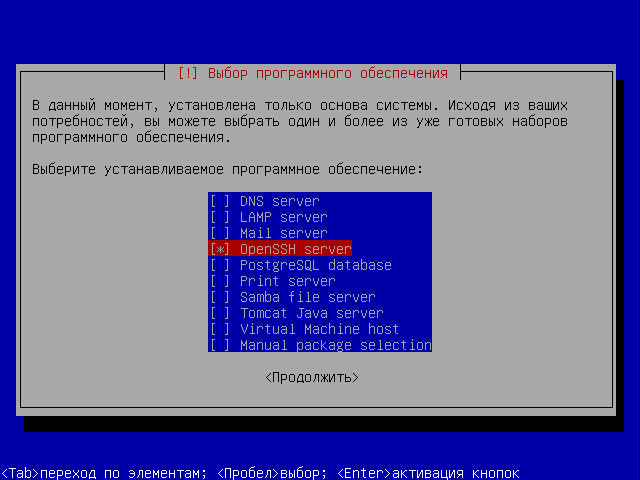
Also, we will immediately be offered to install a couple of “daemons” (analogues of system services in Windows). Yes, this is a “scary” OS, there may even be “zombies” - frozen “demons”, and there are no icons :) For ease of configuration, we will select Open SSH server (so that if necessary, you can connect to the server remotely over the network using a terminal) .
Note: Selecting the desired item is done by pressing the space bar when the appropriate position is highlighted (see the hint line at the very bottom of the screen).
It's time to install the Grub bootloader. We reviewed this loader. We need it to run *NIX-like OSes, although it can boot almost any other OS. Click “Yes”.
- The system is loaded at 0.4%,
- The home directory uses 3.3% of 1009 Mb of space.
- 3% of 512 Mb of RAM is used, which in megabytes is only 21 Mb. For comparison, MS Windows XP Pro SP3 after a “clean” installation (from the original disk) uses about 100Mb and initially “holds” 30 megabytes in the swap file.
- Now there are 84 processes running, there are no logged-in users (because the information was taken before the user, i.e. we, logged in).
- One network card named eth0 is assigned the IP address 172.30.2.3
- There are also 89 service packs and 67 security update packs available.
After installation, you need to update the OS; this will require about 70 megabytes to download from the Internet. Run the update command as root (administrator) sudo apt-get update which will update the list of available packages.
Since the command requires the rights of the super user “su” (super user), we will be asked for our password, enter it. The command entered next apt-get upgrade will start the package update process itself. After launch, the list of packages will be checked and updates will be offered; confirm the installation by pressing the “Y” key.
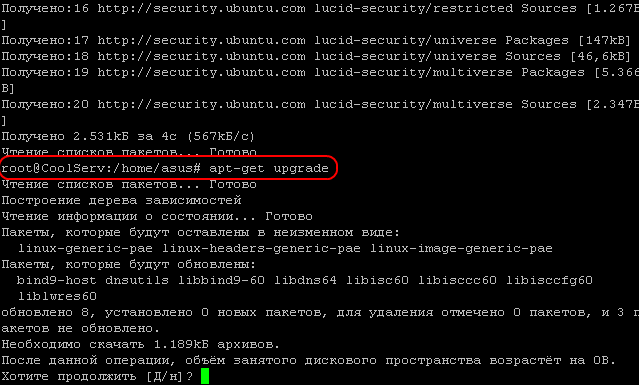
The “get update” command updates the list of available software, including only information about it (version, etc.), and the “upgrade” command directly updates the software (downloads it from the developer’s website new version and installs it).
Let's look at the same update procedure using the sudo command
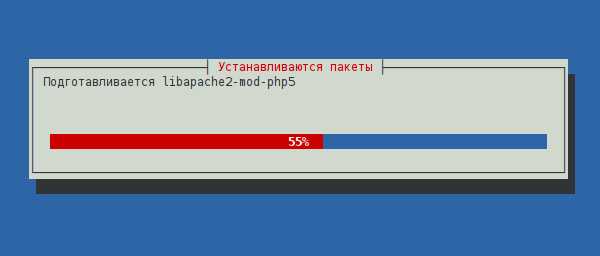
After downloading the necessary packages, installation will begin, which may take several minutes.
Your server is now ready to go! But it still needs to be configured. This is what we will do in the next article.
You do not know how to create a local server on LINUX? Then this article is for you. In it I will clearly explain how to create and configure a local server on LINUX.
Recently, the popularity of free software, including operating systems of the LINUX family, has been growing rapidly. Today Linux is not at all what it used to be. To start working with it, all you need to do is basic knowledge about the computer. Most of the programs needed by an inexperienced user are already available out of the box. However, if you are a web developer, or simply creating a website for yourself, you will most likely need a local server. And after looking through some forums, I noticed that users who switched from windows systems in Linux they encounter some problems when creating a server on their computer.
We need our server to support not only static sites, but also most modern CMS, such as WordPress, Joomla, Drupal, etc. For this we will need the following components:
- apache(webserver);
- php (the language in which many CMS are written);
- mysql (database server).
The combination of Apache + PHP + MySQL is quite popular. IN windows environment it is usually called WAMP (I wrote about this in). In Linux, as you already guessed incorrectly, there is a similar name - LAMP (Linux + Apache + PHP + MySQL).
So, first of all, we will install the software package LAMP, for which we enter the following commands in the terminal
sudo apt-get update
sudo apt-get install tasksel
sudo tasksel install lamp-server
With the first command we update information from the repositories, then we install the tasksel command, which is necessary to install packages, and with the last command we install exactly LAMP package.
As a result of the installation, we will receive all the necessary components for the server, configured to interact correctly with each other.
Setting up an Apache web server
Apache has a lot of settings, which, like most settings of various programs on Linux, are stored in text files. But first, we will make do with just studying a few of them. This is quite enough for us to work comfortably.
The apache web server configuration data is located in the /etc/apache2/ folder.
The mods-available and sites-available folders contain all available modules and sites. And in the mods-enabled and sites-enabled folders only those that are included in this moment. Apache2.conf is the main apache configuration file. Ports.conf - list of listening ports.
The server is controlled via the terminal:
sudo /etc/init.d/apache2 start - start the local server
sudo /etc/init.d/apache2 stop - stop the server
sudo /etc/init.d/apache2 restart - restarts apache.
Teams
sudo a2enmod rewrite
sudo a2enmod userdir
we include the rewrite and userdir modules, which allows you to create custom paths for sites.
After any action to enable or disable modules or sites, apache must be restarted to apply the changes.
Now let's start creating platforms for local sites. For example, I will create two local sites. More of them are created in a similar way.
First, create two files with the names of future sites in the /etc/apache2/sites-available/ directory
1
sudo gedit /etc/apache2/sites-available/test1
and write the following lines in it
ServerAlias test1 www.test1
DocumentRoot /home/user/sites/test1
AllowOverride All
2
sudo gedit /etc/apache2/sites-available/test2
and correspondingly
ServerAlias test2 www.test2
DocumentRoot /home/user/sites/test2
AllowOverride All
/home/youruser/sites/test1
/home/youruser/sites/test2 .
In them we create one index.html file. For the first folder - with the text “Page of the first site”, for the second - “Page of the second site”.
In order for the browser to go to the local server when typing the names of our sites test1 and test2 in the address bar, we edit the hosts file
sudo gedit /etc/hosts .
In the first line we add the names of the sites to be created.
You should get the following
127.0.0.1 localhost test1 test2
127.0.1.1 comp
# The following lines are desirable for IPv6 capable hosts
::1 ip6-localhost ip6-loopback
fe00::0 ip6-localnet
ff00::0 ip6-mcastprefix
ff02::1 ip6-allnodes
ff02::2 ip6-allrouters
comp is the name of your computer, so it will be different.
In the terminal, enter commands to enable sites
sudo a2ensite test1
sudo a2ensite test2
don't forget to restart apache.
All is ready! You can check by typing the names of the newly created sites into your browser.
If something didn’t work out for you or didn’t work out right, ask questions, I’ll try to answer.
Next time I will tell you how to work with databases on local server on LINUX.
This material is devoted to the basics of the operating system. Linux server. From this material you will learn why it is worth using Linux as a server, and also obtain the necessary initial knowledge that will be useful to you to start working with servers based on this OS.
First, let's talk about why you should use Linux as a server operating system. Many people are so used to Windows that they don’t even want to hear about Linux, I mean even custom versions of Linux with beautiful and comfortable desktops. And to the question, why don’t you want to use Linux? Everyone answers: “ Yes, he's kind of clumsy!», « " and so on. But in fact, to all users who are so categorical about Linux, I want to say that Linux is a very friendly operating system, and you just need to understand it a little and everything will become clear to you.
Now I want to list some advantages of Linux over Windows, and also dispel some myths:
- Linux is a completely free operating system ( with the exception of some paid distributions), unlike Windows;
- Linux is virtually virus-free;
- Everyone who says that " Programs I use on Windows do not install on Linux", You might think, why should they be installed!!! After all, this is a completely different OS, it has its own programs! It can also be said about Windows that “ programs that run on Linux do not install on Windows“, for Linux there are many of their own programs that are not inferior to Windows, and many software manufacturers also release their products for both Windows and Linux.
- Linux is more productive, especially the server version of the operating system. I explain that Linux server operating systems do not have interfaces, and most of the resources ( more than a half!!!) just occupies the OS interface, i.e. visual shell ( today have become widespread and Windows versions no GUI).
- Linux OS practically does not freeze, ( I mean the operating system itself). For example, everyone has encountered a situation where in Windows everything freezes, you can’t help but move the mouse, you can’t even press ctrl+alt+del, and you have to reboot. Linux is designed in such a way that such a situation is excluded, except in one case when you yourself cause such a situation.
- Regarding the Linux server OS, it is quite simple to configure, unlike its Windows counterparts, which have a lot of different gadgets that are not so easy to understand. The Linux system itself and all its services are configured by editing configuration files. These are ordinary text files, knowing their location and format, you can configure any distribution, even if you don’t have any tools at hand other than a text editor.
I don't want to popularize the Linux OS and somehow disparage Windows, but in some cases there is no better option than using the Linux operating system. Until some time, I also thought that Linux was somehow not our thing, but when I came across this OS, I was simply pleasantly surprised.
Now let's move directly to Linux basics Server. For example, we will use the distribution Linux Ubuntu Server 10.10.
Basic Linux Server Settings
Describe the process Ubuntu installations Server 10.10. I won’t, because it’s no more complicated, and maybe even simpler than Windows installation, the only thing I ask you to do during the installation process is when “ Selecting the software to install» mark installation « OpenSSH Server" This is so that you can later connect to this computer remotely using an ssh client ( for example PuTTY). And at the same time, you will have full access to the operating system from any computer on your network, since a monitor is usually not attached to the server and the server itself is located in a specially designated room for servers ( server).
In the window " Setting up user accounts and passwords» Enter your username and set a password.
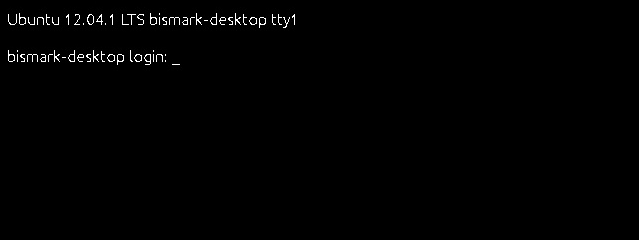
After installation, you boot for the first time, and the OS management console appears before your eyes. To begin, enter your login, press enter, and then your password in order to enter the OS itself. You will be logged in as the user you just created, which does not have root privileges.
Setting up users in Linux
ROOT– standard superuser of Linux OS, which has maximum rights. By the way, unlike Windows, in which administrator rights are not the highest ( there are also system ones), and here root rights the highest and if you work as root and perform any actions, no one will ask you “ Do you really want to do this?"as in Windows, for example, but let's say right away that you will kill the system, without any questions there. But, one way or another, we first need to activate this user, because in the future we will need superuser rights ( Tip: Always work under regular user until you need to switch to root mode), root is disabled by default. Activating the root account is done as follows, simply set a password for root.
Sudo passwd root
The system will ask you to enter the password of the user you are working under, and only then will you enter a new password for the future root and repeat it.
Since we're talking about users, let's learn how to create them. It's done like this.
Sudo useradd -d /home/testuser -m testuser
- sudo is a utility that grants the user some administrative privileges;
- useradd – a utility that adds a user to the system;
- -d – option to set the home directory for the user;
- /home/testuser – home directory path;
- -m – option to create a home directory;
- testuser is the name of our new user.
Now we set a password for the new user.
Sudo passwd tester
Setting up a network in Linux
Now that we have a little understanding of the users, we need to configure the network, it is quite possible that the DHCP server has already done this, but perhaps you want to set static IP addresses, gateway addresses and DNS ( which, in principle, is natural for the server).
To do this, edit the following file.
Sudo nano /etc/network/interfaces
- nano is a standard Linux editor;
- interfaces – a file responsible for the network configuration.
When you open this file, you will see something like the following, or rather, it will look like this in the end if you need static IP addressing on this computer.
# This file describes the network interfaces available on your system # and how to activate them. For more information, see interfaces(5). # The loopback network interface auto lo iface lo inet loopback # The primary network interface auto eth0 iface eth0 inet static address 192.168.1.2 netmask 255.255.255.0 gateway 192.168.1.1
Here eth0- it's yours network connection, there can be many of them depending on how many you have network cards, Static says that this is a static IP address; if it were dynamic, then DHCP would be specified instead of static. Well, the rest is probably all clear.
- Address – computer IP address;
- Netmask – subnet mask;
- Gateway - default gateway.
Save the file by pressing ctrl+o and then exit the editor with ctrl+x.
Now you need to assign a DNS server, this is done by editing the following file.
Sudo nano /etc/resolv.conf
Write or change the following.
Nameserver 192.168.1.100 nameserver 192.168.1.200
Where, 192.168.1.100 and 192.168.1.200 are the addresses of our DNS servers, if you only have one dns server, then specify only one line.
When we have configured everything, we need to restart our network interfaces, this is done as follows.
Sudo /etc/init.d/networking restart
Installing programs on Linux Server
IN Linux programs are installed completely differently than in Windows, so the knowledge that you had when working with Windows will not help you here. In Linux, all software is stored in Repositories - this is a kind of repository of software packages special for Linux, which is located on the Internet, and is freely distributed online, or on CDs. In order to update your repositories ( already installed on Linux OS), You need to run the following command ( provided that you have an Internet connection).
Sudo apt-get update
Now that we have updated the standard repositories, you can install something, I suggest installing file manager, one of the most common in Linux is - Midnight Commander(MC). There are slight similarities with FAR, which is used in Windows. Programs on server Linux are installed as follows.
Sudo apt-get install mc
Where, mc is our program that we want to install, i.e. our file manager Midnight Commander.
After installation you can try this program, it is launched simply, enter the name of the program in the console, i.e. mc and press enter.
I think this is enough for the basis; in the following articles (Basic Linux Ubuntu Server Terminal Commands) we will talk more specifically about setting up any services ( demons). And that's all for now.


