Website hosting
Can be implemented in four ways:
By default in the /var/www/html folder. Access is http://localhost/
Main hosting settings. For example, http://localhost/phpmyadmin
In any folder using the virtual hosts module. For example, http://mysite/
In the user's public_html folder (userdir module). For example, http://localhost/~username
Installation
To install Apache, run in a terminal:
sudo apt-get install apache2Settings
To apply changes in settings, you need to restart the Apache daemon: sudo service apache2 restart
In Ubuntu, the final configuration file (apache2.conf) is divided into several files located in different subdirectories. More details are written in the file comments. apache2.conf.
/etc/apache2/ |-- apache2.conf | `-- ports.conf |-- mods-enabled | |-- *.load | `-- *.conf |-- conf-enabled | `-- *.conf `-- sites-enabled `-- *.conf
Module settings are located in the directory /etc/apache2/mods-available. To enable or disable modules (module settings), use the appropriate a2enmod or a2dismod commands. Example of module connection:
sudo a2enmod< mod-name>Your settings should be saved to files located in the directory /etc/apache2/conf-available. To enable or disable your settings, use the appropriate a2enconf or a2disconf commands. An example of connecting a file with your own settings:
sudo a2enconf< config-name>Virtual host settings should be saved to files located in the directory /etc/apache2/sites-available. To connect virtual hosts, use the appropriate a2ensite or a2dissite commands. Example of connecting a virtual host:
sudo a2ensite< site-name>Default encoding
To specify the default encoding, use the AddDefaultCharset directive in the file /etc/apache2/conf-available/charset.conf(or uncomment the corresponding line):
AddDefaultCharset UTF-8
Virtual Hosts
Virtual host configuration files are stored in /etc/apache2/sites-available/*.conf. By default, Apache already has one virtual host configured. Its settings are in the file 000-default.conf. You can use this virtual host as an example.
Example of setting up a virtual host:
Name the configuration file with your host name host1.server1.conf and save.
After creating the settings file, add your host name to /etc/hosts:
127.0.0.1 host1.server1
To enable the created virtual host, use the a2ensite utility:
sudo a2ensite host1.server1The host is disconnected similarly to the a2dissite utility:
sudo a2dissite host1.server1Modules
mod_userdir
The mod_userdir module allows you to use directories located in users' home directories to store web pages. By default, Apache looks for requested pages in the directory ~/public_html
mkdir ~/ public_htmlTo enable mod_userdir run:
sudo a2enmod userdirand add the required user to the www-data group:
sudo adduser $USER www-datathen restart Apache:
The pages will be accessible at http://localhost/~username, where username is the username.
CGI
If you want to run cgi scripts on the server, connect the cgi module with the command
sudo a2enmod cgiBy default, cgi scripts are placed in the directory /usr/lib/cgi-bin, but you can place them anywhere by specifying this in your virtual host settings, or globally for all hosts in the file /etc/apache2/conf-enabled/serve-cgi-bin.conf.
If your server operates on an external network, then for security reasons it is strongly recommended to place cgi scripts outside the root directory of the virtual host
Setting up HTTPS in Apache
The Apache web server fully supports HTTPS. To enable HTTPS support on an already installed Apache, you must do the following.
Creating a key and SSL certificate
The use of self-signed certificates, although it protects against passive eavesdropping, does not guarantee clients that the server is exactly the server they need. The advantage of self-signed certificates is that they are free. A certificate signed by a Certificate authority costs money.
To create a key and certificate, enter the command:
Openssl req -new -x509 -days 30 -keyout server.key -out server.pem
To the question “Enter PEM pass phrase:” we answer with the password, confirm and remember.
We answer all subsequent questions randomly, you can simply click on Enter, agreeing with the proposed options, only answer the question “Common Name (eg, YOUR name):” with the name of the site for which we are creating a certificate, for example www.example.com.
After answering all the questions, two new files should appear in the directory - server.pem (key) and server.crt (certificate).
To use the generated key, we need to know the password we entered, and Apache will ask us for it when loading, but why do we need unnecessary questions from the daemons? :) Therefore, we remove the password from the key:
cp server.key( ,.orig) openssl rsa -in server.key.orig -out server.key rm server.key.origLet's copy them to /etc/ssl and assign read rights to the key file only to the administrator:
sudo cp server.pem / etc/ ssl/ certs/ sudo cp server.key / etc/ ssl/ private/ sudo chmod 0600 / etc/ ssl/ private/ server.keyApache setup
First you need to activate mod_ssl:
sudo a2enmod sslAnd then enable the site's default HTTPS settings:
sudo a2ensite default-sslNow you need to edit the file with the default HTTPS site settings, indicating in it the paths to your certificates. The file itself is called /etc/apache2/sites-enabled/default-ssl (or /etc/apache2/sites-enabled/default-ssl.conf).
SSLEngine onadd line
SSLProtocol all -SSLv2to disable the use of the legacy SSLv2 protocol.
# Server public certificate SSLCertificateFile /etc/ssl/certs/server.pem # Server private key SSLCertificateKeyFile /etc/ssl/private/server.keyNow just restart Apache:
sudo service apache2 restartAnd if all parameters are specified correctly, your sites will become accessible via HTTPS.
The HTTPS protocol operates on port 443, so if the server is located behind a gateway, then you need to forward this port to it.
Redirecting HTTP requests to HTTPS
If you want to disable the use of HTTP, then the most sensible thing to do is to redirect all HTTP requests to pages to their HTTPS address. Let's do this using mod_alias. If it is not enabled, enable it:
sudo a2enmod alias sudo service apache2 restartThen we change the /etc/apache2/sites-enabled/000-default file, which is responsible for the default virtual host for HTTP requests. Add a directive to this file
Redirect / https://example.com/In this case, all directory settings can be deleted, since your sites will still not be accessible via HTTP.
That's it, now restart Apache again and make sure that when you access via HTTP you are automatically redirected to the HTTPS page.
Apache is the most popular free web server. As of 2016, it is used on 33% of all Internet sites, which is approximately 304 billion sites. This web server was developed back in 1995 as a replacement for the popular NCSA that server and fixed many of its problems. Rumor has it that his name comes from a patchy, as he was fixing NCSA errors. Now, it is a cross-platform program that supports Windows, Linux and MacOS and provides sufficient flexibility, customization and functionality. The program has a modular structure, which allows you to expand its functionality almost indefinitely using modules.
You can install Apache on Linux using a few commands, but the program provides a very large number of settings that can be changed, as well as modules that, when enabled, will work better. This article will cover installing and configuring Apache, we will use Ubuntu as the main system, but you can repeat these steps in any other distribution. We will look at not only installing the program itself, but also how to configure it, setting up apache virtual hosts, as well as the most useful modules.
On this moment, the most a new version programs 2.4; therefore, setting up Apache 2.4 will be considered. As I already said, in Linux program installs in literally a couple of commands. To install on Ubuntu, first update the system to the latest version:
sudo apt update
$ sudo apt upgrade
Then install apache2:
sudo apt install apache2
In other distributions, the program package is called either this or httpd and installing it will not cause you any difficulties.
After installation is complete, you need to add the web server to startup so as not to start it manually after turning on the computer:
sudo systemctl enable apache2
Apache setup
Gone are the days when Apache configuration was stored in a single file. But it’s correct: when everything is distributed in its own directories, it’s easier to navigate the configuration files.
All settings are contained in the /etc/apache/ folder:
- File /etc/apache2/apache2.conf responsible for basic settings
- /etc/apache2/conf-available/* - additional settings web server
- /etc/apache2/mods-available/*- module settings
- /etc/apache2/sites-available/*- virtual host settings
- /etc/apache2/ports.conf- ports on which apache runs
- /etc/apache2/envvars
As you noticed, there are two folders for conf, mods and site. These are available and enabled. When you enable a module or host, a symbolic link is created from the available folder to the enable folder. Therefore, it is better to perform settings in the available folders. Generally speaking, you could do without these folders, take everything and dump everything into one file the old fashioned way, and everything would work, but no one does that now.
First let's look at the main configuration file:
vi /eta/apache2/apache2.conf
Timeout- indicates how long the server will try to continue the interrupted transmission or reception of data. 160 seconds will be enough.
Keep Alive On- a very useful parameter, it allows you to transfer several files in one connection, for example, not only the html page, but also images and css files.
MaxKeepAliveRequests 100- maximum number of requests per connection, the more, the better.
KeepAliveTimeout 5- connection timeout, usually 5-10 seconds are enough to load a page, so you don’t need to set any more, but you also don’t need to break the connection before all the data has loaded.
User, Group- user and group on behalf of which the program will run.
HostnameLookups- write to logs instead of IP addresses domain names, it is better to disable it to speed up the work.
LogLevel- level of error logging. By default, warn is used, but to make the logs fill out more slowly, just enable error
Include- all include directives are responsible for connecting the configuration files discussed above.

Directory directives are responsible for setting access rights to a particular directory in file system. The syntax here is:
Parameter value
The following basic options are available here:
AllowOverride- indicates whether .htaccess files should be read from this directory; these are the same settings files and have the same syntax. All - allow everything, None - do not read these files.
DocumentRoot- sets from which folder documents should be taken to be displayed to the user
Options- indicates which web server features should be allowed in this folder. For example, All - allow everything, FollowSymLinks - follow symbolic links, Indexes - display the contents of the directory if there is no index file.
Require- sets which users have access to this directory. Require all denied - deny everyone, Require all granted - allow everyone. You can use the user or group directive instead of all to explicitly specify the user.
Order- allows you to control access to the directory. Accepts two values: Allow,Deny - allow for everyone except those specified or Deny,Allow - deny for everyone except those specified..ru.
All these directives are not used here, since we are happy with the default values, but in .htaccess files they can be very useful.
We are left with the /etc/apache2/ports.conf file:
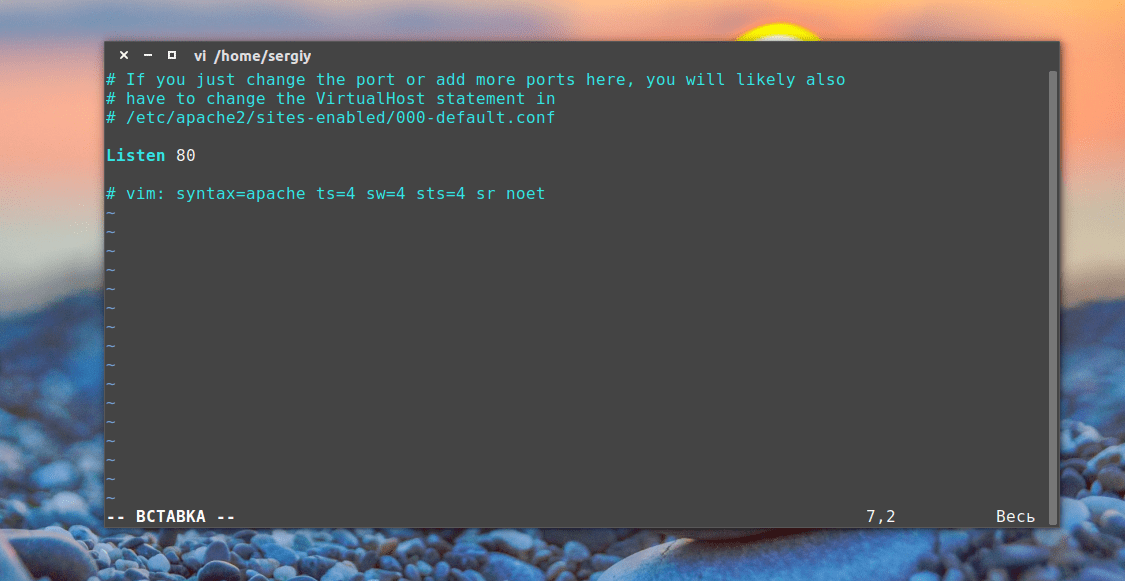
It contains only one directive, Listen, which tells the program which port it should work on.
The last file is /etc/apache2/envvars, you are unlikely to use it, it contains variables that can be used in other configuration files.

Setting up an Apache server via htaccess
.htaccess files allow you to configure your Ubuntu web server to behave in a specific directory. All instructions specified in this file are executed as if they were wrapped in a tag
It is important to note that in order for the server to read instructions from .htaccess, the settings for this folder in the main or virtual host file must not contain AllowOverride None for all settings to work you need AllowOverride All.
Otherwise, any configuration of the Apache server can be done here, from enabling modules to simply changing folder access. Since we have already considered all the parameters, let’s just give a couple of examples:
Order Deny,Allow
Deny from all
Denies everyone access to this folder, important to apply for configuration folders. Most often, .htaccess is used to work with the mod_rewrite module, which allows you to change requests on the fly:
RewriteEngine on
RewriteRule ^product/([^/\.]+)/?$ product.php?id=$1 [L]
But this is a very broad topic and is beyond the scope of this article.
Configuring Apache Modules
As I already said, Apache is a modular program, its functionality can be extended using modules. All available loader modules and module configuration files are located in the /etc/apache/mods-available folder. And activated in /etc/apache/mods-enable.
But you don't have to analyze the contents of these folders. Configuring Apache 2.4 by adding modules is done using special commands. You can view all running modules with the command:

You can enable the module with the command:
sudo a2enmod module_name
And disable:
sudo a2dismod module_name
After enabling or disabling modules, you need to restart apache:
sudo systemctl restart apache2
When one of these commands is executed, a symbolic link to a module file with the extension load is created or deleted in the mods-available directory. You can look at the contents of this file, there is only one line. For example:
vi /etc/apache2/mods-available/deflate.load

This means that the module could be activated simply by adding this line to the apache2.conf file. But it is customary to do just that to avoid confusion.
The module settings are located in the same folder, only in a file with the .conf extension instead of load. For example, let's look at the settings of the same module for deflate compression:
vi /etc/apache2/mods-available/deflate.conf

The files in the conf-available folder are the same modules, only they are installed separately from apache, these can be configuration files to enable the php module or any other programming language. Everything works exactly the same here, only the commands for enabling and disabling these modules are slightly different:
a2enconf module_name
a2disconf module name
As you have seen, enabling modules is very simple. Let's enable a few necessary but not enabled by default modules:
sudo a2enmod expires
$ sudo a2enmod headers
$ sudo a2enmod rewrite
$ sudo a2enmod ssl
The expires and headers modules reduce the load on the server. They return a Not Modified header if the document has not changed since the last request. The expiries module allows you to set the time for which the browser should cache the received document. Rewrite allows you to change requested addresses on the fly, very useful when creating CNC links, etc. And the last one to enable support for SSL encryption. Don't forget to restart apache2 after completing the settings.
Configuring Apache Virtual Hosts
It would not be entirely convenient if only one website could be hosted on one physical machine. Apache can support hundreds of sites on a single computer and serve the correct content for each one. Virtual hosts are used for this. The server determines which domain the request is coming to and serves the required content from the folder of this domain.
Apache hosts settings are located in the /etc/apache2/hosts-available/ folder. To create a new host, just create a file with any name (it’s better to end with the host name) and fill it with the necessary data. You need to wrap all these parameters in a directive VirtualHost. In addition to the parameters discussed here, the following will be used:
- ServerName- primary domain name
- ServerAlias- additional name by which the site will be accessible
- ServerAdmin- administrator email
- DocumentRoot- folder with documents for this domain
For example:
vi /etc/apache2/sites-available/test.site.conf

A web server is a very complex software product that runs on different platforms and on different operating systems. For correct operation V installed system it needs to be configured.
By default, Apache settings are located in the file " httpd.conf"in the catalogue" conf".
You should pay special attention to the path to the files in the Apache and PHP configuration files. You will often have to specify paths to various directories and files. UNIX and Windows operating systems use different directory separators. UNIX uses forward slash (/) and Windows uses backslash (\). Some Apache and PHP directives work with both types of directory separators. But since Apache and PHP were originally developed for UNIX, you can avoid a number of problems by using their "native" format. Therefore, the paths in the configuration files " httpd.conf" And " php.ini" It is recommended to write through a slash in the UNIX format - "/".
Eg:
ScriptAlias "/php_dir/" "c:/php/" File Directives httpd.conf:
Port- sets TCP port, which is used by Apache to establish a connection. By default, port 80 is specified. The port can also be specified in the directive ServerName.
Port 80 The only reason to set a non-standard port is if you do not have permission to use the standard port. When using a non-standard port, such as 8080, the port number should be specified in the address " http://localhost:8080/".
ServerAdmin- contains the specified address Email Web server administrator. This is the address that will be displayed in case of server errors.
ServerAdmin [email protected]
ServerName- contains the specified computer name for the server.
ServerName localhost:80 ServerRoot- points to the directory containing the Apache Web server files.
ServerRoot "C:/web_server/apache" DocumentRoot- defines the directory in which the Web site files are located.
DocumentRoot "C:/web_server/apache/htdocs" Container
The scope of directives within this container extends to all files and subdirectories within the directory specified in the directive DocumentRoot.
Options FollowSymLinks Includes Indexes
AllowOverride All
Directive AllowOverride set to value ALL, allows you to override the value of the main configuration file " httpd.conf"in files" .htaccess".
Directive Options FollowSymLinks Allows Apache to follow symbolic links.
Directive Options Includes allows the execution of SSI (Server Side Includes) directives in the code of Web site pages.
Directive Options indexes specifies that the contents of a directory should be returned if the index file is missing.
DirectoryIndex- contains a specified list of index files that should be displayed when accessing a directory without specifying a file name.
DirectoryIndex index.html index.htm index.php Directive ScriptAliasused to create an alias for the directory " /cgi-bin/", which houses CGI programs and scripts.
ScriptAlias /cgi-bin/ "C:/web_server/apache/cgi-bin/" Next you need to configure the rights and restrictions on the directory cgi-bin.
AllowOverride None
OptionsExecCGI
Order allow, deny
Allow from all
Directive AllowOverride None says that the options in this directory cannot be overridden by files " .htaccess".
Directive OptionsExecCGI Allows execution of CGI scripts.
Directives order allow, deny And Allow from all allow access to the directory.
AddHandler- forces Apache to consider files with the extensions " exe" And " bat", like CGI scripts.
AddHandler cgi-script .bat .exe DefaultType sets the header of files whose type cannot be determined by extension. In this case, all unknown files are treated as regular text files. To process all unknown file extensions as HTML, change the directive as follows:
DefaultType text/html AddDefaultCharset- sets the default encoding if the encoding is not specified in the head of the HTML document.
AddDefaultCharset windows-1251
Apache HTTP Server is a complex software product that runs on different platforms and operating systems around the world. Therefore, for it to work correctly on the installed system, it must be configured.
By default, Apache settings are located in the httpd.conf file in the conf directory. The following will describe the main directives of the httpd.conf file and their commonly used meanings.
Editing the httpd.conf file
1. To load the mod_rewrite module, find and uncomment (remove the “#” symbol at the beginning of the line) this line:
LoadModule rewrite_module modules/mod_rewrite.so
2. To load the PHP interpreter, you need to add the following line to the end of the module loading block:
LoadModule php5_module "C:/php/php5apache2_2.dll"
3. Define the directory containing the configuration PHP file by adding the following line below:
PHPIniDir "C:/php"
4. Find and uncomment the line:
ServerName localhost:80
5. Find the line:
DocumentRoot "C:/Program Files/Apache Software Foundation/Apache2.2/htdocs"
Assign the root directory for site management (you already created it a little earlier):
DocumentRoot "C:/apache"
6. Find this block:
Options FollowSymLinks
AllowOverride None
Order deny,allow
Deny from all
And replace it with the following:
Options Includes Indexes FollowSymLinks
AllowOverride All
Allow from all
7. Delete or comment out the original directory control block (we won't need it), which without comments looks something like this:
Options Indexes FollowSymLinks
AllowOverride None
Order allow,deny
Allow from all
8. Find the block:
DirectoryIndex index.html
Replace it with:
DirectoryIndex index.html index.htm index.shtml index.php
9. Find the line:
ErrorLog "logs/error.log"
Replace with the following (in this case it will be more convenient to view the global server error file):
ErrorLog "C:/apache/error.log"
10. Find the line:
CustomLog "logs/access.log" common
Change to:
CustomLog "C:/apache/access.log" common
11. For SSI operation (server side enablement) following lines, located in the block
AddType text/html .shtml
AddOutputFilter INCLUDES .shtml
12. Add below, in the same block
AddType application/x-httpd-php .php
AddType application/x-httpd-php-source .phps
13. Finally, find and uncomment the lines:
Include conf/extra/httpd-autoindex.conf
Include conf/extra/httpd-vhosts.conf
Include conf/extra/httpd-manual.conf
Include conf/extra/httpd-default.conf
Save changes and close the "httpd.conf" file
Now open the file "httpd-vhosts.conf" located in the "conf\extra" directory and make the following changes in it:
The existing virtual host example blocks should be commented out or deleted and the following inserted:
DocumentRoot "C:/apache/localhost/www"
ServerName localhost
ErrorLog "C:/apache/localhost/error.log"
CustomLog "C:/apache/localhost/access.log" common
Example of creating a virtual host
If you need to install your own virtual hosts, do the following:
Open the file "httpd-vhosts.conf" and create a block in it with approximately the following content:
# The folder where your host's root will be.
DocumentRoot "C:/apache/test.ru/www"
# The domain by which you can access the virtual host.
ServerName test.ru
# Alias (additional name) of the domain.
ServerAlias www.test.ru
# The file where errors will be written.
ErrorLog "C:/apache/test.ru/error.log"
# Host access log file.
CustomLog "C:/apache/test.ru/access.log" common
Then in the "apache" directory, create a folder "test.ru" (just like that, with a dot), in which, in turn, create a folder "www".
The next step in creating a virtual host is to change the file C:\WINDOWS\system32\drivers\etc\hosts operating system. Open this file and add two lines to it:
127.0.0.1 test.ru
127.0.0.1 www.test.ru
Now restart the Apache server with the "Restart" shortcut located in the "Start" menu, open the browser, enter test.ru or www.test.ru in the address bar and you will find yourself in your virtual host. Just be careful, now you can get to the original site with the name of the virtual host (www.test.ru if it exists) only by commenting out or deleting the line: 127.0.0.1 www.test.ru, in the above-mentioned "hosts" file.
Apache documentation, with the server running, is available at http://localhost/manual/
Installation and configuration of the Apache web server is completed.
Creating batch files to start and stop services
Agree that manually editing the "hosts" file every time you start services is not convenient, so for a more convenient, simultaneous start of Apache, MySQL services, and changing the "hosts" file, we will create two batch files: for starting and stopping, which will perform all routine work automatically.
When using virtual hosts, you need to create two files in the C:\apache directory: vhosts-off.txt - containing the initial contents of the "hosts" file and vhosts-on.txt - containing all virtual hosts. Please note that when creating new virtual hosts you will need to add them to the vhosts-on.txt file and not to C:\WINDOWS\system32\drivers\etc\hosts. Look at the examples below.
File vhosts-off.txt (can contain one single line):
127.0.0.1 localhost
Example of a vhosts-on.txt file with virtual hosts www.test.ru and test.ru:
127.0.0.1 localhost
127.0.0.1 www.test.ru
127.0.0.1 test.ru
In the same directory C:\apache, create two batch files: start-webserver.bat – to start services and replace the “hosts” file, and stop-webserver.bat – to stop services and clear the “hosts” file.
Launch file start-webserver.bat:
@echo off
echo.
if not exist C:\apache\vhosts-on.txt goto no_vhosts
echo Create virtual hosts:
copy /v /y C:\apache\vhosts-on.txt C:\WINDOWS\system32\drivers\etc\hosts
echo.
:no_vhosts
NET start Apache2.2
NET start MySQL
Stop file stop-webserver.bat:
@echo off
echo.
if not exist C:\apache\vhosts-off.txt goto no_vhosts
echo Restore hosts file:
copy /v /y C:\apache\vhosts-off.txt C:\WINDOWS\system32\drivers\etc\hosts
echo.
:no_vhosts
NET stop Apache2.2
NET stop MySQL
If you do not use virtual hosts or want to start services without replacing the "hosts" file, simply remove the files vhosts-on.txt and vhosts-off.txt from the C:\apache directory.
Previously in our series on Linux basics We looked at the basics of working with the Apache web server. It is the world's most widely used web server on the Internet (as of July 2015, Apache had a 38% share, IIS had 26%, and Nginx had 15%). Therefore, the more you know about it and understand how it works, the more success you will achieve in hacking it.
Today we will look at the basics of setting up an Apache server. As we wrote earlier, configuration and configuration of almost all applications in Linux or Unix are carried out through configuration files, which are plain text. Apache is no exception here. Therefore, in this article we will focus on the apache2.conf configuration file, which is located in the /etc/apache2 directory.
Step 1: Start Apache2
Let's start by starting Apache2. Let's do this through the Kali graphical shell by going to Applications -> Kali Linux -> System Services -> HTTP -> apache2 start, as shown in the screenshot below.
Or run it via command line by typing the following command in the terminal
Kali >service apache2 start
This starts the Apache2 daemon and from now on the web server should serve our content on the Internet.
Step 2: Check server health
To check if our Apache server is running, let's simply navigate to localhost or 127.0.0.1 in the browser. If you see a page like the one in the screenshot below, it means the server is working fine!

Step 3: Open the configuration file
To configure Apache, we need to go to the /etc/apache2 directory.
Kali > cd /etc/apache2
Let's display a list of all files in this directory:
Kali > ls -l

As you can see, there are several files and subdirectories in this directory. We're only interested in the apache2.conf file for now, but note that we have a ports.conf file and a sites_available folder that we'll need a little later, and there are several other configuration files and folders in here as well.
We can open apache2.conf in any text editor, but here we will use Leafpad. The file can be opened by simply typing in the console:
Kali > leafpad /etc/apache2/apache2.conf

As you can see, this command opens text file with all the configuration information about our Apache web server. To set up the server, we will now try to familiarize you with all the key points of this file.
Step 4: ServerRoot
Let's scroll down, skipping all the comments, and find line #70, where the global settings section begins. Here we see the ServerRoot settings. This is the top of the directory tree in which the Apache server stores all server-related files. Line #84 defines ServerRoot. We can simply uncomment this line if we want to set /etc/apache2 as ServerRoot. We recommend that you do this.

Step 5. Timeout
In the next section we have variables that determine the values of the parameters: Timeout, KeepAlive, MaxKeepAliveRequests and KeepAliveTimeout.

- Timeout: This is the time within which the server must fulfill the user's request. Its default value is 300, which means that the server must process each request within 300 seconds or 5 minutes. This is definitely too long and could be set to 30 seconds.
- KeepAlive: This means that the server remains alive (holds the connection) for multiple requests from the same client. The default is On. This means that clients do not need to create a new connection for each request to our server. This approach allows you to save server resources.
- MaxKeepAliveRequests: This value specifies the maximum number of seconds allowed between requests received from an established connection to the same client. If we set this value to 0, then the amount of time is unlimited.
- KeepAliveTimeout: This is the amount of time between requests to determine that the connection is still alive (established).
We suggest you leave all values at their defaults except for the Timeout parameter. Each situation is different, and you may need to change these defaults to tailor server performance to your specific environment.
Step 6: Apache2 User and Groups
Let's scroll down a few lines again in the apache2.conf file until we reach line #177. Here we can set the Apache2 user and groups. Please note the comment on line #177. It states that we can set these variables in the envvars file ( environment variables). We'll leave this question for a future article, but for now just keep in mind that both User and Group are variables whose values are taken from the /etc/apache2/envvars file.

Finally, the last section, which is of great importance for Apache security, begins at line #193. This section ensures that web clients cannot access the .htaccess and .htpasswd files.
Step 7. Logging
The next section describes how Apache manages logs.
In the first subsection we address the HostNameLookups parameter. This directive tells Apache2 whether it should perform a DNS lookup when it writes to the log. established connection. With the default value "Off" Apache2 performs much better.

Step 8: Available Sites
Now let's look at the site_available directory (available sites) and, most importantly, at the file that is located in it by default. This is often called the default Virtual Hosts file. Open this file by typing in the console:
Kali > leafpad /etc/apache2/site_available/default

As you can see, there are three critical areas in this file. The first line specifies which port the web server is listening on. Here it is defined to listen to any interface on port 80 (*:80). The second line specifies the email address to which notifications should be sent in case of problems with the server. By default there is an address If you are system administrator, then here you can enter your email address. The third element may be the most important - DocumentRoot. It determines where the content for this virtual host will be located, the default being the /var/www directory. We suggest that you leave everything as it was defined by the developers.
Step 9. Ports
Finally, we can go even lower in the apache2.conf file to line #248 - “include port.conf”. This directive simply tells Apache to go into the port.conf file to find the ports it should listen on.


