If you can’t log into Windows 7 because you forgot or lost your account password, then this article will help you. It contains all effective ways to delete, reset or replace the password of any account(even the administrator) in the “seven” and recommendations are given on how to protect yourself in case the password is lost in the future. All the described methods to unlock a user account are absolutely safe if you follow the instructions and do everything carefully.
How to reset a forgotten password using Ophcrack
Ophcrack- a unique utility that allows you to restore access to any account in Windows 7 in just a few minutes. Moreover, it works in any edition of the OS, starting with XP, and can function with bootable usb-flash drives. The program’s operating mechanism is somewhat different from the password selection algorithms of similar applications and includes several components:
- LM hash algorithm- passwords are stored in this format in Windows 7, the number of characters of which does not exceed 15;
- rainbow tables- the mechanism is designed to recover encrypted passwords through the use of hashes with a complex process of reverse decryption.
The program can also unlock complex passwords by extracting them from registry files and then decrypting them using completely new methods of data processing, due to which the load on hardware resources is small, and the selection speed increases by orders of magnitude.
Using a bootable flash drive with Ophcrack
The algorithm below is relevant for computers that cannot be accessed using the following methods: reasons:
- the password for one account is lost, but there are no other accounts;
- It is not possible to access any user profile on this computer.
If you encounter such a case, you will have to follow instructions, which boils down to the following: creating a bootable USB drive based on a special version of Ophcrack and booting from this media to restore access to the account. In more detail, these instructions look like this:

For inexperienced users, it is recommended to select the first (graphical) operating mode of OphCrack: Ophcrack Graphic mode. But it should be taken into account that in graphical mode the program may not start, but in text mode it works flawlessly, although it requires certain skills in handling console programs.
If we consider working in a program with an interface in more detail in the next section, then we will dwell in more detail on using its console version. Although the only peculiarity here is the absence of windows and buttons. After launching the console version of the utility, it will automatically detect passwords for all accounts and display them in the “ Results».
Removing a password from Windows
What to do if you forgot administrator account password? The program will also help here Ophcrack, But in the presence of network connection to download it. Let's consider the sequence of actions:

After a few seconds or minutes, depending on the complexity of the combination of characters in the password, it will be displayed in the “ NT Pwd».
Using system recovery tools
What to do, if no access to the Internet or another computer, do I need to log in to my account? Will help solve the problem Bootable USB drive or disk containing the distribution operating system Windows 7 used on the computer.
In this case, reset your password Windows administrator 7 is maximally implemented as follows.
- We connect the boot drive of the same edition of the “seven” as installed on the PC.
- Reboot the PC.
- Calling boot menu computer/laptop. This can be done using the F2, F9, F11 or other keys specified in the manual system board or on the BIOS boot screen.
- In the list of available devices, select the target USB drive to start the computer from.

- Press any key to boot from the selected media.
- Select the language of the system installed on the computer, and then click the Next button.

- Click the link «
»
in the window with the Install button to launch the Windows 7 OS recovery tools.

- In the parameters we select command line to call the execution tool system commands.

- In the window that appears, enter regedit command and execute it using the Enter key. As a result, the classic registry editor window will open.
- In this window, as in file manager with directories displayed in the form of a tree, go to the HKLM section.

- Through the main menu, call the command "", located in the menu " File».
- Select the file " config» - « SYSTEM", which has no extension.

- Set any file name without using Cyrillic characters and confirm it by pressing the enter button.

- Let's go to the bush " HKLM" - "entered_hive_name" - Setup.
- Double-click to open the key editing menu “ CmdLine».
- For the parameter value, enter “ cmd.exe" to launch Command Prompt before booting Windows 7.

- In the same way we set the value “ Setup Type"equal" 2 ».
- Select a new bush in HKLM.
- Call the command " Unload bush", located in the menu item " File».
- We restart the computer, as a result of which the command line will appear.
- On the command line, enter a command like net user username password and execute it with the Enter key. After this, the command line can be closed.

Thus, it is easy to recover a forgotten password as many times as you like, but using the proposed method on other people’s computers will not work due to the fact that changing the password is required when gaining access to any of the accounts.
Creating a flash drive to instantly reset a password for a specific account
If you don't want a repeat of the situation with forgotten password, it is better to make a floppy disk to reset it. By floppy disk we mean a flash drive, because the use of floppy disks and disks has not been relevant in recent years.
- We call " Start" and click on your account avatar.

- In the vertical menu on the left, click “ Creating a Password Reset Disk».

- “” will open, where we click Next >.

- Select our flash drive (or floppy disk) from the list.

- Set the current account password, then click Next >.

As a result, the wizard will generate a boot disk necessary to unlock the account for which the password has been lost.

Now, if for some reason you cannot log into Windows 7, click the Reset password button, insert the created disk or flash drive and follow the instructions. which boil down to clicking the Next button.
After reinstalling the system, changing the password, or creating a new account, the password reset disk will have to be created again.
Knowing how to reset the Windows 7 administrator password and having a flash drive with the key file, a forgotten password will no longer be a problem.
Video on the topic
How to reset your password in Windows 7 using Password & Registry Editor. As you know, anything can happen in life, you can even forget the password to log into Windows, and if this happens, then you can easily reset the password in Windows 7, the good news is that the whole procedure is not at all complicated.
If you have forgotten your password, and you do not have Win 7, but XP or Win 8, then the option discussed below will also suit you. If you are reading these lines and do not have Forgotten password problems, then I recommend reading to the end and taking into account the information received.
And who knows, you might need help pretty girl who forgot her login password. An excellent chance to visit and heroically return access to the PC to the lovely lady, and then... And then I think it’s clear. Young woman VK is sitting, and you are smoking on the balcony! ;-)
Algorithm of actions:
- Create a bootable “USB” with a program size of only (4.12 MB).
— Procedure for resetting a password in Windows 7.
As has already become clear, you need a regular flash drive, pre-formatted in “ FAT32" How to format a flash drive can be read in the article (Creating bootable USB flash drive with Windows).
Creating a flash drive to reset your password.
Next we need to select the partition where Windows is located. In my case it is " / dev/ sda1 " Opposite each section on the left you can see numbers (1 2 3 4). The required section is selected using these numbers. That is, to choose mine " / dev/ sda1 "and it is located opposite the unit, I need to enter " 1 " and press " Enter»
Once you decide on the section, and press “Enter”, let’s see what happens next! As can be seen from the last line, the program itself found the section “ Windows/ System32/ Config"Okay, that's how it should be. This section contains the “SAM” file, this is what the program needs, it contains the “Hash” of passwords.
Here we just click “ Enter»
Next, let's look at what the program offers us. In this case, we are interested in (Password reset), that is, resetting passwords. This parameter is located under the number “ 1 "so enter 1 and, as usual, click " Enter»
Now the program again offers several options for action. Namely, open the system registry editor with the “ 9 “- this is not interesting to us at all!
We are interested in the first option, enter the number “1” and Enter
It is at this stage that the most interesting part comes. The program showed us all existing users in the system. Our task is to select the user who needs to reset the password
(Well, you should have decided on this a long time ago!)
More details about what's here and how: Here we see in the column “ RID» unique number for each user. Below I will explain why we need this “ RID"needed. Next, the “Username” column lists all existing users in the system.
Admin: Actually, soon we will reset the password for this user. In a collumn " Admin? “You can see what he represents, in this case he has the rights of “Administrator”.
User: Regular Account does not have administrator rights.
4<8=8 AB@0 B>@ : This is our built-in administrator account. The inscription in this form is due to the Russian-language version of Windows.
> ABL: This doesn’t interest us at all, since this is “Guest”
To reset a user's password, you need to enter it " RID" or his name if it is in English. We will reset the password using "RID" since entering the name is easy, and there is a feature with "RID" that is worth knowing about.
If you look at the penultimate line, you can see in it the following fragment of text “ 0 x< RID> " this means that the user number must be entered with " 0 x" That is, RID Admin is like this “ 03 e8 " means you need to enter " 0 x03 e8 ».
I enter " 0 x03 e8 " and Enter
Now the program knows which user to work with and will offer us 4 options for action.
1
– Reset password, in other words, the user will not have a password.
2
– In this option, you can set a password for the user. Win 7 doesn't work.
3
– Promote the user to administrator if he is not one.
4
– If the user is blocked by the admin, you can unblock him.
In this case, we are interested in resetting the user’s password, so we type “ 1 " and Enter
We observe the message "" good!!! The password reset was successful. But it’s too early to reboot and break into the system without a password, since you need to shut down the program correctly and save all changes!
Enter " Exclamation mark(!)" and again, as always, Enter
The program again offers us to continue working, but we no longer need anything. Type "q" and enter.
Now the program prompts us to enter “ n"Agree, enter and Enter
That's all, the work of resetting the password is finished. All that remains is to press the key combination “CTRL + ALT + DELETE” and the computer will reboot. Now you can log in as Admin without a password.
As we see, in fact reset windows password It’s not difficult and any user can perform these steps. I advise you to get yourself a flash drive with this program, just in case.
If you have questions on this topic or additions, write in the comments, I will be glad!
Due to numerous requests from readers, I decided to write a detailed and simple instructions, how to reset a user account password in any version of Windows: 10, 8.1, 8, 7, XP.
So, you turned on the computer, and the system asks you to enter a password to log in. You enter the user's password, but it does not match: the “invalid password” error appears. What to do if no password is suitable, but you need to log in? There is a solution - you can reset your password using special program, recorded on a bootable USB flash drive. Now I’ll tell you how to create such a flash drive. 
You will need to briefly use any others computer. To do this, you can contact a relative, friend, neighbor, maybe you have a computer at work - I think this is not a problem now.
So, we sit down at another computer or laptop. Insert any flash drive into it:

Download free program to reset Windows passwords– . You can download it from the official website (or from my Yandex.Disk): 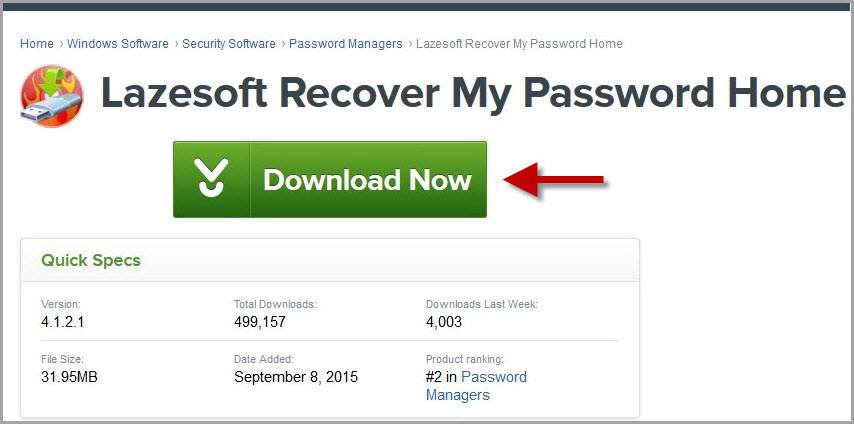
Run the downloaded file lsrmphdsetup.exe:Install the program as usual: i.e. We agree with everything and press the ““ button in all windows. Next" In the last installation window, click the “ Finish” – the program will start automatically and its shortcut will be created on the desktop: 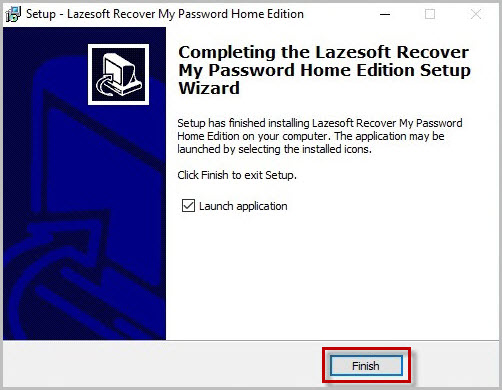
In the start window, click the button Burn Bootable CD/USB Disk Now!(“Burn bootable CD/ USB disk right now"): 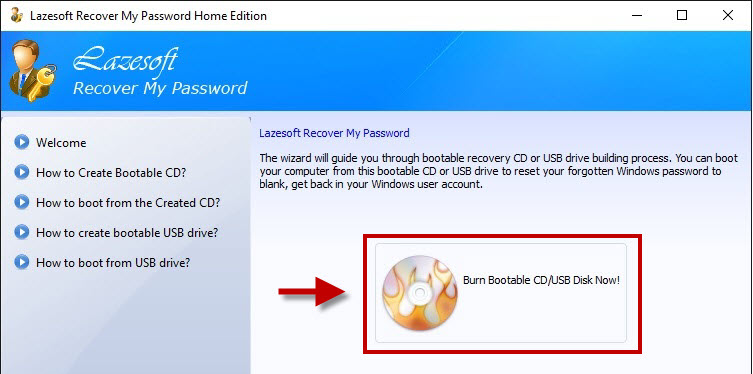
In the next window select Windows version , which is installed on the computer where we will then reset the password. Not on the list Windows 10, but it’s not scary: if you have a “ten”, then choose here Windows 8.1 with your bit depth.
By the way, on one of the forums I saw a message that you can create a bootable USB flash drive with Windows 8.1 64-bit, and it will be suitable for resetting the password on any version of Windows (I checked on Windows 10 64-bit and on Windows 7 64-bit - so and is): 
After you have selected the desired version of Windows, click the “ Next”:

In the next window, place a marker on the item USB Flash
and select the letter of our flash drive (it is already inserted into the computer). In my case, the letter of the flash drive: F.
Then press the button “ Start”: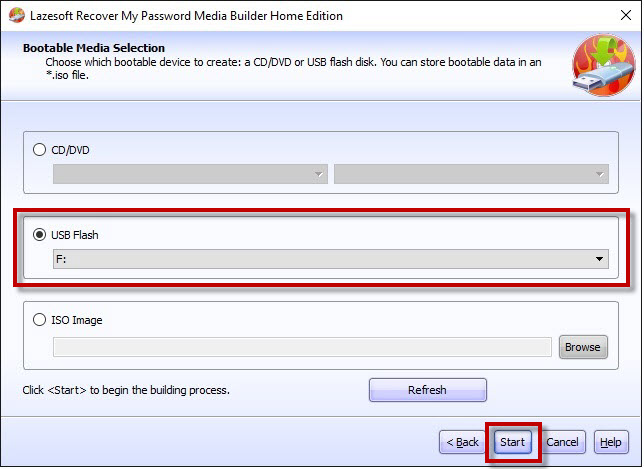
The program will download the necessary components from the Microsoft website for some time:

After this the program will ask: “ Should you format your USB drive now?“All files, if they are on the flash drive, will be deleted. Press the button “ Yes”:
Now we wait until the bootable USB flash drive is created:

At the end of the process, press the button “ Finish”:
 All! The bootable USB flash drive with the password reset program is ready. We take it out and take it to our computer.
Insert the bootable USB flash drive into your computer. And now comes the most important, and at the same time, the most difficult moment for those who will be doing this for the first time. We need configure the computer to boot from our flash drive .
Those who know how to boot a computer from a flash drive can go straight to the end of this article. For those who don’t know how to boot from a flash drive, I’ll try to explain as clearly as possible:
============================================================================================
In order to “force” the computer to boot differently than usual (i.e. with hard drive), and from the device we need (in our case - from a flash drive) - we need to enable a certain setting in Bios computer.
To get into this very Bios, we must immediately after turning on the computer press a certain key on the keyboard (and press not just once, but many, many times until we see the BIOS on the screen).
On different computers On laptops this key is different:
- The most commonly used key is Delete(or Del ).
- You can also often call up the BIOS using the key F2(and on some laptops Fn+F2 ).
- Keys are used less frequently Esc, F1, F6 and others.
In general, immediately after you press the Power button on your computer or laptop, do not wait until it starts Windows boot, and immediately start pressing the key many times Delete on keyboard. After a few seconds (5-10) you should see Bios.
If nothing like this appears, and your Windows starts loading as usual, then we don’t wait for anything else: we restart our computer again (you can directly use the Reset button) and try pressing another key many times - F2.
If you don’t get into the BIOS again, reboot the computer again and try pressing the next key - Esc. After F6 etc. But hopefully you won't have to experiment for so long: in the vast majority of cases, either the Delete or F2 key works.
By the way, a hint about which key to load the BIOS usually flashes at the bottom of the screen immediately after turning on the computer. But for some reason no one looks at her, or does not have time to look at her.
On different computers Bios different, and it looks different for everyone.
For example, on my computer it looks like this: 
On another computer it will be like this: 
On the third computer it’s like this:  That is, I say this because it is almost impossible to write separate instructions for each Bios.
The main thing that anyone who needs to configure booting from a flash drive should know: in the BIOS (no matter how it looks like for you) you need to find the section where the word is present Boot(from English “Loading”). By using the arrows on the keyboard to navigate to this section, we set it to first place in the list of boot devices flash drive.
In Bios, the flash drive may be displayed with its own name (for example, Transcend), or as USB-HDD; There are other options. One thing is important: it must be selected as the first device from which the computer will boot.
Usually the flash drive is “raised” to first place using the arrows on the keyboard, or the keys +/- , or F5/F6.
Having set the setting we need in Bios, we must leave it, not forgetting to save the changes made. To do this you need to go to the section Exit(it’s usually the last one) – and there select the item “ Save and Exit” (“Save and Exit”). And then confirm once again that we are leaving by clicking “ Yes”.
That's all: if you did everything correctly, the computer will reboot and boot from the flash drive (press the Delete key again, or F2, or something else - no need!).
Many people don’t even want to bother creating a bootable flash drive with any software, because... They are afraid that they still won’t be able to configure the computer to boot from it. I tried to describe this entire process of booting from a flash drive in as much detail as possible. If you have mastered this text, I hope it has become at least a little clearer and now all that remains is to practice.
===============================================================================================================
So, I created a bootable USB flash drive with a password reset program on another computer. I insert this flash drive into my computer and turn it on.
Immediately I press the key many, many times Delete on keyboard. After a few seconds I get into Bios.
Using the arrows on the keyboard, I go to the section Boot(although in my Bios you can work with the mouse - in older versions of Bios this will not work).
Here my first device now is HDD
(ACHI PO: WDC WD50...): 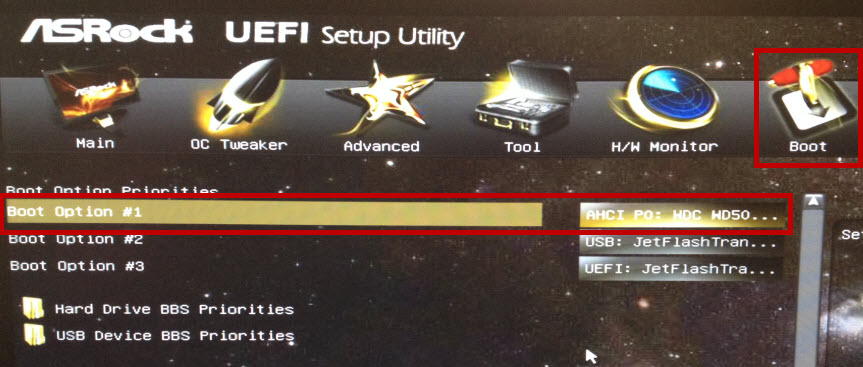 I select this line using the arrow on the keyboard and press the key Enter. A list of devices from which you can boot opens. In my case, this is a hard drive and my flash drive (it is listed here twice). We raise to the first place in the list - flash drive(if there is a choice: USB or UEFI, then choose UEFI). We do this using the arrows on the keyboard or keys +/-
, or F5/F6:
I select this line using the arrow on the keyboard and press the key Enter. A list of devices from which you can boot opens. In my case, this is a hard drive and my flash drive (it is listed here twice). We raise to the first place in the list - flash drive(if there is a choice: USB or UEFI, then choose UEFI). We do this using the arrows on the keyboard or keys +/-
, or F5/F6:
Now the flash drive is in first place in the list of boot devices: 
Now we exit here, saving the changes. To do this, move the arrow on the keyboard to the last section Exit. Select the line Save Changes and Exit- press the key Enter:
Then select Yes: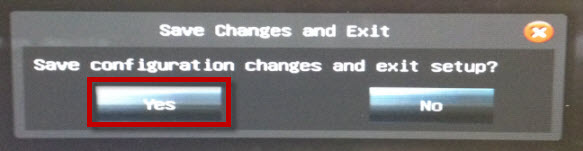
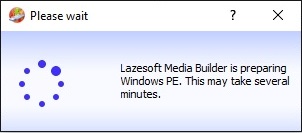
After a while, a menu opens in which, using the key Enter we select an item Lazesoft Live CD:
Wait while it downloads: 
In the next window, check that the item is selected Reset Windows Password(“Reset Windows Password”) and press the button Next:
A window will pop up with a message about non-commercial use of the program - click Yes:
Click again Next:
In the next window highlight the username, whose password will be reset and click Next:
Click on the button RESET/UNLOCK:
The password has been successfully reset - click OK. Then Finish:
We go to “ Start” and press Reboot Computer("To restart a computer"): 
Click OK:
After the computer restarts, we can login to windows without password!

Let's describe the problem
- computer, laptop with Windows XP, Vista, 7, 8
- the built-in user Administrator is disabled or the password is also forgotten
- all users on the screen Windows login under a password and you don't know a single one
- user with forgotten password - a regular local account, not Windows LiveID (with mail)
If any of the above do not match, the recovery process may be different.
Problem solving process
What is necessary:
- ability to use torrent networks
- be able to burn an ISO image to disk/USB
- the disc itself (CD-R, CD-RW, DVD-R, DVD+R, DVD-RW...) or any blank USB flash drive of any capacity
- changing the computer boot order
The method and programs indicated below are supplied “as is” - AS IS, they are not responsible for POSSIBLE damage and inoperability. The author has used this method on several computers and so far there have been no problems.
1. Download BootPass
BootPass - boot disk (Windows 7PE x86).
The disk contains full-featured programs for resetting and editing Windows passwords, programs for removing ransomware banners
Like most bootable disks, they are downloaded in ISO format.
Because a disk image in ISO format is already a standard and can be written by any program, even standard ones using Windows 8.
Download BootPass from a torrent network (for example, http://rutracker.org/forum/viewtopic.php?t=4487280).
You can download not all files, but only the necessary ones - the BootPass.iso file itself.
The rest are optional:
- Iso-Burner.exe is a very small program (646KB) for burning an ISO image to disk.
- Rufus.exe or WiNTBootic.exe to burn ISO image to USB
- text files- for information and instructions
2. Burn BootPass.iso to disk
Now we burn the downloaded BootPass.iso image to optical CD-R disc W or USB.
There are many recording options, we will show only 3:
2.1 Using standard Windows 8 tools
In Windows 8 this is very easy to do. Right-click to call context menu and select "Burn disc image".

Don't forget to insert a blank disc.
2.2 ISO-Burner
If you downloaded this program as part of a torrent, then when you launch it, the Active@ ISO Burner window will appear. There are only 2 fields - specify the path to the ISO image, select a CD-RW or DVD-RW recording device. Click "Burn ISO".

2.3 used to UltraISO
Because it can record both just files and ISO images on optical discs and on USB, HDD, and can create itself boot disks, save in ISO format. In general, an advanced program.
You can download it from torrents, from the official website.
P.S. UltraISO is a shareware product, you need to buy it later if you like it. By the way, you can check whether a recorded disc will open in Explorer or not.
3. Change the computer boot order
If your boot order is already set to CD-ROM (DVD-ROM) first, or you know how, feel free to skip this step.
There are 2 ways to change the boot order of your computer:
3.1 BIOS
The BIOS of any computer has options for selecting the sequence for booting the system. If these options are not automatically displayed when you turn on the computer, press the F2 or Del buttons - they may differ depending on the model and build of your BIOS.
In the BIOS you need to go to the BOOT section and in Boot Sequence select CD/DVD as the first boot device.

Save the settings and exit (SAVE AND EXIT)
3.2 without BIOS
Majority modern computers have the ability to assign a boot order without entering the BIOS. To do this, use the quick boot menu, which is called up by pressing a special key immediately after turning on the computer (for example, F10, F12 or even F8 - depending on the motherboard model).

Usually when loading BIOS It prompts you on the screen which key you need to press.
P.S. The disc must be inserted into the drive.
4. Boot the BootPass Disk
The recorded disc has been inserted, boot from CD/DVD is set, the drive is working properly, and then this window will appear.

We have a variety of programs to choose from that reset Windows passwords.
Password Reset v3.0 is enough for us. If it doesn't work, you can try others.

- Select the user with the forgotten password and click OK. The program asks if you are sure of your desires, the answer is YES! (OK)
- Next it will ask whether to repeat (OK) or reboot (Reboot) the computer?
- We repeat how many users need to clear passwords and reboot the computer.
- Confirm reboot @Yes
- Remove the disk from the drive and click OK
5. Check
As soon as Windows boots, it will ask which user to select. Windows will not ask you for a password.

If all is well, don't forget to set a new password for your user.
P.S. In your password, use capital letters, numbers, and even better, special characters - *-+-=/?...
P.P.S. You can use phrases (rarely used) written on the English keyboard as a password. For example, "Saint Bagheera1002" -> "Cdznfz
6. What to do if
failed to reset Windows password
Go to step 4 and try another program.
Windows stopped loading
Remove all drives and USB. In the BIOS, set to boot from the HDD/SATA/SSD hard drive. As a last resort, run Windows recovery or call a wizard.
Hello! I decided to write another short note today and tell you about how to create a disk (flash drive) to reset a password in Windows 7. This article will be a continuation of the article about ““. It’s just that after I wrote this article, a reader of my blog wrote to me that I still need to talk about how you can make a password reset disk. And I try to listen to my readers :).
What is this disk for? Just in case you forget your password. And with its help, you can reset your password and log in to the system without any problems. So, if you decide to install protection, then it would be a good idea to create such a password reset disk and hide it in a safe place, such as a safe :).
Creating such a disk in Windows 7 is not a problem, but the link to launch the manager for creating this disk says. But as it turned out, in the process of creating this very disk, you can create a flash drive to reset the password. And what floppy disks are like now, well, you understand :).
Therefore, we will create a flash drive. Most likely you should have an old 1-2 GB flash drive. But you can also use a working flash drive, your files will not be affected, just make sure there is some free space on it. Literally a few kilobytes.
A few nuances:
- A password reset disk (flash drive) is created for each account.
- If you have created several flash drives to reset your password, the last created flash drive will work.
- If you changed the password in your account, then you do not need to create a new reset disk; the old one will work.
How to create a USB flash drive to reset a password in Windows 7?
Open Start and click on your account photo.
Insert the flash drive into the computer, then select on the right.
A window will open in which we click “Next”.
Select the flash drive we need and click “Next”.
Enter the password for our account and click “Next”.
The process of creating a flash drive will begin, wait a little and click “Next”, and then “Finish”.
That's all, our flash drive for resetting your account password is ready. I went to the flash drive to see what had changed there. I saw only one new file in the root of the flash drive userkey.psw. Apparently he is responsible for resetting the password.
How to reset login password in Windows 7?
Let me explain in words:
- When you need to enter a password when logging in, but you don’t know it, try logging in without entering a password. A button should appear "Reset the password". Click on it
- Then insert the USB flash drive that we created to reset the password and click “Next”
- In a new window, if you want to set a new password, enter it twice and a hint. And if you no longer want to use a password when logging into Windows 7, then leave all fields blank and click “Next”. The password will be reset.
It seems like everyone is friends. Good luck and take care of your flash drive!


