Hi all! I have long wanted to write an article about BIOS firmware, but initially I wanted to write it for a computer, but I still don’t have the old one at hand so that I could show how to update the old BIOS using commands. Therefore, I decided to demonstrate updating the BIOS on a laptop. Moreover, according to these instructions, you can update absolutely any model!
First, you need to find the BIOS file. I'll show you how to update the BIOS to Asus laptop, but again I repeat, this can be done with another company.
We go to the official website of the manufacturer. For example, we write Asus in Yandex and see the official website, go to:

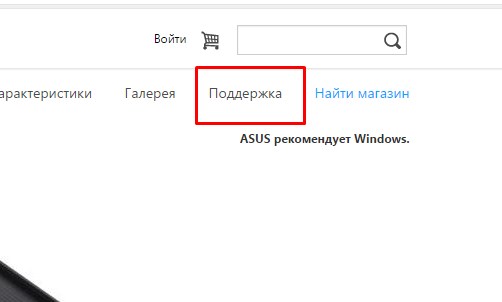
Let's go to service - support.

Now, you need to find out the model of your laptop. It is written either on the front of the laptop.
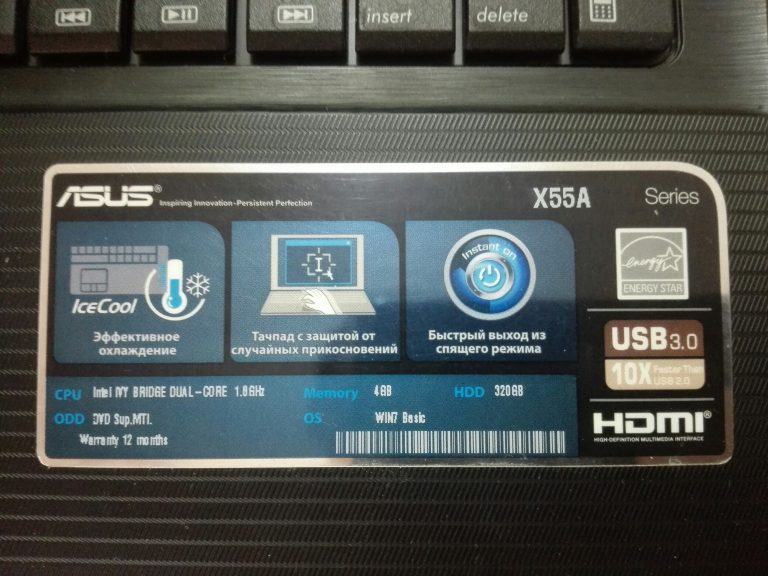
Or on the back cover:

Or else, it can be hidden under the battery and for this you need to remove it.

To search for drivers and BIOS on the site there are two options: search by model and selection by category. We will search by model in the search. Enter the model and click search.
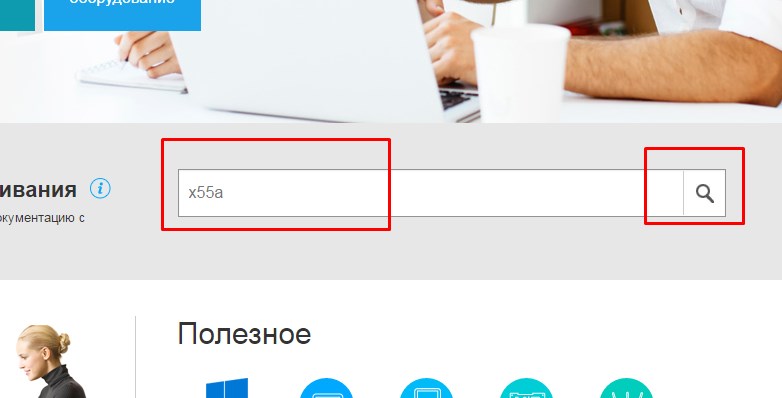
If you entered the correct model, the site will give it to you. Let's move along it.

If you can’t find the model on the website, then go to google.ru and write the laptop model and support.

We choose support or if the site is in English support.

Select your operating system.

Open the bios tab and download latest version.

Now we need to download the utility.
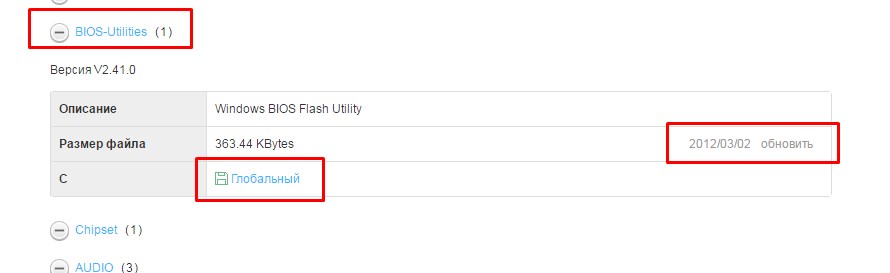
We also select the latest version and download.
If you do not see an item with a utility, select another one Windows version from the list, because for example, if there is a utility in Windows 8, then sometimes developers are too lazy to put it in Windows 8.1. But if you don't find it, don't be upset, because... in the second method I will show you how to update the BIOS directly in it.
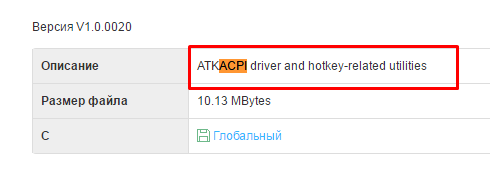
If, when installing the BIOS utility, a message appears: sorry this program only support Asus notebook, then you need to download and install the driver in the same section ATKACPI. You can get it in the utilities section.
After this, the utility should be installed.

You can update bios in two ways:
- From BIOS
- Using the utility
1. Updating the BIOS using the utility
Let's launch the utility. She will give this message, but don’t be afraid, if you do everything correctly, then nothing bad will happen. Click OK.

Select BIOS. It is advisable to place the file with the firmware in the root of the disk.

The program will also issue a warning that the battery must be charged, otherwise if the laptop turns off during the firmware, then you will either have to throw out the motherboard or look for a programmer.

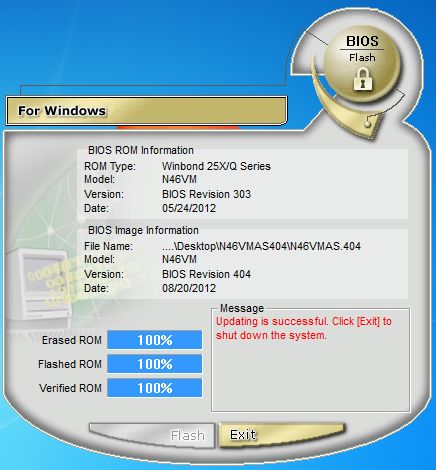
After starting the program, information about the current and new BIOS will appear.
My BIOS is already up to date. This is why the following inscription appears:

In this case, you don't need to do anything. But if there is no such sign, then the utility will write that the BIOS is correct and you only need to press the Flash button.

First the BIOS will be erased.


And finally, checking for correctness.
And if the verification is successful, the firmware process will be completed.
All is ready. Now reboot your laptop.
2. Firmware update using the BIOS itself
Each BIOS has a utility for flashing its firmware. And if there is no BIOS utility for your laptop, then you can update it within the laptop itself. To do this, go to the BIOS. Usually this is F2 or F10.
Let's go to the Advanced tab, but you may have this utility in another place. I also call it Start Easy Flash, and yours may be called Asus EZ Flash 2, ASRock Install Flash, Q-Flash Utility, in principle, everything related to the words bios, update, flash.

When you find it, press enter.
By the way, I forgot to say. It is advisable if you write the BIOS file to a flash drive, because... Not all bios understand NFTS. The file in the archive also needs to be extracted and placed in the root of the flash drive.

On the left, select your media, and on the right, select the firmware and press enter.
The utility will ask, are you sure you want to update the BIOS? Click yes.

The BIOS will be updated. After completion, the laptop will either reboot itself or will need to be rebooted.
![]()
That's all! Knowing these instructions, you can update any laptop!
Some recommendations for the proper use of a laptop may state that it is necessary to update the BIOS from time to time. This article will discuss why this procedure may be required, as well as how it is carried out.
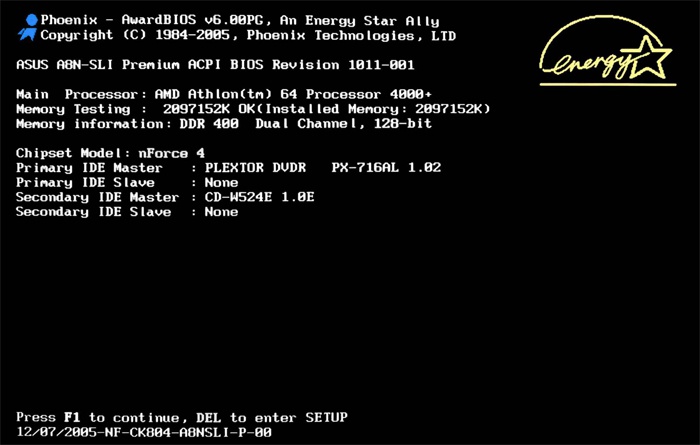
Every time you turn on the computer, before it is loaded operating system, we see GUI BIOS, which is a basic input/output system aimed at checking the functionality of the equipment, preparing and launching the operating system.
Why should you update your BIOS?
In fact, it is more correct to say why you should not update the BIOS:
- Any inattentive step or malfunction of the laptop can lead to complete failure of the laptop, which may require contacting a service center;
- Sometimes laptops can lose power warranty service after performing the BIOS update procedure. If your laptop is still under warranty, you should check this moment;
- If the laptop is working normally, then updating the BIOS for the average user will not bring any significant improvements.
If the laptop is working normally, then you shouldn’t even think about updating the BIOS. The update should be performed if the laptop has errors that were fixed with new versions, there is a need to install new hardware that is not supported by older BIOS versions, etc.
What to pay special attention to when updating the BIOS
- The latest BIOS versions can be downloaded exclusively from the official website of your laptop manufacturer and only for your model;
- During the update process, the laptop must be connected to the network and not be disconnected until the procedure is completed;
- During the BIOS update process, it is better to leave the laptop alone without touching any keys or buttons;
- Before performing the update, you should disconnect all connected equipment except the mouse. You should not connect anything during the process.
Stages of updating BIOS on a laptop
Stage 1: Find out the current BIOS version
First of all, to download the updated BIOS version, you will need to know which version is currently installed on your laptop. Finding out is quite simple: to do this, open the window "Run" keyboard shortcut Win+R and in the window that appears, run the following command:
A window will appear on the screen "System Information", in which you will need to find the line “BIOS Version”. The information contained in it is what interests us.

Now knowing current version, you will need to download the latest BIOS distribution for your laptop model. To do this, go to the manufacturer's website and search for your device model. In the section with drivers and utilities you can find and download the latest version software.
Stage 3: Installing the latest BIOS version
As soon as installation file will be downloaded, you can start installing updates. We recommend installing the update late in the evening, when you definitely won’t need to work with your laptop. To do this, close as many programs as possible on your computer, and then simply run the previously downloaded installation file.
Before starting, the system will warn you that during the process you cannot run programs, put the computer to sleep or hibernate, touch the power button, connect USB devices, and so on. Click OK to continue.
Next, the laptop will automatically reboot, after which it will proceed to the update process. Please note that during this process the laptop may become quite hot and make noise. In this case, there is no need to worry.
Actually, the process of updating the BIOS is very simple, and no difficulties should arise for any user. It is very important to leave the laptop alone during the procedure, and then the update will be completed successfully.
BIOS on a laptop is a set of programs that are stored in the computer’s memory. They perform several functions at once: testing computer components at the moment of switching on, loading the OS into memory. Don't change BIOS settings, if you have little idea what this or that parameter is responsible for. Today we will talk about whether it is worth updating the Bios on Lenovo laptop and how to do it.
When should you update your BIOS?
If the computer is operating in normal mode, then the BIOS does not need to be touched. Installing the update may not bring benefits, but additional problems. Previously, the process of updating this component was quite difficult (you had to use DOS), but now there are special utilities, allowing you to update the software version in just a few clicks.
You should update the BIOS on a laptop only if:
- Various errors occur during computer operation, and they are corrected in the new BIOS version (the list of changes is usually available on the manufacturer’s official website).
- There was a need to install new equipment. From time to time, some manufacturers add support for new components (processor, etc.) to the BIOS.
The BIOS update process may be different for each computer, so there is no single instruction. If you install the wrong update, serious system problems may occur. That is why you need to very carefully read the information on the manufacturer’s website and install new version only if it is really necessary.
How to update Bios?
In order to update the BIOS version, you need to go to the manufacturer's website. Further steps may differ, since the official resources of popular brands have different structures. Let's look at the process of updating drivers for Bios using Lenovo as an example.
- Go to support.lenovo.com, select “Laptops” from the list. Specify the series and model.
- On new page Scroll to the list of components, then select BIOS drivers from the drop-down list.
- Read the list of drivers, their release date, find out the version and changes (for this you need to open Readme).
- On your computer, use a search in the Start menu to launch the msinfo program. In the window that opens, find the BIOS version and compare it with the version on the website.
- If an old build is installed on your laptop, then you need to download the file from the official Lenovo website, run it and follow the instructions.
- After the installation is complete, the computer will reboot, then you need to go to the BIOS menu, load the default setting, save, exit and restart the system again.
The update process is quite simple, but it’s still worth noting once again that you only need to update the BIOS if you need to add support for new devices or fix errors.
Leisure and work of a modern person can no longer be imagined without the use of a laptop. The need for repairs, changes in usual settings and updates often arises among users. Sometimes it is important to know how to update the BIOS on a laptop. BIOS is a key information input/output system that ensures loading operating systems (Windows, Linux, IOS). Flashing the BIOS on a laptop removes errors or enables additional support for memory and processors.
Why do you need a BIOS update?
Before you update the BIOS on your laptop, you need to find out why the program update is required. There are several factors:
- No support for new software. The old settings do not suit the new tools, so the laptop needs to change the BIOS version.
- When you install new programs, the old software “conflicts” with them.
- Installed settings damaged by viruses.
- Information on how to flash the BIOS will be needed when the flash drive is not read as a boot device.
- The laptop freezes when you turn on some programs or their options and reboots itself.
- Motherboard does not detect hard drive large capacity, video adapter (video card) with a high number of gigabytes.
- The stability of the laptop is unstable, the computer works poorly due to minor software errors.
- The manufacturer has installed only a basic set of functions, which is not enough for the computer’s operating power.
How to enter BIOS on a laptop
The BIOS launches immediately when you turn on the laptop. If the laptop model is older, then letters will be visible in the upper left corner of the display in the first seconds of loading. Next, the operating system starts and control of the laptop passes to it. To find out how to open the BIOS on a laptop, first of all, find out the manufacturer and model of the laptop. To enter the BIOS of the most popular brands of laptops, you need to turn on or restart the laptop, then follow to:
- HP (HP) – hold down the F2 or Escape key when starting the laptop.
- ASUS (Asus) – press the F2 key when turning on.
- ACER (Acer) - press the combination F2-Del or Ctrl-Alt-Esc. You can also turn it on using the F1 key.
- DELL (Dell) – Del, F2, rarely Ctrl-Alt-Enter.
- SAMSUNG (Samsung) – at the moment of turning on, press the Pause button. A text will appear, in it you need to find “Press F2 to enter setup”. The F2 key is replaced by F1, F8, F10, F11, F12, Esc by selecting the desired one. To exit, press Enter. The next stage is searching for markings motherboard laptop. To find it out, follow “Start – Hardware – Device Manager – Configurations”. We copy the markings onto a sheet of paper and enter them in the browser. If desired, add additional “to enter setup/BIOS”.
- LENOVO (Lenovo) - classic Del or F2 keys.
- TOSHIBA (Toshiba) - it is worth considering the device model. For older Toshiba models, with the laptop turned off, hold down the F2 button, then, while holding the key, turn on the laptop. New devices are turned on according to the instructions “Login to Windows - Start - Preinstalled programs - Bios System” (sometimes the name is different, but it always contains the word BIOS).
Ways to update the motherboard BIOS on a laptop
Installation software update BIOS differs in ways depending on the type of motherboard. Before installing the firmware, you need to study the instructions for the board to take into account all the details specified by the manufacturer. Upgrade options:
- Branded Windows utility. The advantageous way to avoid errors if it is not clear how to reinstall the BIOS. Modern motherboards (Asus, MSI, Gygabyte) preferably accept this utility.
- Built-in BIOS settings. The option is considered suitable when the user is confident that the installed BIOS version is absolutely correct. The program for updating the BIOS (Q-Flash, EZ Flash, Utility) is written to a flash drive and launched.
- DOS mode. This firmware option is for experienced users; for beginners it will be difficult to update the I/O program using this method. The mode requires creating a bootable flash drive with DOS and a new version of the BIOS program. Serious errors may appear during installation.
On Windows operating system
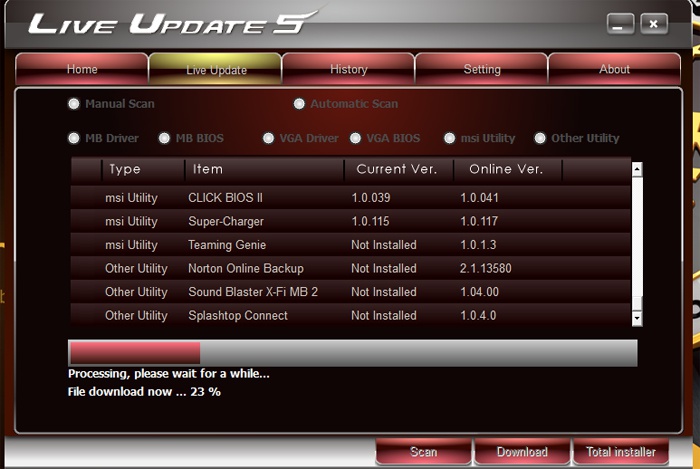
How to update the BIOS on an Asus or any other motherboard? Using the proprietary MSI Live Update 5 utility, the algorithm of actions is as follows:
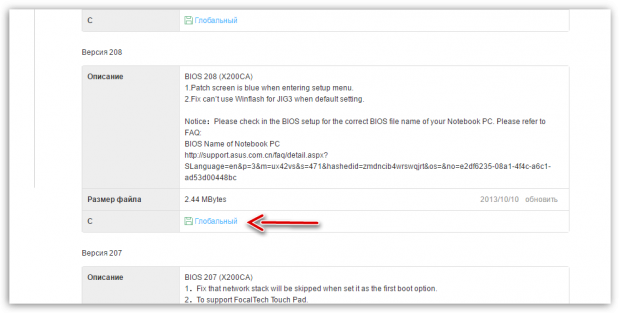
- Let's launch MSI program Live Update 5, click the Scan icon.
- In the report list, look for the MB BIOS line. If there is one, then there is an update for your laptop. Click the arrow to download.
- Run the file you saved earlier and click Next.
- Select In Windows Mode to begin installation.
- Active programs close, click Next.
- Waiting for the program update to complete.
- Press any key appears - press any button to restart the computer.
- The update reinstallation process is complete.
Update directly in BIOS
The Windows upgrade option is not very safe for the motherboard. The main danger is the computer freezing or unexpected shutdown. If the installation process is interrupted, the motherboard will be damaged. Updating directly into the BIOS will help you configure the necessary programs and avoid problematic installations using built-in tools. Step-by-step instruction:
- Download the update file to your computer.
- Write it to a clean, well-functioning flash drive - you need one that has been previously scanned for viruses.
- We do not remove the flash drive from the port and reboot the computer. The next step is to enter the BIOS.
- In the Tools section, open the update utility (we find out the name from the instructions for the motherboard).
- In the main menu, go to the left column (Tab key). This is where all the media that is detected by the device is located.
- Select the flash drive, click update and press the Enter button.
- Sometimes the motherboard triggers an error check, the end of which you need to wait for without canceling anything.

In DOS mode using a USB flash drive
- Download the program from the official website. No installation required, so let's launch right away.
- In the Device section, select a flash drive to load the file onto. Important: save everything you need from the flash drive first, otherwise when loading, all files from the flash drive will be deleted and recovery will not be possible.
- In the File System line we indicate FAT32.
- Opposite Create a bootable disk using, set the version of MS-DOS or FreeDOS. How to find out the BIOS version for your laptop? There is no fundamental difference between these options, choose any one.
- Click Start: the process will complete within a few seconds.

Video instructions: how to reflash the BIOS
BIOS is the basic software that performs the initial startup of the system. The firmware included in it begins to work as soon as you press the power button of the system unit. Firmware instantly analyzes the state of the main components of the computer, checking the functionality of the controllers and setting operating parameters. Simply put, the BIOS tests the system, promptly signaling any errors detected using a beep.
The BIOS update program allows the user to install a modern version of the basic software, speeding up the system and improving its performance. But the procedure for making changes to installed version BIOS has serious risks that should definitely be taken into account.
Why update the BIOS - if you don’t know the answer, it is strongly recommended that you abandon this idea. Making changes to your computer at this level can result in critical errors, which are much more difficult to fix than reinstalling Windows. Unsuccessful attempt updates may mean that you have to go to the store for a new board.
There are very few cases when you cannot do without installing a new version. The reasons can literally be counted on one hand:
- The need to install new parts that are compatible with the motherboard, but refuse to work;
- The BIOS version initially installed was unfinished, with errors and system malfunctions.
In other cases, installing a new BIOS version is an unjustified risk. Even if you clearly know why you need to update the BIOS, still think carefully about whether it is really necessary.
Preparing for the update
When deciding how to update your motherboard BIOS, first of all find out which version you have installed. This is easy to do: you can look at the board itself, or in the documentation that came with it in the box.
You can also find out the version in the system itself by pressing the Win+R combination, which brings up the “Run” menu, and typing the command “msinfo32”. In the “System Information” window that appears, you will also find the entry you need.

You know the version. Now, if you want to update your motherboard's BIOS asus boards or any other company, you need to visit the official website of this manufacturer. Here in the “Downloads” section you need to look to see if there are updates for your version.
Note: If you purchased your computer from major manufacturer, which completely completes system unit all boards, then go to the website of this company and search by device model to see if there are any new BIOS versions.
Update procedure
Methods for updating the BIOS vary depending on the manufacturer and model of the motherboard. There are three main methods:
Using a proprietary utility in Windows environment
This is common practice for laptops and most motherboards. For example, it is better to update the BIOS of an Asus motherboard using the USB BIOS Flashback utility, which can be downloaded from the website of the Taiwanese corporation. To update the gigabyte BIOS, also go to the company's official portal. If knowledge in English you are at a high level, then here you can also read detailed instructions on installation updated version and download all the necessary software.

Let's say that a point like disabling hyperthreading is indicated here. This whole procedure is strongly recommended by experts to solve the issue of how to update the BIOS gigabyte boards, is described in every detail and will allow you to carry out the update correctly and safely.
Using DOS mode
When choosing this method, you need to create a bootable USB flash drive (previously this role was played by a floppy disk), with DOS, a new BIOS file and an additional utility for correct installation. About creation bootable flash drive Let's talk in more detail below.
Internal BIOS update
Many modern motherboards support this feature. This method is especially good if, for example, you want to update the BIOS of an Asus motherboard, and you are absolutely sure that you downloaded the correct version.
When choosing this method, all you have to do is configure loading of removable media from the BIOS, open the desired program and perform the update.
Creating a DOS boot disk
This is the most used method, despite the fact that the DOS operating system itself is not particularly widespread among users. Most instructions that describe how to update the BIOS on a laptop call this method the optimal and safest.
Software used
First option- take advantage of the opportunities provided Rufus program. This utility, due to its functionality, can be useful in many cases, and creating a bootable USB flash drive is one of them.
The program does not require installation and is ready to use immediately after downloading. The recording process is simplified as much as possible. The user selects his flash drive in the “Device” field, specifies FAT32 as the file system, selects the DOS version he wants to install, and clicks “Start”. In a few seconds you will have a ready-made bootable removable disk in your hands.

Second way– using the WinToFlash application. It can also be downloaded for free, and the recording process here is no more complicated than in Rufus.

The most popular way on the Runet is to work with USB program Storage Tool. It is downloaded in an archive that contains the OS itself and a program for preparing a flash drive.
The operating principle is as follows:
- You launch the program;
- Specify that formatting should be done in file system FAT32;
- Check the box next to the item that starts creating a flash drive with MS-DOS;
- Specify the path to the files of this operating system.
The bootable USB flash drive is ready. Now you can write programs onto it that allow you to update the BIOS on an Asus motherboard or any other company.
Overclocking a video card
New games are coming out, and the demands on hardware power are increasing. But if random access memory or the processor still has some margin of safety, then video adapters are the first to stop coping with the loads that three-dimensional games offer them.
When the power is sorely lacking, the image begins to deteriorate: inaccuracies appear, black squares appear, the picture freezes, etc. It is not always possible to buy a new video adapter; all that remains is to overclock it. One important aspect of this procedure is updating the BIOS.
But searching for a solution on how to update the BIOS Nvidia video cards This is a last resort when there are no other options left.
First, try setting up the current BIOS version and downloading the latest drivers. If all else fails, then proceed to the practical part of solving the question of how to update the BIOS of an Nvidia video card.
Firmware

If the firmware fails
If after updating the computer monitor does not display an image or the computer refuses to turn on at all, then your attempt to overclock the video adapter clearly failed.
There may be two reasons:
- the wrong BIOS version is installed;
- An error was made during the update process.
To correct the situation and enjoy the work of the old, not overclocked card, you will need a second video adapter. This is a mandatory condition, so it is better to worry about its availability in advance.
Insert the second video adapter into the free slot, and then connect the monitor to it. Reboot the disk from which you recorded the new BIOS version. As you remember, we saved the old version on it. Now it needs to be restored.
In MS-DOS mode, type the command “nvflash -a”. With its help you will find out the code of the adapter that requires new firmware. Enter the command “nvflash -i x -f oldbios.bin”. X in this case is the same adapter code, and “oldbios.bin” is the file old version BIOS.
Turn off the computer, disconnect the second video card and try to boot with the first video adapter. If everything went correctly, it will become a worker again.
Conclusion
Now you know how to update the BIOS on your laptop or computer. Finally - two useful advice, by listening to which you will minimize risks.
First– after a successful BIOS update, it is recommended to reset it to default settings, and then configure it to suit your needs.