I want to enable a recovery tool called " Windows 8 File History", analogous to "Previous versions of files" in Windows 7, but the error "No suitable disks were found and you need to connect an external USB hard drive" appears. I don’t have an external hard drive, but there is an additional partition on my main hard drive under the letter (D:), it has 500 GB of free space! Is it really not possible to adapt it to Windows 8 file history? Nikita.
Windows 8 File History
Hello, friends! Remember when Windows 7 had a cool recovery tool called ""? Many readers are interested in how to use this tool in Windows 8! Yes, this tool can be used, but unlike Windows 7, where it worked silently and unnoticed without requiring any action from the user, all that was needed was to enable system restore, in Windows 8 we will need to enable and configure it.
What is "Previous File Versions" in Windows 7 and "File History" in Windows 8?
One of my friends works at the Ministry of Emergency Situations; he recently bought a computer with two hard drives, the first SSD with the Windows 8 operating system and the second a simple SATA III hard drive with a capacity of 1 TB. When I came to visit him, I installed several necessary programs for him and turned on “File History”. A month later, my friend calls and makes a request: For two weeks he printed a work report in Microsoft Word, all the time saving it on the desktop and then accidentally deleted it past the trash can. Is there any way to restore it? There was desperation in my friend’s voice, and in fact, work on some file for a week, and then it will disappear. But the situation was corrected and “Windows 8 File History” helped us with this. Interesting? Read on!
If you are using Windows 7 and have System Restore enabled for the C: drive, then all the files on that drive have previous versions. That is, the operating system monitors each file and stores its version in memory every day. For example, you were printing a coursework for a week and today you accidentally deleted this text file and emptied the trash, this did not mean at all that your document had disappeared without a trace, you could easily restore yesterday’s version of this file. All the details are in our article “Previous versions of files in Windows 7. File history in Windows 8 it works exactly the same, but many users, having installed Windows 8, did not find the familiar “Previous versions of files” option in the folder properties and panicked, but in vain, there is a similar tool in Windows 8, but it has a different name “File History” and is turned off by default. Let's enable this tool and see how it works.
Right-click in the left corner and select Control Panel,

Then System and Security

And finally File History.

Clicking on the Enable button fails, then select Change disk,

Immediately after this you may get an error: No suitable discs found. Connect an external drive or try using a different drive if yours is not listed.
Note: File History in Windows 8 will only work if you have an external USB hard drive connected to your computer or if you have two different hard drives on your system. A natural question for users who have one large hard drive divided into two or more partitions is: “Why can’t you connect File History if you have the first drive C: and it contains Windows 8, and the second drive D: and there is practically nothing on it. Answer: You can use the additional D: partition for “File History”; you just need to provide shared network access to the D: drive. How to do this is explained later in the article.
If we connect a portable USB hard drive or a second hard drive to our computer, and then launch the “File History” tool, a window will appear in which the program will prompt us to select a drive for file history. Select the disk (in my case G:) and click OK.

If you have several available disks in the previous window, then you can change the disk for “File History” at any time


By default, every hour, files located on the desktop and in the contents of libraries will be copied to drive G:.

If you have an important folder with the necessary documents that you constantly work on and you absolutely cannot lose this folder, move it to your desktop or one of the libraries. The contents of this folder will be constantly copied to drive G: If the files in this folder change, for example, text documents are constantly updated with information, then different versions of the files you are working on will be created on the backup drive G:.
For example, I created a folder on the desktop called “New Folder”, after a while its backup copy, with all its contents, will be created on the G: drive in the folder
G:\FileHistory\Username\Computer name\Data\C\Users\Username

Folder exclusions.
I would exclude folders in which you store “heavy files”: movies, music, since their backup copies will very quickly fill the space of your portable USB drive. Folder exceptions.


For example, select the Video folder. Folder selection


How often will our files be copied to this folder??
Firstly, you can start archiving whenever you need it. Click Launch. To find out more precise settings for “File History”, click the “Advanced options” button

Save copies of files– you can set any value, from 10 minutes to 12 hours or once a day, and the files will be copied after the period of time you need.
Offline cache size– if the drive selected for storing copies is not connected to the computer, backup files will be saved on the main hard drive. When you connect a USB drive with archive copies, the contents of the cache will immediately be written to it. The default volume is 5%.
Store saved versions- 1 month. Exactly one month later, archived copies of files created a month ago will be deleted. If you want to keep your file backups forever, then select the Always option, but be aware that you may soon run out of space on your drive for file backups.

How to recover files from history
The easiest way to restore a file from a backup is to simply open the disk containing the file history (in our case G:) and copy the desired file from there. On drive G: backup files of drive C: are stored in the folder
G:\FileHistory\Username\Computer name\Data\C\Users\Username
You can easily find the file you need. The date the backup was created is added to the backup copies of your files, for example, when I wrote this article, Windows 8 file history created backup copies of a text document every two hours - Article on the site (2013_09_02 07_16_48 UTC).docx and an hour later another copy Article on website (2013_09_02 07_17_48 UTC).docx. If you need a backup copy of a file created two hours ago, select it. If you need a copy from a week ago, please copy it.

There is another way to restore your files from a backup. In the File History window, select Recover personal files.

For example, you want to replace all the files on your desktop from a backup, right-click on the folder and select Restore.

Replace files in destination folder– the existing original file will be replaced with its backup copy.
Skip this file- the existing original file will not be replaced by the backup copy.
Prompt for each file– you will have to compare the versions of the files and choose the one that remains,

For example, we want to replace an existing file with its backup copy, check the first file and click Continue and your text file in the “New Folder” folder will be replaced with the backup copy.

If you check both files, then both versions of the file will be saved - the current and backup.

How to enable “File History” if you have only one hard drive in your computer
Even if this hard drive is divided into several partitions, when you try to enable “File History”, you will receive the error “No suitable drives were found and you need to connect an external USB hard drive.” The fact is that your Windows 8 is insured that if your hard drive fails, then all partitions on the hard drive will be inaccessible, and accordingly, all your backups will go into oblivion along with other files. If you are not afraid of this situation, let's try to place “Windows 8 File History” on another partition of your hard drive; for this, you will need to give this partition Shared access.
Open the Computer window, select, for example, drive E: and open it to Shared, right-click on it and select Properties

And Access, then Advanced Setup,

Put a tick on Share this folder, and click on Permissions 

Apply, OK.

Apply.

In the computer window, click on the Network icon,

Then double-click with the left mouse on the name of our computer

And we see that our entire E: drive is shared.

Now open “File History” and select Change Disk.

Add a network location.

Double-click on the name of our computer with the left mouse,

Select drive E: and click Select folder.

We have already talked about the Disk Management console ( Disk Management), discussing creating, attaching, connecting, detaching, and deleting VHD files. In addition, in Disk Management ( Disk Management) you can convert disks from basic to dynamic (and, less commonly, from dynamic to basic) and change the partition style. There is also a command line tool called Diskpart for disk management in Windows 7.
The Fdisk tool, used for disk management in previous versions of Windows, is not supported in Windows 7.
To perform most tasks in Disk Management ( Disk Management) administrator or archive operator credentials are required. This console is used to manage hard disks or volumes and the partitions they contain. You can initialize disks, create volumes, and format them with FAT, FAT32, or NTFS file systems. To resolve disk-related problems, use Disk Management ( Disk Management) does not require restarting the computer. Most configuration changes take effect immediately.
Working with sections
Disk Management Console ( Disk Management) allows you to expand and shrink sections directly from the interface. In the Disk Management console ( Disk Management) right-click the volume and select a command to create a basic, spanned, or striped volume. If you add more than four partitions to a basic disk, you will be prompted to convert the disk to a dynamic disk or a GPT disk.
Disk Management Console ( Disk Management) allows you to change disk types and partition styles. Some operations are irreversible (until the drive is formatted), so you should carefully consider the drive type and partition style that best suits your needs. The following section style conversions are allowed:
- The MBR partition is converted to GPT if there are no volumes on the disk.
- The MBR partition is converted to dynamic, but after this the disk may no longer be bootable.
- The GPT partition is converted to MBR if there are no volumes on the disk.
- The GPT partition is converted to dynamic, but after this the disk may no longer be bootable.
- A dynamic disk is converted to MBR if there are no volumes on the disk.
- A dynamic disk is converted to GPT if there are no volumes on the disk.
When you add a disk to your computer, the disk does not initialize. The disk must be initialized before use. If you open Disk Management ( Disk Management) after adding a disk, the Initialize Disks wizard will open ( Initialize Disk). You can also right-click a disk that has failed to initialize and select Initialize Disk ( Initialize Disk). The disk will be initialized as basic and you can select the partition style to use - MBR or GPT.
One of the advantages of a GPT disk is that it can accommodate more than four partitions. The GPT style is also required for disks larger than 2 TB. The partition style of a basic disk can be changed from MBR to GPT if the disk does not have partitions or volumes. If you decide to do this, save the data to an MBR disk so you can restore it after conversion. Before converting using the Disk Management console ( Disk Management) delete all volumes or partitions of the disk. Click each volume in turn and select Delete Volume ( Delete Volume). When there are no volumes or partitions left on the disk, right-click it and select Convert to GPT Disk ( Convert To GPT Disk).
GPT style cannot be used on removable media.
To change the MBR partition style to GPT in the Diskpart command line utility, follow these steps:
- Back up the data stored on the primary MBR disk that you are going to convert.
- Open an elevated command prompt and enter the diskpart command.
- At the DISKPART> command prompt, enter the list volume command. Write down all volume numbers.
- For each volume in the list, run the select volume command<номер_ тома> .
- For each volume in the list, run the delete volume command.
- At the command line DISKPART>
- At the command line DISKPART><номер_ диска> .
- At the DISKPART> command line, run the convert gpt command.
You can convert a GPT disk to an MBR disk using Disk Management ( Disk Management), and in the Diskpart utility. The procedure is almost identical to converting an MBR disk to a GPT disk. You must archive all data and then delete all volumes. In Disk Management ( Disk Management) right-click the drive and select Convert to MBR Disk ( Convert To MBR Disk). In the Diskpart utility, the final command is convert mbr .
Using basic and dynamic disks
Basic disks use original MS-DOS-style MBR partition tables that store information about the partitions of the main and logical disks. In dynamic disks, there is a private area of the disk that contains the Logical Disk Manager (LDM) database. The LDM database contains information about volume types, offsets, group memberships, and drive letters for each volume. The LDM database is replicated, so each dynamic disk contains configuration information about all other dynamic disks. This makes dynamic disks more reliable and recoverable than primary disks.
However, once you move a dynamic disk to another computer, you may not be able to move it back to the original computer. If you need to move dynamic disks, move them all at the same time. Before you import them, make sure they are all online and working on the destination computer. If the destination computer already has a dynamic disk, the destination computer's disk group name and primary disk group ID will be preserved. If the destination computer does not already have dynamic disks, after the move the disk group name will be identical to the name on the source computer, and you will not be able to move the disks back to the source computer later. Microsoft recommends that before you convert a basic disk to a dynamic disk, you decide whether you need the dynamic disk capabilities of spanned, striped, mirrored, and RAID-5 volumes. If you don't intend to use these features, you may be better off with basic disks. You can change a basic disk to a dynamic one in Disk Management ( Disk Management), and in the Diskpart utility.
To convert a basic disk to a dynamic disk in Disk Management ( Disk Management), right-click the drive you want to convert, and select Convert to Dynamic Disk ( Convert To Dynamic Disk). To convert a basic disk to dynamic in the Diskpart utility, select the disk you want to convert, then at the DISKPART> command prompt, run the convert dynamic command. After a dynamic disk is converted, it does not contain any underlying volumes. After you convert a basic disk to a dynamic disk, all existing partitions or logical disks on the basic disk become simple volumes on the dynamic disk. Dynamic volumes cannot be converted back to partitions after converting a basic disk to dynamic. You will have to delete all dynamic volumes and then convert the dynamic disk to a basic disk. To save your data, first backup it or move it to another volume.
Converting a dynamic disk back to a basic disk is a much less common procedure. It may require preparation operations (for example, backing up or deleting all dynamic volumes). You can convert a dynamic disk back to a basic one using Disk Management ( Disk Management), and in the Diskpart command line utility. To perform the conversion in Disk Management ( Disk Management) First back up all the volumes on the drive you are converting. Then in the Disk Management console ( Disk Management) right-click each volume in turn and select Delete Volume ( Delete Volume). Once all volumes have been removed, right-click the disk and select Convert to Basic Disk ( Convert To Basic Disk). For a dynamic disk to be converted back to a basic disk, it must have no volumes or data on it.
To turn a dynamic disk back to a basic disk in the Diskpart utility, follow these steps:
- Back up all volumes on the drive you want to convert.
- Open an elevated command prompt and run the diskpart command.
- At the DISKPART> command prompt, run the list disk command. Make a note of the disk number you want to convert.
- At the DISKPART> command prompt, run select disk<номер_ диска> .
- At the DISKPART> command prompt, run detail disk<номер_ диска> .
- For each volume on the disk, at the DISKPART> command line, run select volume=<номер_тома>. Then run the delete volume command.
- At the DISKPART> command prompt, run select disk<номер_ диска> .
- At the DISKPART> command line, run the convert basic command.
Moving drives to another computer
Before you move the drives to another computer, use Disk Management ( Disk Management) check that the volumes on the disks are in the Healthy state ( Healthy). If this is not the case, fix the volumes before moving the disks. The status of the volume is displayed in the Status column ( Status) Disk Management console ( Disk Management). The next step is to remove the drives that need to be transferred. Open Device Manager ( Device Manager). In the list of devices, double-click Disk Devices ( Disk Drives). Right-click each disk to be removed in turn and select Delete ( Uninstall). In the Device Removal Confirmation dialog box ( Confirm Device Removal) click Ok. If the disk you are moving is dynamic, right-click it in Disk Management ( Disk Management) and select the Eject Disk command ( Remove Disk). After removing dynamic disks, or if you are migrating basic disks, physically disconnect the disk drives. If these are external drives, disconnect them from the computer. If built-in, turn off the computer and disconnect the drives.
If you are working with an external drive, connect it to the target computer. When working with a built-in disc, first make sure the computer is turned off, and then install the disc. Turn on the target computer and follow the instructions in the Found New Hardware dialog box ( Found New Hardware).
On the target computer, open the Disk Management console ( Disk Management) and in the Action menu ( Action) select the command Recheck disks ( Rescan Disks). Right-click any drive labeled Foreign ( Foreign), select the Import foreign disks command ( Import Foreign Disks) and follow the on-screen instructions.
When you move base volumes to another computer, they are assigned the nearest unused letter. Dynamic volumes retain the drive letter assigned to them on the previous computer. If the dynamic volume did not have a drive letter on the previous computer, moving it to another computer does not assign a drive letter. If the target computer already has a drive letter in use, the next available drive letter is assigned to that drive. If your administrator has disabled the addition of new volumes to the system using the mountvol /n or diskpart automount commands, the volumes will not be mounted and will not receive a drive letter when you move them to another computer. For a volume to work, you must mount it manually and assign it a drive letter in Disk Management ( Disk Management) or using the diskpart and mountvol commands.
When moving spanned, striped, mirrored, or RAID-5 volumes, you must move all disks that are part of the volume at the same time. Otherwise, volumes located on disks will not be able to be brought online, and only the delete operation will be available for them.
You can move multiple drives from different computers to one target computer by installing drives. Open Disk Management ( Disk Management), right-click any of the new drives and select Import Foreign Drives ( Import Foreign Disks). When importing multiple discs from different computers, always import all discs from the same computer at the same time. Before importing, use Disk Management ( Disk Management) displays information about the status of volumes on disks. Review the information carefully and you will find out what can happen to each volume after import.
Reactivate a missing or offline dynamic disk
Status Absent ( Missing) for a dynamic disk is installed when it becomes damaged, loses power, or is disconnected. Status Offline ( Offline) indicates damage, intermittent lack of access, or that a failure occurred while importing a foreign (dynamic) disk. An error icon appears next to a drive that is offline. Conditions Absent ( Missing) and Offline ( Offline) return only dynamic disks. They can be reactivated. To reactivate a dynamic disk in Disk Management ( Disk Management) right-click the drive and select Reactivate Drive ( Reactivate Disk). The same can be done in the Diskpart utility. As in the previous procedures, you need to list the disks and find out the number of the disk you are looking for. Select the disk by number and at the command line DISKPART> run the command online.
You have the option to remove the missing drive. To do this, you first need to delete all volumes on the missing disk in Disk Management ( Disk Management) or in the Diskpart command line utility. Then in Disk Management ( Disk Management) right-click the drive and select Delete ( Remove). In the Diskpart utility, list the disks and find the number you need, select the disk by number and at the DISKPART> command line, run the delete disk command.
Many people have encountered the fact that they lost their data for one reason or another - they accidentally overwrote the desired file, deleted it without the possibility of recovery, and so on. In order to prevent this, Windows XP SP2 introduced the function of creating shadow copies of data - VSS (Volume Shadow Service), which made it possible to save the state of the file system. In Windows 10, it was renamed File History. This service is a very powerful tool that allows you to automatically create backups of your selected directories on external drives.
By default, File History is disabled. To enable it, open the Start menu > Settings > Update and Security > Backup:

Click on the “Add a drive” button and select the external drive on which you want to store your backups. Click the “Save Now” button. From now on, Windows will synchronize the file system with the selected storage every time it is connected to the computer.
You can also configure archiving parameters: select the interval for saving copies, the duration of their storage and the specific directories whose backups you want to save:

By default, files are backed up every hour. The minimum time that can be set is 10 minutes, the maximum is daily. You can also set the duration of storage of copies: from one month until free space is needed (in this case, older backups will be deleted automatically to free up space for new backups).
Now, if you need to restore any file from a backup, go to Control Panel > File History:

In the window that opens, select “Recover personal files”, go to the desired folder and find the file or directory to restore, then click the green button. You will need to specify the path where you want to save the recovered data. You can switch between versions of a specific file using the “Right” and “Left” arrows:

You can also quickly restore a previous version of a file by right-clicking on it and selecting “Restore previous version.” In the list that opens, select the desired copy and restore the file.
In Windows 8 and 8.1, to create backups and restore personal data, there is a “File History” component that allows you to save and synchronize the contents of libraries and the desktop, as well as contacts and favorites to an external drive or network drive. Thanks to this component, you can easily restore not only an accidentally deleted file, but also undo its editing, which is sometimes very important in the case of documents, for example. How to use it is discussed below.
First, you will have to use the classic control panel - this is where the component we need is located: Control Panel\All Control Panel Items\File History. At first startup, the system will be scanned for the presence of suitable external drives, for example USB flash drives (in our case, a 32 GB flash drive). After completing the disk search process, all that remains is to start creating file history by clicking on the “Enable” button (for the first time this may take quite a lot of time); therefore, to stop the component, just clicking the “Disable” button.

The component settings are available via the “Advanced Settings” link; the user can select the frequency of creating backups, the amount of disk space that can be used on the disk, and the retention period for different versions of files. In addition, in the same window, you can open the component's operation log and enable or disable drive recommendation to other homegroup members.

Naturally, the user can exclude from the default set of folders those for which he does not want to keep a file history, for example, libraries with music and films, the contents of which rarely change or are physically located on external drives. This can be done using the “Exclude folders” link in the main window of the component.

And of course, you can always change the disk used to store file versions; this tool is launched by clicking on the “Change disk” link.

You can use the “File History” capabilities directly from Explorer - you just need to select a file and click on the “Journal” button on the toolbar. The window that opens will show all versions of the selected file; for unsupported file types, you will be prompted to open the appropriate program. For the selected version, just click on the big round green button and agree to replace the original file.


To view the entire collection of files saved in history, it is suggested to use the “Personal Files Recovery” link in the main window of the component (or directly from the initial screen at the request “File Recovery using File History”).

Windows 8/8.1 differs from Windows 7 not only in the addition of a Metro interface and the removed Aero Glass desktop design effect, but also in some functional features, including the very useful standard “File History” utility. What this program is for and how to use it will be discussed in this article.
1. Why do we need “File History”?
“File History” is a software tool introduced into Windows 8/8.1 to prevent the loss of user data in the event of a hard drive failure or accidental deletion of data by the user. When this standard utility is activated, the system will create backup copies of all files stored in user profile folders - these are libraries with videos, images, music, documents, these are contacts and favorites folders, these are also files located on the desktop. Backup copies of files will be created on another medium other than the hard drive on which the system is installed - it could be another external or built-in hard drive, it could be a flash drive, it could also be a network folder.
This way, if a user deletes a file, empties the Recycle Bin, and then regrets it, they can restore the deleted file from a backup. Moreover, the File History mechanism allows you to restore files from a selection of several saved versions. This point will certainly be of interest to users who work with the creation and editing of documents and images. So, even after saving a document, you can return to its previous contents - the state as of some date earlier.
The File History mechanism allows you to create backup copies of documents stored only in the folders specified above. To be able to recover files located in folders that are located in other places on the system or non-system partitions of the disk, these folders must be added to one of the existing libraries.

By default, “File History” is disabled, and in order to take advantage of the capabilities of this utility, you must enable it, first configuring the necessary settings.
2. Launch “File History”
You can find the File History utility in the Windows 8/8.1 Control Panel sections.

And, perhaps, it will be easier for many to do this using a system search. Tap the right side of the screen from top to bottom to make the charm buttons appear. Let's select " Search", enter the initial letters of the key query "File History" into the search field and click on this section that appears in the results.

The File History window will open.

3. Selecting media for backup
In the center you will see the default media installed where the data will be backed up. As a rule, the system automatically detects external devices for these purposes - flash drives or connected hard drives. To change the media for creating backup data, click the link " Disc change».
All external devices that can store backups of your data will appear in the list. Here you can select another external media other than the pre-installed one, or choose to back up the data to a folder on the network.


The “File History” utility does not provide for backing up data on the hard drive where the system is installed; you cannot even set up a non-system disk partition. But Windows 8/8.1 can be tricked by creating a . The system defines it as removable media; you can copy and transfer files to it, just like to a regular disk partition. And it, naturally, will be visible among other removable media in the “File History” list.

After selecting the storage medium for storing backups, click “ OK» to return to the main File History window.
4. Excluding folders from File History
Many people may not want to clutter up the space of removable media, a network folder, or backup copies of all folders that fall under the “File History” mechanism. For example, the system library includes a “Video” folder, which can contain quite hefty video files. The File History settings allow you to exclude some folders from being backed up.

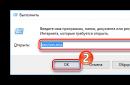
Click the button " Add", select the folder whose data we do not want to back up, and save the changes.

5. Additional reservation options
Returning to the main “File History” window, click the link “ Extra options».

Here everyone can assign their own settings for creating backup copies of files. You can set the frequency of the reservation.

You can change the preset offline cache size.

You can also set your own parameter for the duration of storage of backup file versions.

To free up disk space and clear it of old versions of backup files, click the link “ Clear versions».

After setting all the parameters, press the button “ Save changes».
6. Activation of “File History”
After all the settings have been made, all that remains is to activate the “File History” mechanism. In the main menu of the utility, click the button “ Turn on».

Immediately after this, the backup data of all folders (except for excluded ones, of course) will be written to the media specified in the settings.
7. How to recover deleted files from their backup copies
On the media that is selected for backing up data, a folder will be created " FileHistory" It will contain backup copies of files in the folder tree. Through Windows Explorer or a file manager, we can open the folders of our user profile and find the necessary files.

Backed up files will have the date and time they were saved added to the name so that you can select a file from multiple versions with different states.
Another way to restore files is through the File History interface. Click on the link " Recovering personal files" in the main "File History" window.

Here, in a convenient interface, by scrolling, you can select the date for which the backup copies of files will be presented. We look for the file we need in a particular folder, select it and call up the context menu, and in the menu click one of the suitable options:
- or view the file here, in the built-in viewer;
- or restore the file from the backup copy to its original location, in which case it will replace the file in the current edition;
- or restore the file to some other folder.

Did this article help you?