Windows Defender is a built-in software utility that intended to search for and block malicious software (for example, virus programs, spyware, etc.). The system is protected in real time. In addition, the program can clean up Windows from unnecessary and obsolete files.
So, the built-in program allows you to prevent PC infection in one of two ways. In mode real time it will help stop the spread of the virus by blocking malware before it can be launched. This method is very effective for neutralizing threats while surfing the Internet.
The second method provides scanning system and user files for threats. This type of verification occurs automatically schedule, which is set by the user himself (for example, when the computer is turned on or off, or some time after it is started so that all services have time to boot). You can also run the check yourself at a convenient time for the user by selecting necessary files and folders.
How to disable defender on Windows 10
The user can perform this action in several ways.
Using group policies
Editor group policy Windows is built-in software in the Windows 10 operating system. To disable the antivirus, you must:
- Key combination Windows+R will open the command execution menu. In the line you need to enter the command gpedit.msc and press Enter.
- The following program section opens: Computer Configuration-Administrative Templates-Windows Components- endpoint protection.
It is important to know: in some versions of the operating system, this partition may be called Windows security software.
Making changes to the registry
You can completely disable the antivirus through the registry:
Through the task scheduler
To disable the built-in antivirus through the scheduler, you must:
Standard way - through the settings
The easiest way to deactivate Windows Defender is to disable through the menu settings. For this you need:
How to disable windows defender on Windows 8
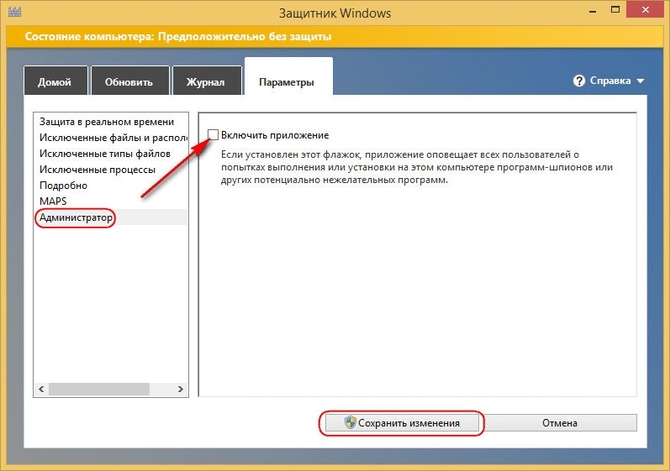
In Windows 8, disable the built-in defender much easier, than in latest version OS. For this you need:

But, after restarting the PC, the antivirus may turn on again and to completely disable it, you will need to run the following actions:
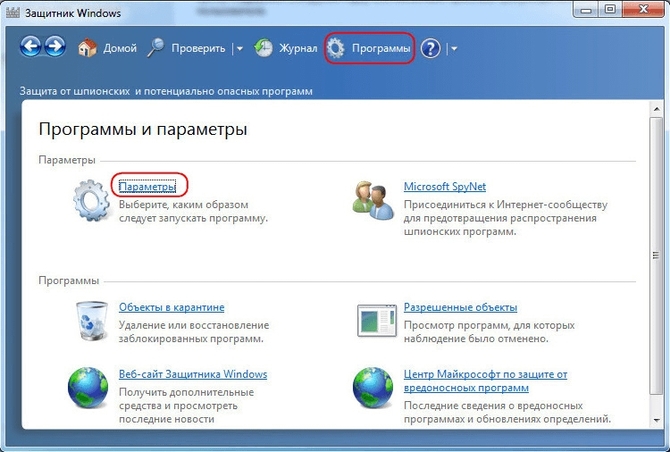
Disable Defender in Windows 7
The procedure for disabling the built-in antivirus in Windows 7 is in many ways similar to the 8th version. operating system:
Defender or antivirus - what to choose
Before the PC user is choice what to choose built-in antivirus or third party software. TO benefits Windows Defender should include:
- Deep integration into the operating system.
- Constant updates.
- Free.
pros third party antivirus:
- Wider range of influence.
- More features (cleaning junk files etc).
- Fresh updates.
So, functionality defender and antivirus are almost equal. Therefore, users need to decide for themselves which option is more acceptable to them.
And for Windows 8. The program is enabled by default and will be automatically disabled when you install a third-party antivirus solution that is recognized by the operating system.
One of the fundamental differences between the Windows 8 and 10 versions of Windows Defender is that in Windows 10, the user cannot turn off Windows Defender using full application settings.
When you open Windows Defender settings, the program's control panel opens in the new Settings app. While you may find an option to toggle real-time protection, the window indicates that this is only a temporary state change.
You can temporarily disable this feature, but if it is disabled for a long time, we will automatically enable it again.
It's unclear why Microsoft decided to rethink the behavior of Windows Defender in this context. Definitely, for many users, the lack of the ability to permanently disable Windows Defender will be annoying.
Of course, you can periodically disable the system antivirus every time after it. automatic start, but there is alternative ways permanently disable Defender.
There are two main ways to disable Windows Defender permanently in Windows 10. Please be aware that one of the methods only works on certain OS versions.
Method 1: Disable Windows Defender using Group Policy
The Group Policy Editor is a feature of Windows 10 Pro and Enterprise. To disable Windows Defender, follow these steps:
- Type gpedit.msc and press Enter.
- Confirm the User Account Control prompt to launch the Group Policy Editor.
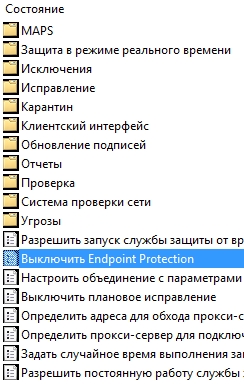
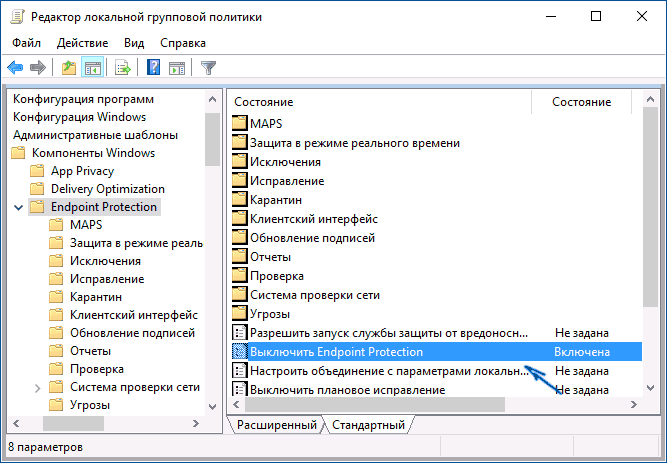
- You will find desired parameter following path Local Computer Policy > Computer Configuration > Administrative Templates > Windows Components > Endpoint Protection.
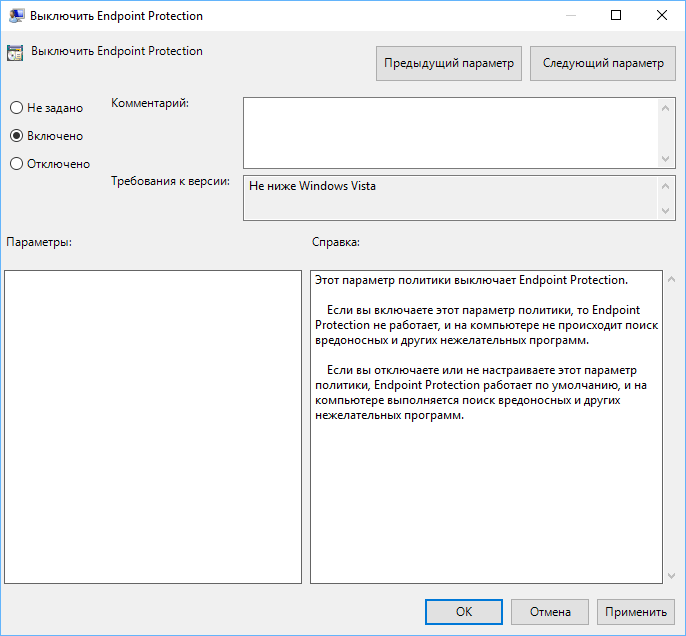
- There you will find the "Turn off Endpoint Protection" policy.
- Double click on the policy.
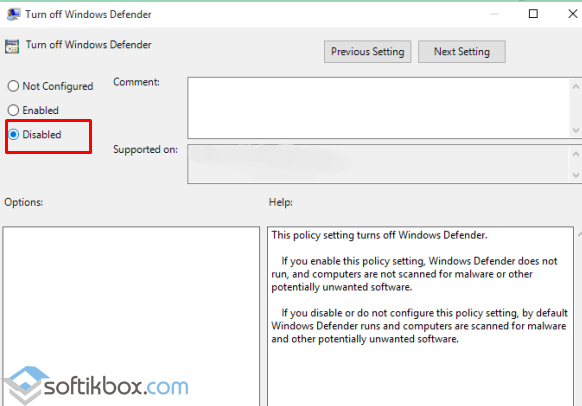
- In the window that opens, set the policy status to “Enabled” and apply the change.
Policy Description:
If you enable this policy setting, Endpoint Protection does not work and the computer is not scanned for malware or other unwanted software.
If you disable or don't configure this policy setting, Endpoint Protection runs by default and scans the computer for malware and other unwanted software.
Windows Defender is instantly disabled after making these changes. Any attempt to start the antivirus results in an error message.
To restore application functionality, set the policy state to Disabled or Not Configured.
Method 2: Disable Windows Defender using the system registry
You can disable system antivirus in the Windows registry. All in all, this setting is identical to the action that the system performs when the corresponding group policy is activated.
- Click Windows icon to open the start menu.
- Type regedit.exe and press Enter.
- Confirm the UAC prompt to launch the Registry Editor.
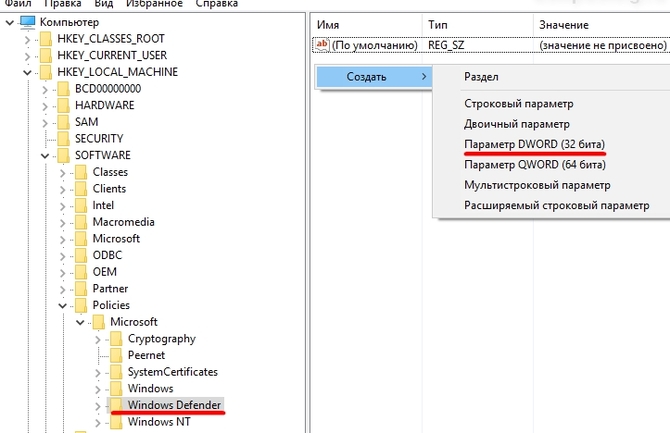
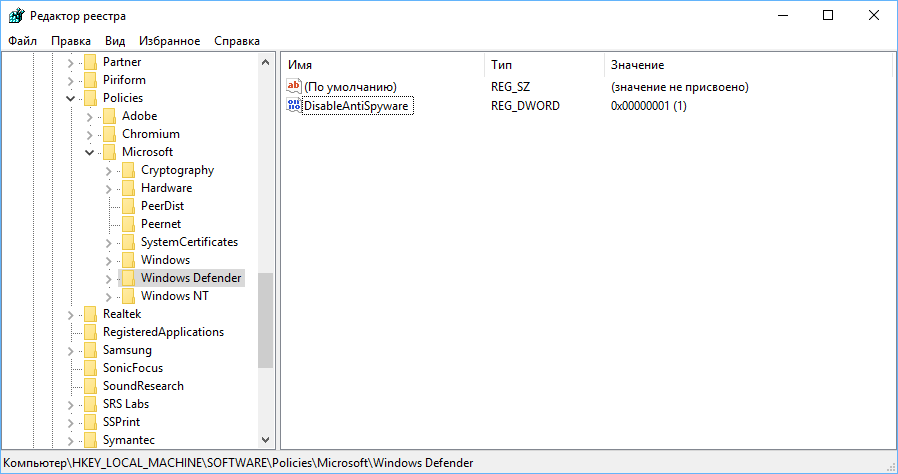
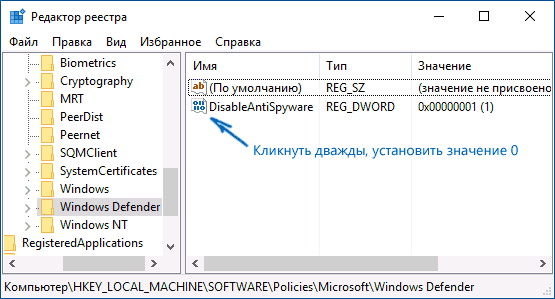
- Navigate to the registry key along the path: HKEY_LOCAL_MACHINE\SOFTWARE\Policies\Microsoft\ Windows Defender
- If you see a property named “DisableAntiSpyware”, change its value to “1” to disable Windows Defender.
- If the property does not exist, right-click on the Windows Defender icon in the editor's left navigation pane, select New > DWORD (32-bit) Value, name it "DisableAntiSpyware" and set the value to "1".
To restore Windows Defender later, change the value to “0” or simply remove the setting.
Method 3: Disable Windows Defender in Task Scheduler
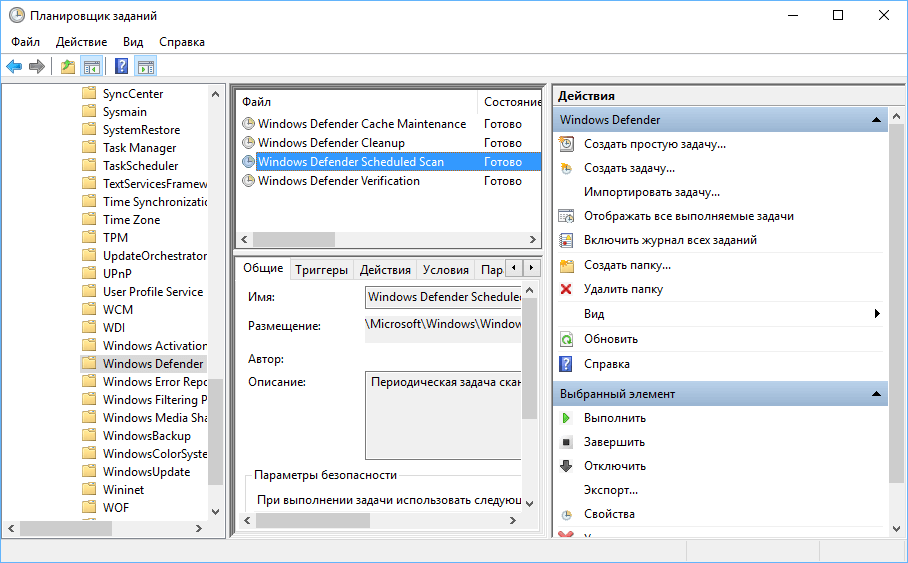
- Click the Windows icon to open the Start menu.
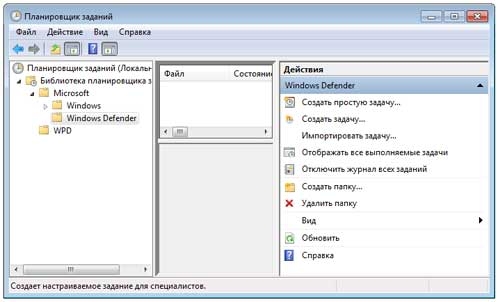
- Type taskschd.msc and press Enter to open Task Scheduler.
- Confirm the UAC prompt to start the Task Scheduler.
- Go to Task Scheduler Library > Microsoft > Windows > Windows Defender.
- There you will find the "Windows Defender Scheduled Scan" task, double click on it.
- Switch to the Conditions tab when opening the window.
- Select the option “Run a task when the computer is idle” and set a high value to prevent the scanner from running on the system.
Method 4: NoDefender Application
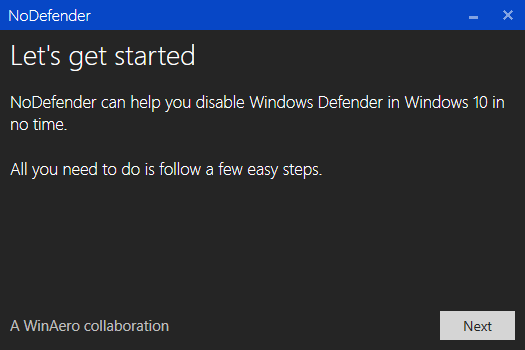
If none of listed ways did not help you, you can try using a free third-party program designed to disable Windows Defender in Windows 10.
Use this method only as a last resort, because it is not clear what exactly the program is doing in the background.
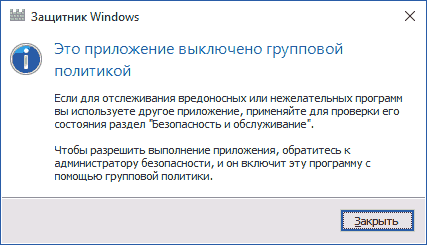
The question of how to turn on Windows Defender 10 is probably asked more often than the question of turning it off. As a rule, the situation looks like this: when you try to start Windows Defender, you see a message that this application is turned off group policy, in turn, use Windows settings 10 to enable it also does not help - in the settings window, the switches are inactive and the explanation: "".
In this guide, there are ways to enable Windows Defender 10 again using the Local Group Policy Editor or the Registry Editor, as well as Additional Information which might be helpful.
The reason for the popularity of the question is usually that the user did not turn off the defender himself (see), but used, for example, some program to turn off "surveillance" in the OS, which, along the way, turned off the built-in windows antivirus Defender. For example, this is what the program does by default.
Enable Windows 10 Defender using the Local Group Policy Editor
This method to enable Windows Defender is only suitable for owners of Windows 10 Professional and above, since only they have a local group policy editor (if you have Home or Single language, skip to the next method).
After these procedures with the local group policy editor, launch Windows Defender 10 (the fastest way is through the search in the taskbar).
You will see that it is not running, but the "This application has been disabled by Group Policy" error should no longer appear. Just click the "Launch" button. Immediately after launch, you may also be prompted to enable the SmartScreen filter (in case it was disabled third party program along with Windows Defender).
How to enable Windows 10 Defender in Registry Editor
The same steps can be done in the editor Windows Registry 10 (in fact, the local group policy editor changes just the values in the registry).
Steps to Enable Defender Windows Data way will look like this:
Then type in Windows search in the Windows Defender taskbar, open it and click the Run button to launch the built-in antivirus.
Additional Information
If the above does not help, or if there are any additional errors when enabling Windows 10 defender, try the following things.
Well, if these options do not work - write comments, we'll try to figure it out.
Many people would like to remove Windows Defender from the list of programs on the computer, or at least disable it. There is some need for this, as the application clogs RAM and hard disk space. Moreover, this program and is not needed at all for most users, since almost everyone has anti-virus programs installed that cope with the system protection function much better, while Windows Defender (the English name for the Defender) can consider even harmless programs to be malicious.
The program, in principle, is not bad, but it is still very crude and does not cope well with the tasks assigned to it. It is better to secure the system using other methods.
What is Windows Defender
Conventionally, we can say that Windows Defender is simple antivirus program. It provides elementary protection against dangerous programs, out of the box, so to speak. For the first time, this application appeared in Windows Vista, continued to exist in the seven and acquired new features in the eight and ten.
On latest operating systems Defender has already begun to resemble a more or less normal antivirus. But in the first two operating systems, this is still a very crude program. Its only advantage is that it's free.. And given that it may conflict with antivirus programs, should not be taken seriously, even if it is a component of the system.
Defender or antivirus
Of course, in this unequal battle, antivirus software definitely wins. Because even the simplest, hastily made applications will defeat those viruses that the defender is not even aware of. This is not a full-fledged antivirus, but just a component of the system. And it doesn't protect against more malware, and security from hacker attacks is out of the question.
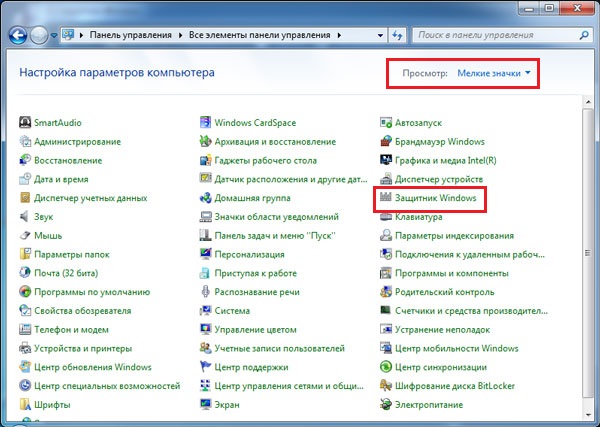
How to turn off Windows 7 defender: method one
Exists two ways, with which you can disable this application. The first is to get into the program settings, and the second is to disable the service that services its work. Let's start with the first one. To do this, you need to perform the following actions:
How to disable Windows 7 defender: method two
The second method of disabling this component involves terminating the service responsible for its operation. This method is no more difficult than the previous one.
How to remove from the system
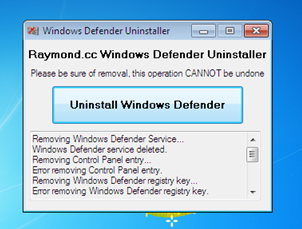
Unfortunately, the removal of the protector standard means is not possible, as this software belongs to the system components. But with the help third party applications it is possible to do so. Another thing is, is it worth it? If the answer is yes, then you need to install the program. You can download it at: https://www.raymond.cc/blog/download/did/1984/
Its interface is very simple. After launch this application you just need to press one button, and this component will no longer be in the system.
Before installing this application and using it, it is advisable to create backup or download important files to another drive, as removing Windows components can lead to unpredictable consequences.
It is also advisable to disable the Defender itself using the above methods. Windows application Defender Uninstaller is compatible with both 32-bit and 64-bit architectures. With the help of such simple actions you can remove this component of the system.
conclusions
The easiest way is to just disable this application and not think about whether to remove it from the system. In principle, this component takes up little space on the hard drive, and therefore its presence will not cause much harm. If you want to free up RAM and remove the load from the processor, then simply turning it off is enough.
In case of a critical memory shortage hard drive you can easily remove Defender and the information in this article will help you.
Related videos
Windows 10 Defender or otherwise Windows Defender is a free built-in antivirus from Microsoft, which works on a PC until the user installs software from third-party developers. You can enable Windows 10 Defender in several ways. And although it does not guarantee 100% system protection, it works stably and does not affect the performance of Windows 10.
How to enable the built-in Windows Defender on a new operating system?
Complete operating room protection Windows systems 10 is carried out using three components, namely:
- Built-in antivirus Defender;
- Firewall or firewall;
- Smart Screen Filter.
Basic protection in Windows 10 is provided by Defender. It starts automatically after system installation. To check if it works or enable protection, you should follow these steps:
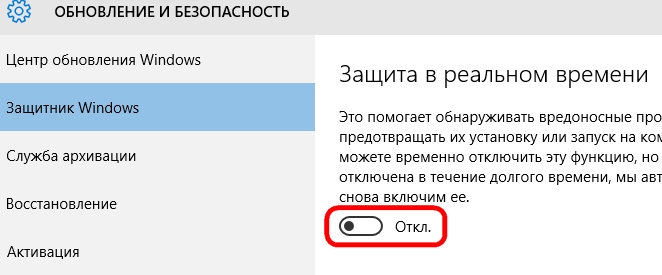
- Click "Start", "Settings" and select "Update and Security".
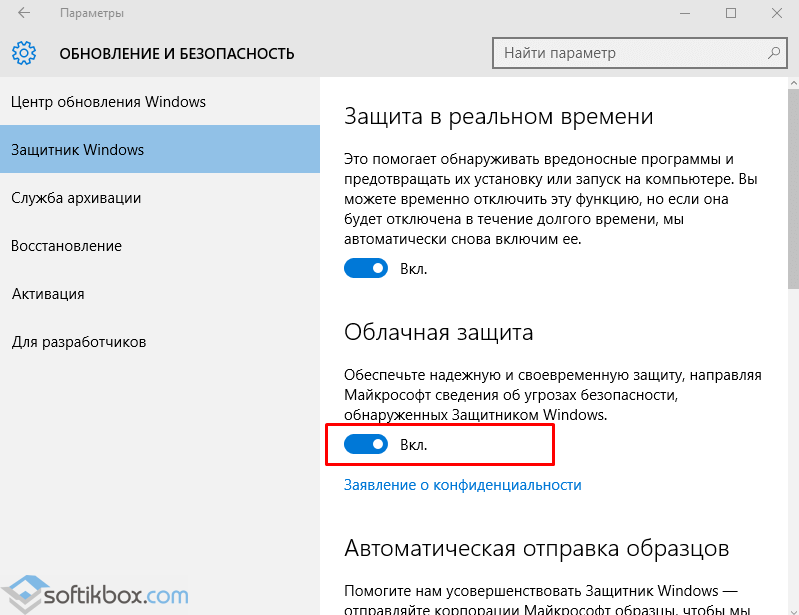
- Select "Windows Defender" from the left menu. In the "Real-time protection" section, the slider should be set to the "Enabled" position. If not, then we expose. So we turn on the Defender.

- If you enable Cloud Protection, all information about viruses and PC attacks will be sent to the Microsoft server. If you don't want to share data, you can disable this option. The "Send samples" function is similar to the previous one.
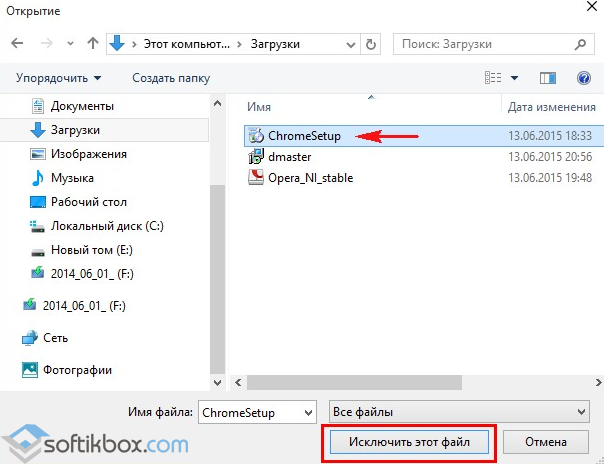
- If you go down, you can see the item "Exceptions". If you click on the "Add exceptions" button, the settings window will open.
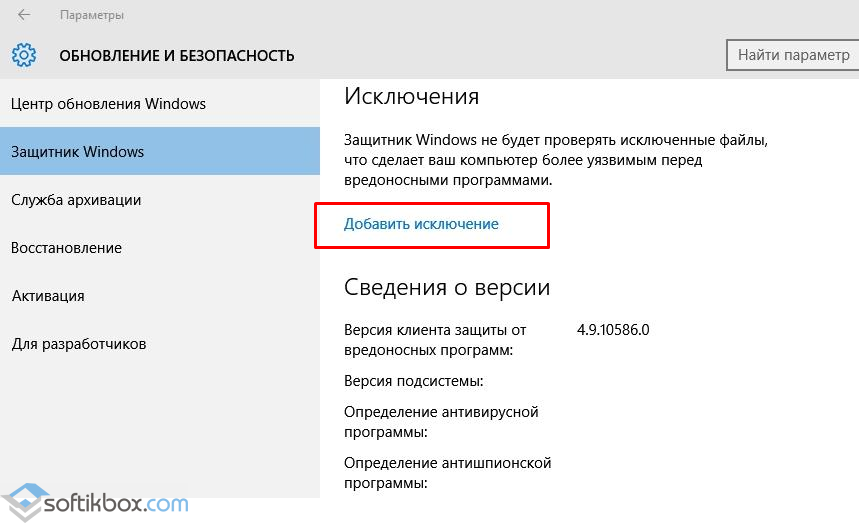
- You can add both a file and a folder of some program.

- By clicking on the appropriate button, Explorer will open. Specify the file to exclude.
- At the very bottom of the Windows Defender section, there is a Use Windows Defender button. If you open this link, a window will appear Windows programs Defender. It has three tabs: Home, Refresh and History. If you click on the "Options" button, you can turn the service on or off.


You can also enable Windows Defender Antivirus through the registry. To do this, do the following:
- Press "Win + R" and enter "regedit".

- We go along the branch "HKEY_LOCAL_MACHINE", "SOFTWARE", "Policies", "Microsoft", "Windows Defender". Right-click on the last partition and select New, DWORD Value. Name this parameter "DisableAntiSpyware". Set the value to "0" to enable the protector, or "1" to disable it.

IMPORTANT! Before making changes to the registry, it is worth creating a backup in case an error occurs.
You can also manually enable the standard Windows 10 antivirus through the Local Group Policy Editor. To do this, do the following:
- Press "Win + R" and enter "msc".

- The Group Policy Management Editor opens. We go to the address: “Computer Configuration”, “Administrative Templates”, “Windows Components” and find “Windows Defender” in the list. It may also be referred to as "Windows Defender". Double-click to start the "Turn off Windows Defender" service (disable Defender).
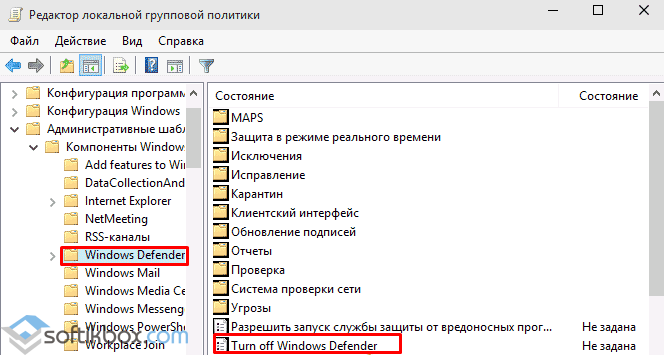
- The settings window will open. We put a mark "Disabled" to activate the antivirus.
- Close the Group Policy Management Editor and restart your PC.
How to disable Windows 10 Defender manually?
If you are planning to install third party antivirus and don't know how to turn off Windows 10 defender, you should use the following recommendations.
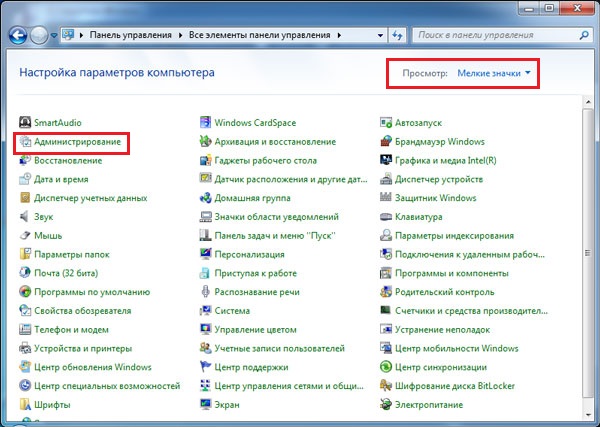
- Click "Start", select "Control Panel", "System and Security", "Administrative Tools".
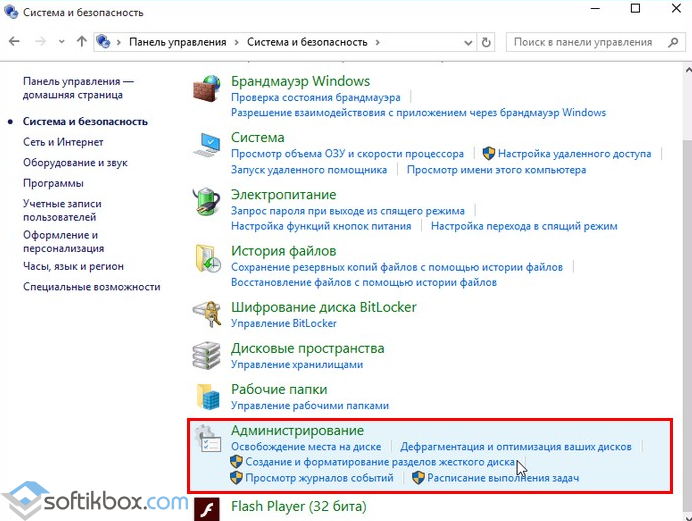
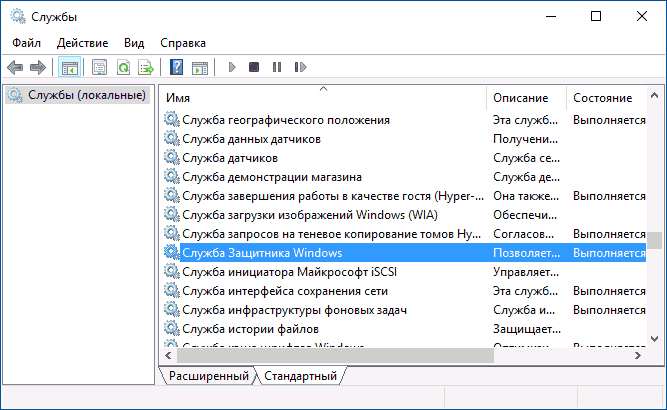
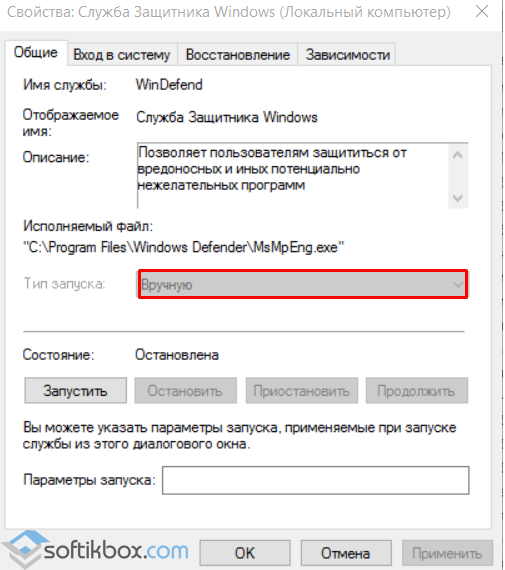
- Select services. If you want to manually disable the antivirus, we find in the list "Windows Defender Service" or "Windows Defender" and double-click to open the settings.
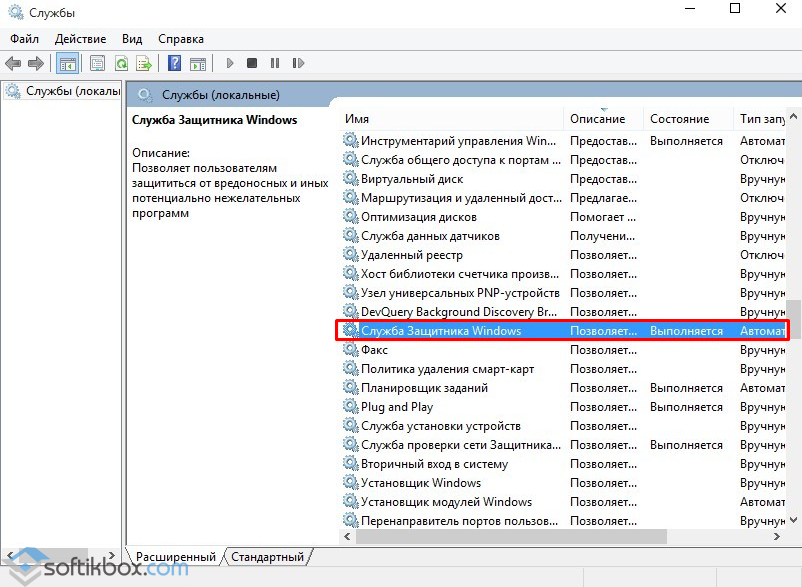
- Set the startup type to "Disabled".
You can also disable the defender through the registry. In it, go to the branch "HKEY_LOCAL_MACHINE", "SOFTWARE", "Policies", "Microsoft", "Windows Defender" and set the value "1" in the "DisableAntiSpyware" parameter.
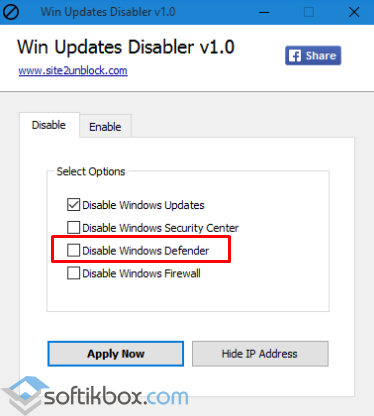
Also, if you are interested in the question of how to disable Windows 10 defender programmatically, it is worth noting that only some utilities are suitable for this purpose. Among them, it is worth highlighting "Win Updates Disabler" and.
The principle of their work is as follows: download and install programs. Run them on your PC. In "Win Updates Disabler" check "Disable Windows Defender".
In "Destroy Windows 10 Spying" check "Disable Windows Defender".

Also, using this program, you can uninstall some applications.
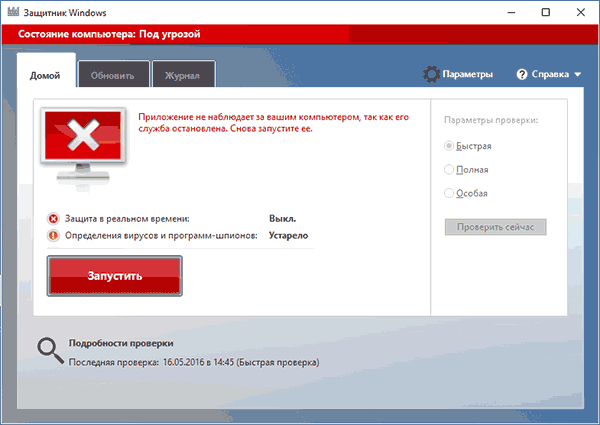
If, when you try to disable the built-in antivirus, you receive a notification that "The application is disabled and does not monitor your computer", then you installed a third-party defender or disabled Defender yourself. You can also go to the "Control Panel" and select "Action Center". Turn on Defender in Action Center Options.

After completing these steps, you should restart your computer or laptop.
Also, how to turn off Windows Defender 10, see the video:


