Greetings dear reader. Today, almost everyone has computers, laptops, tablets and other gadgets. No matter how powerful your computer is, over time it begins to slow down and the further it goes, the worse. There are many reasons for this, but most can be easily fixed. Also, the method described below will be for Windows, since the majority ordinary users sitting on it.
To begin with, there are two ways to clean your computer so that it does not slow down. First- Call a technician to your home. This is the case if you are not confident in your abilities or simply do not have time for this. Second- clean it yourself, namely: clean it from dust, from temporary files, from information garbage, from viruses and malware, to optimize the system. This option requires time and perseverance, but you don’t need to be a programmer or hacker, all the steps are simple. But if not sure in your own strengths and actions - call a technician or take the computer to him.
Why does my computer slow down?
It's certainly nice to work on a new PC or laptop, or if you've just installed a new operating system. Everything works quickly and does not slow down. But over time, “brakes” begin, something doesn’t open right away, gets stuck, sometimes freezes or even turns off, in due to overheating. There may be several reasons for this. The most basic:
- Body contamination: dust, crumbs, wool...
- The processor heats up
- Not necessary programs RAM is clogged,
- Information “junk” has accumulated on the hard drive,
- Viruses and various malware slow down Windows.
What to do about it? There is nothing wrong, anyone, even a novice PC or laptop user, can repeat what is described below. First, you need to clean your computer from dust. You will need a damp cloth, a dry cloth, cotton swabs, a vacuum cleaner, and if possible, a can of compressed air, but this is not necessary. And if you have a laptop, then most likely there will be no dust there, which means there is no need to physically clean it. The fact is that the laptop case is designed in such a way that dust practically does not accumulate there, and sometimes it is difficult to disassemble it, so it’s better not even worth it.
For subsequent cleaning we will use various cleaning programs operating system, so be prepared to install them.
Cleaning your computer from dust.
With the accumulation of dust on the internal parts of the computer, these same elements begin to heat up. Therefore, they cannot perform their functions 100%, which leads to the computer slowing down in games, programs, and so on. This is especially true with top-end computer assemblies; they are very powerful and often heat up. Moreover, if processors, whether central or graphic, often heat up, this leads to irreversible processes inside the cores, which is a serious breakdown and cannot be repaired.
I also note that the cause of strong heating may be drying out of the thermal paste. If you are new to this business, then in order to clean your computer well, you should also replace it. In general, thermal paste is, simply put, a paste that helps remove heat from the processor to the heatsink. And she is located between them accordingly.
And this is how to clean your computer from dust:

Ideally, of course, it is better to remove all elements and wipe them separately. But you need to do this if you are sure that you will put everything back together.
Removing unnecessary programs.
The next step is to clean your computer - find and remove programs and applications that you do not need. The fact is that over time, a bunch of programs are installed, they hang in startup and some are simply not used, and clutter up the RAM.
First, let's remove the programs:

You can use third-party programs. I recommend using them to clean your computer, since such programs usually remove the program 100%, cleaning out folders and the registry. For example, I use . 
It is free, and weighs little, I have never noticed any problems with it. It’s easy to use, install it, and just as I described above, remove the programs. Afterwards it scans the computer, and if it finds folders and files, click delete them.
Cleaning startup.
Sometimes you have to leave some necessary programs, but they hang in startup, that is, they turn on with the computer. We may not use them, but they work and fill up the RAM. Then we need:

There are also third-party programs for cleaning startup, but they have more functionality and are for those who understand what needs to be disabled. For example, I use the program to clean my computer. It's free and works great.

Removing viruses and malware.
If you have an antivirus installed, run a full scan of your computer. This is one of the important factors in how to clean your computer well. What can I say about antiviruses? Many opinions, many programs. In my opinion, you need to install licensed programs and buy licenses. Some of the best: Kaspersky Lab, Dr.Web (Doctor Web), Eset Nod32 (Nod 32) and so on.

True, some of them put a heavy load on the operating system, and it turns out that you will not speed up the computer, but vice versa. But you won’t ruin your system with viruses and malware. This is of course worth keeping in mind if you have powerful computer, then there is no need to worry. Well, it is desirable that there is a constant connection to the Internet so that the antivirus is constantly updated.
There are of course alternatives. I, like many people, love freebies, just for myself I was able to choose a good antivirus, or rather, it’s a set of programs for cleaning and unnecessary files, temporary files, operating system optimization and virus checking. This 360 total security. It's free and easy to use. And from personal experience I can say that it copes well with viruses.
The check or scan, as it is also called, can take a long time. It all depends on the size hard drive and the amount of information on it. Well, after that you should restart your computer.
Cleaning your computer from unnecessary files and folders.
This point is very important in order to clean your computer well. After all, what happens when there is a lot of information garbage in a person’s head? He's starting to get dumb. It's the same with a computer. He sees all the information on the computer, indexes folders and files, and when it’s a mess, it takes more time, and as a result the computer starts to slow down.

Cleaning the registry.
What is a registry? Simply put, this is a kind of operating system database with settings and various parameters. Very important Windows element. And when it is cluttered, the computer also slows down, because all the programs that we install there also register their settings, and when we do something, the parameters in the registry also change. In general, to clean your computer, you also need to clean it.
This will help us now installed program, she does a great job with it.
- Launch the program and select the “Registry” tab.
- Here too, first we do the analysis.
- Now click “Fix”. A window will appear asking you to make a backup copy of the Registry, we agree, it won’t hurt.
- We wait until the end and reboot the PC.
There is also a program that I really like and use it all the time - Wise Registry Clesner. It doesn't even require installation. What are the advantages: 
- Cleans the Registry, also analysis, then cleaning.
- Optimizes the Registry
- Defragments the Registry
I do all three points, a powerful program.
Here, just like with the Registry, all files and folders should be in their places and shelves, and not scattered throughout the hard drive. This point is also important to clean your computer properly. After this, it is easier for the operating system to find files and folders, as a result of which the system does not slow down.

Now you can go about your business, because this process is long but effective. You need to do this with all disks on your computer.
But if you already have a modern SSD drive, then there is no need to do defragmentation, it’s simply pointless, since such disks are the same flash drives. And on regular disks there is a disk that spins up when reading files, and the head can read what is nearby. Well, if the files are scattered, then the head runs a lot, the disk spins faster, and a lot of time is spent. A flash drive eliminates all these moments and reads information almost instantly.
Optimizing the Windows operating system
Here we will look at a few more points to optimize the system itself.
- Disable visual effects. Right-click on my computer - properties - advanced settings - performance - settings. Here we turn off as much as possible, see for yourself, try it. If the computer is generally weak, turn everything off.
- Cleaning up the task scheduler. Go to C:\Windows\Tasks and we delete everything. Now the system won’t schedule anything without your knowledge :)
- Disable System Restore. From practice, this rarely helps to restore the system, but if necessary, then leave this item. Again, right-click on my computer - select the property - system protection (in other versions of operating systems, it may simply be called system recovery) - click on each disk and click configure - in the window that opens, click disable and delete all the points so as not to take up much space and OK.
- Optimize desktop. All icons and folders on the desktop load the system, so in order to clean your computer well, leave only the essentials on the desktop. Or is it better to create shortcuts on the desktop.
Well, I think this is the most basic thing you need to do to clean your computer. And it’s better to do this at least once every two months, and then your computer will live and breathe freely. Have a nice day.
And here is a video about how you can clean your computer so that it doesn’t slow down.
How to clean your computer so it doesn't slow down. updated: September 11, 2017 by: Subbotin Pavel
- We find the problem disk and right-click on it. From the drop-down menu, select “Properties”.
- In the “General” tab, click the marked button.
- We check the boxes for the types of files that we want to delete. After that, click “Clear system files».
Attention: for this function to work, you must work under an account with administrator rights. They are enabled by default unless you are using a guest account.
- The process of searching for unnecessary files and deleting them will follow. We are waiting for its completion.
With the development of the Microsoft product, the algorithm for searching and removing unnecessary data has been constantly improved and in the latest OS it has become very good. In most cases, if you have Windows 10, you no longer need to use third-party software to remove the cache.
Basic cleaning of the operating system has been completed. But we don't stop there. Let's talk about the second one important action over operating system disks – defragmentation.
Defragmentation
Before we begin, remember to use defragmentation on solid state drives SSD is strictly prohibited. By doing this, you will quickly disable them. If you have a regular HDD(HDD) then, of course, you need to optimize the files.
Let's see how this is done:
- Let's launch Windows Explorer. You can also access the drives through the Computer shortcut.
- Right-click on the desired section and select the last item from the context menu.
- Switch to the “Service” tab and click on the button marked “2”.
- Click the “Analysis” button, wait for it to complete and, if the disk requires defragmentation, click “Optimize”.
- Also you can configure automatic optimization. To do this, click on the designated element.
- We enable the function by checking the checkbox at position “1”, indicate the frequency of checks (recommended once a week), select disks (we excluded our SSD) and click “OK”.
You can also activate a very useful, even “smart” system for increasing the priority of a process for several unsuccessful attempts. The fact is that the computer gives preference to user tasks, and background processes at this time are suspended.
It turns out that if the machine is constantly busy and you can’t bring the disk to perfection several times in a row, the system will begin to pause your activities and give priority to defragmentation. As a result, your PC performance will be slightly slower for a while.
Defragmentation is a very important process that needs to be done regularly. If you do not do this, the speed of the disk subsystem will decrease significantly. This does not apply to SSDs. You can troubleshoot other errors here.
Removing viruses
Sometimes the computer slows down or even starts to become “stupid” due to viruses that have “populated” it. In older OSes such as XP, 7 or 8, we will need to install antivirus software. In the case of the “Ten”, we will be quite satisfied with the “” already available here. Let's figure out how to use it to check your computer for malware and, if necessary, remove it.
Attention: Windows should only have one antivirus. If you have several of them, !
- Double-left-click on the antivirus icon in the system tray and launch Defender.
- Next, open the tile called “Protection against viruses and threats.”
- Clicking on the button here will launch a surface scan. It won’t be enough for us, so click on the marked link.
- Set the switch icon to the position marked “1” and click “Run scan now.”
- The process of scanning and eliminating threats can take a long time. Its passage will depend on the speed of the device, its size and the number of files available.
- As a result, one virus was found. If you doubt that you do not need this file, you can look at its name and where it is located. To do this, click the arrow indicated in the screenshot.
- We find our threat and click “Show details”.
As a result, we saw that the file is a KMS activator that is no longer used. If you take no action, the antivirus will automatically remove the threat or at least isolate it.
In the new OS from Microsoft, the standard Defender has reached a level that allows you to not install any additional software. The functionality of the program is quite sufficient for the average user. Moreover, you can install this “software” for free and for more earlier versions Windows.
Cleaning in Windows 10
Let's talk about another cleaning method, however, it only works in the new “windowed” OS. In an effort to get away from the outdated control panel, the developers created new settings that we will use.
- Go to system settings by clicking on the gear icon in the Start menu.
- Switch to the “System” tile.
- Go to the “Device Memory” item and select the “Free up space now” function.
- A computer scan will follow.
- When the analysis is finished, check the boxes next to the items you want to clear. Then press the button marked “2”.
- All that remains is to wait for the cleaning to complete.
Also, using this functionality, we can find what the PC disk is doing. To do this, simply click on one of the drives.
As a result, a list will be displayed in which you will see the different directories and their volume. The data is sorted by size, so the top positions will be the heaviest. Click on one of them.
We have a content view button that will take you directly to the problematic directory. The amount of data is also indicated here.
So, we’re done with cleaning data in Windows 10, let’s move on to other, often more effective methods. We will work with third party software.
We use third-party software
Now let's move on to using software from third party manufacturers. There are many such utilities, however, there is no point in describing them all. We will tell you about the leaders in PC cleaning and complete removal installed software. Finally, we will also show you how to find and eliminate various types of adware and malware.
Finding and deleting large files
Often, the disk of our computer has a very complex hierarchical structure, in which there are many files, folders, subfolders, etc. Finding anything in such chaos is difficult, but if you entrust this task to one small utility, cleaning the disk from unnecessary files will take a matter of seconds . So let's get started:
- Download the scanner using a direct link from the official website. Unpack the archive and run the file indicated below.
- The scanning will begin as soon as we select the desired drive.
- As a result, a map will be displayed file system, consisting of sectors and lower-level directories nested within them. By pointing the mouse at any sector, we see the path to it and can figure out what kind of folder it is.
- Clicking on any segment opens it and expands the internal structure, cutting off upper levels hierarchy. Right click allows you to call context menu, in which you can open this catalog in the computer explorer and delete unnecessary things yourself.
- If we want to start the scanning process of another disk, we simply click on its icon. By moving the mouse pointer over areas of the disk map, we find the directory and the largest occupied space.
This program is simply irreplaceable on any computer or laptop. Each user, having installed it, will find a whole series of “surprises”, which will definitely not be limited to one gigabyte of occupied disk space.
Removing unnecessary programs
Now we will talk about removing programs installed on the computer. But here we need to talk about some nuances. The fact is that when we remove software in a standard way(via the control panel), traces remain on the disk and in the system registry in the form of “dead” keys and “junk” files that are no longer needed, but take up space.
Let's look at how to completely remove a program:
- Go to the official Revo Uninstaller website and download the program for free. Once the download is complete, install the application and launch it. A list of all software installed on the system will open, select the object you want to remove and click the “Uninstall” button.
- Initially, the standard uninstaller of the program will launch. We carry out the removal through it.
Attention: if the application asks you to restart your PC to completely clean it, do not agree, as Revo will not be able to clean up the “Tails”.
The game “tells” us that it was completely removed, but is it true? Let's check. In this example, we will show you how “carefully” Windows uninstalls.
- We launch the scanner of our “smart” assistant.
- We are waiting for the analysis to complete.
- As you can see, there is more than enough “garbage” here. Let's select all unnecessary entries.
- Now press the delete button.
- And we confirm our plans by clicking “Yes”.
So, with almost every software. More and more “garbage” remains in the system, which over time greatly slows it down. You can, of course, clean everything up manually, but we recommend using Revo Uninstaller every time you uninstall.
CCleaner
And here is the highlight of the program. This is the main utility that allows you to clean your PC of existing “junk” and speed up its performance. CCleaner scans not only OS disks, but also the system registry. Let's figure out how to work with it.
- Visit the official website and download free version programs. Then run the installation file.
- Select the Russian language from the drop-down list located in the upper right corner and click “Install”.
- We are waiting for the installation to finish.
- We launch the program by clicking on the big blue button.
- Go to the “Cleaning” tab and click the marked button.
- We are waiting for the analysis to finish.
- If at the time of scanning you have a browser or other program open whose cache you need to clear, CCleaner will ask you to close it. We do this by first saving the data.
- The scanning is completed, now you need to delete the “junk” files.
- To prevent the warning from appearing every time, check the box marked with the number “1” and click “Continue”.
- Disk cleaning has begun; it may take a couple of tens of seconds.
- Next, we move on to cleaning the system registry. Activate the desired tab and click “Search for problems”.
- The scan will begin immediately.
- Now you need to fix the found faults. Click the button indicated in the screenshot.
- We create a recovery checkpoint, since working with the registry is a responsible matter.
- Now you can fix the problems found.
- All that remains is to fix autoloading. Go to the corresponding tab, select the program in the list and delete it. We repeat the action with all the items that are not needed when starting with the system.
When the cleaning is completed, CCleaner will remain guarding the security of your computer and will monitor its cleanliness. If a sufficient amount of system “Garbage” is collected, the program will immediately notify you about it.
Greetings, friends! IN Lately I get asked the following question: “how to clean a computer so it doesn’t slow down?” In this article, I will tell you the best way to clean your computer. I remind you that learn all the secrets of the computer you can here.
In order to clean your computer from viruses, you need to go to your antivirus that you have installed. Then scan for viruses and, after scanning is completed, delete those found.
Today I will tell you how to clear the cache on your computer. I have windows7 installed, so I will show you with my own example. But on other windows you can clean your computer of unnecessary files in the same way. The program that I will give will suit everyone.
So, let's get started. First you need to download CCleaner from official website via this link. Then click on the green “Download Free Version” button. This will download the free version of CCleaner. Personally, I have a free one installed.
After the archive has been downloaded, find it in your downloads and double-click the left mouse button. Then click “next” everywhere until the program is installed. A shortcut will appear on the desktop, open CCleaner through it by double-clicking the left mouse button.
CCleaner is multifunctional. Through ngo you can clean your computer’s memory and remove unnecessary programs. Let's clean your computer right now.
When the program opens, click “clean”. Now you see a list of what will be cleaned on your computer. All checkboxes should be left as they are, except the last two in the section Internet Explorer– this is the very first blog. Here you uncheck “Index.dat files” and “Last download path”. We delete everything else.
To start scanning your computer for junk, click the “analyze” button located below. After this, CCleaner launches and the bar at the top of the program shows how many percent have been scanned.
When the scanning is finished, you will see all the files that need to be deleted. Delete it boldly, don’t even hesitate, nothing useful will be deleted for you. Only everything unnecessary will disappear, the cache will be cleared.

After clicking on the “clean” button, all unnecessary files will begin to be deleted from your computer. After cleaning is completed, scan again, if the program finds more garbage, then delete it until everything disappears.

After this we will clean the registry. Click on the “registry” button, and in the checkbox that opens, leave everything as it is. Let’s start searching for problems, click on the button called “search for problems”.

Here, similarly as in the previous case, scanning begins and the bar at the top shows how this process is progressing. As you can see, I found one problem, it needs to be fixed by clicking on the “fix” button.

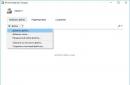
CCleaner's capabilities don't end there. We click on the “service” button and see that here we have “uninstall programs”, “startup”, “system restore”, “erase disk”.
Let's look at how to clean your computer from unnecessary programs. Yes, CCleaner can even do this, cool, isn't it? Now I'll show you how it's done.
Click on the “uninstall programs” button. Here you see all the programs you have. You need to find the one you want to delete. Click on the selected one once with the left mouse button. After this, you need to click on the “uninstall” button.

Please note that you need to click on uninstall, not delete! It is important! Then you delete unnecessary program from a computer.
I think to clean the computer CCleaner program There is no need for us to analyze the remaining functions. What you already know is enough. I recommend cleaning it every day, and then your computer will not slow down. And for those who want to understand all the tricks of the computer, I recommend going through this is training.
Nowadays, now everyone in the house has at least one computer, or maybe even several. And with prolonged use, the PC begins to work slowly, freeze, or even sometimes simply turn off. The cause of these problems is often the clogging of the computer with temporary files from the Internet, viruses, as well as third-party programs that are sometimes installed without our consent.
Therefore, right here and now I will show you how you can quickly clean your computer. All we need for this is a few third party programs and themselves Windows tools, which are installed along with the operating system.
In order not to create one article with a huge amount of text, I will divide the computer cleaning process into two articles, so subscribe to the site news so as not to miss these lessons:
What will be used when cleaning your computer?
1. CCleaner- quite comfortable and fast program for cleaning your computer. The big advantage is its efficiency and simple, intuitive operating interface.
2. is another excellent utility from the same developer as CCleaner called Piriform. This program defragments disks and makes it faster than standard application Windows.
3. - disposable antivirus program for free Windows checks for the presence of viruses. The advantage is accessibility and the fact that new versions with an updated virus database are constantly being released.
How to clean your computer using CCleaner
So let's start with Ccleaner. For those who do not yet have this program, you can download it from the official website by simply clicking on “ Download» and saving it to the desired location. Of course, after the download we install and run the saved utility.
- When you launch Ccleaner, the “Clear” tab will immediately open, which is responsible for deleting the cache accumulated by the browser and system. On the left side of the window, you can select search conditions for and clean files. I recommend that you leave all the checked options as they are, and simply run a garbage search on your computer by clicking on the “ Analysis».
 A short scan will take place and information about the files being deleted will appear on the screen. Pressing " Clear"The process of removing unnecessary and sometimes harmful files will begin ( No personal files or folders in Ccleaner Not destroys, so you don't have to worry).
- The next step is to check and fix registry errors. Click on the tab on the left side “ Registry" and simply select " Troubleshooting" The analysis will start again, but this time the registry, after which a full report about the problem, file location and registry section will appear.
 After checking, press the button " To correct»
  In the window with a question about saving backup copy click " No" In the next window, click on “ Correct marked" and after eliminating the errors, close it with the " button Close».
- Next, go to the “ Service" in which from the list of possibilities we select "". I already wrote about how to clean startup in Windows itself in an article. Now, I'll tell you how to do it here. The principle is the same, select a program that is unfamiliar to you or some spam utility, left-click the bear and click on “ Switch off" We do this with things that are not necessary for you when you turn on the computer and that seem suspicious.

Having completed all these steps, you can simply close the program and move on to the next stage of cleaning your computer.
How to clean your computer with Defraggler
For the second step of cleaning the computer, we will use another utility from Piriform, called Defraggler. It can also be downloaded from the developer’s website, just like CCleaner.
Having launched the program, you should see the main window describing the properties of all local drives found on the computer. So, selecting one of the disks ( I always start with the disk " WITH:\»), Click on it with the left mouse button and click on the “ Analysis» to collect data on the number of fragmented files on the partition.

The analysis itself will take a few minutes, then a report will appear with the results of how many fragmented files are present, the number of fragments and the percentage of fragmented data from the total disk space.

Looking up a little higher, you will see squares of different colors, thus showing all the files on the disk. What do the colors mean? Anything highlighted in red and pink indicates fragmented files, in other words, bad files that need to be tidied up. You can ignore blue and all other colors; they mean that all other files are fine.
So, having figured out what’s what, let’s move on to cleaning the computer itself. Having finished analysis, click“Defragmentation” to start the main work of the program will take about an hour, maybe two, everything will depend on the amount of data on the disks. After waiting for the program to finish, you need to do the same with the disk " D:/».

Cleaning your computer from malicious files
The next step to successful PC prevention is checking it for viruses. It is these harmful files that most often interfere with normal operation, load the computer with various junk or hack system files, which leads to its freezing.
Therefore, this step is an integral part of cleaning your computer. If you have a licensed and fully working antivirus, then you can check the system simply by running a full scan. For those who do not have the opportunity to purchase a license, do not want or cannot, Dr. Web has released a very good and free DR utility. Web Cureit. To download, go to the Doctor Web website and, after agreeing to all the terms, save it to your computer. WITH complete guide You can find the program in the article.
Now let’s look at the test option that is suitable for cleaning your computer. By opening the program, we agree to the terms of use by checking the box and moving on.

In the next window, click on the big button “ Run scan» the computer scanning process will start.


After it is completed, the scan results will appear with detailed description found threat. To remove and clean viruses, you need to use the large orange button with the words “ Defuse", after treatment, close the antivirus and restart the computer.

This completes the first part of the article on how to clean your computer. In the next article you will learn which unnecessary and harmful files to delete, and what else you can do to check your PC. Let me remind you again, so as not to miss the second half of cleaning your computer and laptop, subscribe to updates via E-mail or RSS subscription, and also join our
Computer novices often turn to specialists with just one problem: the computer seems to be new, the store said it was powerful, but not even a couple of months have passed and you discover that your computer is slow.
Moreover, the computer slows down so much that it begins to seem that your computer is at least five years old. The specialist you called just needs to work magic on your computer for 15 minutes - and it’s like new. How he does it? How to clean your computer yourself so that your computer does not slow down?
I will describe several reasons why the computer slows down, and then we will figure out how to eliminate all these problems. The first reason your computer is slowing down may be overheating. "How?" - you object to me, “After all, the computer is new! Has it really already become clogged with dust!? We even bought a special “computer” table for the computer!”
As experience shows, and I have seen a lot of designs of computer desks, I have come to the conclusion that the manufacturers of these same computer desks are very far from the computers themselves. That is, when designing computer tables, as a rule, they either have no idea how a computer works, or they simply sacrificed the functionality of the table for “beauty.”
And only in very expensive and high-quality computer desks (as a rule, imported, and not our “handicrafts”), you really feel care for your iron assistant on a par with beauty and functionality. How to clean your computer from dust?
A modern computer is equipped with very powerful processor, which, despite all the efforts of engineers, consumes quite a decent amount of electricity (sometimes the components of a system unit at peak loads can consume power of almost 700-800 W, and this is almost the power of a small electric kettle or hair dryer). Naturally, during operation, heat is generated, and quite a bit. This heat is removed from the system unit by continuously running fans. How to clean your computer from dust?
I hope you don’t need to prove for a long time that by putting your computer desk into a cabinet or “blind” niche system unit, and even by placing stacks of documents that are not yet needed on top of the system unit, you are dooming your computer to a life of constant overheating. Naturally, the equipment endures, but the cooling fans begin to hum louder. At the slightest load they turn on at full power.
If the load or ambient temperature increases, the electronic components of your computer trigger a special built-in microprocessor protection - called throttling.
The point of throttling is to artificially reduce the number of operations performed per second. That is, your computer, when performing some difficult task for it, begins to take small breaks, stop for some microscopic time, but repeatedly. Because of this, in particular, there are freezes in games and when executing complex programs. And if the radiator on your computer’s processor is clogged with dust, the transition to throttling mode begins much earlier, and under lower loads. How to clean your computer from dust?
To make your computer work as fast as before and to prevent it from overheating, you need to clean it periodically. Here I mean mechanical cleaning of the computer.
To do this, it is enough to remove the system unit from the niche it occupies, and usually unscrew 2 screws (less often one or three), remove one and its side covers. To do this, you don’t even have to call a specialist - you can clean your computer yourself.
Here's what you might encounter sometimes:

In this way, clean your computer from dust wherever you can get it.
That's how much dust there is sometimes in a computer. How to clean your computer without breaking anything in it? First, make sure that your system unit is completely disconnected from any wires from the outside. If you can’t remember where this or that wire is connected, make notes with a marker, or draw a connection diagram on a piece of paper - whatever is convenient for you. There is no need to disable anything inside the system unit.
If any wire remains connected, disconnect it. Take a small soft brush. A new brush will do for painting anything, and also take a vacuum cleaner, having first removed all the attachments from it. If the vacuum cleaner has a wet cleaning function, make sure this mode is turned off. Under no circumstances should you allow water to get inside your computer!
Lay your system unit on its side, flat (you can do this on the floor). Turn the vacuum cleaner on suction. Hold the vacuum cleaner hose with your left hand, and bring this hose to the place where you see the fans and the largest amount of dust. With your right hand, use a brush to gently “ruffle” the layers of dust on and in the radiator, while simultaneously sucking them up with a vacuum cleaner. Actually, a vacuum cleaner is needed in this case so that dust does not fly around your room.
Reinstall the system unit cover that you removed and screw it in with the screws. In principle, you don’t need to screw the lid if your system unit is located in a niche of a computer desk. But if you don’t like to see the insides of your computer, or are just somehow not calm, put the cover back in place.
Now your computer will not overheat and may stop slowing down.
In the case of a laptop, I still advise you to contact a specialist. Very few laptops allow you to get to their dusty insides by simply removing the cover. Often complete disassembly may be required. At the same time, it is very easy to break delicate parts in a laptop. Therefore, I recommend that laptops be cleaned only by specialists. But they need to be cleaned no less often and sometimes more often than desktop computers. Since everything in laptops is very compact, which means it is much easier for dust to linger.

Laptop cooling system clogged with dust. Felt-like dust rolls completely clog the laptop cooling system. This slows him down.
Here is a typical picture that every service center engineer observes in laptops, and which most of you are not aware of. Rolls of dust, similar to felt, completely clog the cooling system of the laptop, and it, overheating, begins to slow down terribly. And if you don’t clean this dust in time, your laptop will face more serious problems and, accordingly, more expensive repairs. Do you need it? So take your laptop to be cleaned service center at least once a year. Especially if you have pets.
How to clean programs?
So, we’ve cleaned the computer’s hardware, but the computer is still slowing down – so let’s start cleaning the software.
Among the many reasons why your computer slows down may be your computer being infected with malware - various viruses, Trojans, worms and other evil spirits. Before cleaning your computer, I highly recommend getting rid of all this crap. How to get rid of viruses? Install a good, powerful antivirus and run a full scan of your computer for viruses!
Which antivirus should you choose? Everyone has their own preferences. I would recommend installing an antivirus from one of the reputable companies. Do not try to download and install antiviruses from little-known companies - these may be so-called false antiviruses. Instead of being useful, they can cause even more harm to your computer.
You can even install paid antivirus– trial version. The trial version of a paid antivirus is usually fully functional and has a limitation only in operating time, usually a month. In any case, a paid antivirus is always better and more effective than a free one.
Important note! Never, under any circumstances, install two or more antiviruses at the same time. This may be another reason why your computer is slowing down.
We checked for viruses, there is only one antivirus in the system, but it’s still there – the computer is slow!
We clean temporary files that have accumulated on your computer during your work. To do this, you must first enable the display of hidden files. Here my tips will differ depending on what Windows is installed on your computer.
Enable display of hidden files in Windows 7 (Vista):
What can you do to stop your computer from buzzing?

Click on: Start=> Control Panel=> Folders settings. Go to the tab View, put a dot in the column “ Show hidden files and folders", then uncheck " Hide system, protected files (recommended)". The computer will swear - they say that you definitely thought, you agree and have not changed your mind at all, and you will not sue Microsoft for opening your own system files to you. To all this verbiage you click an affirmative “Yes”!
Now you will be surprised to find that some new files and folders have appeared on your C drive.
Attention: do not delete these files and folders, otherwise your computer may never boot again!
Now the most important part of our whole venture begins. Cleaning the files! Read further carefully. I am not responsible for the fact that you did not read carefully and deleted something wrong.
Let's go to Computer => Local disk(WITH:) => Windows=> Prefetch(we go into it even if Windows doesn’t let us in the first time). In folder Prefetch(and only in it) delete all files and folders.
Returning to the folder Windows and now we find the folder Temp. There we also select everything (you can press Ctrl+A) and delete it.
The following paragraph should be followed if you have Windows 7 or Vista...(For Windows XP owners - see the next paragraph)
Now let's go back toLocal disk (C:), go to the folderUsers, from it we go touser folderunder which you are registered in the system. Next we find the folderAppData => Localand only in this folder we find the folderTemp, go into it and delete everything in the folderTemp.
Attention! If you still have Windows XP, do the following... (For Windows 7 owners, this paragraph does not need to be completed)
Now let's go back to Local disk (C:), go to the folder Documents and Settings, from it we go to user folder under which you are registered in the system. Next we find the folder Local Settings and only in this folder we find the folder Temp, go into it and delete everything in the folder Temp.
Let's go back to the folder Local Settings. Go to the folder Temporary Internet Files and we also wipe everything inside it.
If there are several users on the computer, the described actions must be performed by going to the folder of each user one by one...
The next step is to perform a standard cleanup of drive C. To do this, go to Computer, on the icon Local Lisk (C:) right-click and go to Properties and check if the checkbox is checked Shrink this drive to save space. If the checkbox is checked, uncheck it and then confirm changing the settings for all files on drive C!
Why? Because the files on drive C are compressed slightly and by activating this option you will free up no more than 100 MB of space, but the computer will slow down one and a half times more. After all, on a compressed disk, in order to perform any operation, the computer must first decompress your data (this wastes time), and then when writing, the data is compressed again - this is also a waste of time.
In fact, with this checkbox installed, your archiver is continuously running, alternately compressing and decompressing your files - do you need it? If you don't have enough space, buy a larger hard drive! But let's get back to our disk cleanup. Click on the button Disk Cleanup. In Windows 7, I also recommend activating the option Clean system files. Then click OK and wait.
Yes! People asked a question here - Do you need to check all the boxes when cleaning the disk?? I answer: in Windows 7 - you can do opposite to all the points, but in Windows XP not everything! Don't check the box "Compress old files" Otherwise, Windows XP will compress all files that it considers old, which means that over time they will slow down when opening, and it will not be easy to decompress them.
In addition, Windows 7, with the “Clean up system files” option enabled, thoroughly cleans out one tricky folder called winsxs, sometimes reducing its volume by more than half. If you have Windows 7, just for fun, go to the C:\Windows folder and see how much this winsxs DADDY takes?... 😉
Fast and beautiful! Disable some visual effects.
To make visual effects work faster (like Windows Aero), disable some of them. If you properly disable visual effects, your computer will slow down less, and appearance you won't notice the effects turning off.
I don’t recommend disabling Windows Aero, that is, transparent windows, completely (of course, if your computer and your edition of Windows 7 supports it). The point is that when Windows activation Aero transfers the graphics load completely to the video card, thus freeing up your processor to perform your tasks.
How to disable effects correctly, but so that everything is beautiful as before? Right-click on Computer, go to Properties, then to Extra options system and activate the Advanced tab. Where it says Performance, click on Settings.
Uncheck the following lines (for Windows 7):
- Animation in the Start menu and taskbar.
- Animation of windows when minimizing and maximizing.
- Animated controls and elements inside the window.
- Smooth scrolling of lists.
- The menu fades after calling the command.
- Sliding when expanding lists.
- Fade or slide effects when accessing menus.
- Fade or slide effects when tooltips appear.
After all this has been done, click Ok, Ok...
It would also be nice to do an audit of your autostart. To do this, press Win+R, enter msconfig in the search bar and press Enter. In the startup section, thoroughly uncheck the boxes for downloaded applications and drivers. I purposely don’t describe what exactly to turn off because I don’t want to get you in the neck if you turn off something wrong. This is the lot of more experienced brothers.
Disable System Restore.
Beginners naively believe that system recovery is a panacea for all computer ills, but this is not always the case. System Restore (Rollback) helps mainly when you have problems with Windows itself, a driver, etc. But as a rule, newbies have all sorts of “left-behind goodies” installed on their computers – third-party programs that are not always competent and not always honest. Therefore, system recovery is more of a function in the manner of “What if it helps?” but nothing more. But what System Restore brings to the system is no joke. Are we turning it off? Let's turn it off!
Right click again on Computer, Further Properties, System protection. Against Local disk (C:) you will see “Enabled”. We highlight Local disk (C:), Press the button Tune and put a dot opposite Disable System Protection. (The inscriptions are menacing but not scary). In addition, you can also free your long-suffering disk (by clicking the Delete button) from all restore points made by the system. Then Ok and voila!
And one more thing, I forgot at first, I’ll add it!
If your computer has 2 or more (for example 4 - 8 GB) RAM installed, and you do not use resource-intensive programs (for example Photoshop) or cool games - feel free to disable the page file!
Click Start, and right-click on Computer, in the window that appears at the top left of it, find the inscription "Advanced system settings", as in my screenshot:

Another window will open Properties of the system, in which you need to select a tab Additionally. Then we pay attention to the Performance section (we already climbed there when we turned off part of visual effects) - and press the button Options- like here:

Clean your computer from viruses?
In another window that opens Performance Options- find and click on tab Additionally, and in the area Virtual memory press the button Change… like this:
 How to clean your computer from viruses?
Ugh! Finally got to the right place! The window called Virtual memory:
 How to clean your computer from viruses?
If there is a check mark on Automatically select paging file size- remove it, as I did in the picture.
Next, place a circle opposite No swap file and press the button Set. Windows is unhappy with the message — they say don’t turn it off, otherwise it’s Khan. But you didn’t lie to me and you have more on your computer at least two gigabytes of RAM and you are aware of what you are doing. So feel free to press the button YES! And then confirm the result by pressing OK. The system will ask you to reboot, so allow it!
And lo and behold! After rebooting, it’s as if someone has replaced your computer! He literally flies! In addition, as in my case, as much as 2 GB of additional space on the hard drive was freed up. If you have more RAM, then more will be freed up! Another useful advancement - now your Windows is loaded entirely into RAM, and when running it practically does not use the hard drive! It wears out less!
If you have to run something resource-intensive, don’t worry. If the computer does not have enough RAM, it will just warn you about it. Then you can repeat the above steps, but just check the box at the top Automatically select the size of the paging file, and press OK. Then Windows will configure everything itself. But this is so, for every fireman.
The computer and Viruses were cleaned, the dust was wiped off. Have you noticed that your computer is starting to run a little faster and is more responsive to keystrokes and clicks? All? No! A little bit more. Now that we already have a clean computer - . For those who don’t know what it is and why – here you go.
By the way! If your computer has Windows 7 or, at worst, Windows Vista installed, don’t skimp and buy a special flash drive for your pet separately, which you will use to use the technology – you won’t regret it. It is not necessary to take a super large flash drive, the main thing is that it works quickly. You can buy a flash drive that is about 2 times larger in volume than the amount of RAM on your computer. For example, if the amount of RAM in your computer is 2 GB, buy a 4 GB flash drive and so on. The performance increase, especially in games, is noticeable. How to enable and use the technology.
As you can see, we did without. And the computer, unlike the use of “all sorts of cyclers,” actually began to work faster. In addition, we have freed up 10-15 GB of space on your hard drive. And now you don’t need to use “squeezers”. Don't forget to hide hidden and system files again. So. For peace of mind. And by the way, this lesson of mine will be almost completely useless for you - if you have an ancient computer. Because there is no point in making new things out of old things. Good luck to you! And don’t let your computer slow down!
GD Star Rating
a WordPress rating system