When connecting to closed (password-protected) network resources, you are asked for a login and password. To avoid entering password permanently, the user checks the “Remember credentials” checkbox. To remove these passwords(for example, when changing users) you need to go:
Start → Control Panel → User Accounts → Account Administration
You can also get here through " Start → Run", enter text " control userpasswords2 " and click OK.

Note: « Start → Run» can be called by hotkeys System+R(where System is the button with the Windows logo).

If you need to prevent the computer from remembering passwords, then you need to go to:
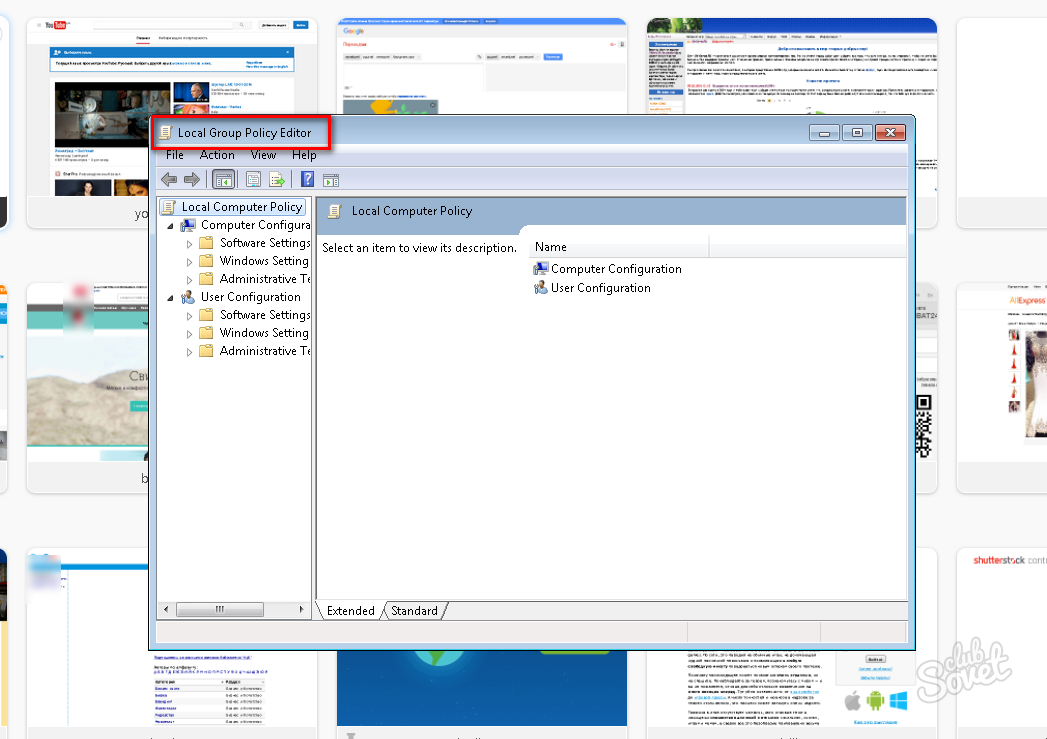
Start → Control Panel → Administrative Tools → Local Security Policy → Local Policies → Security Options → Network Access: Don't allow storing passwords or credentials for network check authenticity → Properties → Disable/Enable


Microsoft's solution for resetting passwords.
1. Log in to the system administrator.
2. Click Start → Run(System + R), enter regedit or regedt32, click " OK».
3. In the editor, select a branch HKEY_USERS, but we do not enter it.
4. In the editor menu, select File → Load hive ( File → Load Hive).
5. A file selection dialog box will open. You have to choose Ntuser.dat in the root of the problematic user's profile (Documents and Settings\User\NTUSER.DAT). After selecting the file, you will need to give the NAME of the loaded registry branch.
6. In the registry editor, go to the address HKEY_USERS\NAME\User.
7. Remove the keys.
8. Select the HKEY_USERS\NAME branch and click File → Unload Hive.
9. Exit the registry editor.
P.S. Remembering and saving RDP passwords. Sometimes there is a need to disable or enable remembering (saving) passwords for a remote worker Windows desktop. See how to do this.

(Visited 8,531 times, 5 visits today)
As a rule, this question arises after you tried to log into another PC over the network, but received a login/password request. The situation can be resolved simply and quickly; the main thing is to learn a few basic commands.
Where does Windows store network passwords?
You can manage passwords in this OS using the “netplwiz” command. To run it, go to the Start menu and enter “Run” in the search bar, or press R+Win-key. The described method is relevant for Windows 7; in Windows XP you should use the “control userpasswords2” command. When the corresponding window with accounts opens, go to the “Advanced” menu and select the “Management” sub-item. This tab is intended for any manipulations with passwords, user accounts, security settings and other actions. Naturally, all operations must be carried out from an account with administrator rights. This way you can easily change any password to a more suitable one. The physical storage of network passwords is the %systemroot%\system32\config directory.
Request for a non-existent password
It often happens that computers controlled by different versions of Windows are difficult to network or connect to them from the outside. For example, Win 7 may ask Windows XP for a network password that was not assigned at all (or will not accept an existing passcode). How to fix this problem? The following conditions must be met on all machines: users must be allowed access over the network by assigning each a non-empty password; The login pass for authorization is the same on the “client” machine and on the server. If the connection still cannot be established, go to “Computer Configuration” (Win+R, enter gpedit.msc) -> select “Windows Configuration”, then “Security Settings”, inside the “Local Policies” item, again “Security Settings”, sub-item “ Network Security: Lan Manager check”, enable the line “Send LM and NTLM”. Also check that the following settings are correct:
- in the “Control Panel”, item “All items” -> “Network and Sharing Center”, sub-item “Advanced settings”, disable “Password protected access” ;
- standard network model for Win 7 it should be “Workgroup” (default);
- the guest account is enabled, in the local policy it is removed from the item "Denial of access to PC from the network."
If you found out\changed the password and did everything as indicated in the article, but still did not gain access to the machine over the network, you need to study the settings in detail local policies access on each specific computer.
Instructions
Select User Accounts (for Windows XP) or expand the User Accounts and Family Safety link and go to User Accounts (for Windows Vista).
Select the one you need account and click the Manage my network passwords button in the dialog box that opens (for Windows XP) or expand the Manage Your network passwords link (for Windows Vista).
Select the account to be deleted from the list and click the Remove button to complete the operation of removing the selected network password.
Return to the main Start menu and go to Run to perform an alternative method for removing the network password (for Windows XP).
Enter control userpasswords in the Open field and click OK to confirm the command (Windows XP).
Go to the "Advanced" tab in the dialog box that opens and click the "Password Management" button (for Windows XP).
Select the password to be deleted from the list and click the “Delete” button (for Windows XP).
Simultaneously press the WIN+R keys to call the main operating menu Windows systems 7 and enter netplwiz in the search field (Windows 7).
Go to the user password management tab in the dialog box that opens and specify the network password to be deleted (for Windows 7).
Click the "Delete" button to complete the operation (for Windows 7).
Use the Command Prompt tool for another way to remove your selected network password: Return to the main Start menu and go to Run.
Enter cmd in the Open field and click OK to confirm the command to run the utility.
Enter net use to define all connected users, or use net command use * /del to delete the selected user's account.
Press the Enter softkey to apply the selected changes.
Performing various operations to change network passwords is slightly different in operating systems Microsoft Windows Xp and Microsoft Windows Vista/7.
Instructions
Call the operating room main menu Microsoft systems Windows XP to perform the necessary network password management operations and go to Run.
Enter control userhasswords2 in the Open field and confirm the command by clicking OK.
Go to the “Advanced” tab of the dialog box that opens and perform the necessary management or editing operations (for Windows XP).
Press the Win+R function keys simultaneously in the Microsoft Windows Vista/7 operating system to perform the network password management operation and enter the netplwiz value in the search bar text box.
Confirm the execution of the command by clicking the “Find” button and go to the password management tab.
Perform the necessary editing or deleting operations for the selected passwords (for Windows Vista/7).
Return to the main menu of the Microsoft Windows XP operating system and go to "Run" if you need to disable the function password network access.
Enter the value gpedit.msc in the "Open" field and confirm the execution of the command to launch the "Editor" tool group policies» by pressing the OK button.
Expand the “User Configuration” node by double-clicking and go to “Windows Configuration”.
Select the "Security Settings" section and select "Local Policies".
Go to “Security Settings” and expand the “Accounts: Restrict the use of blank passwords for console login only” node by double-clicking and select “Disabled”.
Confirm the execution of the command by clicking OK and exit the Group Policy Editor tool (for Windows XP).
Call the main menu of the Microsoft Windows 7 operating system by clicking the “Start” button to perform a similar operation and go to the “Control Panel” item.
Expand the Network and Sharing Center node and select the Change advanced sharing settings command on the left side of the application window.
Select the "Disable" option in the " General access with password protection" and confirm the application of the selected changes by clicking the "Save changes" button.
Sources:
- Networking of home computers running different Windows versions
- how to change password in windows 7
For driving by users The Windows XP operating system includes a special applet that can be launched from the Control Panel. In addition, account operations can still be performed through the emulator command line using DOS commands. Therefore, to delete a user in Windows XP, you have several options to choose from.

Instructions
User management in Windows XP is available only to administrators. If you are working under a user account that does not have such rights, change the account. It is not necessary to restart the computer for this; open the main menu and click the “Logout” button - this will take you directly to the screen for entering the user’s login and password.
After authorization, open the main OS menu again and bring up the panel Windows management- the corresponding link is placed in the middle of the list on the right half of the menu. You can do without the main menu and use the program launch dialog: press the Win + R key combination, enter the control command and click OK.
In the Select a Category list, click the User Accounts link to access the list of accounts. This applet can be called directly through the program launch dialog, bypassing the previous step. To do this, open it with the Winr + R key combination, enter the command control /name Microsoft.UserAccounts and press Enter.
Links to user accounts are placed at the bottom of the applet. Click the desired icon, and a list of operations that can be applied to this account will appear in the window - click “Delete account”.
Select one of the options when the screen asks whether to delete this user's profile files and settings. This will complete the removal procedure.
The operation of deleting a user can also be implemented through the command line. To access it, use the same program launch dialog - press the Win + R combination, type cmd and press the Enter key. In the command line interface, enter net user"Username" /delete, replacing "Username" with the name you want. It is not necessary to put it in quotation marks if the name consists of one word. The user will be deleted when you press Enter.
When a user creates several accounts with separate passwords, difficulties may arise in using them. The problem is caused by the network password function, due to which the login occurs automatically and thereby interferes with the process of changing users.

Instructions
To delete a network password, go to the main Start menu and go to the Control Panel section. Find the "User Accounts" section if you are using Windows XP, or the same section under "Accounts and Family Safety" if you are using Windows Vista. Select the required account and on the page that opens, click on the “Manage my network passwords” link. If you are running Windows Vista, click on “Manage your network passwords”.
Once you highlight the account you are going to delete, click on the corresponding button and return to the Start menu. Go to the "Run" section to remove the network password alternative way(only suitable for Windows XP). To do this, enter the command “control userpasswords” into the empty “Open” window and confirm it by clicking OK. In the dialog box that appears, click on “Advanced” and select the “Password Management” section. A list of passwords will be displayed on the screen - select the one you want to delete and click on the “Delete” button.
Press the WIN key and the letter R at the same time, thereby calling up the main Windows menu 7, if you are using this operating system. In the search window, enter the characters “netplwiz”, after which you will be taken to the program for managing user passwords. In the dialog box, highlight the network password, intended for deletion, and click on “Delete”.
Delete network password you can also use the tool command processor cmd.exe. To do this, go to “Start”, select the “Run” section and in the “Open” window write “cmd”. Click on “OK”, then write the command “net use * /del” to delete the selected user account. Then confirm the application of the changes made by pressing the Enter button.
Skype - popular program to send instant messages and make video calls. The list of contacts can be edited, either adding new ones or deleting those that are no longer needed.

Instructions
Launch Skype, log in using your username and password and wait until the list of available contacts finishes loading. Right-click on the user you want to exclude from the list. In the menu that appears, select the “Delete contact” command. If this feature is not available, select “Block” and then “Delete”. Please note that in this case, the user will disappear from the program window, but you will still be present in his own contact list, albeit with a note that you have denied him access to your personal data and removed him from your directory.
You can select the "Block" command to prevent the user from sending you personal communications as well as making video calls. In this case, he will be present in your contact list with the appropriate mark. When added to the blacklist, the program will also offer to delete a contact forever, which will allow you to combine both functions - the person will disappear from your directory in the program and will not be able to send a request to be added to it in the future.
Switch to Do Not Disturb online mode. In this case, people in your contact list will not be able to send you messages or make video calls. The mode is activated by going to the Skype main menu section and the “Network Status” tab. This function will be useful for those who do not want to remove users from their contact list, but want to get privacy for a certain time so that no one distracts them from their work. At the same time, you will still have the opportunity to send messages to any contacts.
Try not to add suspicious or unwanted contacts to your list so that you don’t have to waste time deleting them in the future. Please review their personal information carefully before sharing your personal information.
In order to set up network equipment, you sometimes need to configure it yourself gateways. To disable required device from the network, you need to turn off the gateway connected to the Internet.

Instructions
Launch an Internet browser on a computer that is connected to network equipment to open the router settings menu. Enter its IP address and press Enter. Then enter your password and username to access your network hardware settings.
If you need to turn everything off network computers completely, then disconnect Internet with a router. To do this, go to the Status menu. In it you will find the network connection status. Next, click on “Disable”.
If you need to disconnect certain devices from the network or Internet, open the special menu additional parameters. Next, go to the “Routing Table” item. Select the required local port, then delete all routes. This method allows you to reset all static routes. If DHCP function active, then access the network Internet computers can.
If you are using a router ASUS, open the menu called “Status”, find in it a list of devices that are connected to the router and a network diagram.
Now you can select the right computer or laptop and set the Disable option. It is recommended to use this method of disabling the gateway only if the computers are connected via network hubs to the router. That is, several PCs are connected to the router’s LAN port at once.
If one PC for which you need to disable the gateway is connected directly to the LAN port, then you just need to physically break this connection by unplugging the network cable.
If you want to disconnect a specific computer from the network on long term, then enter its MAC address into the router table network card. To do this, set MAC addresses to Disable. To apply all settings changes, reboot your router.
As practice shows, many users personal computer encounter difficulties such as confirming a password when logging into Internet. This is not a serious problem, however, more than half of users are simply annoyed by it.

You will need
- - computer;
- - Internet.
Instructions
Click on the "Start" menu, then open the "Control Panel" tab. You need to find the “Network Neighborhood” shortcut. IN this catalog All active connections of your computer are stored, hence the settings. You can also get into this menu and in another way. Click on the My Computer shortcut. You will see a list of all local drives. In the left corner there will be a small menu in which you will find “Network Connection”.
Once you have entered this menu, you need to find a connection Internet a, which is installed on your computer. To do this, click on the “Show all connections” button. Next, select the desired shortcut. For example, it could be "Beeline". On your computer, the connection will be named after the company that provides the service. Internet A.
Next, right-click on the shortcut and select “Properties”. Then go to the "Options" tab. A special menu will appear, which is intended for setting up “number dialing”. If you are constantly asked for data when connecting, it means there is a checkmark in the “Request name, password, certificate". You need to disable this item. You can also enable an item such as “Display connection progress”. This parameter allows you to see the connection status in real time.
If all properties Internet and configured, press the “OK” button and close this menu. Next, restart your computer and try to connect to Internet u. Now you will not confirm the data.
Make calls, video calls, exchange instant messages and files with other users, wherever they are. All this provides Skype program. To simplify and improve the communication process, several various types network status, which is controlled by the user depending on his needs.


