As paper document flow is replaced by electronic one, such a tool as an electronic signature is becoming increasingly important and increasingly widespread. Already, many departments exchange documents exclusively in in electronic format, and each legally significant document is signed with an electronic signature. It is used when working on electronic trading platforms, when interacting with government information systems(such as GIS GMP, GIS Housing and Communal Services and others) and can even be used for authorization on government portals (such as gosuslugi.ru). There is no doubt that the scope of application of electronic signatures will continue to expand in the future, and therefore specialists in the field information technologies it is extremely important to understand the principle of operation electronic signature and be able to carry out the necessary installation and configuration activities software for working with electronic signatures.
Of course, studying this issue would be worth starting with the federal law “On Electronic Signatures” ( http://www.consultant.ru/document/cons_doc_LAW_112701/
), which provides definitions of concepts, the legal status of an electronic signature, the procedure for its use, etc. helpful information. However, the purpose of this article is to show how quickly, without going into details, to install an electronic signature, which in some cases, in cases where there is no time for proper study, will be very useful.
We will install on a computer running operating system Windows 7 Professional, a private key for an electronic signature on eToken media, and we will use CryptoPro CSP as a crypto provider.
Let's start by installing the necessary software:
- CryptoPro CSP version 3.6 or higher;
- Media driver (when using eToken or Rutoken).
The driver for eToken can be downloaded for free from the following link http://www.aladdin-rd.ru/support/downloads/etoken/
, the driver for Rutoken is available for download here http://www.rutoken.ru/support/download/drivers-for-windows/
.
Other devices, such as a flash drive, smart card or registry, can also be used as a carrier of key information, but it is not recommended to use them as they do not provide a sufficient level of protection of key information from unauthorized access.
Installing an electronic signature key certificate.
After the eToken driver (Rutoken) and the crypto provider CryptoPro CSP are installed, we can begin installing the electronic signature verification key certificate.
Launch the CryptoPro CSP program, go to the “Service” tab and click the “View certificates in the container” button.
In the window that opens, click “Browse”, select the desired owner and click “OK”. 
In the next window, do not change anything, click “Next”. 
A window will open in which we can see brief information about the user certificate (information about the owner, the validity period of the certificate and its serial number).
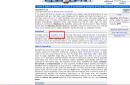
To view detailed information, click “Properties”. If the root certificate of the certification authority has not yet been installed (as in our case), then in the general tab we will see a message as in the figure below. The current root certificate of a certification authority is usually available for download on the website of the certification authority (the organization that issued the electronic signature). 
Return to the previous window and click “Install” to continue installing the user certificate. A message appears indicating that the certificate is being installed. Confirm the installation by clicking the “Yes” button. 
A message will also appear from eToken PKI, with a proposal to write the certificate to eToken. We refuse, click “Cansel”. 
The certificate is installed in the certificate store. Click “Finish” to complete the installation.
Installing the root certificate of the certification authority.
Open the file of the root certificate of the certification authority (with the .cer extension) by double-clicking the mouse and clicking the “Install certificate” button. 
The Certificate Import Wizard will open. Click “Next”. Then check the “Place the certificate in the following storage” checkbox. 
Through “Browse” we specify the “Trusted Root Certification Authorities” folder. 
Click “Ok” and complete the installation. A message appears indicating that the operation was successful. 
Now, when we open the properties of the user certificate, we will not see the same error. 
All we have to do is test the private key container.
Testing.
Open CryptoPro CSP, and in the “Service” tab, click “Test”. 
We find the key container through “Browse” or using the corresponding certificate and click “Next”. You will be prompted to enter a pin code for the container. Enter the password and click “Ok”. If you check the “Remember pin code” checkbox, the system will not request it whenever you access the key container (including when signing a document), which is not recommended in order to protect against unauthorized access.
Next, a window will open with information about the presence or absence of errors. 
Installing an electronic signature in the register.
It is possible that the private key of an electronic signature needs to be duplicated in order to be used on several computers. In such cases, the optimal solution would be to install the private key of the electronic signature in the registry. For a container created in the registry, you can set a password and thereby limit access to the private key of the electronic signature, which is stored in the container. Removable media, after installation, can be transferred to another user. I note that such a measure is justified in cases where, for example, several employees of one organization (department) use the same signature (for example, the signature of an authority). In other cases, resorting to such measures is not recommended.
Installation of the “Register” reader.
The first thing you need to do is install the reader. This is quite easy to do using the reader installation wizard (adding and removing readers is done under account with administrator rights). If, when installing CryptoPro CSP, you checked the “Register reader “Registry”” checkbox, as in the figure below, and it is present in the list of readers, you can immediately proceed to copying the private key container to the registry. 
Launch CryptoPro CSP, in the “Equipment” tab, click the “Configure readers” button. 
In the window that opens, click “Add”. 
The reader installation wizard will start, click “Next”. 
From the list in the window on the right, select “Registry” and click “Next”. 
Then we set the name of the reader, or leave it unchanged as in our example and click “Next”. 
We complete the wizard and click “Finish”.
Copying the private key container to the registry.
The reader is prepared, now you need to copy the container with key information from the eToken removable media to the registry. To do this, go to the main menu of CryptoPro CSP and in the “Service” tab, click the “Copy” button. Through “Browse” we indicate the container that we want to copy to the registry. 
The system will then ask for a password to access the container on removable media(eToken). Enter the password, and in the next window set the name for the key container that will be created in the registry. 
In the next window, the program will prompt you to select the media on which you want to burn the container. Select “Registry” and click “Ok”. 
Now we need to set a password for the container that we placed in the registry. 
Enter the password, confirm and click “OK”.
Now, having launched the function of testing the private key container, in addition to the container on removable media, we will see the created container on the “Registry” reader.
We complete the container testing procedure. If no errors are found, proceed to installing the electronic signature key certificate (if it has not been done previously). The procedure for installing a certificate from the registry is similar to the installation procedure from removable media, and if the owner’s certificate has already been installed from removable media, then installing it again after copying the container to the registry is not required.
Difficulties in validation on the RTS-Tender website arise due to the fact that the digital signature browser plug-in does not see the RuToken key or only the signing certificate. To find out why the PC does not see the electronic signature key, instructions from the supplier of specialized software, a thematic forum on the Federal Tax Service website or resources dedicated to digital signatures, as well as specialists from the technical support service of the crypto-software manufacturer will help.
How it should work
Why doesn't the computer see the digital signature? It seems that there is a key in the form of a flash drive (the same RuToken), and the Crypto-Pro utility is installed, but the electronic signature is not checked. The main reason is that the PC initially does not see the digital signature flash drive. This usually occurs because they are trying to run the key on a device with an unsupported OS. After all, each flash drive key is made for its own environment, and a banal OS update can lead to loss of compatibility with the existing digital signature key (flash drive).
When the installation of a crypto provider is completed on a supported device, according to the instructions, but the computer still does not see the digital signature, the problem may be in the key itself. To find out, please contact support. There you will be asked for screenshots:
- CSP versions/builds (General tab);
- errors when connecting the digital signature container.
In addition, indicate to the specialists where you received the digital signature, on what media you have the container installed (rutoken, etoken, flash drive or registry) and what OS is used (bit size, build).
The computer does not see the digital signature certificate: first steps
If the computer does not see the electronic signature certificate, then in the Windows operating system you need to go to:
Start - Control Panel - CryptoPRO CSP - Service - Test - By certificate. This way you can understand whether the certificate is installed in the user’s Personal Storage linked to RuToken.
If the user’s browser does not see the digital signature and he cannot register on the site or connect digital signature, you need to determine whether the site of interest is added to the trusted list:
Start - All programs - CRYPTO-PRO - Digital signature settings browser Plug-In.
Better to use Internet browser Explorer, since the java script may not work correctly in other browsers.
If the computer does not see the digital signature, then first of all you need to visit the thematic forum of the CryptoPro company. If the issue cannot be resolved on your own, then contact the support service (send there the event logs of the system and applications, indicate the version/build of CSP, OS).
The key/certificate is not installed
Why may CryptoPro CSP not see the keys? You should check the following parameters:
- Is the program installed correctly (is it running? Windows service Installer);
- there is access to the network;
- The correct key was issued by a certified center.
When installing, it is advisable to do this:
install a personal certificate following the installation wizard
indicate via “Browse” the location of the certificate file with the extension .cer
select the private key container (via “Browse” select the certificate on the reader - flash drive / floppy disk)
If you were ever installed incorrectly previous keys and the new media is not installed, you need to clear the registry (Windows). To do this, there is a button “Delete remembered passwords” in the CSP panel.
If there were no errors in application events, but the event logs showed them in the system, you need to check the Sfc/scannow files, and then re-register the MSIExec/unregister components, then MSIExec/regserver.
Difficult case
If the computer does not see the digital signature, what should I do? In this case, the plugin does not see the certificate, but it is installed and the site is added to the trusted list. The error is rare, but sometimes it occurs even for those users who have fulfilled all the requirements of the instructions for using CIPF. For example, we installed a root certificate. The procedure is described in detail on page 35 in paragraph 2.5.2, which is called “Viewing and installing a personal certificate stored in a private key container.” If, after all the requirements have been met, the computer still does not see the electronic signature (no certificate on cryptopro.ru), then the problem is most likely in the certificate revocation list of the certification authority (CA). If the company operating the digital signature accessed the Internet through a proxy server, then in online mode the program will not see the installed certificate in the revocation directory. Everything will work if you install this directory locally on your computer.
Electronic digital signatures (EDS) have long and firmly come into use as government institutions and in private companies. The technology is implemented through security certificates, both general for the organization and personal. The latter are most often stored on flash drives, which imposes some restrictions. Today we will tell you how to install such certificates from a flash drive to a computer.
Despite their reliability, flash drives can also fail. In addition, it is not always convenient to insert and remove the drive for work, especially for a short period of time. The certificate from the key media can be installed on the production machine to avoid these problems.
The procedure depends on the version of Cryptopro CSP that is used on your machine: for latest versions Method 1 is suitable, for older ones - Method 2. The latter, by the way, is more universal.
Method 1: Automatic installation
The latest versions of Cryptopro DSP have useful function automatic installation personal certificate from external media to HDD. To enable it, do the following.
- The first step is to launch CryptoPro CSP. Open menu "Start", in it go to "Control Panel".

Left-click on the marked item. - The program's working window will open. Open "Service" and select the option to view certificates marked in the screenshot below.
- Click the review button.

The program will prompt you to select the location of the container, in our case a flash drive.
Select the one you want and click "Further".. - A preview of the certificate will open. We need its properties - click on the desired button.

In the next window, click on the certificate installation button. - The certificate import utility will open. To continue, press "Further".

You have to select a storage location. In the latest versions of CryptoPro, it is better to leave the default settings.
Finish working with the utility by pressing "Ready". - A message indicating that the import was successful appears. Close it by clicking "OK".

The problem is solved.


This method is the most common today, but in some certificate options it is impossible to use it.
Method 2: Manual installation method
Outdated versions of CryptoPro only support manual installation personal certificate. In addition, in some cases, the latest versions of the software can take such a file into use through the import utility built into CryptoPro.
- First of all, make sure that the flash drive that is used as a key contains a certificate file in CER format.
- Open CryptoPro DSP in the same way as described in Method 1, but this time choosing to install certificates.
- Will open "Personal Certificate Installation Wizard". Proceed to select the location of the CER file.

Select your flash drive and the folder with the certificate (as a rule, such documents are located in the directory with the generated encryption keys).
After making sure that the file is recognized, press "Further". - The next step is to review the certificate properties to ensure that you have chosen the correct one. After checking, press "Further".
- Next steps are to specify the key container for your CER file. Click on the appropriate button.

In the pop-up window, select the location you need.
Returning to the import utility, click again "Further". - Next, you need to select the storage location for the imported digital signature file. Click "Review".

Since our certificate is personal, we need to mark the corresponding folder.
Attention: if you use this method on the latest CryptoPro, then do not forget to check the box “Install a certificate (certificate chain) into the container”!
- Finish with the import utility.
- We're about to replace the key with a new one, so feel free to click "Yes" in the next window.

The procedure is over, you can sign the documents.


This method is somewhat more complicated, but in some cases this is the only way to install certificates.
To summarize, let us remind you: install certificates only on trusted computers!
Good afternoon!. For the last two days I have had an interesting task of finding a solution to this situation, whether there is a physical or virtual server, it probably has the well-known CryptoPRO installed on it. Connected to the server , which is used to sign documents for VTB24 DBO. Everything works locally on Windows 10, but on the server platform Windows Server 2016 and 2012 R2, Cryptopro does not see the JaCarta key. Let's figure out what the problem is and how to fix it.
Description of the environment
There is a virtual machine on Vmware ESXi 6.5, Windows Server 2012 R2 is installed as the operating system. The server is running CryptoPRO 4.0.9944, the latest version at the moment. WITH network USB hub, using USB over ip technology, a JaCarta dongle is connected. Key in the system it seems, but not in CryptoPRO.
Algorithm for solving problems with JaCarta
CryptoPRO very often causes various errors in Windows, a simple example (Windows installer service could not be accessed). This is what the situation looks like when the CryptoPRO utility does not see the certificate in the container.

As you can see in the UTN Manager utility, the key is connected, it is seen in the system in smart cards as a Microsoft Usbccid (WUDF) device, but CryptoPRO does not detect this container and you do not have the opportunity to install the certificate. The token was connected locally, everything was the same. We began to think about what to do.
Possible reasons with container definition
- Firstly, this is a problem with the drivers, for example, in Windows Server 2012 R2, JaCarta should ideally be defined in the list of smart cards as JaCarta Usbccid Smartcard, and not Microsoft Usbccid (WUDF)
- Secondly, if the device is seen as Microsoft Usbccid (WUDF), then the driver version may be outdated, which is why your utilities will not detect a protected device. USB storage.
- Outdated version of CryptoPRO
How to solve the problem that cryptopro does not see the USB key?
We created a new virtual machine and began installing the software sequentially.
Before installing any software that works with USB media containing certificates and private keys. Need to NECESSARILY disable the token, if inserted locally, then disable it, if over the network, terminate the session
- First of all, we update your operating system, everyone available updates, since Microsoft fixes many errors and bugs, including drivers.
- The second point is, in the case of a physical server, to install all the latest drivers on the motherboard and all peripheral equipment.
- Next, install the Unified JaCarta Client.
- Install the latest version of CryptoPRO
Installing a single JaCarta PKI client
Single JaCarta Client is a special utility from the Aladdin company for proper work with JaCarta tokens. You can download the latest version of this software product from the official website, or from my cloud, if suddenly you can’t get it from the manufacturer’s website.

Next, you unpack the resulting archive and run it installation file, for my Windows architecture, mine is 64-bit. Let's start installing the Jacarta driver. Single client Jacarta, installation is very simple (I REMIND you that your token must be disabled at the time of installation). On the first window of the installation wizard, simply click next.

We accept license agreement and click "Next"

For JaCarta token drivers to work correctly for you, just run standard installation.

If you choose "Custom installation", be sure to check the following boxes:
- JaCarta Drivers
- Support modules
- Support module for CryptoPRO


After a couple of seconds, Jacarta Unified Client is successfully installed.

Be sure to restart the server or computer so that the system sees the latest drivers.

After JaCarta installations PKI, you need to install CryptoPRO, for this go to the official website.
https://www.cryptopro.ru/downloads

Currently the most latest version CryptoPro CSP 4.0.9944. Run the installer, leave the "Install root certificates" checkbox and click "Install (Recommended)"

Installation of CryptoPRO will be performed in background, after which you will see a proposal to restart the browser, but I advise you to reboot completely.

After reboot, connect your JaCarta USB token. My connection is via the network, from a DIGI device, via . In the Anywhere View client, my Jacarta USB drive is successfully detected, but as Microsoft Usbccid (WUDF), and ideally it should be defined as JaCarta Usbccid Smartcard, but you need to check it anyway, since everything can work like that.

Having opened the Jacarta PKI Unified Client utility, no connected token was found, which means there is something wrong with the drivers.

Microsoft Usbccid (WUDF) is a standard Microsoft driver that is installed by default on various tokens, and sometimes it works, but not always. operating room Windows system by default, sets them in view of its architecture and settings, I personally like this moment this is not necessary. What are we doing, we need to delete Microsoft drivers Usbccid (WUDF) and install drivers for Jacarta media.
Open the manager Windows devices, find the item "Smart card readers" click on Microsoft Usbccid (WUDF) and select "Properties". Go to the "Drivers" tab and click Uninstall

Agree to remove the Microsoft Usbccid (WUDF) driver.

You will be notified that a system reboot is required for the changes to take effect; we must agree.

After rebooting the system, you can see the installation of the ARDS Jacarta device and drivers.

Open the device manager, you should see that your device is now identified as JaCarta Usbccid Smartcar and if you go to its properties, you will see that the jacarta smart card is now using driver version 6.1.7601 from ALADDIN R.D.ZAO, this is how it should be .

If you open the Jacarta unified client, you will see your electronic signature, which means that the smart card has been correctly identified.

We open CryptoPRO, and we see that CryptoPRO does not see the certificate in the container, although all the drivers have been identified as needed. There is one more trick.
- In the RDP session you will not see your token, only locally, that’s how the token works, or I haven’t found how to fix it. You can try following the recommendations to resolve the "Unable to connect to the smart card management service" error.
- You need to uncheck one box in CryptoPRO

BE SURE to uncheck the "Do not use outdated cipher suites" checkbox and reboot.

After these manipulations, CryptoPRO saw my certificate and the jacarta smart card became working, you can sign documents.

You can also see your JaCarta device in devices and printers,

If you, like me, have the jacarta token installed in the virtual machine, then you will have to install the certificate via console virtual machine, and also give the rights to it to the responsible person. If this is a physical server, then you will have to give rights to the management port, which also has a virtual console.
When you have installed all the drivers for Jacarta tokens, you may see the following error message when connecting via RDP and opening the Jacarta PKI Unified Client utility:

- The smart card service is not running on the local machine. The architecture of the RDP session developed by Microsoft does not provide for the use key media connected to a remote computer, so in an RDP session, the remote computer uses the local computer's smart card service. It follows from this that starting the smart card service inside an RDP session is not enough for normal operation.
- The smart card management service on the local computer is running, but is not available to the program within the RDP session due to Windows settings and/or RDP client.\
How to fix the error "Unable to connect to the smart card management service."
- Start the smart card service on the local machine from which you are initiating the remote access session. Configure it to start automatically when your computer starts.
- Allow the use of local devices and resources during the remote session (particularly smart cards). To do this, in the "Remote Desktop Connection" dialog, in the parameters, select the "Local Resources" tab, then in the " Local devices and resources" click the "More details..." button, and in the dialog that opens, select "Smart cards" and click "OK", then "Connect".

- Make sure your RDP connection settings are safe. By default, they are saved in the file Default.rdp in the "My Documents" directory. Make sure that in this file there was a line "redirectsmartcards:i:1".
- Make sure that the remote computer, to which you are making an RDP connection, is not activated group policy
-[Computer Configuration\Administrative Templates\Windows Components\Remote Desktop Services\Remote Desktop Session Host\Device and Resource Redirection\Do not allow smart card reader redirection]. If it is Enabled, then disable it and reboot the computer. - If you have Windows 7 SP1 or Windows 2008 R2 SP1 installed and you are using RDC 8.1 to connect to computers running Windows control 8 and higher, then you need to install an update for the operating system https://support.microsoft.com/en-us/kb/2913751
This was the troubleshooting for setting up the Jacarta token, CryptoPRO on the terminal server, for signing documents in VTB24 RBS. If you have any comments or corrections, please write them in the comments.