This manual is suitable for any version SpeedFan.
I recommend using the program's English interface. This will avoid problems with resetting the names of temperatures and fans, and the English text will look more concise and compact.
Setting up the program
Press the button " Configure».Before us is the first tab - “ Temperatures", displaying the sensors installed on the motherboard and current temperatures with standard parameters.
Let's start setting up
You can see that all available temperature values are displayed, which SpeedFan was able to detect. In a collumn " Chip» the sensor chip is indicated. In this case we have three different chips: one W83782D and two LM75. We can tell the difference between the two LM75s due to the different addresses ($48 and $49). The LM75 chips, in this case, are actually clones created by the W83782D, and we will not pay attention to them since all temperatures are available directly through the W83782D. But this is not always true. Winbond chips can be configured to actually hide the true temperature received from the main sensor. In this case, you need to work with LM75. So, choose the desired temperature. For example, we chose TEMP02.
We select “Desired” and “Warning” temperature values according to our wishes. Please note that we say “wishes”. You are free to set any values. But you shouldn’t go to extremes and set values, for example, around 15 degrees. This will not bring the desired result.
Ideally, thresholds should be set like this. Select a comfortable CPU fan speed for idle mode (usually set so that it is not audible), and now remember what the processor temperature is at this fan speed. For example, if the processor temperature at idle is 35 degrees, then the desired ( Desire) you need to set more, for example, 37-40. Then, when this threshold is exceeded, the fan will accelerate to the upper value ( Warning) in its settings, and when the temperature starts to fall and crosses this mark ( Desire), then the fan will slow down.1. If the sensor temperature is less Desire, the fan will rotate at the Min speed (set for it).
2. If the sensor temperature exceeds Desire, but less Warning- the fan will rotate at speed Maximum Value(usually set<100%).
3. If the sensor temperature exceeds the value Warning, then the fan starts rotating at 100% of its possible speed.
As you can see, we first have to select the temperature, then we can select its parameters. You can also rename the name of the temperature (using the mouse or clicking " F2"). The new name will be more clearly displayed in the main window.
In modern systems there are usually a large number of different temperature sensors. To correctly identify them, it is recommended to run the program in parallel AIDA64 and rename all the necessary temperatures according to its readings, checking the same indicators.
We have renamed TEMP1 and TEMP2 to CPU1 and CPU0.
So we're done renaming and setting parameters for each temperature. Since in our case the highest temperature in the system is the “Case” temperature, we decided to display it in the taskbar (checkbox “ Show In Traybar»).
Now we must hide in the main window those temperatures that are unused. In our case, these are the indicators of LM75. Not every system has unused sensors, but it also happens that there are unconnected sensors on the motherboard that are reporting incorrect values (like -127 or something like that).
Uncheck any temperatures that you think are not useful or are incorrect.
You can now organize the temperatures displayed in the main window. All we have to do is use drag&drop to move them up or down.
So, the first part of the setup has been successfully completed, and we have achieved the following result:
Fan settings
Just like with temperatures, we can rename the fan names...
... remove unused ones from the main window...
... and organize.
Setting speeds
These are the default settings for this system. You can set your minimum ( Minimum value) and maximum ( Maximum value) power values for each fan.Don't forget that not every motherboard has the ability to control fan speeds. This, first of all, depends on what sensors can be installed on it and detected by the program SpeedFan. The same goes for temperatures, voltages and fans. Not every sensor chip can monitor all of these parameters. SpeedFan displays all the information available to it.
As usual, we can rename...
... remove unused ones from the main window (W83782D has 4 PWMs, but you are unlikely to use them all) ...
... and organize.
We will not describe the voltage settings here, because... they can also, similar to other parameters, be renamed, hidden and arranged.
Assigning speeds to temperatures
Now the main window looks much better than when you first launched the program. The flame icons are gone and unnecessary options no longer clutter the window :-)
But we still have CPU0 speed and CPU1 speed equal to 100%. It is necessary to reduce the fan speed. Please note that you will not be able to change all speeds. This depends on the sensors and controllers installed on your motherboard. Since, in this case, we have a W83782D, we have the ability to change many parameters.
Going back into the settings panel, we can see that the CPU0 temperature is associated with all available speeds, two of which have checkboxes, and the other two do not. This happens because we hid some speeds from the main window and the program, assuming that we don’t need these speeds, automatically unchecked them.
Each PWM can increase or decrease the speed of one fan. Theoretically, each fan can affect any temperature. Here we are telling the program that CPU0 speed and CPU1 speed (which are linked to PWM2 and PWM1) both affect CPU0's temperature. It means that SpeedFan will try to speed up both of these fans when the CPU0 temperature is too high and will try to slow them down when the temperature drops.
This is how we have formed the CPU0 temperature until now. But this is not what actually happens in this system. Here, the temperature of CPU0 changes under the influence of the speed (fan) of CPU0 and the temperature of CPU1 changes under the influence of the speed of CPU1.
We change the configuration accordingly.
There is one more temperature that we would like to control: the temperature " Case" This temperature actually changes under the influence of both fans. We can easily tell the program about this.
Automatic speed change
As you can see, when the “ Automatic Fan Speed", the speed does not change automatically. Therefore, we return to the tab “ Speeds» settings panel.
Select the fan speed we need and put a tick in the “ Automatically varied» (Automatic change). This needs to be done for all coolers whose speeds are planned to be controlled automatically.
Now the speeds of the fans we need will change depending on the temperatures we set on the “ tab Temperatures».
Default, SpeedFan can vary each speed from 0 to 100%. If you uncheck the " Automatic Fan Speed» (Automatic fan speed control), SpeedFan will stop automatically controlling speeds.
Setting the desired speeds
One of the fans in our system is quite quiet already at 65% power ( Minimum Value). That's a good thing because it's still running at 5,700 rpm. The other fan is noisier. Therefore, the value of its power will be slightly different from the first one.
90% power ( Maximum Value) The second cooler is enough to cool the central processor to an acceptable temperature. At 100% the noise level becomes quite high.
With these settings, the program will dynamically change the speed of the first fan from 65 to 100%, and the speed of the second - from 65 to 90%.
Please note that if " Alarming» ( Warning) temperature reached, SpeedFan will set the fan speed to 100%, regardless of what we set previously.
Here we describe the basic settings that need to be made for the program to work successfully.
1.1. Setting up Advanced Fan Control.
In latest versions Speedfan it became possible to set the curve of the dependence of fan speed on temperature - Advanced Fan Control. You can see detailed information on setting up at the link provided. I note that if you are not satisfied with the accuracy of placing points, open the file speedfansens.cfg and there set the points directly with numbers (value ControlPoints, after the change the program must be restarted). Please note that the minimum and maximum fan speed thresholds on the tab Speeds have higher priority than the curve Advanced Fan Control. Temperature is the same: if a point on the curve goes beyond the boundary Warning on the tab Temperatures, the fan will start rotating at 100% speed.2. Enable autoloading.
The program is configured, but now we need it to start every time the computer boots. There are no problems with Windows XP, you just need to drop the shortcut into Startup. But with Windows 7 and 8 it’s more complicated.In Windows 7 with default UAC settings, the program may not start by simply moving the shortcut to startup, so the easiest way is to lower the UAC slider to a minimum. If this does not suit you (and in Windows 8 this may not work), then the Task Scheduler method will help. Right click on My Computer - Management - Task Scheduler - Task Scheduler Library. On the panel on the right - Create a task. On the tab Are common enter the name of the task (optional) and check the box Run with highest rights. Tab Triggers - Create - On login. Tab Action - Create - Run program- please indicate Speedfan.exe button Review. Click OK- a task will be created. You can check its launch immediately: right click - Execute.
3. F.A.Q.
Q: How can I find out what temperature sensors Temp1, Temp2 correspond to?A: Run in parallel AIDA64 and find the same readings. Rename the previous names to the desired ones.
Q: Help! One of the sensors (aux) shows 127 (-125) degrees!
A: If the readings of this sensor are always the same, feel free to remove it from the list of displayed ones.
Q: After changing the names of the sensors and fans to their own, the next boot the previous names vent1, temp2, etc. appear again. I have to click “Configuration - OK” and only then my names appear instead of vent and temp.
A: Use the English interface language.
Q: I did everything as written in the program settings, but the fan on the processor cooler does not change its speed.
A: Make sure the four-pin fan is inserted into the four-pin connector on the motherboard. If the fan has only 3 wires, then speed control is impossible (with rare exceptions).
Q: I have a three-pin connector on the motherboard and the same on the fan / I have a four-pin connector on the motherboard and the same on the fan - the speed still does not change.
A: Change the PWM x Mode value (where x is the desired fan) in the IO settings of the chip (Configure - Advanced) to something like Software Controlled or Manual PWM Control, remembering to check the “Remember” checkbox
Q: The program shows that the voltage on the 12V line is only 9V. What to do?
A: You should not trust this data. The only correct solution is to measure the voltage with a voltmeter.
Q: I'm planning to upgrade my operating system, but I don't want to have to reconfigure the software. How can I save all settings?
A: Copy 3 files from the program’s working folder: speedfanevents.cfg, speedfanparams.cfg, speedfansens.cfg.
Q: Fan speed is huge. It's fine in other programs.
A: First change the Fan Div value in the IO settings of the chip (Configure - Advanced), if that doesn’t help - Fan Mult.
Download SpeedFan from the official website: www.almico.com/sfdownload.php
Please ask all questions related to the setup and operation of the program in the appropriate topic on .
Please indicate any errors or typos you notice in the comments.
A fairly common problem for all fans of computer games and graphics editors: overheating of the processor, video card, and unstable operation of the cooler. To solve this “illness” a program called Speedfan was created. This simple utility will help you monitor the temperature of all components that may be subject to overheating, even the hard drive. In this article you will get to know the program better and learn how to use it.
Installing and downloading the program
The Speedfan program can be freely downloaded from the official website http://www.almico.com/speedfan.php
Go to the “Downloads” tab.
On this page you will see another section with the same name “Downloads”, and in it there is a small link with the latest version of the program. Click on it to start the download automatically.


The program installer takes up very little memory, so it downloads very quickly. Once you run it, you'll need a license agreement. Click on the “I Agree” button.


In the next tab, several items will appear, next to which you need to tick. This is adding shortcuts to the desktop, to the quick access panel. Click “Next”.


Select the program installation directory. If you have two disks, then do not install it on the local one, since it should be allocated for the required systems. You can select a folder using the “Browse” button. Click “Instal” to start the download.


The program will install in just a few seconds, you need to wait until the line at the top is filled with green.
At this point, the installation of the program is complete, you can begin setting up and working.

How to set up the Speedfan program
Now you can adjust the rotation speed of the fans in the cooler, control the temperature of the video card, hard drive, and central processor.
- Access the program via a shortcut on the desktop or in the Start panel.


- The entire utility interface is in English. You only need a little knowledge to easily understand all the components.
- All configuration takes place in the configuration section, click on the “Configure” button to enter it.


A new window will open in front of you, containing many tabs. First go to “Temperature”. Here you can configure the display of component temperatures. Check all of them, namely:
- GPU – your video card;
- HDD – hard drive of a computer or laptop;
- Temp – sensors on the motherboard;
- Core – CPU cores that must always be cooled.
All these parameters must have their own maximum temperature, upon reaching which the program will notify you and speed up the operation of the fans in the cooler. At the bottom of the window you can set values for each component separately.
Click on the component, enter the value in the “Warning” column below, if you know what the temperature limit for this component is. For example, for older video cards, heating above 93 degrees is not recommended.
By going to the “Speeds” tab, you can set your cooler speed values. This promotes better cooling, but wears them out more.


Now apply all the parameters by clicking “Ok”, exit and go to the “Charts” window. These are charts that are easy to view. Check the boxes that concern you most. This way you can track the metrics in the chart.


Now that everything is set up, you can simply go into the program and look at the temperature readings, follow the diagram, change the cooler speed at your discretion.
Please note that sometimes it is not practical to change the speed of rotation of the screw, as it will have to be lubricated more often. If you don’t know how to do this, then everything will become even more complicated, because the special rubber gasket inside the cooler will quickly wear out without lubrication, and as a result it will become unusable and begin to make loud sounds.
To prevent this from happening, do not set new values on old equipment. Coolers wear out relatively quickly, it is better to take care of them - pay attention to special cooling pads if you need to lower the temperature.


SpeedFan is a free program that allows you to change the fan speed and temperature in your PC system. You can either set a fixed speed or configure its dynamic changes depending on the temperature inside your computer case. We recommend that only advanced users learn to use SpeedFan; beginners can do a lot of mischief using the SpeedFan program.
How to use SpeedFan
To start using SpeedFan, of course, you need to download and install it. It is recommended to use only trusted sites (for example, get the program here: http://www.softportal.com/software-3121-speedfan.html), otherwise you may receive a damaged version, catch a virus, a Trojan, or encounter several of these troubles at once: Dernaket.ru, Amigo Browser, omiga-plus.com, etc.
So, after downloading and installing, launch SpeedFan.
To begin with, if not selected Russian interface, it would be a good idea to switch to it for greater convenience of further work.
Russification is done very simply: click Configure(this is a button on the first main tab, which for now will be called in bourgeois language - “Readings”), among all the tabs we find Options, and there is already a point there Language. We select our native language, which is already built-in from the very beginning - no need to download any additional localization tools.

- These are cooler sensors detected by the SpeedFan program, they are designated as Fan.
- Here you can track the temperature of the processor (CPU or Temp), hard drive (HDD), video card (GPU).
- When using this zone, you can adjust the rotation speed of the coolers.
Let's move on to mastering the direct functions of the SpeedFan program
First tab "Indicators"(the same former “Readings”) will allow you to see the rotation speed of the fans, the temperature and how stressed the system is.
Second - "Frequencies". There you can overclock the processor and specify the conditions under which the system bus frequency will increase or decrease. Remember that overclocking the processor can be dangerous, even breaking your computer. But a little overclocking can be safe, and performance will increase significantly.
Using SpeedFan contributions "Information" And "SMART“, you can find out the status of the RAM and hard drive.
Then "Charts"— temperature graphs of computer devices are shown. There it is convenient to monitor under what circumstances the temperature rises or falls.
You need to start settings in the tab "Indicators" after going to it and pressing the button Configuration.
A menu with several tabs will open − Fans, Speeds, Voltages, Temperature etc. When you go to each of the tabs, a list will appear in which you need to check the boxes where you need to activate. There you can also edit any of the available parameters.
By changing certain values, we will adjust the reliability, stability, noiselessness and speed of the computer. Let's say, if you lower the fan speed without changing anything else, the result will be as follows: the computer will make less noise, but heat up more.
It would seem that “the nose is out and the tail is stuck,” but this is still not entirely true. By experimenting with the settings, it is quite possible to achieve more comfortable and high-quality computer operation (objectively or exclusively for you) than without using the program. But you should clearly understand all the characteristics of your equipment in order to obtain a similar result, guaranteed and safe for the system.
In the tab "Events" the program's actions are configured when a particular temperature is reached (for example, if the processor heats up to 75 degrees Celsius, immediately turn off the computer).
It makes sense to use SpeedFan only for advanced users; if you are not confident in your abilities, it is better to put the program aside for a while.
Updated: 12/01/2019 Published: 01/11/2017
Description
- When you try to increase or decrease the cooler speed, nothing happens in the main program window - the number of revolutions does not change.
- In manual mode, fan speed control works, but in automatic mode it does not.
Cause
- Incorrect program settings.
- Incorrect BIOS setting.
- No hardware support.
Solution
If manual adjustment of coolers does not work
First, make sure the cooling system is present and working.
Look at the fan speed in the main program window:
If it is equal 0 RPM it means either there is no cooler or it doesn’t work. Accordingly, there will be no opportunity to change the speed.
Check that the program settings are correct.
- On the main page, click on the button Configuration:
- Go to the tab Fans and look at the name of the chip to which the desired cooler is connected (for example, CPU):
- Go to the tab Additionally and select the desired chip from the list. For the required PWM X mode set the value for manual control - Manual or Software controlled(depending on the program version):
* if you don’t know which PWM mode needs to be changed, change it for everyone.
To ensure that the settings are not lost, check the remember box for each setting.
Check your BIOS settings.
Go to BIOS and find an option with a name similar to Q-Control or Fan Control. Most often, this option is located in the Power management section.
Play with the values - Enabled and Disabled. It happens that one of them blocks manual control of the fans.
Having disabled intelligent cooler control (Disabled), you need to check from time to time to ensure that the processor temperature does not exceed the permissible values. This can be done using the same SpeedFan or AIDA64.
Hardware support.
To control the cooling system, the latter must be connected to the motherboard with additional wiring. As a rule, the cooler should have a 4-pin connector:
In other words, no matter how the 21st century stands, there is still equipment without support for fan speed control.
If you still can’t control the cooling system
If a 3-pin connector is used, there are two options:
- Buy a new cooler.
- Buy an adapter from 3 pin to 4:
If a 4-pin cooler is installed, but the adjustment does not work either in SpeedFan or in the BIOS.
Update your BIOS. Since the basic I/O system is a program, it contains errors. The update includes their fixes.
If nothing helps.
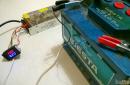
It looks like the problem is in the motherboard itself (microcrack or manufacturing defect). The last thing you can do is install an independent speed controller.
Here's an example of how this can be done.
Automatic fan control
If you can manually adjust the speed, but SpeedFan does not change it automatically when the temperature changes. Check the following:
- There is a checkmark in the main program window Auto speed vents:
- Configuration- tab Temperatures- the correct values for “Desired” and “Alarm” are set:
- Configuration- tab Speeds- ticked Auto change and the correct “Minimum” and “Maximum” values are set:
SpeedFan Alternatives
SpeedFan cannot always control fan speed. Most often, the problem occurs on laptops, where speed control can be performed using their own utilities.
And so, if the SpeedFan program did not help us, we try to install another program. An example of programs that can be used to control the speed of fan rotation:
- TPFanControl - controls speed for IBM computers.
- BIOS / UEFI - in the settings of the basic input/output system you can also control the speed of the fans. For this purpose, several speed profiles are provided (for example, quiet mode or maximum performance).
- AMD OverDrive - suitable for AMD processors.
- Riva Tunes - suitable for Intel processors.
SpeedFan is one of the most popular free programs for monitoring the state of your computer with the ability to regulate fan speed. It is for the second part of its functionality that many users install this software on their computer, because it is much easier to configure the cooler directly in the operating system, without entering the BIOS. However, SpeedFan also succeeded in monitoring temperatures, voltage, and cooler rotation speeds. The user only needs to customize the software for himself in order to interact with it comfortably.
As part of today’s material, we want to discuss the complete configuration of the mentioned application, examining each important detail step by step. The entire process will be divided into separate sections, so you can familiarize yourself with the content and immediately proceed to perform the necessary actions. However, we still recommend that you learn about all the intricacies in order to discover new facets of editing parameters in SpeedFan.
Interface
It is always recommended first of all to customize the interface for yourself in order to simplify all further actions with the software. It’s worth noting right away that SpeedFan has localization into Russian, so choosing this particular language of buttons and functions will allow you to quickly understand all the components. The interface configuration is as follows:

Once the configuration is complete, be sure to apply the changes, otherwise all settings will be automatically reset to their original state.
Fan control
Next, let's look at the most interesting feature of SpeedFan - fan control, which is why many people install this software. First, pay attention to the main menu: here basic information about the state of components is displayed - temperature, speed of rotation. However, this is not what we need now. Check the box "Auto fan speed" so that the program automatically manages them as the system loads and temperatures increase. Just below are three lines responsible for the ability to quickly change the rotation speed.

Then go back to the window "Configuration" and open the tab "Fans". Here you can tick the items that will be monitored. As you can see, not all coolers present here are always actually installed in the computer, so a checkbox is not required. Enabling unnecessary parameters will only add a few unnecessary lines to the report or notification.

Next we will touch on the topic of speed control. This is done in the corresponding tab, where three items are marked - system, processor and an additionally connected cooler through the AUX sensor. Select one of the items so that two control values appear below. Here you can set the minimum and maximum rotation speed. Read more about changing these parameters in our other articles by clicking on the links below.

Additional fan control settings
There is another tab responsible for additional fan control settings. Here you add one of the devices and fine-tune the rotation speed distribution to specific temperatures. The procedure for creating a new profile looks like this:
- Move to the tab "Fan Control". Here, check the box next to "Advanced fan control" and click on "Add".
- Enter a name for the new controller.
- Select the new profile and in the pop-up list, identify the fan device connected to one of the connectors.
- Now add a device whose temperature will be detected. To do this, click on the bottom button "Add". As you can see from the screenshot below, the button "Add" a little hidden in the interface. This is due to errors in the development of windows and you will not be able to fix the problem yourself.
- From the list that opens, select the component whose temperature you want to monitor.
- Then modify the graph by moving the rotation speed points up or down depending on your needs. So you can make sure that from a temperature of 30 to 60 degrees the speed of revolutions will be at the same level, and then increase by the specified amount of percent.


Additional chip properties
In the tab "Additionally" There are several more properties that allow you to configure the temperature offset. To get acquainted with them, you will first need to select the chip itself by expanding the pop-up menu. It displays all connected devices.

Next, all that remains is to choose an interpretation and set two temperature offsets, if necessary. Just don't forget to press the button "OK" after each change is made so that they are saved.

Creating Events
Sometimes you want something to happen automatically when special events are achieved. To accomplish this task, SpeedFan allows you to create special scripts, completely customizing them yourself. Let's look at one example of writing such an event.
- Move to the tab "Events".
- In the popup menu "If" select the operator that is responsible for the condition, such as CPU temperature.
- Next, set a condition, for example, when the temperature exceeds or falls below a certain value.
- Specify the frequency of the event duration at which the condition will trigger.
- Set the condition itself, for example, displaying a notification, sending an email, or a sound signal.
- Set additional descriptions and actions if required.
- Click on the button "Add".
- One line will appear at the top with a detailed description of the condition.


Using exactly the same method, you can add several more different events that will perform some action when the goal is achieved. Such settings allow you to create flexible conditions, optimizing the operation of the software.
Sending messages by email
Above we mentioned sending messages via email. Now is the time to talk about setting up this process. The built-in functionality of the software in question allows you to enter your address and additional information, which will later be used to send reports on the operation of the system or certain warnings. The entire configuration is built completely individually and is carried out through the menu "Mail".

Making report
Reports in SpeedFan are generated automatically, but you will first need to enable their saving and configure some parameters. All data is entered into a separate file with all the required notes, and it is stored for a certain number of days or sent by mail. The report configuration looks like this:

Viewing Hard Drive Status
Finally, let's look at two important functions that have little to do with the topic of setting up the program, but have a place in this material. First, pay attention to the tab "S.M.A.R.T.". Here you can quickly check the status of the connected drive by running one of the available tests. You will be shown performance, physical condition and values of key parameters.

Charts
The formation of graphs will allow for a more successful analysis of the system by adding the necessary indicators to the display. This includes: system temperature, CPU, graphics adapter and additional components. In addition, you can analyze not only degrees, but also voltage by selecting the appropriate mode.

Now you are familiar with the basic aspects of setting up the SpeedFan program. As you can see, there are really a lot of parameters here, and after familiarizing yourself with each of them, the procedure for mastering the software will take much less time, which will allow you to immediately use the tool to its full potential.