Instruction
on the operation and configuration of equipment designed to receive digital signal in standardDVB- T2
1. General part
1.1 Basic terms:
◦ DMV– the decimeter range within the frequency limits of MHz, used for digital broadcasting purposes, has a low level of noise and interference, which makes it possible to conduct high-quality multi-program broadcasting in it.
◦ Multiplex- a digital package of TV channels broadcast on one frequency TV channel.
◦ Digital set-top box- this is an electronic digital device connected to the terrestrial receiving antenna, and converting the digital signal of terrestrial television broadcasting in the DVB-T2 standard into an analog one connected to the TV.
◦ Digital television- transmission of video and audio signals from the transmitter to the TV using digital modulation and the MPEG data compression standard
◦ Digital Terrestrial Television (CETV) - a set of devices for the direct transmission of a television or radio signal in digital format.
◦ MPEG-4(Eng. Moving Picture Experts Group) is an international standard for video and audio compression.
◦ DVB standard– depending on the signal propagation medium, the DVB standard has several modifications:
▪ DVB-T(Digital Video Broadcasting - Terrestrial - terrestrial antenna) - European standard for digital broadcasting;
▪ DVB-C(cable-cable) distribution of a digital signal over a cable;
▪ DVB-H(handheld-handheld) terrestrial broadcasting on mobile devices;
▪ DVB-S(sputnik-satellite) distribution of a digital signal through a satellite.
1.2 Equipment required for watching digital TV:
1.2.1 UHF receiving antenna;
TV connection diagram through an external DVB-T2 signal receiver (Fig. 3)
1.2.3 If the TV has a built-in tuner DVB-T2, MPEG 4, H.264 AVC, (look in the TV passport), then you do not need to purchase a set-top box, you only need an antenna.
2. Aboutorganization of digital television signal reception.
2.1 To organize the reception of a digital television signal:
· If the digital tuner is built-in on the TV, but not activated, then you need to select the broadcasting country in the corresponding section of the settings menu.
· When using a digital set-top box, connect the video and audio cable to the corresponding connectors on the analog TV (other interfaces for connecting STB and TV are possible: HDMI, SCART, RGB, S-Video). and put the TV in the "via set-top box" mode.
· Connect the antenna cable to the antenna input of a digital TV or STB (set-top box).
· Search for digital TV programs automatically (using the instruction manual). The TV will tune in to the channel broadcasting in your locality.
· If the automatic search did not give any results, use the manual search (see the instruction manual), for this you need to know the TV channel that broadcasts in your locality.
If neither automatic nor manual search helped, then first of all it is necessary to check the quality of the connectors and connections, and how well the receiving antenna is tuned. ( Note : one digital set-top box can be connected to multiple TVs. But at the same time, one channel will be broadcast on all TVs. If there is a need to watch two or more channels at the same time, then you need to purchase a set-top box for each TV. Or organize a collective digital television reception system in your home.)
The system of collective reception of digital television is a special equipment that helps to avoid the need to purchase a digital set-top box. If there are several TVs in the apartment, then it will be possible to watch different channels on them at the same time. While when using an individual digital set-top box, the same channel will be broadcast on all TVs in your apartment. The downside of the digital TV collective reception system is that the so-called “digital effect” disappears: you get a regular analog signal with the appropriate quality. There are also economic difficulties in implementing such systems.
2.2. Instructions for setting up antennas for digital television:
2.2.1 If you use collective antenna reception then:
· Set up the STB or TV according to the instruction manual.
· If, after following all the instructions, there is no signal reception, contact the organization serving the collective antenna economy (perhaps your house is not equipped with the necessary equipment, or the signal level at your subscriber branch is not sufficient for decoding programs).
Note: The systems of collective reception of television programs (SCPT) or the so-called collective antennas, which are usually installed on the roofs of multi-storey buildings, are managed by house management companies. It is to their address that applications for the installation of SKPT or claims for the operation of these systems should be sent. Home management companies must choose a contractor or hire competent specialists who are able to provide installation / repair of SKPT in your home.
2.2.2 If you are using a personal antenna then:
· If you live near a repeater, try to receive on an indoor antenna first, if reception fails, use an outdoor antenna.
· For optimal setting indoor antenna to receive a digital signal, use the signal level and quality indicator built into the TV or set-top box and change the orientation and location of the antenna.
· For reception of DTT in rural areas or at a considerable distance from the transmitting TV station, it is recommended to use individual external UHF antennas of industrial production with high gain and band antenna amplifiers.
Most digital TVs (and set-top boxes) have a built-in signal level and quality indicator that will allow you to optimally tune the antenna to receive a digital signal.
For simultaneous reception of a conventional cable TV signal and digital TV, you can use a conventional TV signal combiner.
Attention!
1. DVB-T receiving user equipment does not support DVB-T2 standard, first generation equipment owners need additional receiving devices.
2. A set-top box with a satellite dish will not be able to receive broadcasting in digital format, since satellite broadcasting is carried out in the DVB-S standard, and on-air broadcasting in DVB-T2. In any case, a special prefix is required to receive terrestrial CETV.
The federal targeted program does not provide for measures to support the population in purchasing digital set-top boxes. However, regional authorities are already developing assistance programs for privileged categories of citizens.
Size: px
Start impression from page:
transcript
1 DVB T2/T DIGITAL TERRESTRIAL RECEIVER WITH RECORDING FUNCTION DTR-01
2 DEAR BUYER! Thank you for choosing FUSION products. We are pleased to offer you products designed and manufactured to the highest standards of quality, functionality and design. We are confident that you will be satisfied with the purchase of a product from our company. Take care to save this manual, use it as a reference for future use of the device. CONTENTS Operating and safety instructions... 3 Package contents... 5 Tuner controls and their functions... 5 Connecting the tuner... 5 Remote control... 6 Getting started using the tuner... 8 Setting up the tuner Using the tuner Recording video Safe Disposal Troubleshooting Specifications
3 PRECAUTIONS AND OPERATING REGULATIONS 1. Please read this manual before operating the device. Observe the precautions in this manual. 2. Electricity can perform a variety of useful features , but it can also cause harm and property damage if used incorrectly. Safety has been a priority in the design and manufacture of this product, but improper use may result in electric shock. For your safety and to prolong the life of the product, please read this manual carefully before using, installing, operating and cleaning the player. 3. Do not open the housing cover or touch internal live parts. Do not attempt to repair the device yourself. Improper repairs may result in fire and/or electric shock and will void the warranty. 4. Connect the device to the power supply system in accordance with the specifications indicated on the product label. 5. It is recommended to use a grounded plug to connect the appliance to the mains. If the plug of this appliance does not fit into your outlet, contact an electrician to replace the outlet. 6. The outlet to which you plug the tuner must be easily accessible. 7. Do not use the device if the power cable is damaged. Contact an authorized service center for repair or replacement. 8. When disconnecting from the mains, do not pull on the cable, hold on to the plug. Do not handle the cable with wet hands. 9. Do not overload outlets, extension cords, and adapters as this may result in fire or electric shock. 10. Route power and signal cables so that they are not likely to be stepped on or pinched. 11. Turn off the power of the device when not in use. 12. Do not place the device on an unstable surface, otherwise it may fall and fail, and injury may result. 13. Do not expose the device to direct sunlight. Keep the machine away from heat sources. 14 Do not place the device in places with high humidity (in the bathroom, near the sink in the kitchen, etc.). Do not splash water on the device or allow moisture to come into contact with the device. Do not place vases filled with water or other liquids on the device. 15. The device should be placed in a horizontal position in places with sufficient ventilation. 16. The ventilation openings provided in the device must not be blocked. Overheating of the device may cause malfunctions. 17. Do not push objects of any kind into the openings in the device as they may come into contact with live parts of the device, resulting in a fire or electric shock. 18. Do not place heavy objects on the device. Disconnect the device from the mains before cleaning. To clean the body of the device, use a soft 3
4 dry cloth. Abrasives and alcohol-containing substances are not recommended for use, as this may damage the device. If you do not use the device for a long time, unplug it from the mains and disconnect the antenna and other cables. During thunderstorms, also unplug the device from the mains and antenna to avoid short circuits. For repair and maintenance, please contact specialized service centers in the following cases: - the device has been hit or dropped, the body of the device has been damaged; - the device does not work correctly or there have been significant changes in its operation; - liquid has been spilled on the device or a foreign object has fallen into it; - The device has been exposed to rain or moisture. NOTE: 4 When connected to the mains, high voltage is present inside the device, representing a danger to life. When using the device, be careful and follow these instructions. The instrument uses double insulation between dangerous high voltage parts and those parts of the instrument with which the user comes into contact. All pictures in this manual are for illustration purposes only, the actual product may differ from the picture. NOTE: The software update function is available only under the conditions of the service center. It is forbidden to update the software by the user. The device, damaged as a result of self-updating, is removed from warranty and post-warranty service.
5 COMPLETE SET Tuner 1 pc. Remote control 1 pc. Audio/video cable 1 pc. Instruction manual 1 pc. Warranty card 1 pc. 5.DC IN Connector for power cable connection 6.Mini USB connector for connecting an additional IR sensor (optional) 7.Infrared signal receiving window of the remote control 8.Power indicator (red / green on) 9.USB connector for connecting storage devices CONNECTING TUNER CONTROLS AND THEIR FUNCTIONS TUNER CONTROLS AND THEIR FUNCTIONS 1.ANT IN Input for connecting an external TV antenna 2.AUDIO L/R Analog audio output (left and right channels) 3.VIDEO OUT high-definition video output for connecting HDMI version 1.3 devices with HDCP support Connect your TV to the player according to the diagram above. This must be done before using the appliance with the power off. WARNING: Disconnect the equipment from the mains before making any connections. 5
6 REMOTE CONTROL Using the remote control Point the remote control (hereinafter referred to as remote control) at the infrared signal receiving window on the front of the unit. The maximum remote control distance is 7 meters from the player. The allowable tilt angle of the remote control is 30 degrees. The remote control may not work properly if the signal receiving window is exposed to direct sunlight, in which case change the lighting. When you press the buttons on the remote control, keep an interval of at least one second between presses. When using the remote control, be careful not to subject it to shocks, immerse it in liquids, or leave it in places with high humidity. Installing Batteries To operate the remote control, two AAA batteries must be installed in the remote control. 1. Open the battery cover. 2. Install the batteries, observing the polarity (corresponding markings are inside the compartment). 3. Close the battery cover. Battery Safety Precautions Improper use of batteries may result in electrolyte leakage and/or explosion. Follow the instructions below. Install the batteries in strict accordance with the polarity (+) and (). Various types batteries have various characteristics. Do not use batteries together different types. Do not use old and new batteries together. Mixing old and new batteries will shorten the life of the new battery or cause the old battery to leak electrolyte. Remove the batteries as soon as they are exhausted. Chemicals leaked from batteries cause corrosion. If traces of chemical leakage are found, remove them with a cloth. Batteries supplied with the TV may have a shorter lifespan due to storage conditions. Remove the batteries from the remote control if it is not being used for a long time. 6
7 REMOTE CONTROL BUTTONS AND THEIR FUNCTIONS 1. POWER Switch on/off the instrument. 2. MUTE Sound mute button. 3. 0~9 Numeric buttons for entering channel numbers and menu operation. 4. GOTO Button to move to a specific time of the file being played. 5. RECALL Button to switch between the current and previous TV channels being watched. 6. MENU Button to go to the settings menu (will be displayed on the TV screen). 7. EXIT Button to exit the current menu and return to full screen playback. 8. CH+/- Buttons for switching TV channels. 9. VOL+/- Volume buttons. 10. DEFG Menu navigation buttons. 11. OK Confirmation button when working with the menu 12. INFO Button for calling up information about the received TV channel in full screen view mode. 13. SUBTITLE Button to switch the subtitles broadcast by the TV channel. 14. AUDIO Sound mode switching button. 15. TEXT Button to enter and exit teletext mode. 16. FAV T Button to go to the list of favorite TV channels / fast forward files in the reverse direction (each press of the button changes the fast forward speed in the following order: x2, x4, x8, x16, x32). 17. EPG S EPG/Fast Forward Button (Each press of the button changes the forward speed in the following order: x2, x4, x8, x16, x32). 18. PLAY/PAUSE DU Button to start playback/pause. 19. STOP Button to stop video recording in video recording mode / stop playback in playback mode. 20. REC P Button to start recording live video of the current broadcast / skip to the previous track in file playback mode. 21. TV/RADIO O Button to switch between TV/Radio / skip to the next track in file playback mode. Colored buttons (red, green, yellow and blue) for working with various menus. 7
8 GETTING STARTED TO USE THE TUNER After making all the connections, turn on the TV and make sure the tuner is connected to the mains. Press the tuner power button to turn it on. When you turn it on for the first time, and also after restoring the factory settings, the initial installation menu should appear on the TV screen. In the settings menu, use the DE buttons to select the desired page: Program (Control channels), Picture (Picture settings), Channel Search (Search for channels), Time (Setting time and timer), Option (Setting options), System ( System settings), USB (Playback control). On the selected page, select desired parameters to adjust, use the FG buttons, then use the DE buttons to adjust the selected item, or press the D or OK button to go to extra menu. To close the settings menu, press the EXIT button. CHANNEL MANAGEMENT (Program) OSD Language OSD language. Use the FG buttons to select an option from the menu, use the DE buttons to select your language from the list. Country Country. Use the FG buttons to select an option from the menu, use the DE buttons to select your country from the list. Channel Search Search for TV channels. Use the FG buttons to select an option in the menu, press the D or OK button to start automatic TV channel search. When the search is completed, you can start watching the found TV channels. If no TV channels were found, make sure the antenna is connected correctly. TUNER SETUP Navigating the setup menu Press the MENU button to access the setup menu Program Edit Channel Management. Highlight this option and press the D or OK button to access the secondary menu. This will require you to enter a password (default password: , master unlock password:). A list of channels (TV channels and radio stations) will be displayed in the menu that opens. Use the FG buttons to select the desired channels to perform the necessary operations (block, skip, add to favorites, move or delete) with them, following the prompts at the bottom of the screen. Setting Favorite Channels Select the desired channel and press the FAV button to
9 add it to your favorites list. A list of categories will appear on the screen. Select the category you want to add the selected channel to and click OK. A heart-shaped icon will appear next to this channel, which means that this TV channel was successfully added to the favorites list. After you have added all the desired TV channels to your favorites list, press the EXIT button to close the menu. While watching, press the FAV button to display your favorite channel list on the screen. Use the DEFG navigation buttons to select the desired channel and press the OK button to switch to that channel. To remove a channel from your favorites, switch to it and press the FAV button. In the window that opens, select the "Disable" option and click OK. Deleting channels Select the desired channel and press the BLUE button. The screen will ask you to confirm the operation, press the OK button if you confirm the deletion of the channel. Skip channels If a channel or radio station is skipped, when you switch channels with the P+/- buttons, it will be skipped. However, you can switch to this channel by entering its number with the number buttons. Select the desired channel and press the GREEN button to set a pass to it. A skip icon will appear on the screen. To unskip a TV channel, highlight it in the list and press the GREEN button, then the skip icon should disappear. Moving channels Highlight the channel you want to move and press the RED button. The move indicator should appear. Use the FG buttons to move through the list until you select the location where you want to move the channel. Press the OK button to confirm. Channel Lock The Channel Lock feature prevents unauthorized viewing of unwanted channels. To view a locked channel, you will need to enter a password (default password: , unlock password:). Select the channel you want to block and press the YELLOW button. A lock icon will appear next to that channel. To unblock a channel, select it in the list and press the YELLOW button. The lock icon should disappear. 2. EPG Electronic Program Guide Highlight this option and press the D or OK button to enter the Electronic Program Guide. You can also enter the electronic program schedule by pressing the EPG button on the remote control. 3. Sort - Sort You can choose how to sort the channels: By LCN By logical channel numbers in ascending order. By Service Name By channel name in alphabetical order. By Service ID By ID. By ONID NOTE: The sort function can only be used after the logical channel numbers have been disabled (next option in this setup menu). 4. LCN Logical Channel Numbers You can enable (On) or disable (Off) the function. 9
10 PICTURE ADJUSTMENT 1. Aspect Ratio Aspect Ratio Set the appropriate aspect ratio according to your TV's aspect ratio: 4:3 Pan and Scan, 4:3 Letter Box or 16:9. Below is a schematic illustration of how these screen formats look on TV screens, depending on the type of signal. 2. Resolution Set the appropriate resolution according to the properties of your TV: 576i, 576p, 720p, 1080i, 1080p. 3. TV Format Color System Set the appropriate color system according to the properties of your TV: PAL or NTSC. SEARCH FOR CHANNELS (Channel Search) 1. Auto Search Auto Search Auto search allows you to automatically find all channels and store them in the device's memory. When performing an automatic search, all previously stored channels are deleted. Highlight this option and press the D or OK button to start automatic search. If during the search you need to stop it, press the EXIT button, then only those channels that the device has managed to find will be saved. 2. Manual Search Manual Search Manual Search allows you to search and store additional channels without deleting previously saved channels and settings. Highlight this option and press the D or OK button. Then you will go to the channel search menu manually. Use the DE buttons to set the channel frequency and press the OK button to start searching. If a channel is found, the device will store it in memory and add it to the channel list. If the channel is not found, the device will exit the search mode automatically. TIME AND TIMER SETTING (Time) 1. Time offset Time setting Select the time setting mode: automatic or manual. 2. Country Region - Country, region If you chose to set the time automatically, set your region here. 3. Time Zone Time zone If you choose to set the time manually, set your time zone here. 4. Power Down (Sleep) Auto Power Down (Sleep Timer) 10
11 Set here the time from one to twelve hours after which the device will turn off automatically, or disable the function (Off). OPTION SETTING (Option) 1. OSD Language OSD Language Select desired language from the list. 2. Subtitle Language Subtitle language Select the desired language from the list. 3. Audio Language Audio language Select the desired language from the list. If the program does not have audio in the selected language, then the program's default language will be used. SYSTEM SETTINGS (System) 1. Parental Guidance Parental Guidance To set the Parental Guidance feature, highlight this option and press the D or OK button. You will need to enter a password (default password:). You can also just disable this function by selecting Off. 2. Set Password Setting a password You can set your own password to access blocked channels. To change your password, you first need to enter Old Password(default password:). The system will then ask you for a new password. If you forget your password, use the password to unlock it: Restore Factory Default Restore Factory Default To restore factory settings, highlight this option and press the D or OK button. You will be prompted to enter a password (the default password is:), then press the OK button to confirm. When restoring factory settings, all saved channels and settings will be deleted. 4. Information Highlight this option and press the D or OK button to view model, player and software information. PLAYBACK CONTROL (USB) The player can play AVI, MPG, DAT, VOB, MKV, MJPEG, MP3, AAC, JPEG, PNG, and BMP files recorded on a storage USB device. The USB device must be formatted in file system NTFS, FAT16 or FAT Multimedia When a USB device is connected to the player, highlight this option and press the OK button to enter playback mode. Use the DE buttons to select the desired file type (MUSIC - Music, PHOTO - Photos, MOVIE Movies, PVR - Videos) and press the OK button to switch to the corresponding file type playback mode. 2. Photo Configure Set photo display Slide Time Display time. Slide Mode Slideshow effects. You can choose one of the proposed effects or set a random effect (random). Aspect Ratio Image format. 3. Movie Configure Video playback setting Aspect Ratio Image format. Subtitle Specific Subtitle Font Size Subtitle Background Subtitle Font Color Subtitle Font Color 4. PVR Configure Record Setting 11
12 Highlight this option and press the D button to view device information (format, total memory, and free memory) and format the connected storage device (if necessary). CAUTION: As a result of formatting the drive or hard drive all files stored on them are deleted. Before formatting, make sure you back up copies of important files on other media. NOTES FOR USB DEVICES Not all USB devices are compatible with the player. Some USB devices may not be compatible with the player. The company is not responsible for any loss of data recorded on the USB device. The more information recorded on USB stick, the more time the player takes to read first. Some files, even if their format is supported by the player, may not be played or read depending on their content. USING THE TUNER Viewing current information Press the INFO button to display information about the current TV program on the screen. Selecting the sound mode 12 Press the AUDIO button to change the audio language if the TV channel broadcasts in different languages, or another sound mode (LEFT RIGHT STEREO) if the TV channel broadcasts the appropriate signal. Selecting subtitles Press the SUBTITLE button to select subtitles if they are broadcast by the TV channel. Electronic program schedule Press the EPG button to open the weekly electronic program schedule of all TV channels (which broadcast such a schedule). List of TV channels and radio stations Press the OK button to display a list of all TV channels and radio stations on the screen.
13 To schedule a recording, press the MENU button. Then, in the settings menu, go to the PROGRAM page and highlight the EPG option. From this menu, go to Program Guide, then to Planning. Follow the prompts at the bottom of the window. RECORDING VIDEO The player allows you to record video. Before using the video recording function, connect a USB storage device to the instrument. There are three ways to record: - real time recording, - timeshift recording, - scheduled recording. Realtime Recording To start recording, press the REC button on the remote control. The TV program you are watching will be recorded by the player and an indicator will appear at the top of the screen. Press the INFO button to view the current recording progress information. To end recording, press the H STOP button. Scheduled recording then in Schedule (Schedule). Select the Event add option, and then set the recording interval (Timer Recording). Thus, you will never miss the desired program or movie again. In TV mode, press the EPG button to open the electronic program guide. In the schedule, select the program you want to record and click OK. The schedule of events will be displayed on the screen. Set the required video recording parameters in the window that opens. Set the Mode parameter to Record. Then this program will be automatically recorded in set time. You can set the recording frequency by selecting one of the values: Once (Once), Daily (Every day), Weekly (Every week) or Monthly (Every month). Once the videos have been scheduled, you can change the schedule. To do this, press the GREEN button. If you need to delete a scheduled entry, highlight it in the list and press the BLUE button. When finished, press the EXIT button to save your changes and exit this mode. Time Shift This video recording mode allows you to pause watching a TV program, while the device continues to record it to the drive. While watching a show, if you want to pause the show, press the DU button to activate the function. 13
14 In the window that opens, select OK, and then click OK. Press the INFO button to view current time shift information. When you need to resume watching a program, you can rewind or fast forward the program using the TS buttons. To disable the timeshift function, press the STOP button. When using the timeshift function, make sure a USB device is connected to the TV. SAFE DISPOSAL Your device is designed and manufactured with high quality materials and components, which can be recycled and reused. If a product has the crossed-out wheeled bin symbol, it means that the product complies with European Directive 2002/96/EC. Familiarize yourself with the local system for separate collection of electrical and electronic goods. Observe local regulations. Dispose of old devices separately from household waste. By ensuring that your product is disposed of correctly, you will help prevent potential negative consequences for the environment and human health. 14
15 TROUBLESHOOTING OPERATOR'S MANUAL If you find a problem, it does not always mean there is a problem. Before sending the device in for repair, check it according to the following instructions. Never attempt to repair the equipment yourself, as this will void the warranty. Malfunction Possible reason Remedy There is no image. The screen displays "No Signal". There is no sound. No picture but sound is fine. The remote control does not work. Image is unstable. The tuner is not connected to the mains. The tuner is not switched on The cable from the tuner is not connected. Incorrect settings Not connected TV antenna. Audio cable not connected or connected incorrectly. Sound is blocked. The problem is with the soundtrack. Broken cable or disconnected antenna. Station signal is too weak. The batteries are exhausted The signal from the remote control does not reach the player The signal is too weak. Connect the tuner to the mains. Turn on the tuner with the power button. Connect the cable to the tuner. Restore factory settings. Connect the TV antenna correctly. Click the Reset button. Turn off the mute by pressing the MUTE button Try to install Make sure all cables are connected correctly. Press the TV/RADIO button to switch to TV mode. Replace batteries with new ones. Point the remote control directly at the signal receiving window on the front panel, remove objects that block the signal, or move closer to the player. Check if it works antenna cable and its connection. 15
16 TECHNICAL SPECIFICATIONS Received signal: DVB-T 2/T (reception open channels) Playable video codecs: H264, MPEG1/2/4. Playable audio codecs: AAC, MP3, ADPCM, MP1/2, PCM Media containers: FLAC, JPG, JPEG, TRP, M2T, M2TS, MOV, AVI, MPG, VOB, MP4, 4.1 main), TS pluggable media via USB port Display subtitles and teletext language. Parental control function Digital radio in Russian Fast and slow playback of recorded programs with a speed variation of 2, 4, 8 or 16 times Time shift mode Possibility to control the level and quality of the received signal Synchronization of the built-in clock while receiving programs Possibility of updating the software (in the conditions of the service center) Recording programs by timer Terminals: HDMI / Video-Audio composite output / USB 2.0 Adapter supply voltage: V 50/60Hz Dimensions: 118*83*25mm Weight: 0.35kg The manufacturer reserves the right to make changes to the design, design, equipment and technical characteristics of the device without prior notice. 16
17 CERTIFICATION INFORMATION Thank you for choosing FUSION. The manufacturing company reserves the right to make changes in the design, design and packaging of goods without prior notice. Subject to mandatory declaration of conformity. Service life of the product - 3 years Warranty period - 1 year Central authorized service center: VipService LLC, Moscow, pos. Mosrentgen, settlement Mosrentgen, st. Geroya Rossii Solomatina, 31 Manufacturer: FUZHN TEKNIKS CO LIMITED North Point, 8 Java Road, Carnival Commercial Building, 13/F, room 1306, Hong Kong, China. Made in China. Manufacturer: FUSION TECHNICS CO LIMITED China, RM 1306, 13/F, Carnival Commercial Building, 8 Java Road, North Point, HK. Made in PRC Importer / organization authorized to accept claims from buyers in Russia: VipService LLC, Moscow, pos. Mosrentgen, settlement Mosrentgen, st. Hero of Russia Solomatina, 31 Unified information service: List service centers attached (see insert) The manufacturer reserves the right, without prior notice, to make changes to the list of authorized service centers, including changes to addresses and telephone numbers of existing ones. You can also find out the address of the nearest SC by phone hotline or on the website www. fusion.ru, as well as by sending a request on 17
SAFETY PRECAUTIONS AND RULES OF USE Please read this manual before operating the device. Observe the precautions in this manual. Do not open the lid
RECEIVER OF DIGITAL TERRESTRIAL CHANNELS DVB T2/T WITH RECORDING FUNCTION DTR-02 DEAR BUYER! Thank you for choosing FUSION products. We are pleased to offer you products designed
OPERATING MANUAL OPERATING MANUAL SDT-82 DVB-T2/T DIGITAL TERRESTRIAL RECEIVER WITH RECORDING FUNCTION 1 CONTENTS Precautions and operating rules... 3 Package contents...
OPERATING MANUAL SUPRA SDT-84 DVB T2/T digital terrestrial receiver with recording function CONTENTS Precautions and operating rules... 3 Package contents... 4 Front panel...
Operation manual Electric heater EPH-8152 CONTENTS Safety measures and precautions... 3 Package contents... 3 Electric heater device... 4 Control panel...
Quick Start Guide High Definition Digital Cable TV Receiver Supports Irdeto Closing System Test Sequence Carefully open the box. Check completeness:
Operation Manual EPH-7101 Mikathermic Household Electric Heater CONTENTS Safety Precautions... 3 Package Contents... 3 Electric Heater Design... 4 Installation and
User Manual DCD3011 Cable TV Receiver Contents Safety Instructions 3 Appearance 5 Front panel 5 Rear panel 5 Remote control 6 Connection 7 Home
DVC-2300 HD Digital Cable Receiver Owner's Manual Contents Safety Guidelines 3 Appearance 5 Front Panel 5 Rear Panel 5 Remote Control 6 Connection
FAN FLOOR SF-3001 Dear customer! Thank you for choosing FUSION products. We are pleased to offer you products designed and manufactured in accordance with
Operating manual ROTARY ELECTRIC SHAVER RS-203 Dear customer! Thank you for purchasing a SUPRA Electric Shaver. Please read this manual carefully. It contains important
DVB T2/T DIGITAL TERRESTRIAL RECEIVER SUPRA SDT-85 CONTENTS Precautions and safety...3 Package contents...4 Front panel...4 Rear panel...4 Connecting the tuner...5
DVB T2/T DIGITAL TERRESTRIAL RECEIVER WITH RECORDING FUNCTION SUPRA SDT-87 SUPRA SDT-88 SUPRA SDT-89 SUPRA SDT-97
English Version.1 USER MANUAL DIGISAT T2 CLASSIC Digital Terrestrial Receiver Main Features Full support for DVB-T2 (H.264), AVC, MPEG4, MPEG2 standards Maximum speed
BT-3000 BLUETOOTH PORTABLE AUDIO SYSTEM OPERATOR'S MANUAL CONTENTS Precautions and Safety... 3 Package Contents... 3 Model Description... 4 Powering the Unit... 4 Basic Operation...
OPERATING MANUAL SUPRA SDT-75 DIGITAL TERRESTRIAL RECEIVER SUPRA SDT-77 CONTENTS Precautions and Safety...3 Package Contents...4 Front Panel...4 Rear Panel...4 Connection
INTRO DTV-09 Digital TV Tuner USER'S MANUAL 1. Warnings 1. This product is designed for professional installation on 12V vehicles only.
OPERATING MANUAL SDT-98СI TV BOX CONTENTS Operation and safety instructions... 3 Package contents... 4 Set-top box controls... 5 Remote control
User manual Hair dryer PHS-1211 1 CONTENTS Safety precautions... 3 Contents... 4 Using the appliance... 4 Cleaning the appliance... 4 Safe disposal... 4 Specifications... 4 Dear
SUPRA BTS-628 PORTABLE BLUETOOTH AUDIO SYSTEM CONTENTS Precautions and Safety...3 Package Contents...4 Audio System Structure...4 Powering the Unit...5 Basic Operations...5 Safe Disposal...6
User manual ROTARY ELECTRIC SHAVER RS-204 1 CONTENTS Safety precautions... 3 Package contents... 3 Power supply... 4 Use of the device... 4 Cleaning and maintenance... 5 Replacing the shaving head...
INSTRUCTION MANUAL DVB T2 DIGITAL TERRESTRIAL RECEIVER SUPRA SDT-65 CONTENTS Precautions and operating rules...4 Package contents...5 Front panel...6 Rear
User's Manual www.iconbit.ru Safety 1. Please read this manual carefully before using the device, and save it for future reference. 2. Follow all precautions
1 CONTENTS Safety precautions... 3 Package contents... 4 Power supply... 4 Use of the device... 4 Cleaning and maintenance... 4 Safe disposal...
BTS-553 PORTABLE BLUETOOTH AUDIO Bluetooth2.1+EDR (Enhanced Data Rate) AUX input, support MP3/MP4/PC/mobile phone Earphone jack Control functions: Volume+/Volume-/Next/Previous/Play/Pause/ Power on/Phone
FLOOR FAN MVF-1611 DEAR BUYER! Thank you for choosing SUPRA products. We are pleased to offer you products designed and manufactured in accordance with
Www.teleboxtv.com Safety instructions: 1. Read this manual. 2. Pay attention to warnings. 3. Do not use the device near water or high humidity area. 4.
DCD2204 Cable TV Receiver User Manual Table of Contents Safety Instructions 3 Appearance 5 Front Panel 5 Rear Panel 5 Remote Control 6 Connection 7 Home
SUPRA BTS-527 PORTABLE BLUETOOTH AUDIO SYSTEM CONTENTS Precautions and Safety...3 Package Contents...4 Audio System Structure...5 Powering the Unit...6 Basic Operations...6 Safe Disposal...8
HIGH DEFINITION DVBT T/T2 DIGITAL RECEIVER T2505 USER'S MANUAL Important Safety Instructions 1) Read the instructions. 2) Keep the instructions. 3) Follow all warnings. 4) Follow
Anti-wrinkle massager MFS-101 Operation manual 1 Dear customer! Thank you for purchasing the SUPRA massager. Please read this manual carefully. It contains important
English Version.1 User Manual DIGISAT T2 Digital Terrestrial Receiver Precautions 1) Read the instructions carefully. 3) Heed all warnings. 5) Do not use the device near
DIGITAL CABLE TELEVISION CONTENTS: 1. Equipment set...2-3 1.1 Equipment set...2 1.2 Remote control. Button Assignment...3 2. First Connection...4-6 2.1 Wiring Diagram...4 2.2 Update
CBC-5111 User's Manual Digital Cable Receiver with Built-in CONAX Precautions Please read the following precautions carefully: The voltage must be
English GI UNI DVB-T2 HD Digital Terrestrial Receiver USER MANUAL 1 Section 1 System Description 1 Main Features Operating Support Android systems 4.4.2 with ARM Contex A5. Support
BTS-525 PORTABLE BLUETOOTH AUDIO Bluetooth 2.1+EDR AUX input top panel Supported devices: iphone, ipad, devices with Bluetooth function
Quick Start Guide Digital Cable Receiver Product Description Open the box, the package includes: Digital Receiver User Manual Remote Control Power Adapter Batteries
Instruction Manual HSS-1240 Hair Straightener 1 CONTENTS Precautions... 3 Package Contents... 4 Device Design... 4 Use of the Device... 4 Cleaning the Device... 5 Safe Disposal...
digital photo frame DEXP MP-72 / MP-74 / MP-82 / MP-102 Dear customer! Thank you for choosing products manufactured under the trademark "DEXP". We are pleased to offer you products designed and manufactured
Digital photo frame SP-70/MP-70/MP-71 HD/MP-78 Elegance/ MP-79 HD Elegance/MP-80/ MP-100/MP-108 Elegance Dear customer! Thank you for choosing products manufactured under the trademark "DEXP".
ZALA TERRESTRIAL TV User manual Contents GENERAL INFORMATION... 3 Operation... 3 Operations performed on the home page interactive menu... 8 TV... 9 Select a channel and watch
2 3 4 Type TFT LCD, wide (16:9), ROTATING 270 Screen Size 7 (for KREOLZ DVPS7xx models), 9 (for KREOLZ DVPS9xx models) Resolution 480*234 pixels (7 inches) 640*234 pixels (9 inches)
User Manual SUPRA SDT-110 DVB T Digital Terrestrial Receiver with Recording Function and CAM Module Slot
English Version.1 USER MANUAL DTR-100 DVB-T2 Digital Terrestrial Receiver Contents Safety Instructions... 2 Key Features... 3 Appearance ... 4 Remote control ...
User manual RS-213 ELECTRIC SHAVER 1 CONTENTS Safety precautions... 3 Package contents... 4 Power supply... 4 Use of the device... 4 Cleaning and care... 4 Safe disposal... 4 Technical
MPS-104 MANICURE AND PEDICURE SET WITH BUILT-IN DRYER MPS-104 Two rotation speeds Two directions of rotation Built-in dryer 4 nozzles: - Fine disc nozzle - Felt disc nozzle - Large
Digital Photo Frame Digma PF-702 User Manual Thank you for purchasing our product! This guide contains important safety and operating instructions. Please be careful
Additions to the Operating Instructions for the Soundbar with built-in DVD player: SUPRA SB-3210D
DCD2304 Cable TV Receiver User Manual Table of Contents Safety Instructions 3 Appearance 5 Front Panel 5 Rear Panel 5 Remote Control 6 Connection 9 Home
CONTENTS 1. INSTALLING THE RECEIVER .... 3 1.1 FRONT PANEL ....3 1.2 REAR PANEL .................................... .................................4 1.3 CONNECTING THE RECEIVER...4 1.4 REMOTE CONTROL ..............4 .......................
Kaiboer Technology Co. HDMI 1.3 K200 Network Media Player (1080p) Precautions Operating Instructions Congratulations on your purchase of the K200 Network Media Player. In order to prevent
TV BOX User manual CONNECTION Complete set: - 1 pc. - network adapter 1 PC. - remote control 1 pc. - HDMI cable 1 pc. - batteries for remote control
FLOOR FAN VS-1610 Dear customer! Thank you for choosing SUPRA products. We are pleased to offer you products designed and manufactured in accordance with
SUPRA BTS-555 PORTABLE BLUETOOTH AUDIO SYSTEM CONTENTS Precautions and Safety...3 Package Contents...4 Audio System Structure...5 Powering the Unit...6 Basic Operations...6 Safe Disposal...8
GR-01URB PORTABLE RADIO OPERATOR'S MANUAL CONTENTS Safety Precautions and Precautions... 3 Package Contents... 4 Radio Components... 5 Radio Power Supply...
FC07-WNHA FC09-WNHA FC12-WNHA FC18-WNHA FC24-WNHA FC30-WNHA FC36-WNHA FUSION! Specifications Remote control instruction manual Precautions Installing and replacing batteries
TV), it's time to move on to the most important part - digital TV setup. How to set up digital TV with your own hands? Read more about this.
I will show on the example of the receiver Mystery MMP-71DT2, and like me, his software completely coincides with Rolson. If you have a different prefix, the principle will be the same, but you may have to look at the instructions.
How to connect everything
To start, connect antenna to the receiver, and the receiver to the TV. Preferably through, so the image quality will be as clear as possible. If there is none, then through the usual "tulips", they come complete with a prefix, as a rule. We look at the connectors in the instructions, it will turn out something like that. If the antenna is with an amplifier, first turn it off, then you can always turn it on.
We are launching all this economy, a set-top box, an antenna, a TV. Select the desired video input. If everything is done correctly, then you will see the start menu, like this:
How to set up digital television through "auto search"
By default, the set-top box is not configured for anything, and you yourself will need to catch the channels that are transmitted in your area. The easiest way is to start auto-search.

After launching the autosearch, the prefix will think for a long time, and should find something in the end. Important: since each is transmitted at the same frequency, you will catch channels not one at a time, but immediately in packs of ten. Therefore, be patient. If in analog TV channels are caught one at a time, then several minutes may pass, and the set-top box will search. But then all 10-20 channels will pop up at once.

After the search is over, the set-top box will offer you to add the found channels. If you have found all 20 pieces - congratulations, the process is complete!

List of tuned channels, TV guide function
How to check signal quality when setting up digital TV
Check that the signal is strong enough and everything is set up well.
It's very easy to do. You should have an INFO button on the set-top box, triple pressing displays data on the quality and intensity of the signal. Look in the instructions, it may be called differently, but it will do the same:

The higher the signal, the better. Optimally - from 60% and further
If both indicators are high, above 60%, everything is fine.
Check it out on both multiplexes, say, Channel One and TNT.
Since different multiplexes are transmitted, you can catch the first one well, and the second badly, or vice versa. Your task is to rotate the antenna so that both are well caught.
But in practice it is somewhat different. For example, you can catch duplicates. When the same channels will occupy several places at once. It seems not critical, but annoying. How to treat me.
What to do if you caught duplicates, or nothing was caught
The second option is when not everything was caught, or nothing was caught. Fine tuning and manual mode will help us here. We read about it. However, if you live in a city and there are towers near you, then in 90% of cases, auto-search is enough for you.
Summarizing
As you can see, setting up dvb t2 digital television with your own hands is not a difficult task. And certainly you should not call a master who will do the same for you for a thousand rubles)
A package of channels broadcast on the same frequency is called multiplex. The number of channels in one multiplex can be from 1 to 10. The composition and number of channels is determined by the broadcaster, for example, the state.
In Crimea, there are now 3 multiplexes so that they do not interfere with each other, as in analog broadcasting, in each region broadcasting is carried out at different frequencies (CHANNELS).
DVB-T2 broadcasting in Russia, Ukraine and a number of other countries is carried out only in the decimeter frequency range - these are from 21 to 69 UHF (UHF) channels.
List of transmitters and frequency channels broadcasting in Crimea
Alupka - 21, 30, 43 (Lenin st. 64)
Alushta - 30, 32, 56 (Sergeev-Tsensky st. 13)
Annovka (Belogorsky district) - 22, 32, 41
Belogorsk - 36, 37, 58 (Nizhnegorskaya st. 33a)
Dzhankoy - 24, 28, 30 (Kraynaya st. 20)
Evpatoria - 23, 29, 32 (Razdolnenskoe highway 17)
Factory (Leninsky district) - 27, 26, 30
Kerch - 24, 41, 43 (Ordzhonikidze 144)
Kirovskoe (Chernomorsky district) - 21, 24, 40
Krasnoperekopsk - 24, 31, 43 (Tavricheskaya 105)
Partenite - 26, 27, 37
Sevastopol - 30, 40, 47 (Prospect Pobedy 96)
Simferopol - 36, 37, 51 (Studencheskaya st. 14)
Sudak - 32, 49, 60 (Eastern Highway 33)
Feodosia - 26, 27, 30 (Simferopol highway 45a)
Foros - 21, 43, 44 (Cape Sarych)
Yalta - 26, 35, 37 (South coast highway 55)
To receive DVB-T2, you need (preferably) an external decimeter television antenna without an amplifier with a modern cable with minimal signal attenuation in it. It is possible to use all-wave antennas. More often than not, an antenna with a good cable will receive a better signal than an antenna with an amplifier and an old cable. The use of the Soviet RK-75 cable is not allowed, such a cable was not designed to receive signals in the UHF range, therefore it has large signal attenuation.
It also happens that in the same locality, for example, Nikolaevka, Zuya, depending on the place of reception, reception can be carried out from different directions. So on one side of the lowland in Zuya, the signal can only be received from Simferopol, and on the other side of the settlement only from Belogorsk.
If reception is carried out outside the line of sight of the direction to the transmitter, then the maximum signal is possible even in the opposite direction from the transmitter. In this case, the reflected signal is received. To determine the ideal orientation of the receiving antenna, select the manual channel search mode on the TV or set-top box, then enter one of the channels (preferably with a lower number from the list above) from the transmitter from which you want to receive a signal. Now you can see the received signal level scale and use it to orient the antenna.
Rotate the antenna 5-10° in any direction, mentally count to 10, record the signal strength. Rotate the antenna another 5-10° in the same direction
(next) and count down to 10 again and record the received signal level. Thus, rotate the antenna in a full turn around its axis by 360 °.
After that, you will see from your records from which direction the maximum signal is coming.
With the advent of the era of digital terrestrial television, many subscribers of cable and satellite networks began to think more and more about connecting free broadcasting. After all, according to the FTP, on the development of a digital broadcasting network, in the public domain there will be more than twenty TV channels V excellent quality absolutely free . Which include obligatory federal television channels.
The question arises - how to connect digital terrestrial television at home?
There is nothing difficult in this. To receive digital on-air television you will need any subscriber equipment of the standard DVB-T2/MPEG-4 with mode support Multiple PLP and decimeter antenna ( DMV) range. The antenna can be either collective (installed on the house, also called common house) or individual, installed directly in your house or apartment. Depending on the distance to the transmitting center, it is necessary to select the desired antenna. They are divided into active (with amplifier) and passive. When buying an antenna, you can first clarify the power of the transmitting equipment installed in your region and the distance to the transmitting center. Based on the data obtained, select an antenna.
Approximate range of transmitting stations:
10 W– about 3 km;
50 W– about 5 km;
100 W– about 15 km;
500 W– about 25 km;
1 kW- about 30-35 km;
2 kW- about 35-40 km;
5 kW- about 40 - 50 km.
Let's go directly to the receiving equipment. Three main groups can be distinguished: TVs with a built-in DVB-T2 tuner, set-top boxes of the same standard, and DVB-T2 digital computer tuners. Their setup is similar, if not the same.
Video: how to set up DVB-T2 digital terrestrial television
Connect digital ether console it is best to follow the manufacturer's instructions, it is almost impossible to make a mistake there. Also, you can watch the official video from RTRS:
A few recommendations, also from RTRS:
connect the plug of the antenna cable and, if necessary, the digital set-top box to the TV;
connect automatic channel search - the TV will tune in to the corresponding digital terrestrial channel, when tuning to a channel in manual mode, you must specify the channel frequency (for example, 35 TV channel, 685 MHz);
Most digital TVs (and set-top boxes) have a built-in signal level and quality indicator that will allow you to optimally tune your antenna to receive a digital terrestrial signal (see the instruction manual for your TV).
On TVs with a built-in DVB-T2 tuner, all manipulations are carried out through the TV menu. There shouldn't be any problems either.
We recommend updating your software subscriber equipment to the most current. This can be done in specialized services, or by yourself (if you are confident in your abilities). The software can usually be downloaded from the official websites of the manufacturer.
DVB-T2 digital channel frequencies:
21st television channel- reception frequency 474 MHz;
22nd television channel- reception frequency 482 MHz;
23rd television channel- reception frequency 490 MHz;
24th television channel- reception frequency 498 MHz;
25th television channel- reception frequency 506 MHz;
26th television channel- reception frequency 514 MHz;
27th television channel- reception frequency 522 MHz;
28th television channel- reception frequency 530 MHz;
29th television channel- reception frequency 538 MHz;
30th television channel- reception frequency 546 MHz;
31st television channel- reception frequency 554 MHz;
32nd television channel- reception frequency 562 MHz;
33rd television channel- reception frequency 570 MHz;
34th television channel- reception frequency 578 MHz;
35th television channel- reception frequency 586 MHz;
36th television channel- reception frequency 594 MHz;
37th television channel- reception frequency 602 MHz;
38th television channel- reception frequency 610 MHz;
39th television channel- reception frequency 618 MHz;
40th television channel- reception frequency 626 MHz;
41st television channel- reception frequency 634 MHz;
42nd television channel- reception frequency 642 MHz;
43rd television channel- reception frequency 650 MHz;
44th television channel- reception frequency 658 MHz;
45th television channel- reception frequency 666 MHz;
46th television channel- reception frequency 674 MHz;
47th television channel- reception frequency 682 MHz;
48th television channel- reception frequency 690 MHz;
49th television channel- reception frequency 698 MHz;
50th television channel- reception frequency 706 MHz;
51st television channel- reception frequency 714 MHz;
52nd television channel- reception frequency 722 MHz;
53rd television channel- reception frequency 730 MHz;
54th television channel- reception frequency 738 MHz;
55th television channel- reception frequency 746 MHz;
56th television channel- reception frequency 754 MHz;
57th television channel- reception frequency 762 MHz;
58th television channel- reception frequency 770 MHz;
59th television channel- reception frequency 778 MHz;
60th television channel- reception frequency 786 MHz;
61st television channel- reception frequency 794 MHz;
62nd television channel- reception frequency 802 MHz;
63rd television channel- reception frequency 810 MHz;
64th television channel- reception frequency 818 MHz;
65th television channel- reception frequency 826 MHz;
66th television channel- reception frequency 834 MHz;
67th television channel- reception frequency 842 MHz;
68th television channel- reception frequency 850 MHz;
69th television channel- reception frequency 858 MHz.
Let us clarify that the equipment of the standard DVB-T is not compatible with DVB-T2 equipment.
You can ask questions about broadcasting digital terrestrial television by calling the free number of the single information center RTRS 8 800 220 2002
.
Digital terrestrial television channels (DVB-T2 standard)
First channel;
Russia 1;
Match TV;
NTV;
Channel 5;
Russia-Culture;
Russia 24;
Carousel;
OTR;
TVC.
Ren-TV;
Saved;
STS;
Home;
TV3;
FRIDAY;
Star;
World;
TNT;
Muz TV.
These channels are open and broadcast absolutely free.
When a new level of data transmission quality appeared, the DVB-T2 digital television network was launched. Digital television gives high quality pictures and excellent transmission signal. But to set up a connection to this network, you need to have the necessary knowledge, choose the right receiver and set it up well.
How to connect the T2 module and configure it will be described below.
How to connect a T2 set-top box to a TV
The T2 tuner is quite easy to connect to a TV. If you have had experience connecting players, antennas and other devices to a TV, then it will not be difficult to connect the receiver.
We connect the antenna to the receiver, and from it we connect the wires to the TV. This can be done using standard HDMI wires, "tulips" or SCART. The most important thing is that you do not have to pay for calling the master. However, if the master can connect the set-top box to the TV for free, then you should leave it to him.
How to connect DVB-T2 to a TV without a set-top box
To connect your TV directly to a DVB-T2 network without buying a receiver, you can immediately purchase a TV with a built-in DVB-T2 tuner. This saves space, time and costs. Among other things, it will be possible to control T2 channels with one remote control from the TV while there will be two remote controls with the receiver.
Today, almost all LCD TVs have a built-in tuner, which makes it easy to connect. Simply insert the antenna into the desired socket.
How to set up DVB-T2 using the receiver
After installing and connecting the receiver, you need to set up the TV. To do this, we perform simple steps:
- We go to the console menu.
- Click "Quick Setup".
- If the default is another country, then set "Russia".
- Then you must select the standard "DVB T2". Often stands in the field of the DVB T / DVB T2 standard, which leads to the fact that the receiver is looking for DVB T quality channels, and only then DVB T2. We need DVB T2 and its excellent quality.
- Then click "Auto-tune" and everything will be done automatically.
- After finding the channels, you can also view detailed information on the quality of the connection by pressing the "Info" button.
Thus, you can set the receiver to receive all the channels you need. But the setup doesn't always go smoothly. Sometimes, problems arise.
What to do if DVB T2 setup does not work
There are several options why the setting does not occur:
- The problem is in the receiver;
- The problem is in the antenna;
- TV problem.
First, try tuning with a different antenna. If it helps, then the problem is in the antenna, and if not, then the receiver is to blame.
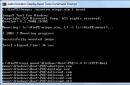
If the antenna is to blame, then only a specialist will help it. If the receiver, then there are several options. First, the receiver may have the wrong firmware. Then you need to reflash the prefix. To do this, go to the manufacturer's website, download new firmware, write it to a USB flash drive and insert it into the receiver. It will update itself and the problem will be fixed.
If updating the firmware does not help, then the problem here is most likely in the electronics. In this case, it is better to hand over the prefix to the service or change it under warranty.
You can also check the TV itself. To do this, use the set-top box on another TV, and if it works, then it may be in the TV settings. In this case, please contact the manufacturer. There they will be able to tell you how to correctly set the TV settings to connect the receiver.
How to choose a prefix for DVB-T2
The choice among receivers is quite large. Here are the most popular receivers that are recommended to buy:
- Trimax TR-2012HD
- Strong SRT-8500
- Strong SRT-8502
- Thomson THT702
- Trimax TR-2012HD PVR (TR-2013HD PVR)
Their price starts from 1000 rubles and above, depending on the functions. More expensive receivers have more fine-tuning, a better reception signal, more different inputs for connecting additional devices, and they also work faster. Compared to satellite set-top boxes, a DVB-T2 receiver is inexpensive.
You can also go to any hardware store and there, on the spot, choose a new receiver, after consulting with a specialist.
The introduction on the territory of Ukraine of terrestrial digital television of the DVB-T2 standard has made it possible to significantly expand the zones of reliable reception of the signal from TV towers, in comparison with the analog signal. Also, the ease of setting up and installing T2 did their job, they became much more popular. satellite television with MFA channels.
Let's move on to the practical side and talk about the direct installation of all the equipment necessary for receiving DVB-T2. Many modern TVs are already equipped with an integrated DVB-T2 receiver, in which case it is enough to find out the position of the repeater, point the antenna at it and scan the available channels using the TV. In case of simple TV, installation and connection of T2 is somewhat different, we will discuss it now. To install T2 in the standard version, you will need:
- DVB-T2 digital receiver
, the form factor you need, for example, for hidden installation with a remote IR sensor, etc. The choice is now huge, there is practically no significant difference, everyone can choose for their needs. Practice shows that it is worth buying in a reliable store with a guarantee, we suggest you buy a receiver from our partners who will provide you after-sales service, warranty and repair.
Buy digital set-top box MINI DVB-T2 with delivery from China
- UHF Antenna , in practice, the so-called "Polish antennas" are often used, you can also purchase an antenna manufactured by Konvaliya, Margoon, etc., you just have to take into account that the antenna must be taken with a margin of gain, since it is possible to predict how the signal will be received in a particular case hard to say. It is also desirable that it has an amplification board that can be powered both from and from an external power supply.
- Cable, regular TV , almost anyone will do, but it is better to take with a percentage of filling with a braid of 50%.
- RCA or HDMI cable to connect receiver to TV may be included or must be purchased separately.
Connecting digital T2 using the World-Vision T38 receiver as an example
First you need to install the antenna, if it has not been installed before. It’s probably stupid to advise anything here, I’ll just say follow the manufacturer’s recommendations, and at least first turn it in the required direction. In which direction to direct the antenna, you can find out by looking at neighboring antennas or calculate the direction, for example, using Google or Yandex maps.


Connecting the T2 digital receiver to the antenna will also not cause much difficulty, the manufacturer and standardization make this process simple and it is quite difficult to make a mistake here.

When connecting, it’s hard to confuse something, the RCA - cable is connected simply, just follow the color on the plug and on the socket, yellow to yellow, white to white, red to red. The antenna connector will also not allow you to connect other plugs to it, in this receiver model it is located on the left side. It is also possible to connect via HDMI, everything is simple here, the COAX connector is used to connect a digital audio signal amplifier and is practically not used in standard configurations.
After all the cords are in place, we connect the last one - the power supply connector, for this model it is located on the side panel.

This completes the connection of the T2 receiver. Next, you need to turn on the TV and receiver. By pressing the “AV-TV” switch button on the TV remote control, we switch from the antenna jack to the “tulips”, on newer TVs we select the input to which the receiver is connected. The following should appear on the screen:


The receiver will restart and a menu will appear with a search for channels and setting the initial parameters of the receiver:

Select the parameters and click "Auto Search", the receiver will scan and display the found channels.
![]()
If not all channels are found or there are none at all, we adjust the antenna and repeat the search from the receiver's menu until the number of channels and reception quality satisfies you. Enjoy watching!
Allowing you to watch digital television. Digital TV has much more advantages than conventional TV, which is why many people switch to it. And, of course, you need to start with the choice of the receiver. In this case, it is necessary to take into account the brand of the manufacturer, functionality, quality and, of course, the price. Finally, having acquired a digital receiver, it is necessary to prepare it for use. But how to do that? In this article, you will learn how to connect and set up DVB-T2 digital television. Let's look into the issue together.
If you want to learn how to set up a TV box, then this article is for you.
The first step is to connect all the elements together. There is nothing difficult in this, see for yourself. Connect the antenna to the receiver, and the receiver itself to the TV. That's all - done! It is recommended to connect the set-top box via HDMI cable, of course, provided that the devices have the appropriate inputs and connectors. If HDMI is not supported, please connect via regular tulips. With any model of the set-top box, there is an instruction in the kit, which clearly shows what needs to be connected and with what.

Let's connect the device
Please note that the setup process is the same for all digital receiver models, so it does not matter what brand your set-top box is. Of course, the design of the windows and some of the names of the menu sections may differ slightly, but the general essence does not change.

First, choose a connection method.
After connecting the device, turn on the TV and set-top box. On the TV, you need to select the video input to go to the receiver's menu. If everything is done correctly, then on the screen you will see a welcome window in which you will need to select the language, region, mode and image format, as well as the search mode. Set the required parameters using the remote control of the set-top box. You can leave the settings unchanged and leave them as default. Click "OK" to go to the next window.

The first dialog window on the screen
If in the “Search mode” section there is “DVB-T + DVB-T2”, then the receiver will immediately find all the channels available for your region on its own. But this method will only work if you already have a working antenna pointing in the right direction. When the auto search is completed, you can close the menu and enjoy watching. Other users need to perform antenna positioning. There is nothing complicated in this, all that is needed is to make a few settings in the receiver's menu.

The list of available channels is loaded manually or automatically
If you didn't have an antenna before and it appeared only now, together with the DVB-T2 set-top box, being in the welcome window, press the button to open the menu on your remote control. Go to "DVBT Setup" and select "Channel Search". In the window that opens, set the "Search Mode". Here you can set both "by channel" and "by frequency". There is no big difference here - choose what you like best. Next, set the search band to "UHF".
To simplify the process of finding channels, go to a special site with information on frequency channels for your particular city. In principle, it is not necessary to do this, you can do without it, but this approach will facilitate and speed up the setup process. Select the desired value in the "Frequency channel" item. If the direction was chosen correctly, then after a couple of seconds you will see the filled scales "Signal intensity" and "Signal quality" at the bottom of the window. If the level of the scales is good, then click "Search". After that, the receiver will tune in the specified frequency channel.
In the event that you do not know the desired direction of the antenna, take it and gently twist it, following the scales of intensity and quality. As soon as they are filled to an acceptable level, fix the antenna and search. As soon as
This is the simplest terrestrial DVB-T2 receiver connected to TVs or monitors (some types) to watch digital television. It has HDMI, YPbPr (component) video output, composite RCA output, digital coaxial audio output, USB 2.0 port to which you can connect external drives for playback (as a media player) and recording (including scheduled) television programs. As a media player, the receiver supports popular video and audio formats, has a Timeshift pending view mode (if a drive is connected).
Attention traffic.
Let's see how it is sent.
Gray box with a picture of a TV and logos of supported standards. 
Everything inside is packaged. 
Package Included:
- DVB-T2 receiver,
- remote control,
- user manual (in English),
- cable for transmission of composite analog audio and video signal. 
Instructions in English (on four pages). 
You can see the scan.
Perhaps someone will come in handy.
There are no specs in the instructions. Therefore, we look at what is written on the store page. 
I did an auto transfer. Not everyone understands English:
DVB-T2 MPEG4 HD Digital Terrestrial TV KitI provided both options in order to exclude the indignation of one of the "half" of readers who understand and not very English :)
This digital receiver DVB-T2 HD offers many useful and exciting features that enhance your enjoyment, including a 7-day EPG and the ability (with an external USB memory device connected) to Record and Live Pause programs. It can also play media files.
Fully compliant with DVB-T2 and H.264, MPEG-4, MPEG-2
Maximum traffic flow rate up to 50.1 Mbps
Support PVR function and media playback (MP3/BMP/JPEG/AVI, etc.) via USB2.0
Various program editing functions (favorite, move, lock, skip, delete)
Video output resolution: 480p / 576p / 720p / 1080i / 1080p 50Hz
Video decoder up to 1080p @ 30 fps (Full HD, support up to 1080p)
Support EPG for 7 days (Electronic Program Guide)
Storage of up to 1000 channels of TV and radio programs
Logical Channel Support (LCN)
4-digit LED indicator on the front panel
Auto/manual channel search function
OSD language support
Support for teletext/subtitle/audio language selection
Outputs include HDMI (V1.3C), YPbPr, CVBS, coaxial
Automatic PAL / NTSC conversion
Note: 1. This set-top box does not support TV programs with Dolby surround sound.
2. This set-top box CANNOT be used in France and Germany, please note when ordering.
Specification:
Model: DVB-T2
RF input frequency: 48~862MHz
RF input level: -20 ~ -82dBm
IF bandwidth: 7 MHz and 8 MHz
Modulation: QPSK, 16QAM, 64QAM, 256QAM
Video decoder format: MPEG4 AVC / H.264 HP @ L4; MPEG2 MP@ML/HL
Video output: 576P/720P/1080I/1080P 50Hz
Aspect Ratio: 4:3, 16:9, Auto
Video output port: HDMI (V1.3C), YPbPr, CVBS
Audio decoder format: MPEG-1 (layer1 & 1 & 2 & 3), WMA
Audio output: S/PDIF (coaxial), RCAx2 (L/R)
Supported capacity: unlimited
Supported media files: WMA, MP3, JPEG, BMP, AVI
Supply voltage: 100-240V 50/60Hz
Maximum power consumption: 10W
Standby power consumption:<0,8 Вт
And here is the receiver. The case was covered with a protective film, partially blocking access to the ventilation holes.

Weighed. 291

The front panel is made of plastic, it contains a USB connector, an IR sensor, an LED indicator (two-color: red in standby mode, green in operating mode), as well as buttons for switching channels and turning on the receiver. 
The display had a protective film. I already took it off.
The rear panel contains antenna input and output connectors (the receiver supports loop-through), a coaxial digital audio output connector, an HDMI connector, three YPrPb component video output connectors, and three RCA connectors for composite video and stereo audio.

The purpose of each output is described in the instructions. 
The kit included a cable for connecting an analog video and audio signal (RCAx2 (L / R)). 
The remote control was in a separate package. 
Regular remote, nothing special. Lies comfortably in the hand.
See the instructions for the buttons. 
There are some ambiguities about the purpose of the buttons. But more on that at the end of the story.
The remote is powered by two AAA batteries. 
Batteries are not included.
Took it apart just in case. Nothing interesting inside. 
Let's see what's inside the receiver.
Unscrew 4 screws. 
Everything is very compact. The power supply and receiver are located on the same board. There are cuts between the primary and secondary circuits in the board. There is a fuse at the entrance. 
Power supply with galvanic isolation.
As a "brain" processor MSTAR MSD7T01. 
It's time to see what he (the receiver) can do.
The device connected to the TV LETV X3-40 FHD LED Smart TV.
When turned on, you are prompted to select the menu language, country and start searching for channels. 
I chose the language Russian, the country - Russia.
Two multiplexes are broadcast in Tambov. 
TV (LETV) allows you to take screenshots. That is why I joined him. All photos are original resolution. Didn't change anything. 
This is how the main menu looks like (press the "MENU" button). 
Management is intuitive. We move arrows. Confirm with the OK button. 
When you select "Channel Editor" asks you to enter a password. To edit, enter zeros (as a password).

Channels can be moved, skipped, blocked, deleted, added to favorites and renamed. 
This is the next line of the menu (TV guide). 
You can schedule both recording and viewing. 
I pass to the next section The menu - "Video" contains settings for screen proportions, resolutions (1080P 60HZ, 1080i, 720p, 576p, 576i) and a choice of PAL and NTSC standards. The choice of standards (PAL and NTSC) when transmitting a signal via HDMI does not affect the image in any way. 
Users are offered a choice of different screen formats:
-Auto
- 16:9 PillarBox
- 16:9 Pan&Scan
- 4:3 Letter Box
- 4:3 Pan&Scan
- 4:3 fullscreen
- 16:9 wide screen.
Proceed to the next section of the Menu. In the "Search for channels" section, you can repeat the automatic search for channels, turn on or off the additional power to the antenna, filter out scrambled channels (if applicable).

You can use manual search.
Now the next menu item.
Here you can select the time zone and region. The region can be selected only Moscow (in auto mode). In manual mode, select the correction for the time zone (the DVB-T2 standard supports time transfer). 
And also set up auto-off (from 1 to 12 hours with an interval of 1 hour) and the time to turn on / off the device. 
The next menu is language. 
System settings allow you to activate parental controls, 
Set password, 
restore factory settings (password is still the same zeros), 
get information about the software 
and update the software. 
I did not follow this procedure. As long as everything suits. 
The last menu item. 
To play and record video files, you need to connect a USB device.

Records with MTS extension.
The MTS extension is associated with video files that are used in the AVHCD (Advanced Video Coding High Definition) video format. AVHCD video format was developed for tapeless camcorders. Video can be recorded with a camcorder that burns files to a DVD, hard disk, solid state disk (SSD), or memory card (SD, Memory Stick). The AVHCD MTS format was developed by Sony and Panasonic and was introduced in 2006. The AVHCD video format is now used by camcorders from manufacturers such as Sony, Panasonic, Leica, Canon, Hitachi and JVC (JVC uses AVHCD and its own video format with TOD extension).A 1 minute recording takes up 23-24MB of space.
The MTS file uses MPEG-4AVC/H.264 (AVC) video encoding. The maximum video resolution is 1080i. Audio is encoded by the Dolby Digital AC-3 audio codec. Some professional camcorder models support uncompressed linear PCM audio. The AVHCD video format is designed to be fully compatible with the Blu-ray video format. AVHCD videos can be played on Blu-ray players without any encoding.
You can see an example entry:
Characteristics of the recorded file:
Video: MPEG4 Video (H264) 720x576 (20:11) 25.00fpsTo record broadcasts and use the Timeshift mode of delayed viewing, a storage device connected to the USB port is required, and it is not necessary to enter the Menu at all. There are dedicated buttons on the remote for this. We count from left to right, top to bottom.
Audio: MPEG Audio 48000Hz stereo 192Kbps
subtitle
The first button "USB" opens the menu item of the same name. The second button starts video recording.
The fourth button activates Timeshift. The image on the screen freezes (pause mode) and recording to the USB drive starts.

After drinking tea or coffee, press the same button and continue watching the program you like.
The third button turns off video recording / disables Timeshift.
Track rewind (the first two buttons in the second row) allows you to increase the viewing speed (x2, x4, x8, x16, x32) by successive pressing.
The next two buttons open access to the previous or next video file.
The green and yellow buttons change the resolution and aspect ratio of the screen.
The receiver also allows you to receive teletext signals.

At the end, some information for extras.
The receiver does not get hot during operation. Power consumption from the network is only 5.4W. In standby mode 1.1W.
Connected an external hard drive as a drive. Not enough power. The SSD is working fine.
It's time to move on to the final part. I'll highlight what I liked and didn't like. The point of view is subjective.
Pros:
Fully compatible with DVB-T2 format:
built-in power module (no adapter required);
metal case;
the presence of the delayed viewing mode Timeshift (if there is a connected drive);
the presence of on and off timers;
HDMI output for high quality viewing;
recording TV programs on external USB drives;
convenient multilingual menu;
support for teletext and subtitles.
Minuses:
no display;
the absence of any hints of the manufacturer.
And one more thing at the end.
I talked about the device that I hold in my hands. Listed all the pros and cons. Everything that I noticed, I wrote about everything.
If something is not clear, ask questions. Hope it helped at least someone.
That's it.
Good luck!
The product was provided for writing a review by the store. The review is published in accordance with clause 18 of the Site Rules.
I plan to buy +59 Add to favorites Liked the review +34 +83