Before installing Windows 7, you need to prepare a bootable USB flash drive or disk.
Let's talk about how to burn an image to a flash drive.
Most often recorded Windows image 7 to USB disk with U programs ltra ISO or Windows7 USB DVD tool. These programs require labor-intensive settings and the results are not always positive.
Make sure you don't have any important data on it beforehand. Additionally, repositories modified by this application can still be used to transfer data without interfering with the download function. The program will guide you through the settings step by step. Both could be your last chance to get to the data or how to clean your system of pests. Finally, software loads necessary files and writes them to the target media.
If you are still having problems with your system, you still have your own personal rescue squad. So you can consider different scenarios to save your data. Before you start, you should think carefully about which tools you really need, because the more tools you choose, the longer it will take to load. The program can create a dual-boot installation or completely replace an existing one operating system.
And there is a small, simple program called Rufus. It does not require any settings, but it always works quickly and reliably and, according to the developer, this program writes an image many times faster than other programs. You can download it here: http://rufus.akeo.ie/.
Launch Rufus, the program does not require installation on your computer, just run the downloaded file.
Simply select the image file and the corresponding output media. Using the application is very simple and you just need to follow four simple steps to create an installation disk. Preliminary program will format the portable drive. If there are important files on it, you need to make a backup.
Data disc writing, rewritable media
Everything else is done automatically. There are also options to run antivirus and system tools. For the ease of use of this tool, which less experienced users are aware of. Easily create data disks with backup copy your documents or photos that you want to share with friends or family members. If you mess something up, you can delete them at any time and try again with the same media.
Rufus automatically detects your USB drive, which is displayed in the top line.
The next position is MBR, let's leave it as it is. The program itself determines the necessary recording parameters.
We leave the file system as NTFS.
The cluster size is 4096 bytes, note that the size is the same as when formatting.
Specify the path to ISO image, click on the button marked with the arrow below. After this, an entry appears in the “New volume label” field. I edited this entry to make it clearer for myself.
After inserting the blank media into the drive, open the My Computer window from the Start menu. Double-click the burner icon. The system then asks how you want to write the data to the inserted disc. Then you can close it or add another track. The advantage is that this disc is readable even on other operating systems and devices. You can also make the most of your media.
After selecting one of the options, enter the drive label and click Next. The disc will be formatted or ready for recording. To do this, proceed as follows. But they will not be burned immediately. When displaying media content, only a list of added files appears. You can do the burning yourself by clicking the Burn to Disk button on the File Manager toolbar.
Greetings, friends! This article will talk about creating bootable usb Flash drives with Windows 7 on it. That is, we will learn how to write to a flash drive Windows distribution 7 so that later you can use this flash drive to reinstall the operating system. The need for such a flash drive arises more often among owners of netbooks and laptops with a non-working disk drive. Also for those people who prefer installing windows from a flash drive rather than from a disk.
Insert the disc into the drive, click "My Computer" to label it, and click the "Delete this button" on the toolbar. All you need to do is click Next and wait for a while to clean up the drive. Please note that the drive icon also changes after deletion. The system removes file presence information from the table from which the reader collects information about the file on the media.
The file remains physically present, you cannot access it. Some burning programs allow you to decide whether you want to quickly or slowly erase the data on the rewritable disc. With a quick delete, the table listing the files is only deleted; they are physically present on the media until they are overwritten by new data. Until then they can also be read using special programs. Complete removal then it will take care of completely removing the file from the media.
Before we move on to the process itself, I would like to draw your attention to the fact that installing an OS from a flash drive has several advantages over installing from a disk. First of all, this is durability, we all know that CDs sooner or later get scratched, become dull and it becomes impossible to install windows from them - errors appear and freeze during installation. This will not happen with flash drives; you can store files on them for as long as you like. The second advantage of flash drives is read/access speed. Almost always windows installation It's faster from a flash drive than from a disk.
In the new window, click "Record". Launch the program, and then click the "Burn image to disk" button. In the "Source" field, select the file and find the disk image. Check your settings and press the big button to record. Recording music in this program is quite simple. First, browse your music library with the playlist you want to record.
Now drag and drop files to burn into the desired sidebar using the playlist of the future CD. Observe the full indicator. In this case, it does not matter how large the original music files are, but the length of the individual tracks is taken into account.
But there are also disadvantages. Very old models motherboards cannot boot from a flash drive and in this case you will have to make do with installing from a disk or try flashing the BIOS.
What you need to create a bootable USB flash drive for Windows 7
You need a USB flash drive, windows iso image 7 and the UltraISO program. Previously, I recommended using the UltraISO program to burn an image to disk. Today we will burn an image using it to a flash drive.
Preparation begins in a similar way - you will see a list of files on future media. The fill factor changes over time. After adding the desired tracks, click “Start Recording” and wait until it finishes. You can combine content with a combination of video files, photos and music. You usually have 150 minutes. After adding the content, enter the drive label below and click the Options link.
The thumbnail images are illustrative only, clicking on any of them changes the menu layout and uses the contents of your files. If you don't have one basic settings for the control menu, then click the "Customize" button after selecting the closest settings that resemble your preferences. Go to the menu where you will change the font used, select the video in the foreground and background of the menu and select the file to be used as the soundtrack. You can choose a different control design from the Scene Styles menu.
We take a flash drive based on the size of the image, or vice versa, if you have a flash drive with a capacity of 4 gigabytes, then take an image of a slightly smaller size. I will write the 3.66 GB image onto a 4 GB flash drive. So let's get started.
1. Insert the USB flash drive and run UltraISO program on behalf of the administrator.
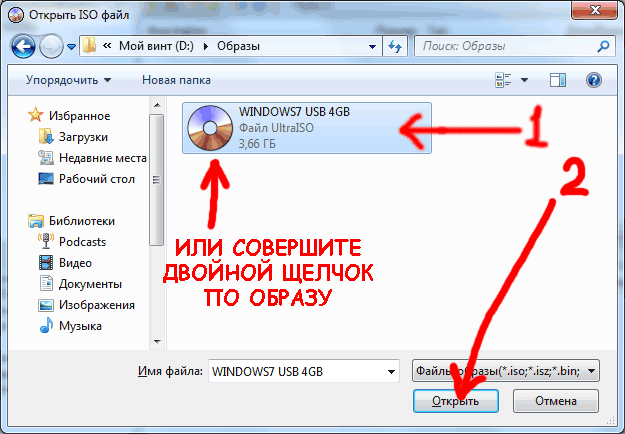
2. Now open the image in the program. To do this, select “File” -> “Open” from the menu.
Confirm new setting"Change Style" button. Just click the "Text Menu" button and rewrite the text in the fields. If you're creating a video with photos, edit your slideshow by clicking the Slideshow button. On the other hand, combustion programs offer a single user interface. This is a great app in Czech with various types carriers.
It offers convenient control and its functions are accessible with just one click to the right of the opening window. It is available in a classic version and in a form that does not require installation. The disadvantage of the portable version is that it is not translated into Czech, unlike the classic version of the installation. Gradually select appearance your window, button, then fill in the settings with the “Finish” button.
3. An image selection window will appear. Go to the folder where you have the image and double-click on it.
4. In the top menu of the program, select “Boot” -> “Burn image” Hard drive»
![]()
Then you can see the autoplay design. Once you are done, click the recording media symbol button and record the data. You may have had a recovery image on your computer that is used to partially restore your computer or restore it to factory settings. If you want to save space on your computer, you can remove the recovery image from your computer and use a recovery disk instead.
In the search box, enter the recovery block text, and then click the Create Drive button or click the Create button. If your computer does not have a recovery partition, this checkbox is grayed out. The recovery module will only contain backup and executable image utilities, but not a recovery image that you could use to restore your computer or restore it to factory settings.
- Swipe along the right edge of the screen, then tap Search.
- You can enter the administrator password or confirm your choice.
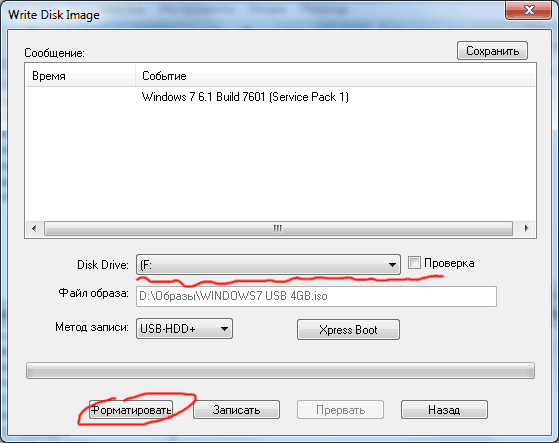
5. In the Disk Drive list, select the letter assigned to your flash drive and click “format”
6. Optionally enter a title in the volume label field and click “start”

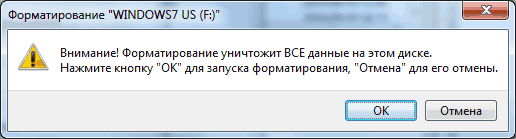
7. Accept that during formatting everything from the flash drive will be deleted and click “OK” and close the formatting window.
This process will take some time depending on the computer and the size of the image to be restored. Once this process is complete, do one of the following: If you want to save the recovery partition on your computer, click the Finish button. If you want to remove the recovery partition from your computer to free up disk space, click or select Remove recovery partition. This saves disk space in which the recovery image is saved.
- Then click or tap Delete.
- Once clicked, tap or click Done.
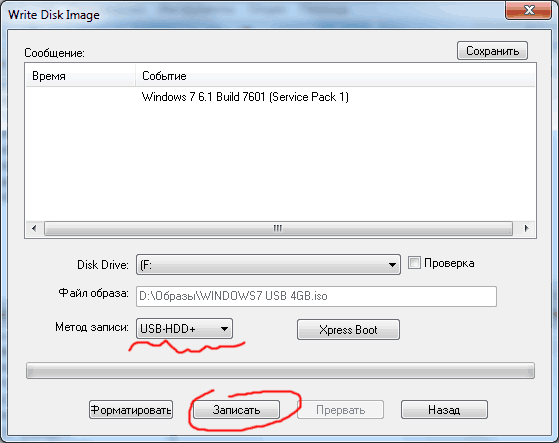
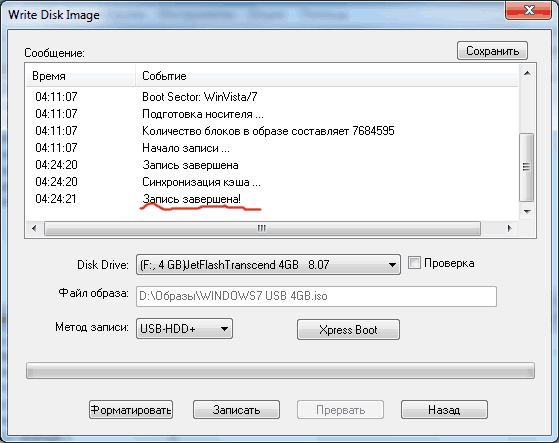
8. Now in the “Write disk image” window, make sure that the recording method is selected “USB-HDD+” and click the “Burn” button.
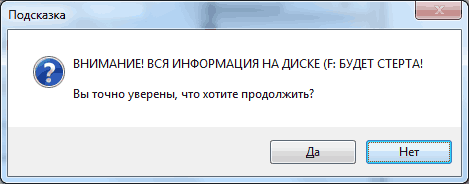
9. Click Yes.
To save space on your computer, you can remove the recovery image from it and use that instead. If your computer does not have a recovery partition, this checkbox is grayed out. If so, then there is no recovery partition taking up additional disk space.
- Then select "Delete".
- The disk space occupied by the recovery images will be released.
- When you're done deleting, select "Done."
- On some computers, the option to delete the recovery partition is not available.
If, instead of starting to write the image to the flash drive, the line “You need to have administrator rights...” appears in the window, then you did not run the UltraISO program as an administrator and you need to start all over again, but AS AN Administrator.
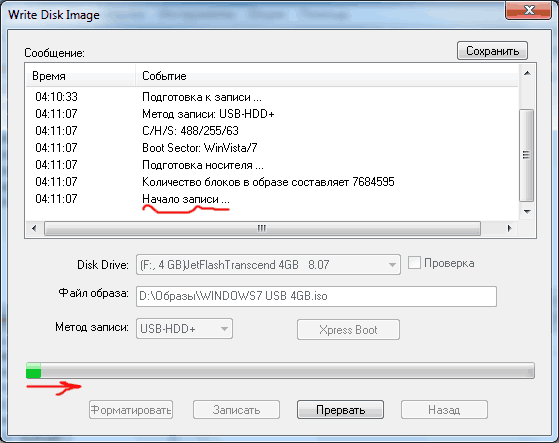
10. If a line with the text “Start recording” appears, then everything is in order, wait a few minutes.
Copying files to a prepared flash drive
Backup files contain the original operating system, drivers, and software that were pre-installed on your computer. It is actually a copy of the original computer code that makes up the files themselves. For example, we cannot mention the ability to save any changes to the system without being able to update the installation of new applications.
You can use any one, but if you need to install such software, it is better to use one that is specially prepared for the one you are using. graphical environment. Click the "Select Disk Image" button to burn a button that will open your file manager.
11. As soon as you see the message “Recording complete,” you can rejoice, since you have a bootable USB flash drive with Windows 7 on it.
Now you have learned how to make a regular flash drive bootable. You can begin preparing your computer for reinstalling Windows.
However, if the drive is not shown, you must click the "Select a drive to burn to" button and manually select it. Now click on the properties button to open the properties window, then click on Write Speed. Finish by clicking the "Close" button. Click the "Record" button to start recording. Monitor and follow information that may appear on the screen.
Using recording apps
You can find it by issuing the command as well. Note that you must use the drive letter, not the partition number. This application should be available in your system's repositories and, if not installed, can be easily used by your favorite program manager. Click in the middle open window- the file manager will open.