This guide is intended for users who would like to replace the motherboard on their computers without reinstalling the system. In particular, the article may be useful to you if:
- you are about to upgrade your motherboard but want to keep the current one Windows installation along with settings and programs without reinstalling them from the very beginning;
- you want to switch the SATA controller mode from IDE to AHCI or RAID (or vice versa) in order to achieve better performance disk subsystem.
If one of the above scenarios applies to you, then you should know that regardless of your goal - replacing motherboard or switching the SATA controller to another mode - the result will be the same: " blue screen death" (BSOD) with an error STOP 0x0000007B INACCESSABLE_BOOT_DEVICE when loading the operating system.
The cause of this annoying incident is the inability of Windows to find proper drivers for the SATA controller. Fortunately, the problem can be circumvented, thereby avoiding reinstalling windows. To do this, you just need to “tell” the operating system so that it uses the standard SATA controller driver at startup, and can help us with this.
To make the appropriate changes to the Windows Registry, simply follow the instructions below.
Before we begin, please review the information in the two points below, as one of them determines your course of action:
1. The motherboard has not been replaced yet, so Windows boots normally. In this case, you need to make changes to the registry in a normal working Windows environment and only then proceed to upgrade the motherboard.
2. The operating system won't boot because you've already installed a different motherboard, or because you changed the SATA mode in the BIOS. In this case, you will have to use the offline registry editor.
Registry change before motherboard upgrade (Windows boots fine)
These instructions are only for those who have Windows running in normal mode because the motherboard has not yet been replaced. If you already have another card installed and Windows won't boot, then follow the instructions in the next section of the article.
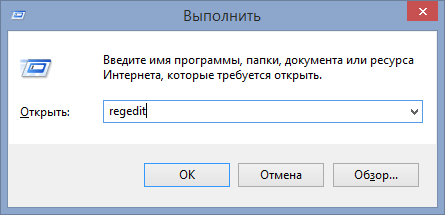
So, turn on your computer in normal mode and then open the Windows Registry Editor. To do this, press + R, type regedit, press Enter.
Inside the registry, follow (in the left pane of the window) this path:
HKEY_LOCAL_MACHINE\SYSTEM\CurrentControlSet\services\msahci
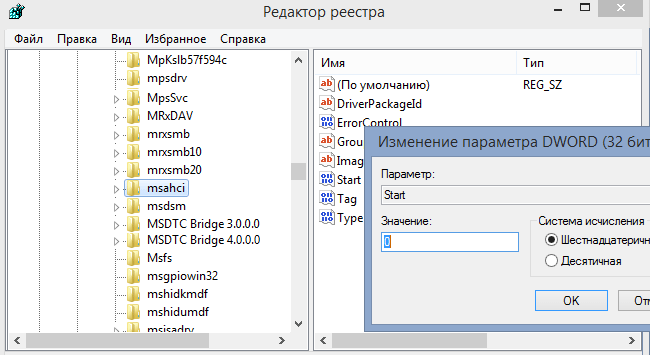
In the right pane of the window, double-click on the parameter start and change its value to 0 (zero). Then click OK.
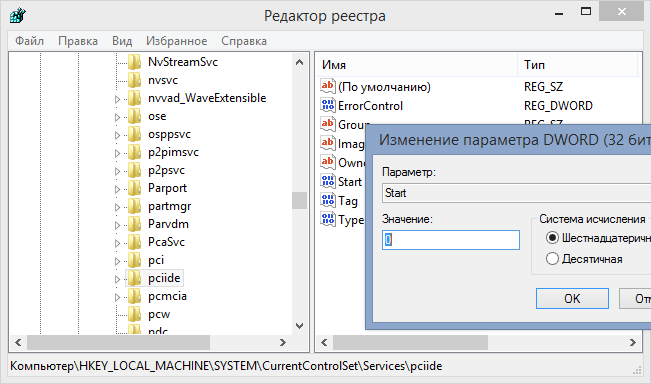
Now do the same in the following registry branch:
HKEY_LOCAL_MACHINE\SYSTEM\CurrentControlSet\services\pciide
If you are using RAID (otherwise skip this step) then you need to make the same modification in this section:
HKEY_LOCAL_MACHINE\SYSTEM\CurrentControlSet\services\iaStorV
That's all. Your machine is now ready to be upgraded. Shut down the computer, install a new motherboard and connect all the necessary components to it. Then start the system, enter the BIOS and set the ATA mode (IDE-ATA, AHCI or RAID) or leave the default value. Starting Windows should pass without problems. When operating system finishes installing the controller driver, continue installing drivers for the rest of the devices on the new motherboard.
Windows won't boot: Editing the registry with an offline editor
Use this instruction if the operating system does not boot because you have already replaced the motherboard, or changed the SATA controller mode in the BIOS.
In this case, you need to use the offline registry editor. For this task, I prefer to use the recovery environment, which can be accessed, for example, using the disk to install the operating system.
To open Registry Editor using the installation DVD or USB drive, follow these steps:
Boot your computer using the installation disc. You may need to select DVD/CD or USB as the first boot device in BIOS settings. For this:
- turn on the computer and press the DEL or F1 or F2 or F10 key to enter the BIOS (the BIOS entry key depends on the computer manufacturer);
- inside the BIOS menu, find the Boot Order option (this option is usually located inside the Advanced BIOS Features menu);
- in Boot Order, select CD / DVDRW or USB (depending on what type of media the installation files are on). Windows files) as the first boot device. Save your changes and restart your computer by pressing F10.
After rebooting, the computer will start booting from the installation disk.
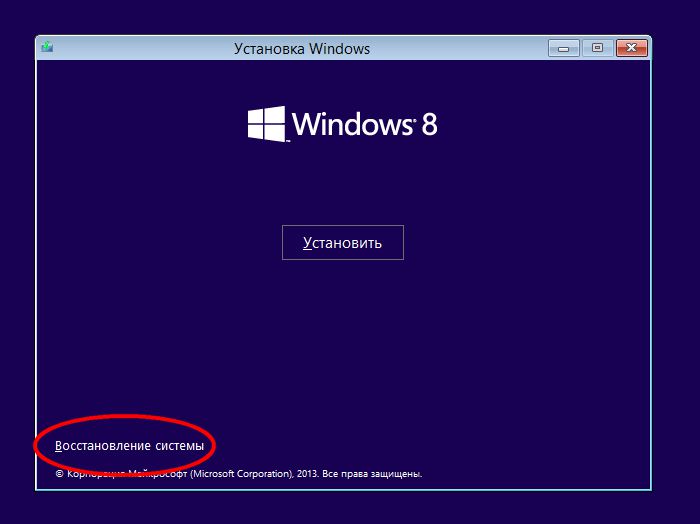
After booting up, on the very first screen, click "Next" and then select "System Restore".
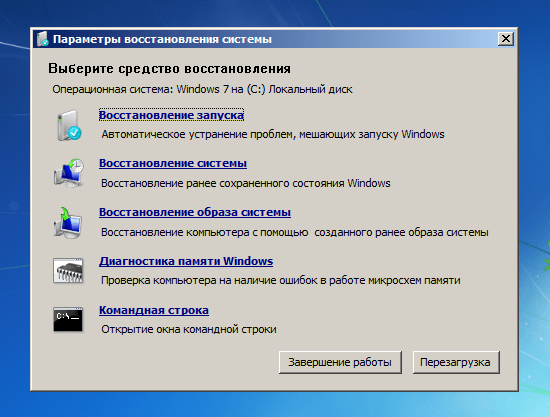
If you have Windows 7, in the recovery options window, click Next, and on the next screen, launch a command prompt.
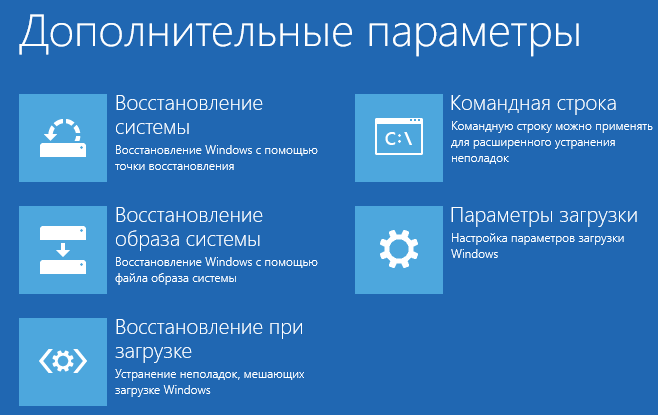
If you are using Windows 8.x or Windows 10 then you need to select "Diagnostics" -> " Extra options» -> «Command line».
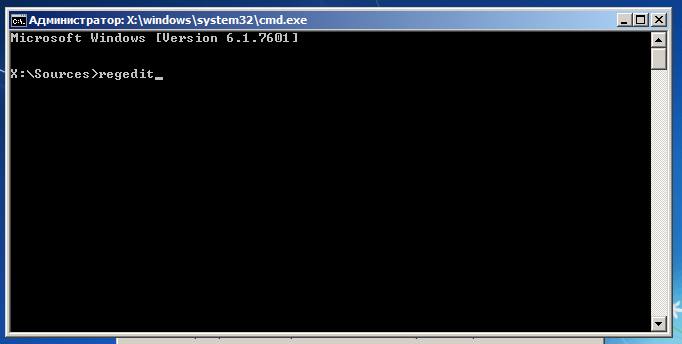
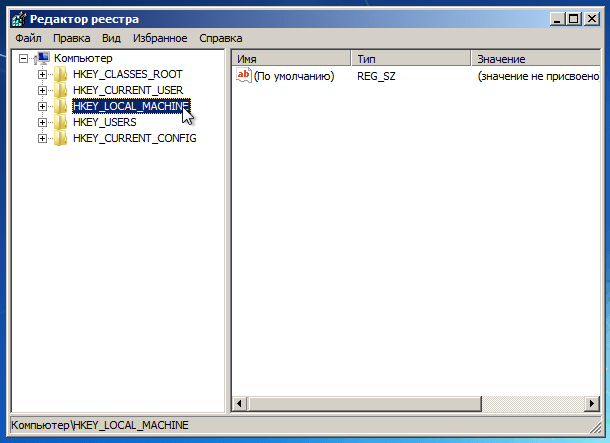
At the command line, type regedit and press Enter.
In the registry editor, select the branch HKEY_LOCAL_MACHINE, and on the File menu, click Load Hive.
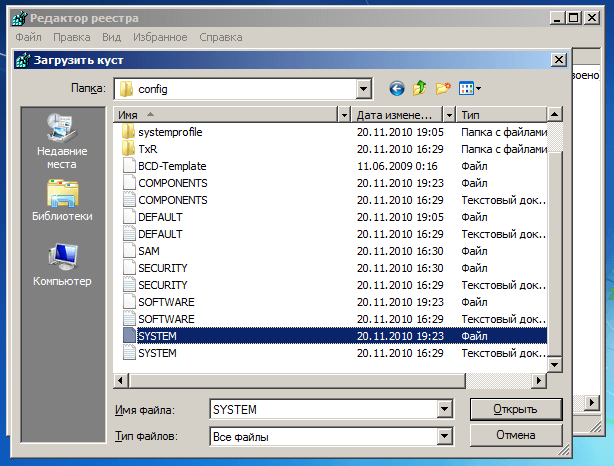
Open the drive where the operating system is installed.
Navigate to the Windows\system32\config directory, select the file system and click "Open".
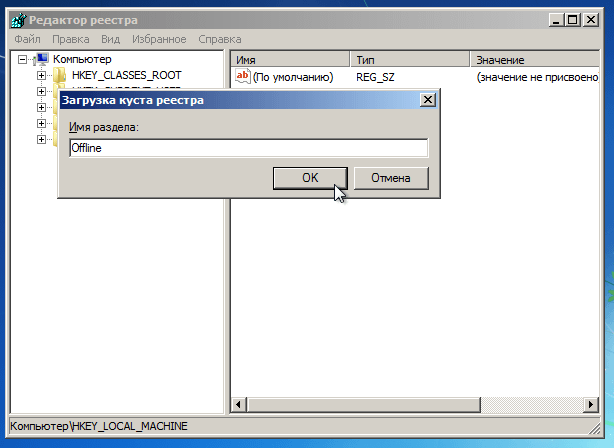
Enter a name for the section (for example, Offline) and click OK.
Expanding the HKEY_LOCAL_MACHINE branch, you will see the created partition (in our example it is called Offline).
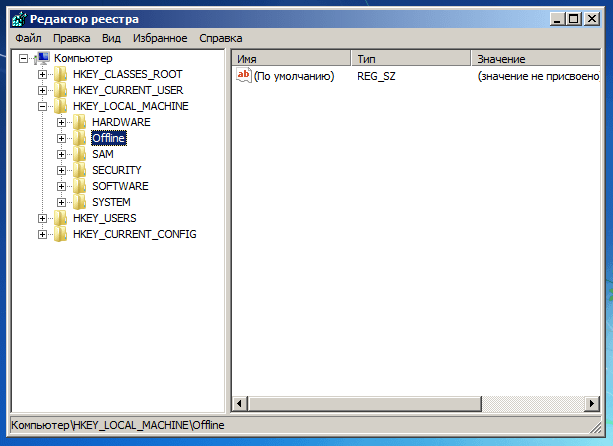
Expand the new section and navigate to the following subsection:
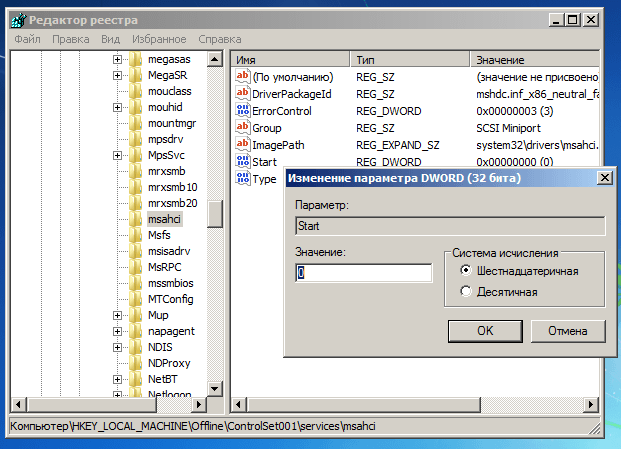
HKEY_LOCAL_MACHINE\Offline\ControlSet001\services\msahci
Open option start, change its value to 0 (zero), press OK.
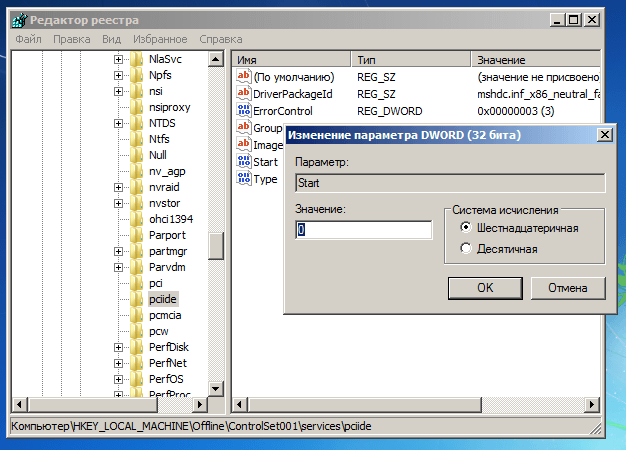
Perform the same operation on the subsection:
HKEY_LOCAL_MACHINE\Offline\ControlSet001\services\pciide
If you are using RAID (otherwise skip this step), do the same here:
HKEY_LOCAL_MACHINE\Offline\ControlSet001\services\iaStorV
Close Registry Editor, Command Prompt, and restart your computer. Extract installation disk so that the operating system can boot normally. Now Windows should start without any problems and then install the necessary controller drivers hard drive.
That's all!
Have a great day!
Causes of Windows not working after replacing the motherboard. Often after replacing the motherboard or changing the operating mode hard controller disk in the BIOS settings (Raid, Compatible, AHCI, Native SATA), the system boot starts as usual, the initial splash screen appears, then a reset, information about the BIOS POST, and again, the boot starts with the same continuation. This usually occurs because the system was unable to load the boot device driver and a critical error occurred STOP: 0x0000007B Inaccessible Boot Device (Inaccessible Boot Device)
In order to get accurate information about a critical error instead of rebooting, you must disable the automatic reboot when it occurs. For Windows XP and older, this can be done through the Windows bootloader menu, if you press F8 at the very beginning of the boot and select the boot option - Disable automatic reboot on system failure
When booting in this mode, if a critical error occurs, a Windows "blue screen of death" or BSOD - Blue ScreenOf Death will be displayed on the monitor screen.
A critical Stop 7B error when replacing the motherboard, or changing the operating mode of the hard disk controller, occurs because the new controller is not recognized by the system as, exactly, a hard disk controller.
At the very beginning of the operation of the operating system loader, special BIOS routines (INT 13H interrupt functions) are used to perform operations with the hard disk, and this is why the system starts to boot and runs normally for a while. However, at a certain point in the boot and initialization of the kernel, since Windows does not use the BIOS interrupt function, it becomes necessary to load the drivers through which the boot device will be accessed (Boot Device). First of all, the system must determine which hard disk controller will be used and load the appropriate driver for it. If the controller is not found, the driver is not found, or its launch is prohibited, the system will complete the boot process due to a critical error in the boot device inaccessibility (stop 7B).
When replacing the motherboard with a different type of board, the hard disk controller, from the point of view of the operating system, will become a different, new device. In progress bootstrap, Plug-n-Play (PnP) devices are identified by the system using a special code (PnP-ID), depending on the chipset on which the device or chipset is assembled, and a new HDD controller assembled on a different chipset will have a different ID . If the system "knows" the new PnP-ID of the HDD controller, and there is a driver to service it, then the motherboard will be replaced without any problems. Otherwise, the ID of the HDD controller unknown to the installed system will not allow it to load the driver required for operation.
And there are 2 possible solutions to the problem:
Make the system work with the new hard disk controller using standard drivers from Microsoft.
- add a new hard disk controller driver from the hardware manufacturer to the non-working system.
The first option is much simpler, safer and can be easily done using the usual import of several keys into the registry of a non-working system, for example, using ERD Commander and also ensure its loading and initialization.
One way to resolve stop error 7B is to perform the following steps in sequence:
Translation of the controller, if necessary, in the settings motherboard BIOS boards in compatibility mode (Compatible Mode) with a standard IDE - controller
Usually, this is done in the configuration section of the hard disk controller and can have different settings,
Controller Mode: Compatible
Configure SATA as: IDE
SATA Operation as ATA
AHCI Mode: Disabled
SATA Native Mode: Disable
Using standard drivers from Windows distribution to boot the system.
Usually, this does not require any special effort, except to check a few registry values.
Windows XP has an unpleasant feature - if you replace the motherboard, then there is a high probability that the operating system will stop starting. It usually looks like a blue screen on boot with a STOP 0x0000007b error followed by a restart of the computer. Loading in safe mode gives the same result.
But there is a solution to the problem. To do this, you need to boot from the Winternals ERD Commander disk (download link iso image at the bottom of the page) make changes to the registry using the file - mergeide.reg and add the drivers to the Windows\system32\drivers folder. After that, we restart the computer and enjoy the normal boot. It remains only to install the drivers for the new motherboard.
Quick Guide
1. Boot from the Winternals ERD Commander disc with support for your system
2. Write files from the idedrivers folder to C:\WINDOWS\system32\drivers
3. Run mergeide.reg to register standard IDE drivers
When switching from Intel chipset on any other, you must also delete the branch in the registry
otherwise the following error may appear
STOP 0×0000007E
If all this still does not help, you need to reinstall XP in recovery mode. We take for example Zver CD and start the installation not in automatic, but in manual mode and after license agreement(where the product code is written instead of the agreement) a search is in progress installed systems. Select the one you need and press R. (Not to be confused with pressing R to enter the recovery console immediately after loading the disk. There we press Enter) Then everything is as usual only after the installation is completed, we see our long-awaited desktop with all programs. :-)
If the motherboard is replaced with a non-identical model, Windows may issue a BSOD 0x0000007b. This is due to a mismatch installed drivers SATA controller.
The solution to this problem is to reinstall the operating system. But it happens that it is important to keep the installed system working. Do not be upset! ERD Commander 6.5 will help us. With it, we will make adjustments to Windows registry 7 required to boot on the new controller.
- Create boot disk or flash drive with ERD Commander.
- Loading
- To the question "Initialize network connection in background"?" Answer No.
- Answer Yes to the question "Reassign drive letters...".
- Select a keyboard layout and click Next. Then select our operating system from the list and click Next
6.In case the previous boot of Windows 7 failed, the search for boot problems will start
7. Click Cancel so as not to waste time, since this startup recovery tool will not help if you change the motherboard.
8. Select the item Microsoft Diagnostics and Recovery Toolset
9. Now run the registry editor
10. First of all, you need to delete the HKLM\SYSTEM\MountedDevices registry branch
11. Now you need to enable the launch of services that load standard drivers for IDE> and SATA controllers
12. Open the HKLM\SYSTEM\CurrentControlSet\services branch on the left side of the registry editor. Now check the following sections in this thread: amdide, amdsata, amdxata, atapi, intelide, msahci, pciide. The Start parameter for each must be equal to 0x00000000 (0).

13. After start is set to 0 for all the above registry keys, close the registry editor and restart the computer in normal mode. In most cases, this is enough to successfully boot Windows 7. Now you need to install the drivers on the new motherboard.
If it didn't help. If the steps taken did not help and Windows 7 still does not boot and gives a STOP 0x0000007b error, then the required controller driver is not loaded.
Let's try to enable loading of all drivers known to the operating system. To do this, set the value of the Start parameter to 0 in the following services: adp94xx, adpahci, adpu320, aic78xx, amdsbs, arc, arcsas, elxstor, HpSAMD, iaStorV, iirsp, LSI_FC, LSI_SAS, LSI_SAS2, LSI_SCSI megasas
We restart the computer in normal mode. The OS should boot.
Good day, dear users computer systems. Today, our focus will be the replacement of the hardware base personal computer. talking in simple words, in this article we will step by step analyze the process of replacing the old printing platform with a new one. This kind of technical work has to be carried out for two reasons - the failure of the previous motherboard or updating the outdated base of the desktop assembly. This is quite a difficult job, so before you get down to business, you should be well prepared. Collect all the necessary information on the topic, prepare the desktop and everything necessary for the successful completion of the task. If you know how to install a motherboard in a PC case, then replacing this component will not be difficult for you, because. dismantling the old platform is similar to installing it.
Motherboard replacement this is a rare procedure. As a rule, they change the system bus either in the case of a planned upgrade of components, or if this component breaks down. Unlike the replacement system block, updating the motherboard does not require such a lot of work from the user. Here, high concentration and sequence of actions come to the fore. The owner of a stationary computer must strictly adhere to the plan and not change the order of the necessary manipulations. Before proceeding, make sure that the future basis for your computer is compatible with a specific case (micro ATX, mini ATX, ATX). In this case, the form factor plays an important role. It is he who determines the standard for matching the PC case and the motherboard. Therefore, when buying a new printing bar, you should clarify its compatibility with the system unit of your computer.
Motherboard replacement starts with the organization of the workspace. Before changing the base of the PC, you should prepare all the necessary tools and equipment for the planned work. So, let's start dismantling our old motherboard. Carefully disconnect all cables and cords connected to the computer system unit. Next, we remove the charge of static electricity from ourselves, by the way it can harm the electronic filling of the machine. We lay the case on its side and open its removable cover. If this is your first time doing this, we strongly recommend that you write down the order of operations and label all major system cables. Now you have to disconnect all the wires connected to your old motherboard (board power, CPU power, SATA, IDE, etc.). Remember the main types of connectors on the printed bus to which power, indication and data cables are connected.
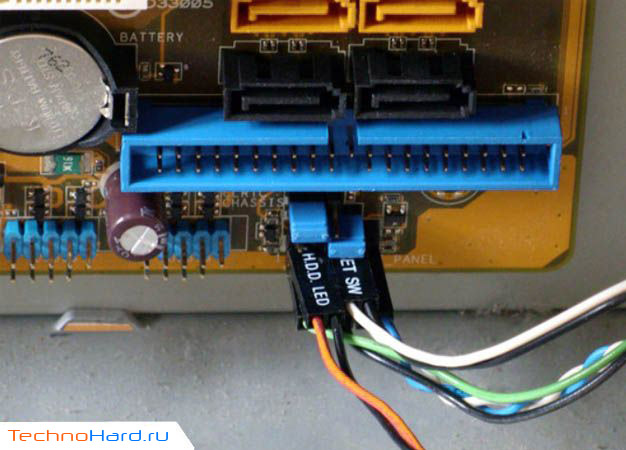
Motherboard replacement desktop computer requires concentration and attention. Plugs of all detachable wires must be installed in the appropriate sockets on the new motherboard. The next step is to disconnect additional devices such as discrete adapters, Wi-Fi modules, TV tuners, etc. Carefully remove them and put them on the table. Particular attention should be paid to one very important component. This is a combined unit with light indication contacts (power supply, HDD operation). On relatively new cases, all these contacts are made in the form of a single plug, which greatly facilitates the work of inexperienced PC users. At the next stage, we take out the slats random access memory. After that, you can go to the motherboard itself.
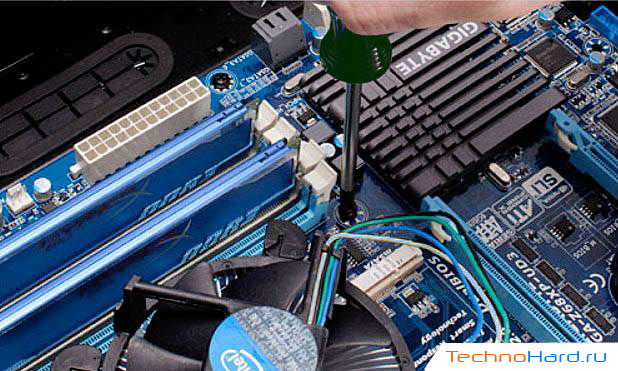
Using a screwdriver, unscrew a few screws securing the device in a metal frame. You need to know that in addition to them, the system unit has insulating racks that prevent the motherboard from touching the steel sheets. With a little effort, you can pull out the obsolete board and put in its place a new, more advanced base for your PC. The latches securely hold the device in the case, so be careful when removing the MP. After we still got the board out of the box, we need to remove the cooler and the central processor if we want to put them on new foundation computer. Also, do not forget to remove the rear plate of the MP, which covers the input / output connectors. Before installing a modern hardware center in a PC case, we recommend that users clean up its internal space. Free the case from all kinds of dust, and only after that you can start installing the newly minted motherboard.
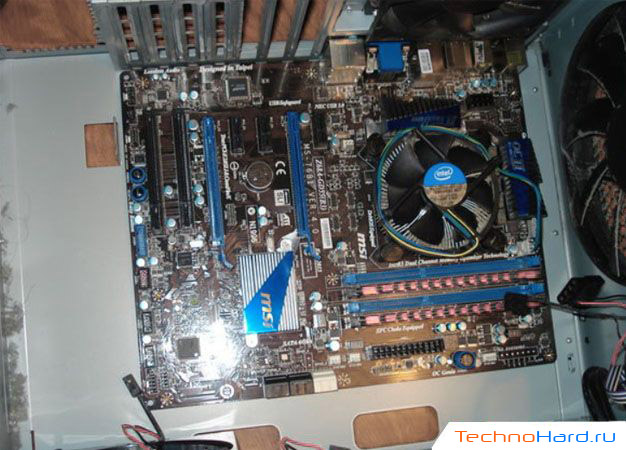
In fact, installing a motherboard in a case is the reverse process of removing it. In other words, we carry out all the above steps in reverse order. Carefully install the metal back plate in the desired opening, put the board in its niche and connect the system cables, power cables, expansion modules and much more. The main thing here is to strictly adhere to the plan and do everything in order so as not to forget anything. The main thing is not to rush anywhere and be attentive to the matter. Here the proverb "measure seven times, cut once" will be relevant. It is better to play it safe, but do everything without mistakes. After you install and connect all the devices, it will be possible to start checking the system operation without closing the lid on the stand. Together with motherboard you will have a CD with everything necessary software to get started.