In this article we will look at several ways to disable verification hard drive(HDD), which starts every time you turn on or restart the computer.
The reason most often is that the system flags HDD as in "dirty". This occurs due to improper shutdown of the computer, violations in the file system, or damage to the hard drive itself.
In order to fix this problem, you need to do the following:
1. Run a full disk scan.
Open "My computer" =>
right-click on the disk that is constantly being scanned =>
from context menu select "properties" =>
then on the tab "service" click the button "Run check"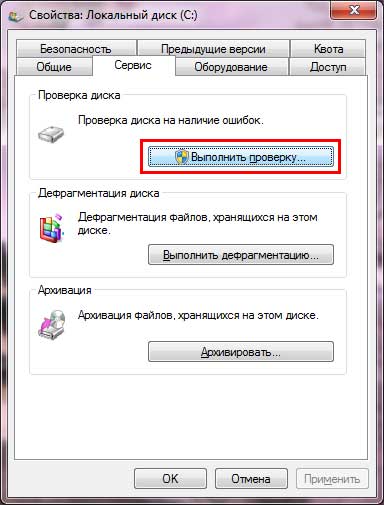
in the window that opens, check all the boxes and click “ Launch».
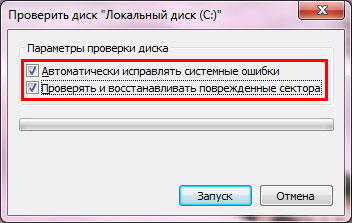
If selected system disk, then you will be asked to perform a check the next time the system boots - we agree and reboot the computer. We are waiting for the verification process to complete.
If the problem remains, move on to the next point;
2. Disable disk check.
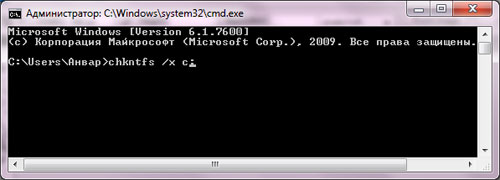
Press the key combination Win-R or Start => All programs => Standard => Run => enter the command cmd -> click OK. In the window that opens, enter the command chkntfs /X C: (Where C: - the name of the drive that is constantly being checked).
The check is now disabled. If you want to turn it on again, you need to type the command chkntfs /D.
CHKNTFS - enable/disable hard drive check on reboot
Displays or changes disk check options during boot.
- CHKNTFS volume: [...]
- CHKNTFS /D
- CHKNTFS /T[:time]
- CHKNTFS /X volume: [...]
- CHKNTFS /C volume: [...]
volume- specifies the drive letter (followed by a colon), mount point, or volume name.
/D- restores standard computer settings; all disks are checked upon boot and CHKDSK runs when errors are detected.
/T:time- changes the countdown AUTOCHK for the specified period of time in seconds. If no time is specified, shows the current setting.
/X- excludes standard disk check at boot. Information about previously excluded drives is not saved.
/C- requests to perform a disk check at the next boot; if errors are detected on the disk, it starts CHKDSK.
If no parameters are specified, CHKNTFS Displays either the status of the error detection bit for the disk or whether it will be checked at the next reboot.
Hi all. Today I want to tell you about how to disable chkdsk when loading Windows on your computer or laptop.
The chkdsk command is a kind of checking the disk for correct operation and the integrity of all files operating system and to identify problems. The function is very useful and sometimes helps restore the functionality of your computer. But if it takes up a few minutes of your time each time you start it, you won’t like it.
Recently they brought me a computer for service that had the same problem. Every time I booted, a check of disk “D” was launched and this, of course, drove my client crazy. I started looking for a solution and immediately found 2 options. I'll tell you how to disable disk check at boot and disable chkdsk when Windows boots.
How to disablechkdsk using the registry:
1.Press the Win+R keys and enter the command regedit.
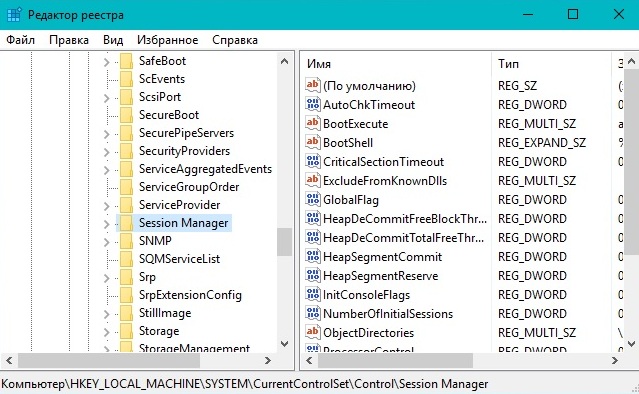
2.In the registry we follow this path: HKEY_LOCAL_MACHINE\SYSTEM\CurrentControlSet\Control\Session Manager
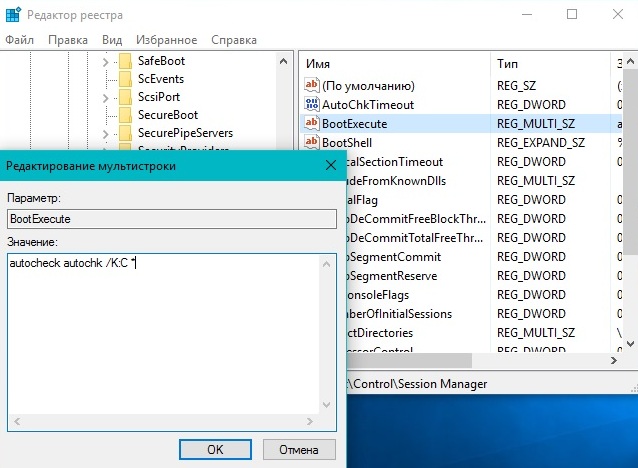
3.Now you need to double-click on the item BootExecute and change its parameter. You must add the value at the end of the parameter /k:C or /k:D(the letter at the end corresponds to a drive that you do not want to check every time you boot). You should get something like this: autocheck autochk /k:C * or autocheck autochk /k:D*. After this, restart your computer and chkdsk will not run.
How to disable disk check at boot using the command line:
1.Enter the command line. To do this, press the keys Win+R and enter the command cmd.
2. Enter the parameter into the command line chkntfs /x with: or chkntfs /xd:- Where c And d corresponds to the drive letters on which you want to disable Windows startup check. This method is a little simpler than the previous one, but some users may have problems with access.
If you have other problems with loading the system and you cannot solve them, then contact our service center iSAVE. We perform computer repair Kropyvnytskyi (Kirovograd), laptop repair Kropyvnytskyi (Kirovograd) and solve any software errors.
Instructions
Use the Chkntfs command - this will allow you to cancel check disk at subsequent system boots. The syntax for this command is as follows: Chkntfs /x Y: (Y: is the hard drive letter). You will see a message about the NTFS system being used.
Every time the operating system boots, it automatically starts Chkdsk utility. This utility scans your hard drive for errors and possible malfunctions file system. Of course, there is nothing wrong with this, but the system boot speed will decrease. Meanwhile, this procedure can be disabled, thereby increasing the OS loading speed.
You will need
- - a computer with Windows OS.
Instructions
To disable scanning of the system disk, follow these steps. Click Start. Select All Programs, then Accessories. Among standard programs there is "Command Line". Launch it.
Next, at the command line, enter Chkntfs /X C, where C is the system drive letter. If your system drive has a different letter, then, accordingly, you need to register it. After entering the command, press Enter. Close the command prompt. Automatic scanning of the system partition is now disabled. In the same way you can disable automatic check other hard drive partitions. Just at the end of the command you should write the letter of the hard drive partition for which you want to disable scanning.
Another way to turn off check- This is to edit the system registry branch. At the command prompt, enter regedit. After a second, the Registry Editor window will open. On its left side there is a list of the main sections of the system registry. Find the HKEY_LOCAL_MACHINE section among them.
Click on the arrow next to the name of this section. Repeat the procedure near the SYSTEM subsection. Thus, open the sections in this order: CurrentControlSet/Control/Session Manager. There is no need to open Session Manager; select it with a left mouse click.
After selecting the last section, branches for editing will be available in the right window. Find among them the branch called BootExecute. Double-click on it with the left mouse button. Now you can edit it. All you need to do is add the /K:C option before the asterisk. Ultimately, the edited branch will look like this: autocheck autochk /k:C. Save your changes. After this, disk check will be disabled.
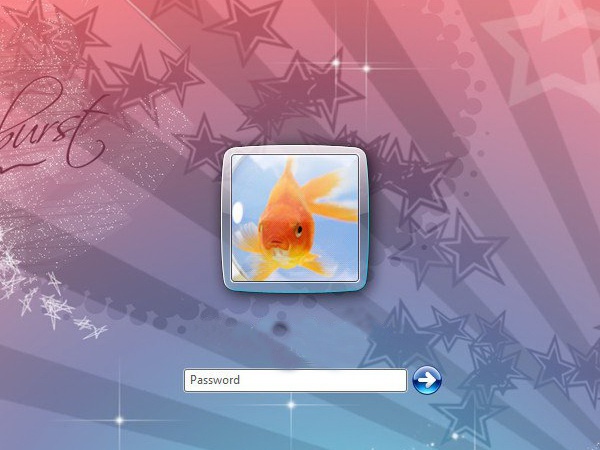
When the operating system boots, one of the last items that appears is the welcome screen. As such, it is merely a decoration and signifies that the login was successful. The welcome screen may appear immediately, but if there are several users on the system, it will appear only after logging in (authentication) to the system. Some operating system users claim that the welcome screen does not play a major role. Moreover, they consider it a secondary element (atavism) that can always be removed. How to do it? Read on.
You will need
- Use system settings operating system.
Instructions
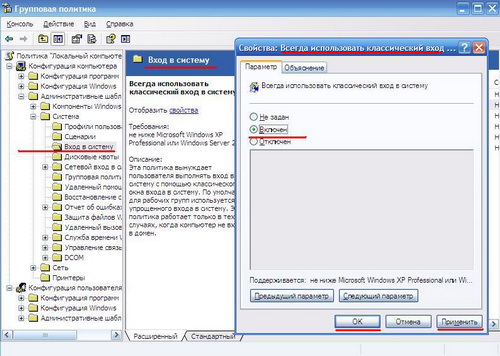
Click the "Start" menu - select "Run" - enter the value "gpedit.msc". In the window that opens " Group Policy"Select the folder "Computer Configuration" - "Administrative Templates" - "System" - "Login" - select the file "Always use classic login." A window for this file will open. On the Option tab, set it to Enabled, then click Apply and OK.
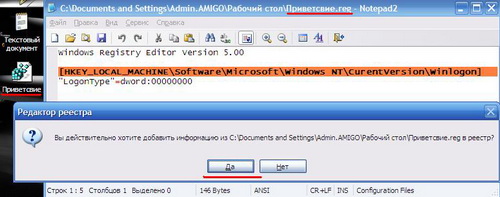
In order to remove the welcome screen, you need to open a text editor and create a new document. In the body of this document, place the following lines:
Windows Registry Editor Version 5.00
"LogonType"=dword:00000000
After that, click the “File” menu - “Save as” - name the file “Greeting.reg” - click “Save”. After that, run the file - click “Yes” in the dialog box.
Restoring the welcome window display mode can be done in the reverse order. Use system restore if you were unable to return to the original settings.
Sources:
- 6 language settings Windows that may confuse you
Checking hard disk is carried out in cases where messages appear about critical errors occurring when loading the system. operating room Windows system has its own disk checking tool, which can be activated either from GUI, and from command line.
Instructions
Click the "Start" button to enter the main menu and select "My Computer" or open the "My Computer" icon on the desktop.
Select the disk or partition to scan and call service menu right-click on the desired line.
Open Properties and select the Tools tab.
Click the Run button check».
Click the “Run” button in the “Check” window that opens local disk ()».
This will begin the verification operation of the non-system hard partition disk. Checking the system partition is only possible after rebooting the computer (but before starting the operating system), since system partition is a necessary condition for the functioning of the system itself.
Click the "Scan Schedule" button disk"to set the parameters for scanning the system partition.
An alternative way to run disk scan is to use the command line.
Enter the main menu by clicking the “Start” button and select the “Run” section.
Go to Open and type chkdsk c: /f /r in the command line to check disk WITH:.
Wait until a warning appears about the impossibility of executing the entered command and set the value to Y.
Restart your computer to begin the scan.
If critical disk errors prevent the system from booting, use installation disk Windows for testing.
Produce loading Windows from the installation disk.
Enter chkdsk command c: /r and press Enter to start scanning (Windows XP).
Specify required parameters languages and click Next (for Windows Vista/7).
Select the "System Restore" option.
Select "Command Prompt" in a new window with a choice of recovery methods.
Type chkdsk c: /r b press Enter.
note
Be sure to make backup all your data before using third-party utilities!