Good day.
Many owners of mobile computers, after using them for a long time, encounter a situation where some operational problems begin to appear in the operating system. There are many solutions - it all depends on the severity of the disease and the capabilities of the user. So, for example, on Asus laptop– restoring factory settings is considered one of the most effective. In addition, you can simply place the system manually, clean it from “garbage” or even remove dirt inside the device itself. Today I will touch upon the topic of returning the device to the state when it was first purchased.
It’s worth saying right away that the procedure with an EeePC laptop, as well as ZenBook from Asus, will not always work. So, for example, if you purchased a device with an already installed OS, and then decided to change it, say, to Windows 7 Ultimate, most likely you will not be able to do what you planned.
The fact is that the hard drive has a special partition in which everything is stored. necessary files, which are precisely responsible for the function of returning to standard view. And in case hard formatting disk, the above data disappears.
It is also worth noting that if a “third-party specialist” is involved in reinstalling Windows 8 or other versions, the situation ends the same - system partition is deleted. This is usually due to lack of professionalism. But sometimes the master is simply convinced that this element is simply clogging HDD.
What to do? If suddenly the situation described above happened on your X550C, there are fewer options to return the operating system to functionality. But they still exist: a recovery disk, a clean installation. Sometimes you can find the appropriate tools directly on the device manufacturers' websites.
What happens when returning to factory settings?( )
Before you begin the procedure on your K53S or other Asus model, it is important to understand what will happen:
All user data is lost. In some cases, this may only happen to the system area. And here is the disk D:\ will remain the same. But again, I repeat, this does not always happen.
The main partition is formatted.
Windows 10 or another version is being reinstalled. In this case, you will not need to enter the key.
After the first start of the N76V and similar models, automatic positioning begins system programs and drivers.
It turns out that if the entire process is successful, users will become owners of the equipment in the condition in which it was purchased.
It’s worth noting right away that such a procedure most likely will not be able to solve the problem of device overheating.
Sequencing( )
The procedure itself is simple and only requires consistency. To return to the standard appearance of the UX31A, as well as the X53B Asus, you need to do a number of actions:
If everything went well, users will see a clean " Desktop».
That's all. I hope this article will help you get your computer back up and running. If you still have some questions, you can view video
Subscribe and tell your friends.
So, let's continue the conversation about returning laptops to factory condition. Today we will talk about restoring laptops from Samsung. Traditionally, before describing the recovery procedure, I strongly recommend that you read the article if you have not done so before.
It must be said that the recovery mechanism for Samsung laptops is somewhat different from similar tools used by most other manufacturers of mobile computers, in which the hard drive is completely formatted, after which data is loaded onto it from the recovery partition.
In Samsung laptops, everything happens almost the same, but there is a slight difference.
When you turn it on for the first time mobile computer produced by Samsung, we are offered to partition the hard drive into two logical drives: C and D. This procedure is performed only once. After a system restore, it does not happen again. Therefore, strictly speaking, a 100% return to factory condition is not provided.
All recovery procedures affect only drive C. You can either format drive D yourself or use it to store data from drive C. After restoring the system, you can get it back.
Well, if the operating system is in such a state that it can no longer boot, use the article’s recommendations to save data.
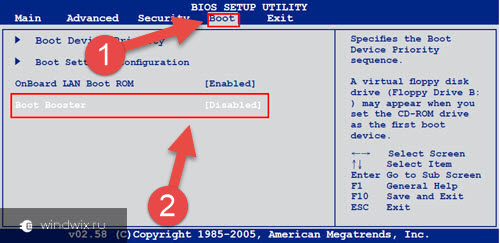
To start the system resuscitation procedure from the recovery partition immediately after turning on the computer, you need to start clicking on the F4 button. In addition, some models may have a functional recovery button used in conjunction with the Fn key.
But the F4 method is universal and also requires pressing only one key, so it is simply more convenient. But I leave this up to your discretion. The end result is important to us.
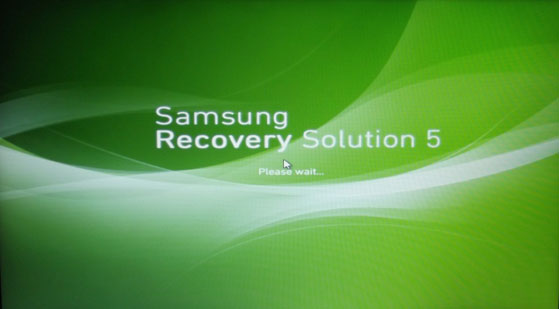
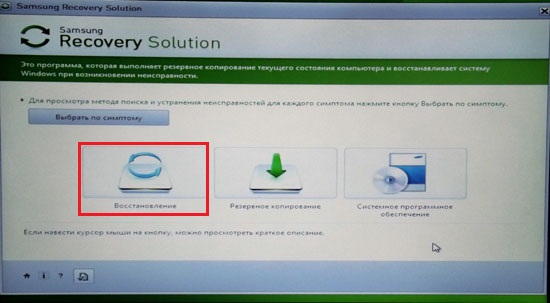
If everything is done correctly, the Samsung Recovery Solution utility splash screen will appear on the screen. We stop pressing the buttons and wait.
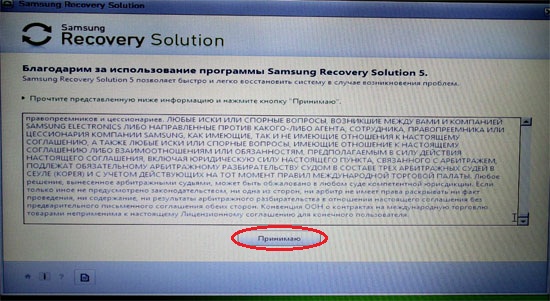
After some time, we will be asked to familiarize ourselves with the text of the agreement. We read it and accept it if we want to move forward.
We will be offered a set of available actions to choose from. Select the “Recovery” item.
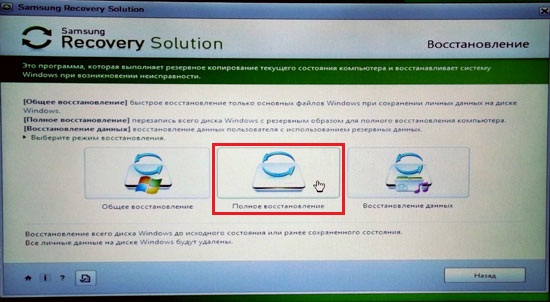
From the available options, select “Full recovery”.
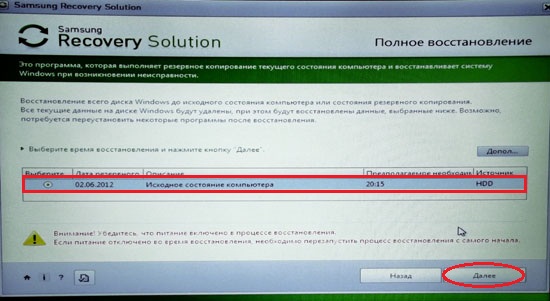
A list of available system backups will appear. If there are several, choose the earliest one. It is automatically created by the system when you first start the computer. After that, click "Next".
We will be warned that all data will be destroyed. Since we assume that you have already saved all the required information, click Yes.
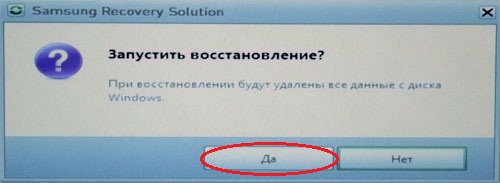
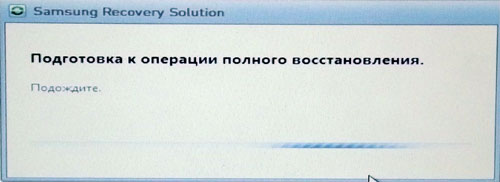
Preparations for a complete laptop recovery operation will begin.
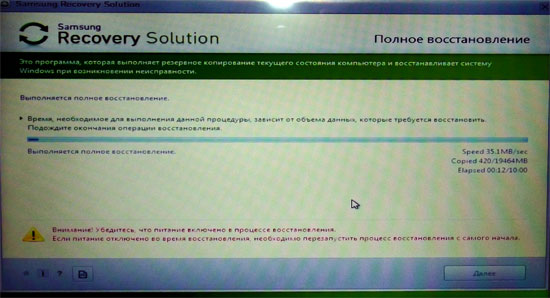
After this, the recovery procedure itself will begin. It takes some time. Be patient.
When completed, the following message will appear on the display:
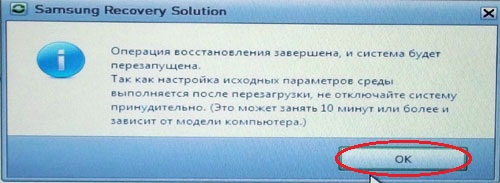
Click OK. The computer will reboot and preparations for the first launch will begin. Do not touch or press anything. If the laptop starts to reboot again, then this is necessary. Don't bother him. You need to wait until the following message appears on the display:
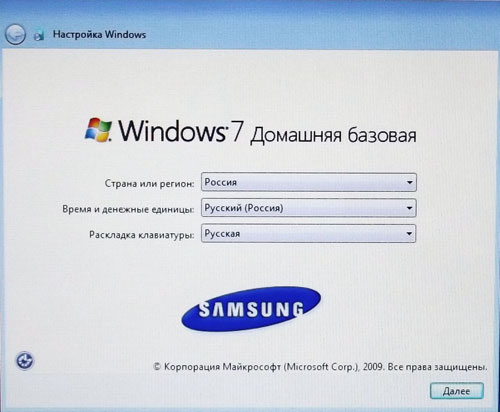
Its appearance means that the recovery procedure is completed and the operating system is in first run mode.
That's all. Now you know how to restore Samsung laptops to its original state.
If my article was useful to you, please recommend it to your friends using the buttons social networks or simply by sharing the link.
You can send your questions for the section “ Free help» at: admin@site. Please write “Free Help” in the subject line of your email.
Resetting Windows to factory settings or resetting is a function that allows you to return the hard drive to the “As from the store” state: all personal files and personal settings will be deleted, only the standard operating system with default settings will remain.
Why reset Windows?
It should immediately be noted that this feature is present only on computers where the operating system was installed by default. As a rule, these are all branded devices that are sold in stores.
There are 5 main reasons for resetting Windows to factory settings:
- Sale/transfer of device. In order not to manually delete all personal files on your computer, you can use zeroing. Any buyer will be only happy with a “store-bought” HDD;
- Reinstalling the OS. Resetting Windows to factory settings - best alternative reinstalling the OS in case of a critical failure;
- Littering the operating system and system directories. If Windows has been used for a long time, then littering is an inevitable phenomenon in which the OS begins to slow down and work incorrectly;
- Driver installation failed. Windows 7 stopped working after installing a new driver - restore to original state will fix a similar problem;
- "Rally" of the system. If Windows has crashed for unknown reasons, then resetting to factory settings will be the most optimal solution.
Comment. Restoring Windows 7 to standard settings is only possible with a working hard drive.
How to determine the presence of the reset function
The hard drive of the computer on which Windows is installed by default is marked in a special way. There is a hidden or service section here. It stores a backup copy original system with all necessary utilities and drivers. The disk is not visible through Explorer, but it appears in Disk Management. Algorithm:
Comment. The Samsung brand is taken as an example, hence the name of the backup disk Samsung_REC.
The section does not have letter designation and is not available while the user is working with the system. You can view the contents (it’s better not to do this unless absolutely necessary) only by booting the computer from external media, where you can assign a letter to the drive.
Preparing for a rollback
Some manufacturers integrate into the custom shell Windows utility to reset the settings, which allows you to start the recovery procedure while working with the system. But if the OS does not boot due to a critical error, then this will not be useful, so all proprietary devices are equipped with a factory reset tool that can be launched when the computer starts by pressing a special key.
The image shows a list of common PC models and default system recovery initiation keys:
The preparation procedure includes only two stages:
- Do backup copy all key files to any third-party media (preferably a flash drive) from all hard drives , if there are several of them;
- Check the battery charge on your laptop. It must be complete, since an unexpected power outage can cause a lot of trouble to the computer, including the need to carry the device to the service center. Owners of stationary systems either must be confident in their station, or connect the computer to an uninterruptible power supply.
Recovery using hotkeys
Pressing one of the keys described above on the screen initiates the launch of the recovery wizard. The entire program is adapted to the Russian language, so even an inexperienced user will not have problems using the utility:
Comment. In some cases, the owner will be asked to copy the data to another medium. If the information has already been saved, then this item can be skipped.
Do not forget that it will be impossible to interrupt the procedure. Once started, the process should complete. The duration depends on the performance of the device. On average it takes 20-30 minutes.
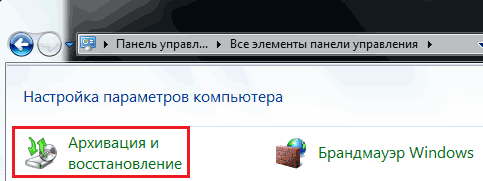
Restoring using the built-in utility
As an example, we chose the HP Pavilion G6 laptop, where the program for resetting the settings was installed by default. To begin the rollback, perform the following steps:
After clicking, the utility will provide the opportunity to create a backup copy of the data to an external storage device. We agree or refuse.
Rollback via recovery environment
If Windows does not boot to the user interface, then the recovery wizard can also be launched through the recovery environment. For this:
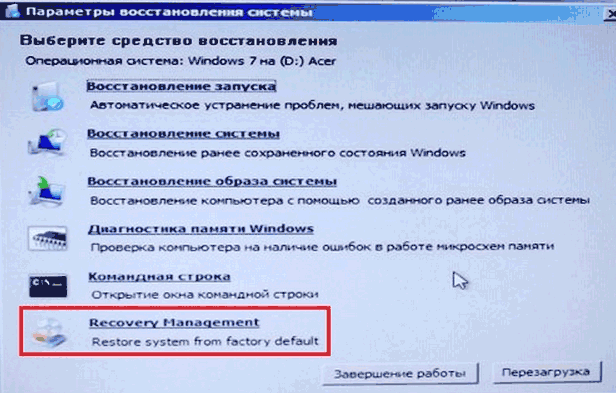
- After starting the environment, the owner must select the interface language and account(if there is a password on the PC, you must enter it);
- In the recovery options, select the item located below the command line:
On each device, such a section is called differently, but the launch principle is always the same.
For clarity, below is a video instruction:
Brought recently Acer Aspire 5742g with Windows 7 barely moving, they say after viruses. At first I wanted to just clean the system, but everything was too bad. I remembered about the hidden section. And for good reason.
During Windows boot, immediately when the Acer logo appears, hold down the Alt key several times and briefly press and drop the F10 button. You find yourself in hidden section, as in the photo, and then just nod your head and agree to everything.
And in an hour you will become the proud owner of a zero system.
I suffered the most with McAfee removal. I wonder who came up with this wonderful idea to equip a new book with a trial version of a stupid antivirus, which, moreover, cannot be removed from the system.
Moreover, Microsoft has its own good antivirus. By the way, I recommend it. For those who have it on their laptop licensed Windows, and for those who are not afraid of numerous updates - download and install Microsoft Essential/
http://windows.microsoft.com/ru-RU/windows/products/security-essentials/download
It works very well. And my head doesn’t hurt about keys and licenses.
Now, a few words about that How to remove McAfee
This is described in detail on the Kaspersky website.
Solution 1. Removal McAfee antivirus using Microsoft Windows
In the lower left corner of the screen, click on the Start button.
Next for Windows XP users - Select the Control Panel menu item.
In the Control Panel window, select Add or Remove Programs.
For Windows Vista/7 OS users - Select the Control Panel menu item.
In the Control Panel window, left-click on the Programs section.
In the Programs window, select the Programs and Features section.
Select McAfee antivirus from the list of programs.
Follow these steps:
For Windows XP users:
In the Add or Remove Programs window, click the Remove/Change button (if you are prompted to remove some shared files, click the Yes, for all button).
For OS Windows Vista/7 users:
Double-click the left mouse button on the program name.
In the Programs and Features window, confirm that you really want to remove the program by clicking Yes.
The removal of McAfee antivirus from your computer will begin. If you successfully remove McAfee antivirus from your computer, there is no need to complete the subsequent steps. If you receive any error messages or a message indicating that McAfee antivirus uninstallation was not completed successfully, you must uninstall McAfee antivirus manually.
Solution 2. Removing McAfee antivirus using special utility McAfee
If the automatic removal of McAfee antivirus did not complete successfully, please follow the instructions below to completely remove the product from your computer:
Download and save the MCPR.exe utility on your computer
Run the MCPR.exe file by double-clicking the left mouse button on the file.
Once the McAfee product removal process is complete (this process will take about a minute), the McAfee Cleanup window will appear with a message (on English language): Reboot required to remove all files. Would you like to reboot now? (translated into Russian: “To delete all files, you need to restart the computer. Do this now?”).
Click on the Yes button to restart your computer now and complete the McAfee product removal process.
Acer laptops have one wonderful and convenient function for recovery, without using system image disks. The laptop manufacturer recorded a system recovery image that occupies only a few gigabytes in a hidden partition hard drive.
In order to restore Windows 8 on laptop, you must turn off your PC and be sure to connect the charger.
When you turn on the laptop, as soon as the Acer logo appears, simultaneously press the Alt + F10 key combination, preferably several times at once.
When you press these keys, a proprietary Windows 8 recovery program called Acer eRecovery Management will launch. If this utility does not start, check in the BIOS to see if the Disk-to-Disk (D2D) function is enabled. If eRecovery Management asks for a password, then try entering the standard AIM1R8, 000000 or 00000000. If you have problems logging into the utility, we recommend contacting the service.
After the utility has loaded, you need to select “Full system restore to factory settings”, this option restores the system to its factory state. You should also pay attention to the presence of a recovery function that saves user files and data. But if you decide to use the second option, after viruses or unstable operation, this will not help the system for a long time.
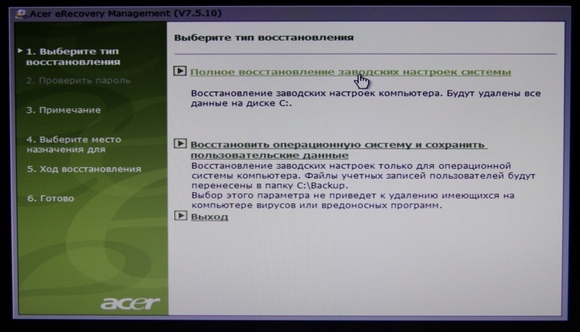
Now that you have decided on the recovery method, read the warning and click on the “Next” button.

The backup and restore process will begin. system files. This procedure will take about 15 minutes. Wait for it to finish.
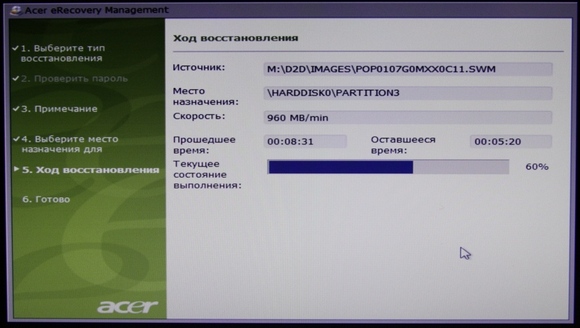
Then click "OK" button, the system will reboot.
After rebooting the laptop, the program will start as originally.
Complete Windows recovery 8 on an Acer laptop completed. Next, the operating system desktop will launch and a window will appear at the bottom of the screen, showing the installation process of utilities and the necessary drivers. Wait for the installation to complete. This will take about 20 minutes.
If during the installation of drivers and utilities prompts to restart the PC appear, select the “Restart later” option. Preinstalled antivirus program Sometimes you will be prompted to change the registry - agree.
At the end, the driver and program installation utility will delete all temporary files and reboot your laptop.
That's all! You have restored Windows 8 OS on your laptop from hidden section hard drive.


