Brought recently Acer Aspire 5742g with barely moving Windows 7, they say after viruses. At first I wanted to just clean the system, but it was too bad. I remembered about hidden section. And not in vain.
During Windows boot, directly at the time of the appearance of the Acer logo, holding the Alt key several times, briefly press and release the F10 button. You fall into hidden section, as in the photo, and then just nod your head and agree to everything.
And in an hour you will become the proud owner of a zero system.
Most tormented with removing McAfee. I wonder who came up with this wonderful idea, to provide a new book trial version of a stupid antivirus, which, moreover, cannot be plucked out of the system.
Moreover, Microsoft has its own good antivirus. By the way, I recommend it. For those who have a laptop licensed Windows, and for those who are not afraid of numerous updates - download and install Microsoft Essential/
http://windows.microsoft.com/en-GB/windows/products/security-essentials/download
It even works very well. And the head does not hurt about the keys and licenses.
Now, after all, a few words about that How to uninstall McAfee
This is described in detail on the Kaspersky website.
Solution 1 Removal McAfee antivirus Microsoft Windows
In the lower left corner of the screen, click the Start button.
Next for users of Windows XP - Select the menu item Control Panel.
In the Control Panel window, select the Add or Remove Programs section.
For Windows Vista/7 users — Select the Control Panel menu item.
In the Control Panel window, left-click on the Programs section.
In the Programs window, select the Programs and Features section.
Select McAfee antivirus from the list of programs.
Do the following:
For Windows XP users:
In the Add/Remove Programs window, click the Uninstall/Change button (if you are prompted to remove some common files, click the Yes, for all button).
For Windows Vista/7 users:
Double-click on the program name with the left mouse button.
In the Programs and Features window, confirm that you really want to uninstall the program by clicking the Yes button.
The removal of McAfee antivirus from your computer will begin. If you have successfully removed McAfee antivirus from your computer, there is no need to follow the next steps. If you receive any error messages, or if you receive a message that the uninstall of McAfee Antivirus was not completed successfully, you must uninstall McAfee Antivirus manually.
Solution 2 Uninstalling McAfee antivirus using special utility McAfee
If the automatic removal of McAfee antivirus was not completed successfully, please follow the instructions below to completely remove the product from your computer:
Download and save the MCPR.exe utility to your computer
Run the MCPR.exe file by double-clicking on the file with the left mouse button.
After the McAfee product removal process is complete (this process will take approximately one minute), the McAfee Cleanup window appears with a message (on English language): Reboot required to remove all files. Would you like to reboot now? (translated into Russian: "To delete all files, the computer must be restarted. Do it now?").
Click the Yes button to restart your computer now and complete the McAfee product removal process.
Acer laptops have one great and handy feature for recovery, without using disks with a system image. The manufacturer of these laptops recorded a system recovery image that occupies only a few gigabytes in a hidden partition hard drive.
In order to restore windows 8 on laptop, you must turn off your PC and be sure to connect the charger.
When you turn on the laptop, as soon as the Acer logo appears, simultaneously press the Alt + F10 key combination, preferably several times at once.
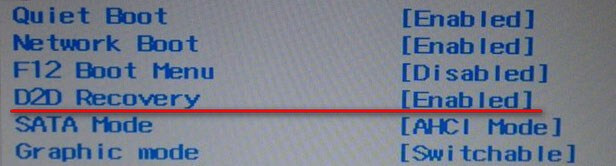
Pressing these keys will launch a proprietary Windows 8 recovery program called Acer eRecovery Management. If this utility does not run, check the BIOS to see if Disk-to-Disk (D2D) is enabled. If eRecovery Management asks for a password, then try entering the standard AIM1R8, 000000 or 00000000. If you have problems logging into the utility, we advise you to contact the service.
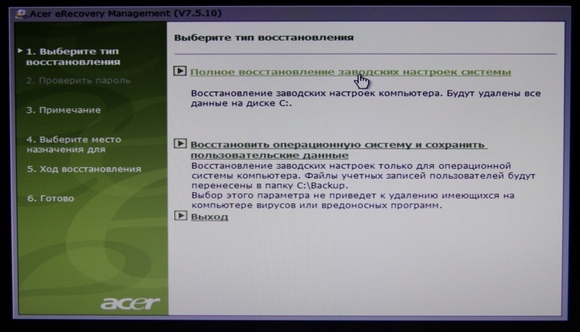
After the utility has loaded, you need to select "Full factory reset of the system", this option restores the system to the factory state. You should also pay attention to the presence of a recovery function with saving user files and data. But if you decide to use the second option, after viruses or unstable work, this will not help the system for a long time.
Now that you have decided on the recovery method, read the warning and click on the "Next" button.

The copy and restore process will begin system files. This procedure will take approximately 15 minutes. Wait for the end.
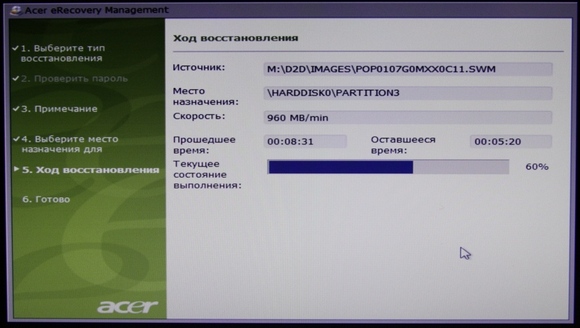
Then click "OK" button, the system will reboot.
After restarting the laptop, the program will start according to the original one.
Complete Windows recovery 8 on Acer laptop completed. Next, the desktop of the operating system will start, and a window will appear at the bottom of the screen showing the process of installing utilities and the necessary drivers. Wait for the installation to finish. This will take approximately 20 minutes.
If during the installation of drivers and utilities prompts to restart the PC appear, select the "Restart later" item. Preinstalled antivirus program sometimes it will display a request to change the registry - agree.
At the end, the driver and software installation utility will remove all temporary files and restart your laptop.
That's all! Have you restored Windows 8 on your laptop from a hidden partition hard disk.
I thought for a long time where to start today's topic "How to restore factory settings on a laptop." After all, this procedure is resorted to for different purposes. Some due to the fact that the computer starts to slow down due to a heap installed programs, half of which were also removed incorrectly. others because Windows already so infected with viruses that it makes no sense to somehow restore everything. Or it just won't load. The third case is when equipment is returned to the store under warranty from the store, and service personnel need to reset Windows 10 to factory settings.
As a result, I decided to start without an introduction and go straight to the point.
How to factory reset a laptop
The whole action is essentially not difficult, and you will now see for yourself. In the article I will try to mention all the major manufacturers. I hope I don't forget anyone.
Acer
The process can be implemented directly from Windows. To do this, you only need to install special program « Acer Recovery Management«.
We go into the BIOS, go to " Main", Where you should make sure that the function" D 2D Recovery"Enabled).
Reboot, and at the same time press the Alt + F 10 hotkey combination until the application window opens.
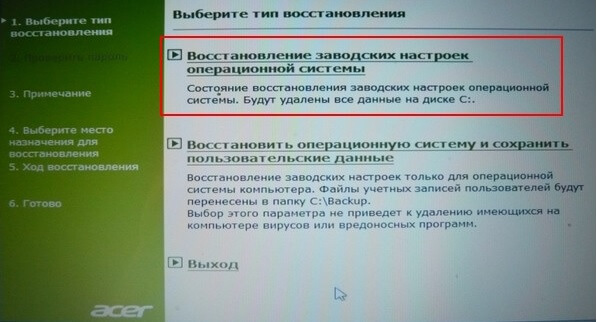
Now select the option highlighted below, in the screenshot. In other operating systems, say (8/8.1), the phrase may have a different meaning - "Revert to original state".
We confirm our actions and wait for the end of the work.
This video is in case you English version utilities.
Asus
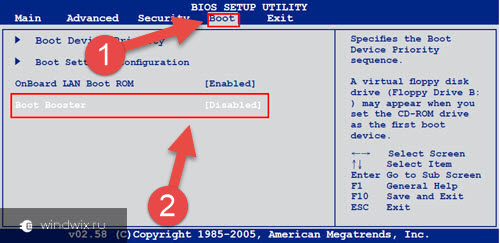
I want to note in advance if the recovery asus systems happens for the first time, then you should first deactivate " Boot booster»In BIOS.
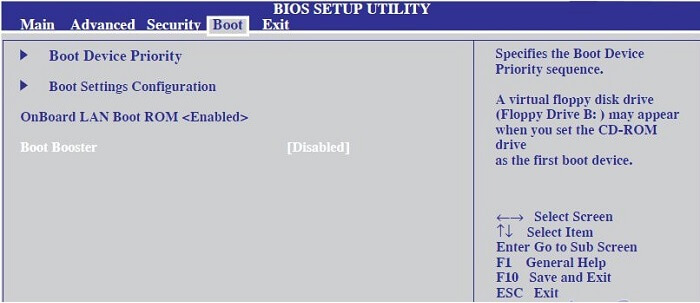
Now we can start. We start the laptop, press the F9 key. The button can be released after the Boot Manager window appears. Press Enter on "Windows Setup".
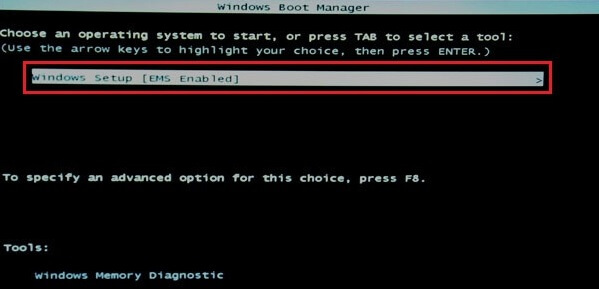
We answer the topmost line, as shown in the figure below.

And we are waiting for the end of the process.
Dell
Reset laptop to factory settings this company is also not difficult. For example, through "Computer Troubleshooting", as in the Toshiba option described below.
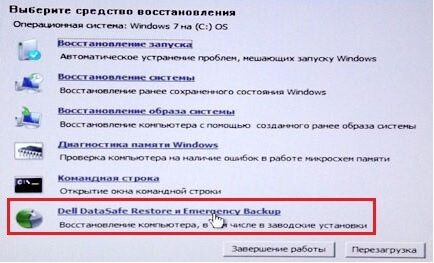
In order not to repeat myself, I will describe another way. An internal utility will be involved here - Dell DataSafe.
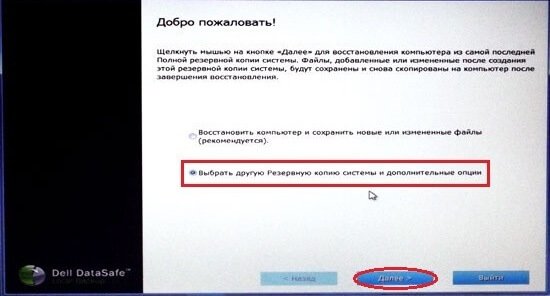
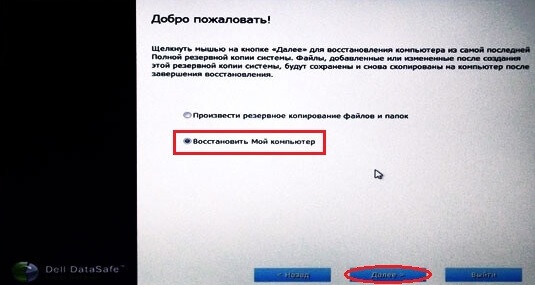
a) Run it. Highlight "Choose another backup and additional options.
b) We mark the item "Restore My Computer".
c) Set the value "Restore without saving ..."
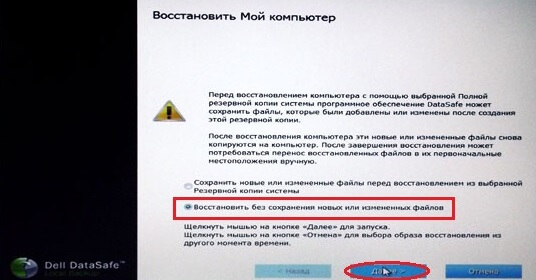
d) We confirm our actions and wait for the end.
Toshiba
First we need to turn off the laptop. Then, holding down the "0" (zero) button, turn it on. Release the key only after how do you hear the characteristic squeak! Then follow the instructions on your computer screen.
But what if you have an outdated laptop model?
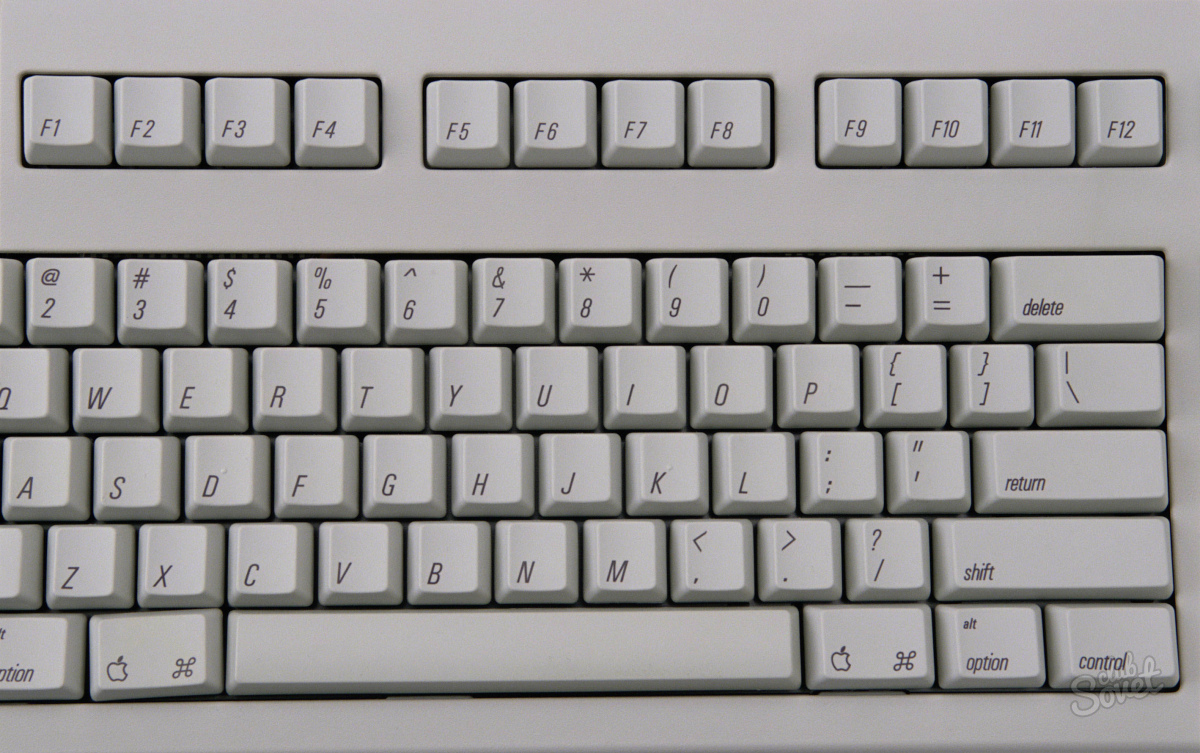
Turning on or rebooting it, press the F8 button on the keyboard and select the very first value.
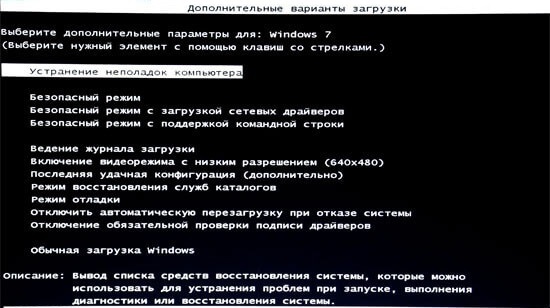
In the list, click Toshiba HDDRecovery” and then “Shut down”.

Again, follow the instructions on the screen.
Samsung
It's not hard here either.
a) Turn on the PC and click on F4.
b) Go to the "Recovery" tab (if you need to accept the license agreement).
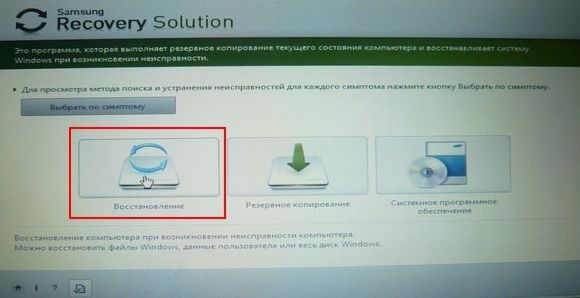
d) Activate "Full recovery". Don't forget to specify a backup.
e) We are waiting for completion.
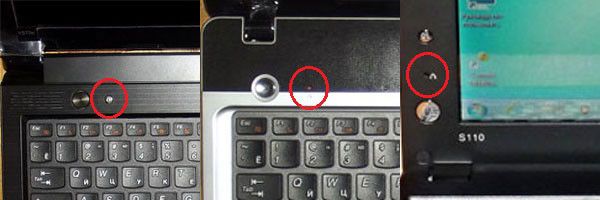
Lenovo
Examine the laptop keyboard for "OneKey Rescue," an inconspicuous little button. It is usually located on the left upper corner next to "Enable".
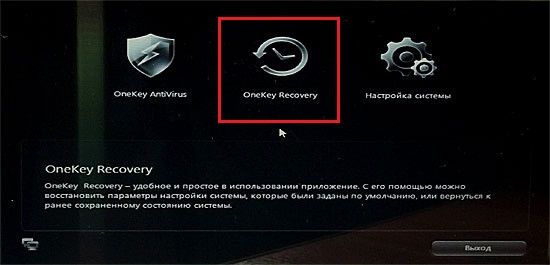
We select the option of the same name in the utility.
We mark the item shown in the picture below.
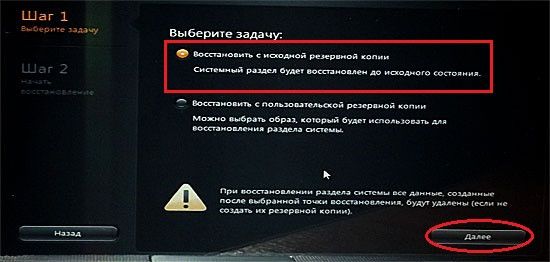
At the end of the work, you should reboot.
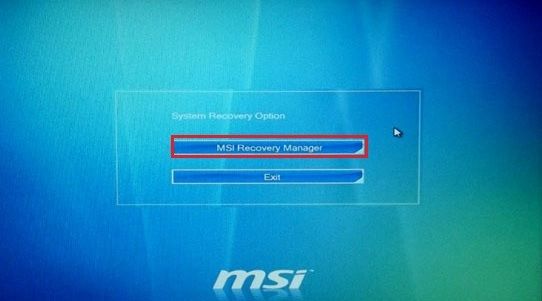
MSI
We start the PC and press the F3 key on the keyboard until the window “Windows Boot” already familiar to us appears. manager". As in the case of Asus, we activate "Windows Setup".
Find "MSI Recovery Manager" in the menu and click on "OK".
Crashes in Windows happen quite often. The system gets clogged unnecessary programs which interferes with the normal operation of the laptop. You can reinstall Windows with drivers and necessary programs, but it is much easier to restore the factory settings than to reinstall the drivers.
Most laptops are sold with an OS installed. There is a department on the hard drive where the OS image with drivers and programs is stored, so a disk is not needed to reinstall the system. To free up space on the hard drive, many users delete this partition, and someone does not know about it. The folder where all the information is stored is called Recovery. You can resume the system when you restart the laptop or from the operating system. It should be remembered when restoring the factory settings, network adapter must be connected to the device. The factory settings of the laptop are in a hidden section called "Recovery Partition". To enter it, you need to enter "Computer Management", then "Disk Management". In Toshiba laptops, in addition to the partition "Recovery", there is a folder "HDD Recovery" located on drive D. Both of these folders cannot be deleted, otherwise it will be problematic to restore the factory settings.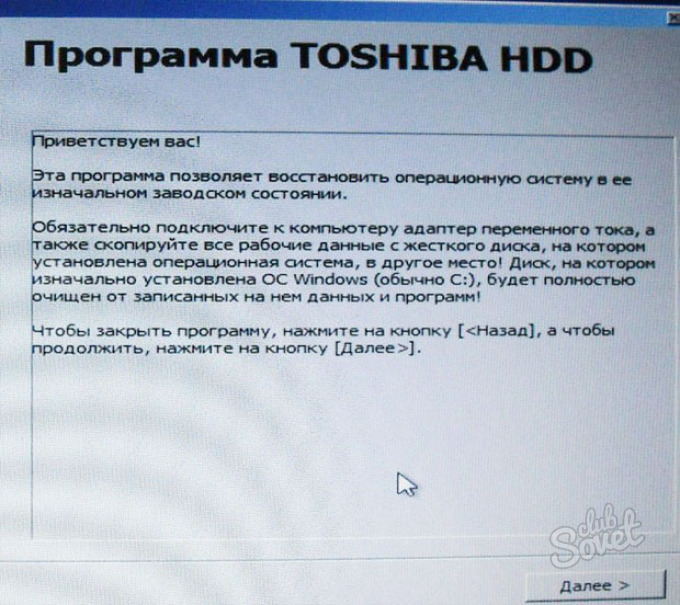

- Samsung - "F4";
- MSI - "F3";
- Acer - "Alt + F10";
- Fujitsu Siemens - "F8";
- LG - "F11";
- Toshiba - "F8";
- HP Pavilion - "F11";
- ASUS - "F9";
- Packard Bell - "F10";
- Sony VAIO - "F10";
- Dell inspiration - "Ctrl + F11";
- Lenovo ThinkPad - "F11";
- Dell XPS - "F8" or "F10".

When the laptop is restored to factory settings, all information stored on the hard drive will be lost. Therefore, all programs will have to be installed again.
Good day.
many owners mobile computers, in the case of their long use, they encounter a situation where in operating system some problems are starting to appear. There are many solutions to them - it all depends on the severity of the disease and the capabilities of the user. So, for example, on Asus laptop- Restoring factory settings is considered one of the most effective. In addition, you can simply place the system manually, clean it from "garbage" or even remove dirt from the inside of the device itself. Today I will touch upon the topic of just returning the device to the state when it was just bought.
It should be said right away that the procedure with the EeePC laptop, as well as the ZenBook from Asus, will not always work. So, for example, if you purchased a device with an already installed OS, and then decided to change it, say, to Windows 7 Ultimate, most likely you won’t be able to do what you planned.
The fact is that there is a special partition on the hard drive in which all necessary files, just responsible for the function of returning to standard view. And in case hard formatting disk, the above data disappears.
It should also be noted that in the case of involving a "third-party specialist" to reinstalling Windows 8 or other versions, the situation ends the same - system partition is removed. Usually this is due to unprofessionalism. But sometimes the master is simply convinced that this element simply clogs the hard drive.
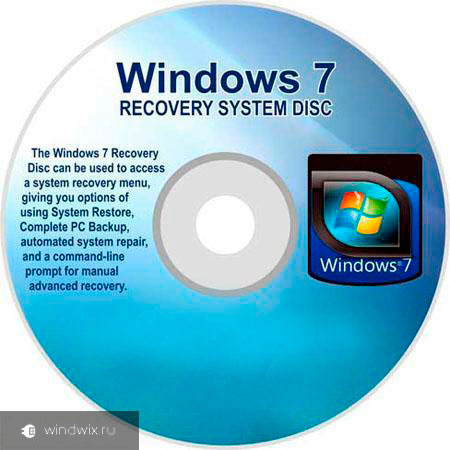
What to do? If suddenly the situation described above just happened on your X550C, there are fewer options to return the operating system to working capacity. But they are still there: a recovery disk, a clean installation. Sometimes you can find the appropriate tools directly on the websites of device manufacturers.
What happens when you return to factory settings?( )
Before proceeding with the procedure on your K53S or another Asus model, it is important to understand what will happen:
All user data is lost. In some cases, this can only happen to the system area. And here is the disc D:\ will remain the same. But again, I repeat - this does not always happen.
The main partition is being formatted.
Reinstalling Windows 10 or another version. In this case, you do not need to enter the key.
After the first start of the N76V and on similar models, automatic positioning starts system programs and drivers.
It turns out that if the whole process is successful, users will become the owners of the equipment in the condition in which it was purchased.
It should be noted right away that such a procedure most likely will not be able to solve the problem of overheating of the device.
Sequencing( )
The procedure itself is simple and requires only compliance with the sequence. To return to the standard look of the UX31A, as well as the X53B Asus, you need to do a number of actions:
If everything went well, users will see a clean " Desktop».
That's actually all. I hope this article will help you get your computer back up and running. If you have any questions, you can view video
Subscribe and tell your friends.


