When working with a computer, there is often a need to capture the contents of the monitor. This can be done without using special programs, simply by pressing the Prnt screen key on the keyboard. When pressed, the computer does not signal in any way that the command has been executed, and you can find the saved image using any graphic editor. That is, the picture is copied to the computer’s clipboard, and in order to see the image, you need to paste it into the program. Let's take a closer look at how to do this.
Computer devices that run on the Windows operating system have the simplest graphics editor Paint. To find a picture saved using the Prnt screen key, find and open this program. We execute the following commands:- Click<Пуск>in the lower left corner of the screen;
- Select a menu item<Все программы>.
![]()

If there is no special program for creating screenshots on the device, then you can only develop the captured image using a graphics editor. We looked at the option of detecting a picture using the example of a standard program
Many of the less advanced users personal computers, were often asked about the purpose of the “Print screen” key, which is present in almost any keyboard. Those who are at least a little familiar with English language, most likely they can guess why it takes up free space on the keyboard. It is needed primarily to create a picture or, as it is usually called, a screenshot of the screen. But while no one will have any problems pressing this button, not everyone knows what to do next and how to get the finished image. At least for now. To change this, I suggest brief instructions in which I will tell where does it save Print Screen .
So, press this very key (it is located in top row, slightly to the right of the f12 key). Next we need any graphic editor through which we will get the coveted picture. In principle, any will do, but I will use the Paint built into the system. Go to Start -> All Programs -> Accessories -> Paint.
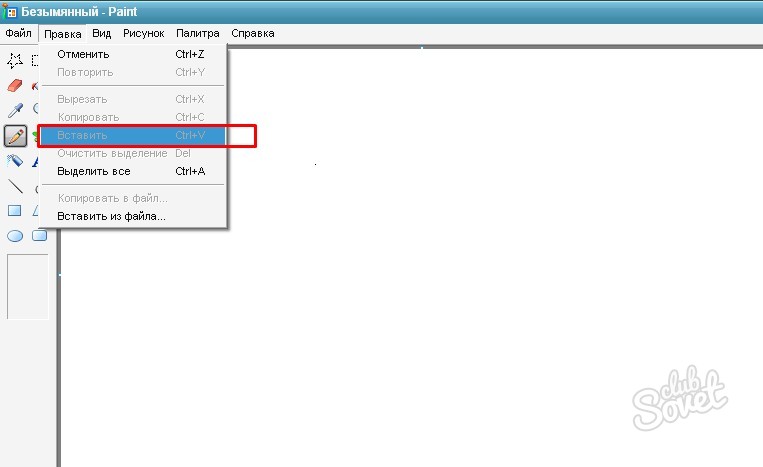
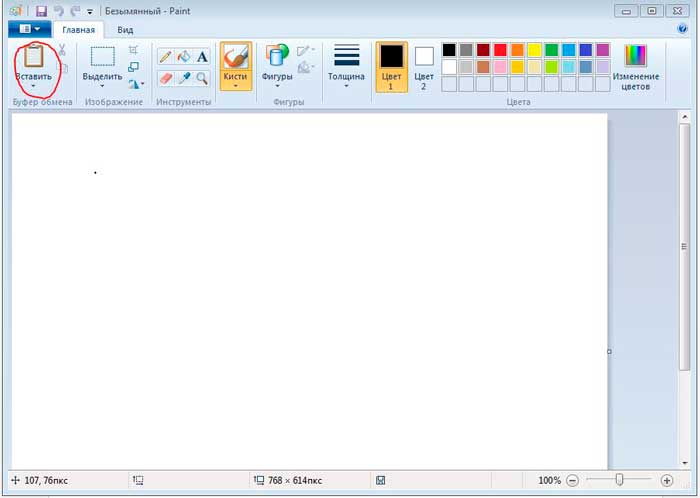
An editor familiar to everyone from school computer science lessons opens. Next, from the top menu, click the “Insert” button. Or press the key combination CTRL + V, whichever is more convenient for you.
For example, I'll take a screenshot of an image.
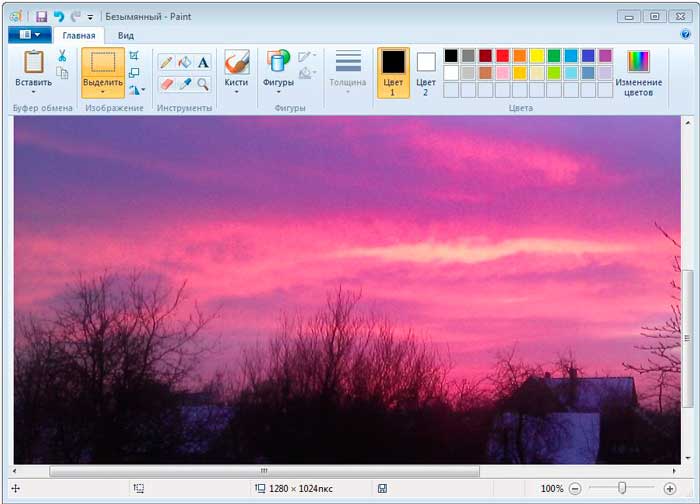
Well, we placed our screenshot in the editor, but how can we get from it finished picture? In the left top corner press the key context menu and select “Save As”.
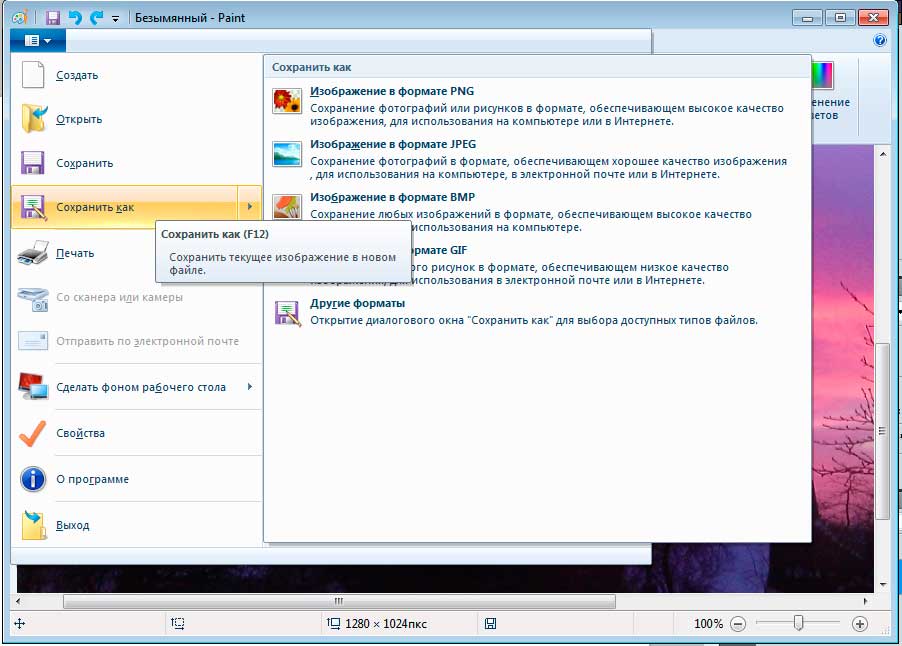
By the way, for the especially lazy, there is the F12 key, which does the same thing. Here you can choose in which format to save our image. Typically, the most common format is JPEG, so we'll choose that.
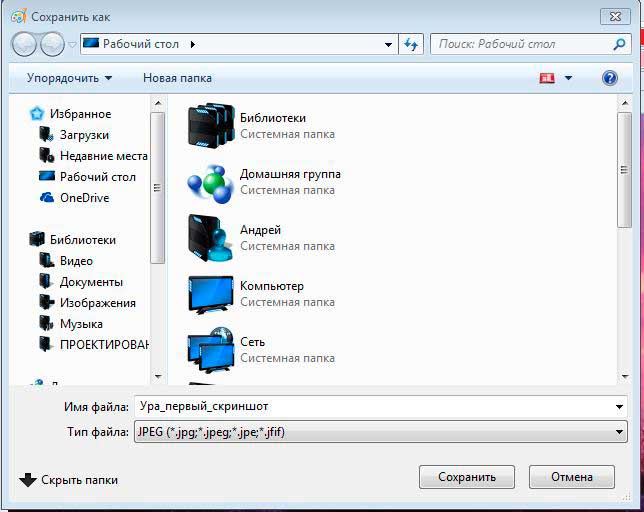
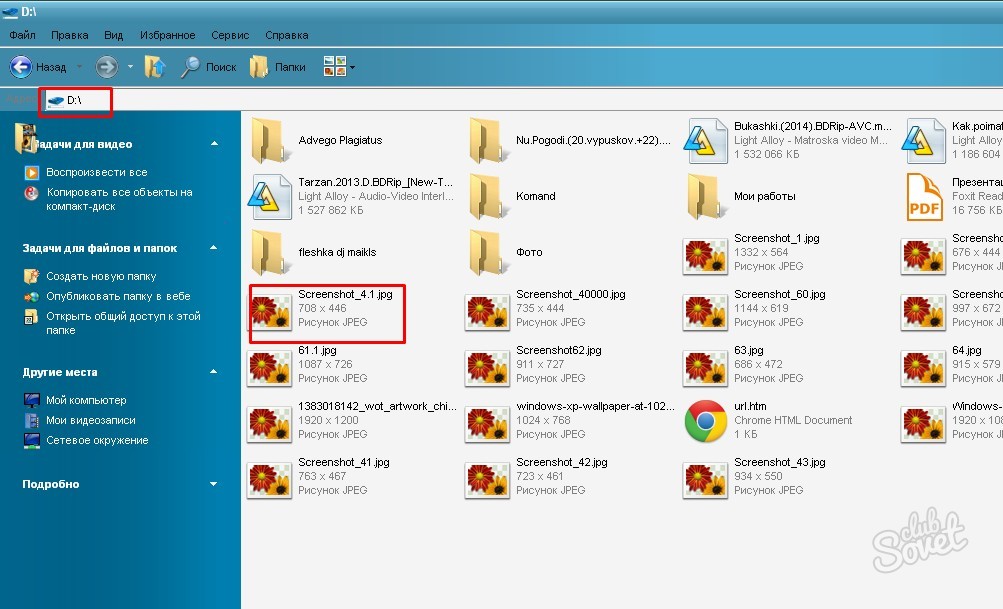
We give our image a name, select its future location and click the “Save” button.
Congratulations! If you did everything correctly, this image will appear in the folder you specified when saving. Then you can use it as you wish - send it to friends, print it, in a word, do everything that can be done with ordinary pictures.
By the way, if you hold down the Alt+PrintScreen key combination, you can get a screenshot of the active window, that is, the one in which you worked in this moment. Well, then, the algorithm of actions is already known to you. This method suitable for almost any graphics editor, be it Photoshop, Paint.net or CorelDraw. The principle of operation is approximately the same in all.
By the way, another interesting utility is built into Windows 7 - “Scissors”. It can also be used to cut out part of the screen.
IN modern world Computer techologies are so developed that not every user can understand them. Some people still don’t know about the existence of the Print Screen key and take pictures of the screen. In different operating systems, screenshots are saved in different places. This article will talk about where screenshots are saved on operating system Windows 7.
Saving screenshots in Windows 7
To take a screenshot of your computer screen, you need click on Print key Screen. It's quite simple. If you don't know where this key is, you can find it to the right of the f12 key.
To take a screenshot of only the active window, you need to click Alt + Print Screen key combination. Many users are unaware of this and take a screenshot of the entire screen. And then, in a graphics editor, they cut out the area of the image they need.
Pressing these keys alone is not enough. After clicking them, the screenshot is already saved to the operating system’s clipboard. For those who don't know, the clipboard is an area random access memory. It stores not only screenshots, but also other copied information. The screenshot will be recorded in RAM until other data is copied there.
What to do next? It depends on what purpose you are taking the screenshot for. If you need to send it to someone, for example, social network, then you can immediately copy it in the message entry line. This is available for all browsers except Enternet Explorer.
If you need to save it, or correct something in it, then you should open the built-in system graphic paint editor , and copy it there. Next, you should save the image in the folder you need. Please remember that only one screenshot can be stored on the clipboard. Therefore, it is necessary to save it, and only then make a new one.
In addition to the Print Screen key, there is another tool that has appeared quite recently. It is provided for latest versions Windows operating system. These are scissors. You can find it in standard programs Start menu. If you are too lazy to look there, you can use the search by entering the word scissors in the search bar.
Instead of opening Paint and cutting something out in it, you can cut using scissors the screen fragment you need and save it. The image appears when you click the Create button. Next, the image of the computer screen can be sent to someone, or saved in the folder you need.
Other ways to take a screenshot in Windows 7
In addition to the methods listed above, you can use another one - special programs for creating screenshots. So why install any programs if you can just press a few keys and save an image of the computer screen. As a rule, they are used by those users who quite often need to take new screenshots.
The peculiarity of such programs is that the settings indicate the folder in which you want to save screenshots. You can also come up with your own key combination that is convenient for you, which will record the screen image to the clipboard, just like Print Screen.
List of programs that take images of the computer screen:
- Magic Screenshot.
- FastStone Capture.
- Snageet.
- GreenShot.
- Fraps.
All these programs can be downloaded on the Internet for free.
Let's consider saving a screenshot in the most used Magic Screenshot program. This program weighs only a few megabytes. So there shouldn’t be any difficulties downloading it to your computer. The program has a fairly simple and understandable interface for any user.
To record a screenshot, you need to go to “Settings”. Then you need specify the following parameters:
- The folder where the screenshot should be located.
- Screenshot name.
- If needed, a key combination that will perform the same functions as Print Screen.
Next, select the “Screen” or “Fragment” item, and then select the area of the screen we need with the mouse. Then you need to click on the “Save” button. After selecting an area of the screen, you can draw something in it, or make some changes to the images. We can say that this program contains the functions performed by the Print Screen key and the Scissors program.
If you cannot decide in what format to save the screenshot, then choose jpeg. This is the most popular graphics file format. It is least susceptible to distortion.
To keep your files organized, save all screenshots in one folder. And then, you won't have to look for the lost screenshot.
Where are screenshots from computer games saved in Windows 7?
Nowadays quite a lot of people are keen various computer games. The most popular of them:
Some gamers will save screenshots of games in order to brag to someone about their achievements in this game. Or, for example, they keep some of their own game statistics.
To find screenshots from computer games, you need to do the following steps:
- Go to My Computer.
- Go to the hard drive on which the game is installed.
- Go to the “Saved Games” folder. It is located in your user folder.
- In the My Games folder, go to the folder of the game you need.
- Go to the Screenshots folder.
Screenshots from your game will be saved in this folder.
Now you know where screenshots are saved in the Windows 7 operating system and how to work with them.
A PC screenshot is taken using the Print Screen button (a keyboard shortcut involving Print Screen) or special programs. The question arises where the screenshot of the screen is saved in Windows 7, 8, 10. It all depends on the way you photograph the contents of the display. Let's look at these situations in more detail. I recommend checking out where you can find more information.
Saving a screenshot using standard means
1. When you press the Print Screen (photo of the entire screen), Alt + Print Screen (photo of the active window) buttons, the resulting image is saved to the OS clipboard. The clipboard is a designated area of RAM that stores temporary copied data. Often, users use the clipboard to do . The screenshot is also saved in the clipboard until it is overwritten by other information.
To save a screenshot on your computer, you need to paste it into a graphics editor or other program. For example, use Paint built-in Windows application. In the search, write the word Paint, then launch the application. Pressing combinations Ctrl+ V, will paste the screenshot into the application window.
After working with the image, click on the diskette icon or Ctrl+ S. Specify the name, file type and folder where the screenshots will be saved Windows screen 7, 8, 10 and click “save”. Look for the resulting image files in Explorer in the specified folder.
2. The snipping tool allows you to work with display snapshots in Windows. Enter the name “scissors” into the search area, then launch the application. When you click the “create” button, the image is placed in the application editor window. Saving a screenshot is carried out as in the Paint program.
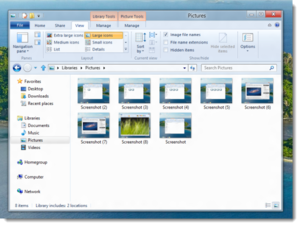
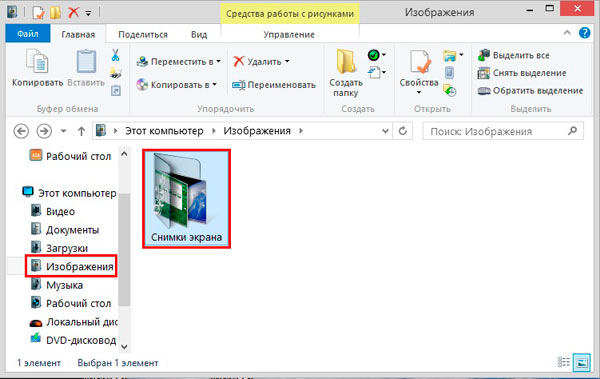
3. In Windows 8, 10, a function was introduced with the ability to save a screenshot immediately as a file on HDD. The image is created by pressing + Print Screen in PNG format. To find a screenshot, open Windows Explorer. In the left navigation, select “images,” then navigate to the “screenshots” directory where screenshots are saved.
Saving a screenshot by programs
Programs that create screenshots and perform tasks usually use the same Print Screen key, or their own combination of buttons. In this case, the storage location of the files is specified in advance in the settings, or you yourself specify each time where to save the pictures.
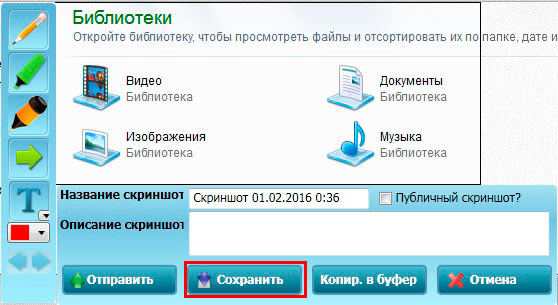
As an example, let's look at the process of saving a screenshot in the Magic Screenshot program. Download the archive, unpack it, then install and run the program. In the tray, click on the butterfly icon to exit to the main menu.
Click “settings”, set the parameters for yourself and click “save”. Select “screen” or “fragment” and select the screenshot area with the mouse. Here you can draw on the image, apply text, and undo changes. Click the “save” button, set a name and indicate the location where to save the screenshot.
Now you understand where the screenshot is saved in Windows 7, 8, 10, depending on the selected method. In most cases, you specify the storage location for the image file yourself.
In this article we will look at various ways creating screenshots in Windows OS and answer the question where screenshots are saved in Windows 8. Screenshot(screenshot) – a full-fledged “snapshot” of the contents of the screen or part of it, taken without loss of quality.
Simply put, everything you see on the screen can be saved as a file graphic format or place it on the clipboard.
Other names: snapshot(snapshot) screen(screen) and even print Screen(printscreen).
Option for any version of Windows
operating room Windows system from the most ancient versions allows you to take a screenshot using the PrintScreen key.
When you press this key, all graphic contents of the computer screen will be placed on the clipboard. Next, you can paste this image into any program that supports working with images using the built-in “Insert” command or the universal key combination Ctrl + V. These can be programs: Paint, Microsoft Word, Excel and many others.
If an image requires processing, you edit it and save it in the desired format wherever you need it.
As a rule, your goal will not be the entire screen, but only some part of it. There are two simple ways get an image of part of the screen.
Getting a picture of the application's appearance
If you want to save a picture of some running application(appearance image) e.g. Windows calculator, it’s easier for you to use the Alt key combination + PrintScreen. By clicking it, you will send it to the clipboard appearance only active application.
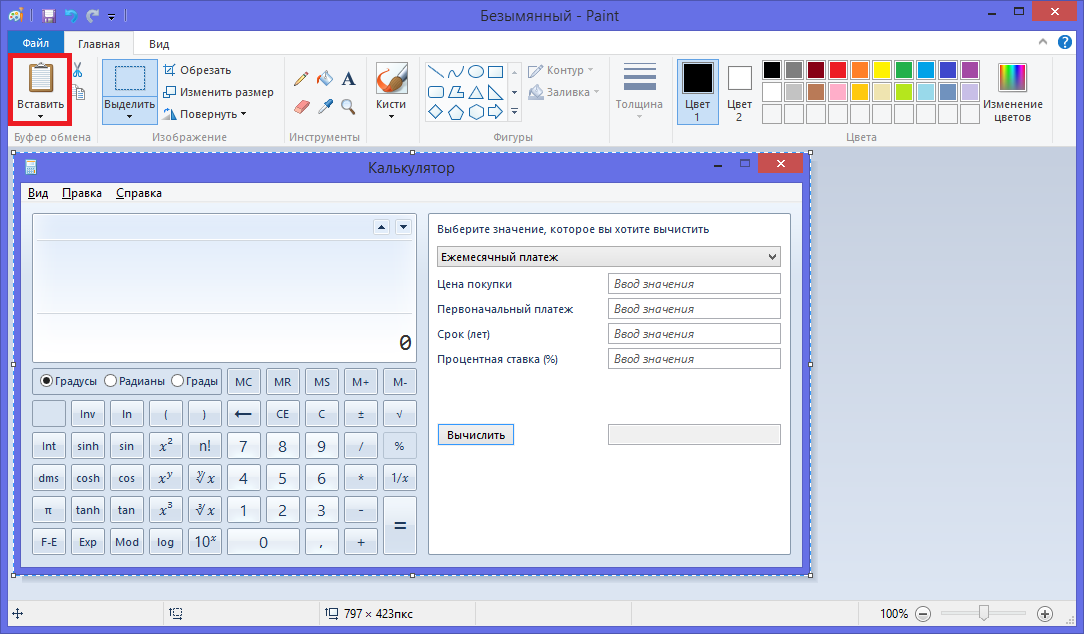
Let's give an example: open the calculator and press Alt + PrintScreen.
Now let's open the graphic editor Paint (available in any Windows versions) and press the Insert button, or the keyboard shortcut Ctrl + V, which is easier. We will see that the editor now contains an image of a calculator:
By inserting an image into the editor you can:

Copying part of an image in Paint
If you need to cut part of the screen image, the easiest way to do this is in the editor Paint.
After copying an image to the clipboard using PrintScreen or Alt + PrintScreen go to Paint and press Ctrl + V .
Next, turn on the " Select» 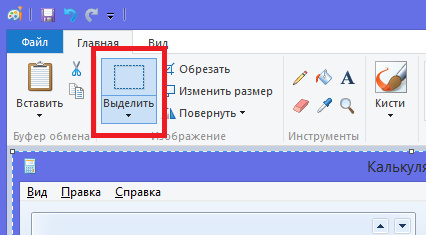 and use the mouse to select the area required for saving.
Then, press Ctrl + C to save part of the screen to the buffer, open a new file using the menu " File", « Create" and using Ctrl + V you will get the previously copied section of the image.
Windows 8 screenshot
In addition to the previously described features, Windows 8 allows you to use the Win key combination + PrintScreen.
Let us remind you what the Win key is:

This keyboard shortcut allows you to take a screenshot of the entire screen and automatically save it to a file with title Screenshot (1).png
Instead of the number 1 in brackets there will be the corresponding screen number.
Location where this file is sent: (SYSTEMDISK):\Users\(USERNAME)\Pictures\Screenshots
Where SYSTEMDISK– the drive letter on which Windows is installed; USERNAME- Username.
For example, the folder will have the address: C:\Users\Andrew\Pictures\Screenshots, provided that Windows is installed on the "C:\" drive and the user name is "Andrew".
The amazing thing is that this folder actually has two paths, oddly enough!
If you try to “get” to this folder using the built-in system Windows programs 8, then you can take a different route:
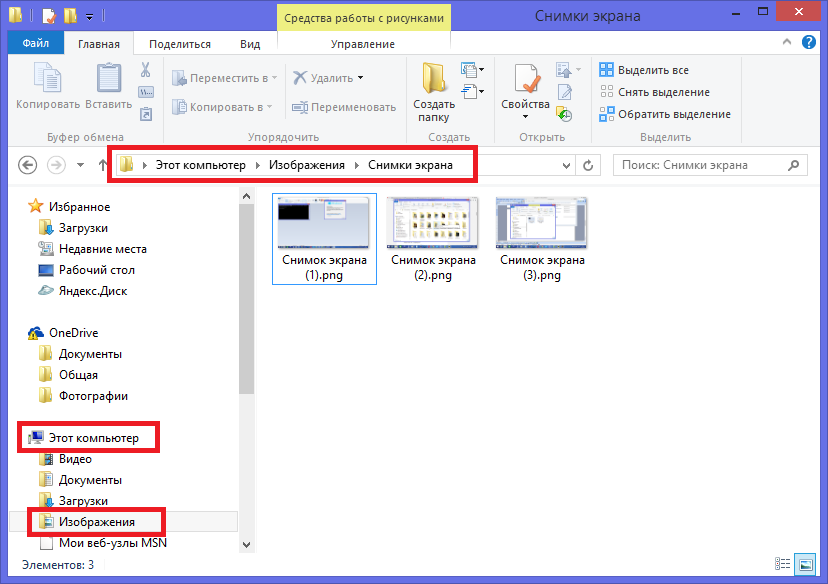
It is in this folder, which has two different names and paths, that screenshots are saved.
The ability to take screenshots is very useful and important. It helps designers, webmasters, authors of user manuals, and programmers. Just those who want to show something to another, while making some notes. This feature allows you to create interesting collages and helps schoolchildren prepare educational presentations. And perhaps it has many more uses that we don’t even know about.
That's all, we hope that the information in this article was useful to you.
Video on the topic


