Like any other operating system, V Linux Mint updates are coming out and need to be installed. Updates can be within one version of Linux Mint, or there can be an update from one version to another. This is what this article will be about.
Installing Linux Mint updates
If you have just installed the system, then you need to update it to current state. This can be done in two ways. The first is to launch the update manager. It can be found in the menu - administration - update manager.
Although this is a safe procedure, proceed at your own risk. Before starting any update, back up all your important files, documents, favorites and other data. If you installed proprietary drivers manually and directly from the manufacturer's website, you will need to remove those drivers and revert to open source drivers source code before the update. To do this, use the tutorial below.
To avoid a lot of errors and even installation failure, disable all third party repositories by taking a look at the following tutorial. After this, restart the system. Click the "Yes, update now" button and then provide a password to authorize the update. On the next screen, confirm your choice by clicking the "Update" button.
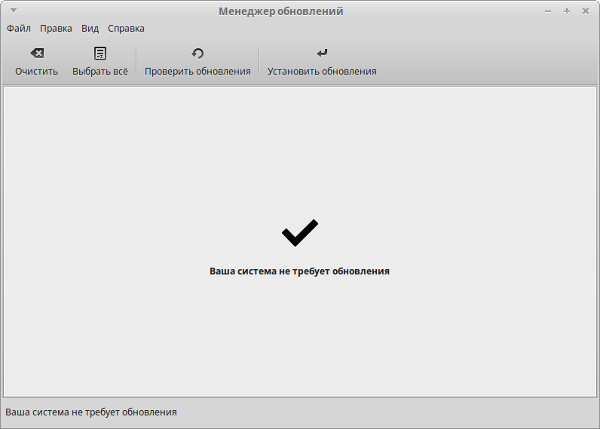
First, click on the “check for updates” button, and then on the “install updates” button.
The second way is to update via the terminal. Launch a terminal and enter the commands:
sudo apt-get update
sudo apt-get dist-upgrade
These updates should be checked and installed regularly to improve the security of your computer and data.
The updater will then receive the files that will be installed and ask if you really want to run the update. Confirm your choice by clicking the “Start update” button. If there are packages outdated with the update, you will be informed and you can choose between "Keep" and "Remove", with the latter being the most recommended option.
Finally, you will be prompted to restart your computer to complete the update. Now you can use it and even leave it as you wish by following the tips below. Any update or change in the operation of the system goes through a high level of criticality. So feel free to save your data.
Upgrading Linux Mint from one version to another
The Linux Mint developers have already released 17 versions of their operating system, and many people have a question about how to upgrade from one version to another. In general, we do not recommend upgrading from one version to another and it is better to install new version from scratch, but if you don't have time for that, then let's look at it using Linux Mint 17.1 as an example. To do this, launch the above-mentioned update manager. In its menu, click on the “edit” button and the following submenu will appear in front of you:
In the dash, enter “Programs and Updates.” Make sure your system is completely up to date. Start the update process. Reboot your system and enjoy the new version! There are a few caveats to upgrading it, especially when accessing the kernel, learn more.
But what does this support mean?
There are many updates and fixes over time.
Difference in kernel packages
Although it has not yet been released as of this writing, it is now possible to upgrade System 10 to the development version. This may be useful for testing both the update process and 04 features before the official release date.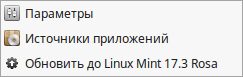
At the bottom it suggests updating to latest version system (in our case with Linux Mint 17.1 to 17.3). Click on this button.
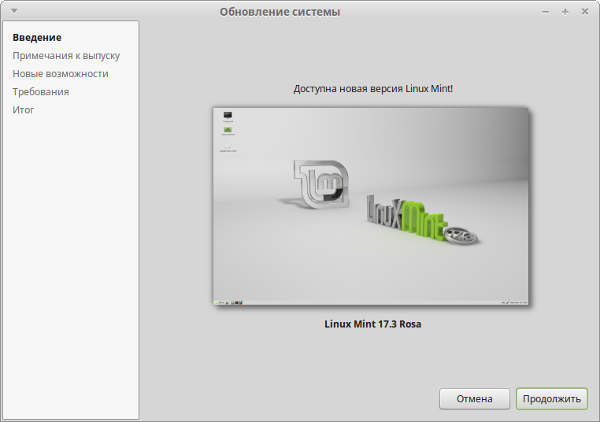
The next step will ask us to review the release notes
Attention. Like almost every update between major versions of an operating system, this process carries an inherent risk of failure, data loss, or software misconfiguration. Full backups and extensive testing are highly recommended.
While many systems can be upgraded without incident, it is often safer and more predictable to migrate to a new major release by installing the distribution from scratch, setting up services with extensive testing along the way, and migrating applications or user data as a separate step.
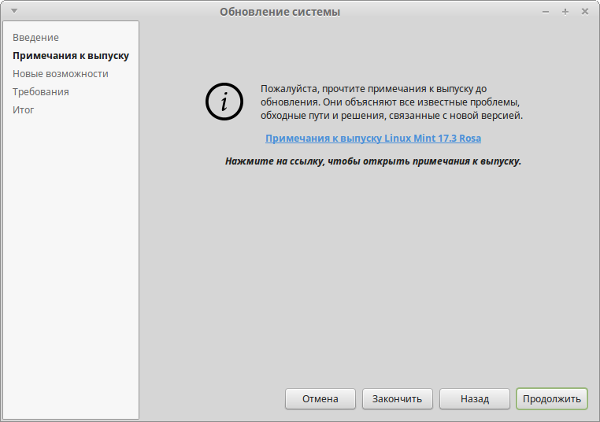
Click on the "continue" button and check out the new features of the release.
![]()
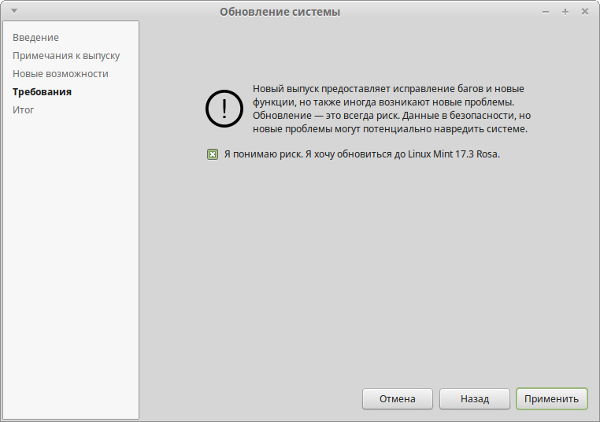
At the last step we will be warned about possible problems after the update and you need to check the box that you are aware of the risk.
You should never update a production system without first testing all of your software and services deployed against the update in a test environment. Please be aware that these libraries, languages, and system services may change significantly.
Step 1 - Back up your system
Before attempting a major update on any system, make sure you won't lose data if the update goes wrong. The best way to do this is to back up your entire file system. If this fails, make sure you have copies of users' home directories, any configuration files, and data stored in services such as relational databases.
Click on the "apply" button and wait until the update is completed. After that, restart your computer. As you can see, nothing complicated, but we recommend that you update from one version to another as follows:
2) Boot from it and run file manager with administrator rights from the terminal using the command sudo caja(relevant for the MATE desktop environment).
Snapshot process. Then update installed packages to the latest available versions. A list of updates will appear and you will be prompted to continue. This is the recommended official path to update the server, which should be done via a remote connection. For other systems under your control, remember that it is safer to perform major operating system updates when you have physical access to the machine.
Then you can be warned that the mirror entry was not found. When scanning your repository information, a mirror entry for an update was found. Once the lists of new packages have been downloaded and changes have been made, you will be asked if you want to start the update.
3) Find the “view” tab in its menu and check the box next to the line “show hidden files”
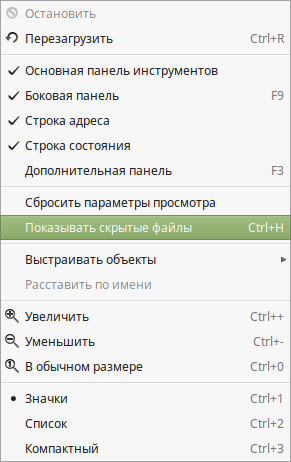
Delete all folders and files whose names begin with a dot
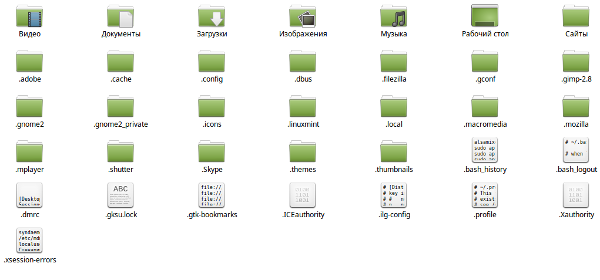
Now close the terminal and file manager and proceed with the installation. At the disk partitioning stage, do not under any circumstances check the box to format the partition. /home, as this will delete all your data. The rest of the installation is no different from the usual one.
New packages will be downloaded, then unpacked and installed. Even if your system is on a fast connection, it will take some time. During installation, you may encounter interactive dialogs regarding various questions. For example, you may be asked if you want to automatically restart services when needed.
In other cases, you may be asked if you want to replace the configuration file you modified with the default version of the installed package. This is usually a problem that will likely require knowledge of specific software that is beyond the scope of this manual. After the new packages finish installing, you will be asked if you are ready to remove the outdated packages. On a normal system without user configuration, it should be entered safely here as well.
We looked at how to update Linux Mint, but if you still have questions, ask them on our forum.
Instead of getting update Ubuntu versions from the disk you can update Ubuntu to the new version directly from your desktop. And it's very easy to do! Although I would still recommend it, since it’s more reliable... But it’s a matter of choice.
What you need to know about long-term support
Here you will likely need to examine the configuration changes required for the applications and services you deploy. In this regard, it is worth clarifying that this versioning is focused on ensuring the stability of the system and not necessarily increasing it with new features, tools and applications.
However, for security reasons, not everything in this version risks falling behind in the medium term. Applications such as browsers and web-enabled tools are updated with new and free versions obsolescence. But the user has no alternatives?
But before you start, make sure that you have applied every released update to your installed system. If you don't do this, you may end up with more problems than benefits.
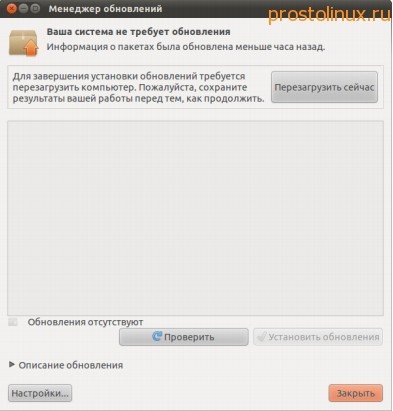
To do this, select the command sequence System| Administration| Update Manager (System | Administration | Update Manager) to display a window similar to the one shown in the photo:
What is the advantage of upgrading the system?
In a way, this puts the user against stability. In addition to the benefits of the most stable release, the system logically had a number of bug fixes made by its developers, as well as important application and security updates - in this section of the official website.
The update includes packages Table 6, Last update series, that is life cycle ends. But before you go straight to installation, it's important to look at some details. Otherwise, it is best to format the system. However, there is a procedure for this, however it is recommended to also test for virtual machine with help - if you don't know how to use the program, find out what we're doing step by step.
The contents of the window may vary. You may or may not see a different update depending on the current updates on your system.
But in order to be absolutely sure that your computer knows about all the latest available updates, press the button Check(Check). As you can see, everything is simple so far; to check the update you just need to follow simple tips.
Use updater
With observations properly recorded, we move on to update procedures! There's no problem with keeping the version - on a system used for critical missions it might even make sense to maintain it - but it's worth mentioning that there is a way to update it.
The procedure is quite simple and can be done through the terminal. To do this, follow the following path. Click "System", then "Administration" and. Check all the options found. Using this area, you can install, uninstall, configure, or even update software packages.
After downloading all the latest data, you will see the same or other updates in the window. If any updates are displayed, click the Install Updates button to install them.
If at any time you are asked for a password, enter it. You may also be prompted to restart your computer.
To select a package, the procedure is very simple: just select the content you want to install and click "apply". In any case, the procedure is simple. Once we have access to the command line as an administrator, we will begin updating the package list! After the update, we will update the installed packages using the following procedure.
With two commands you have updated the packages. The following commands can also be used so that you always have your computer "stable", that is: practical and fast. Another command that can be used. Finally, you can also check for broken dependencies by running the following command.
On the other hand, if after pressing the button Check(Check) no new updates will appear, button Install updates(Install Updates) will remain inactive (pale), indicating that installed system contains all the latest updates.
When a new version is available (which usually happens twice a year, usually in April and October), the text New Distribution release "xx.xx" is displayed at the top of the Update Manager window. available), where "xx.xx is the new version number. If there is no newer version than your current one, this text will not be displayed.
Let's analyze it in practice? When using synaptics, you need to be careful not to erase anything incorrectly. Already on the command line, in addition to executing the required command in practice, this will avoid future errors.
The update notification should not appear until mid-July when version 1 is released. To upgrade to version 04, you must first back up your data. We are waiting for you to create backups your data. There is no use in deceiving us and then backing up your data.
To install a new version of the distribution, click the button Update(Upgrade) and follow simple instructions appears on the screen if prompted, and restart your computer if necessary.
If your Current version several releases older than the latest available version, you will have to repeat the process described, upgrading your system to all intermediate versions one by one until you reach the latest version. When no new versions are available, you are done updating.
Modernization and modernization: what's the difference?
If you really want to take the risk and don't back up, you already know the problem is within your control. Now that you have copied or accepted the risk of losing your data, make sure that the system is completely up to date. As a reminder, the update should not be taken lightly, so we strongly recommend that you read this document before proceeding. The update must be different from a simple update.
When updating, migrant will move your software to a newer version, and will also install, replace or remove several new programs or, conversely, outdated ones. Updating has a profound impact on your system and should be done consciously. This is an update.
It’s that simple, and you don’t have to pay anything, everything is free. Although in Windows latest Upgrading to version 10 is also free, but there are probably pitfalls, since these accountants from Microsoft don’t just do anything for free - you’ll have to pay for something later!
Published 19 Jun 2013 11:22 © Simply Linux | Everything about Linux, Android and Windows.


