I had such a situation that when changing the operating system, I did not know how to show hidden folders in Windows 7. Previously I had XP, and there were no special problems with it.
Seven has undergone enormous changes that distinguished it from previous operating systems. I had to do some digging to figure out the basic settings. Now I will show you several ways to open hidden folders, since in Windows 7 they are invisible by default. Before starting the procedure, you can verify the results after following the recommendations. In the article we will go over standard software methods and use the command line.
Standard recommendations for showing hidden folders and files in Windows 7
First, you need to find the window where this option is enabled; to do this, you need to do one of the following:
1. Launch Explorer (my computer), in the window that opens, click “arrange”. Next, select “Folder and Search Options.”
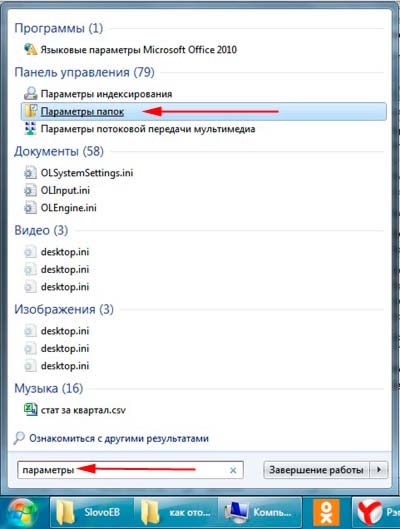
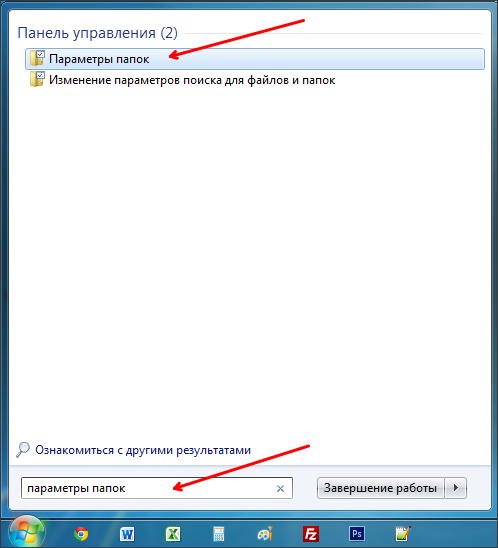
2. Click “start” and type “settings” in the search. When the list is built, select the element shown in the screenshot below.
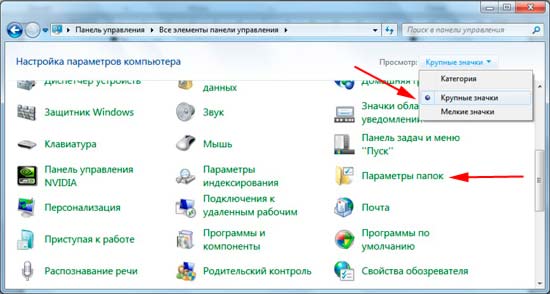
3. Click "Start" -> "Control Panel". Next, make sure that “large icons” or “small icons” is enabled, and then you can look for the “folder options” setting.
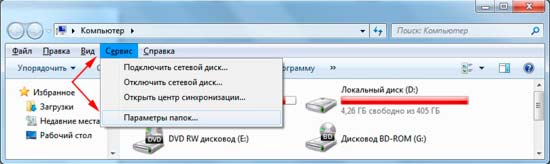
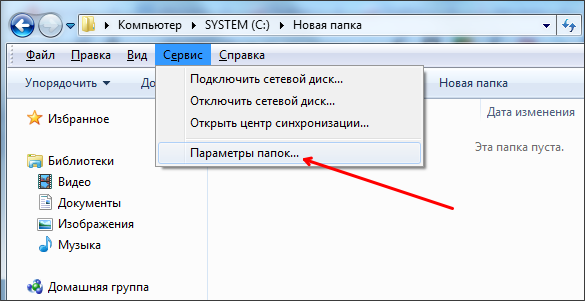
4. In the Explorer window, press the ALT key, you will see extra menu between the path bar and the main menu. Select "service" -> "".
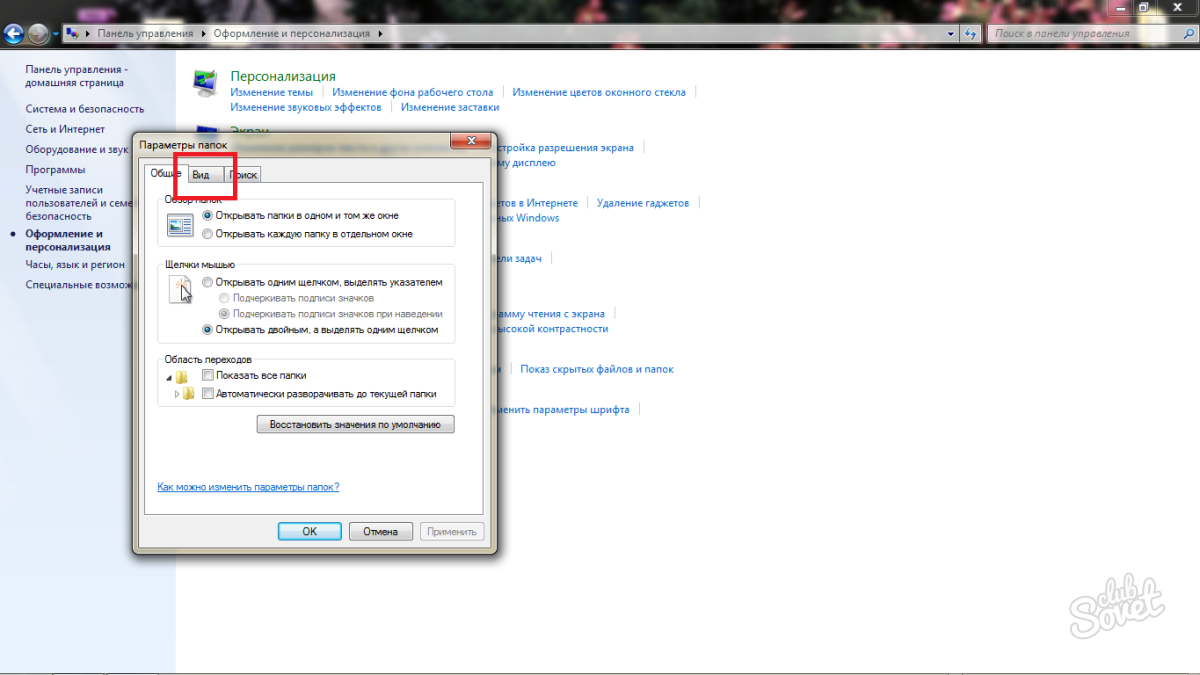
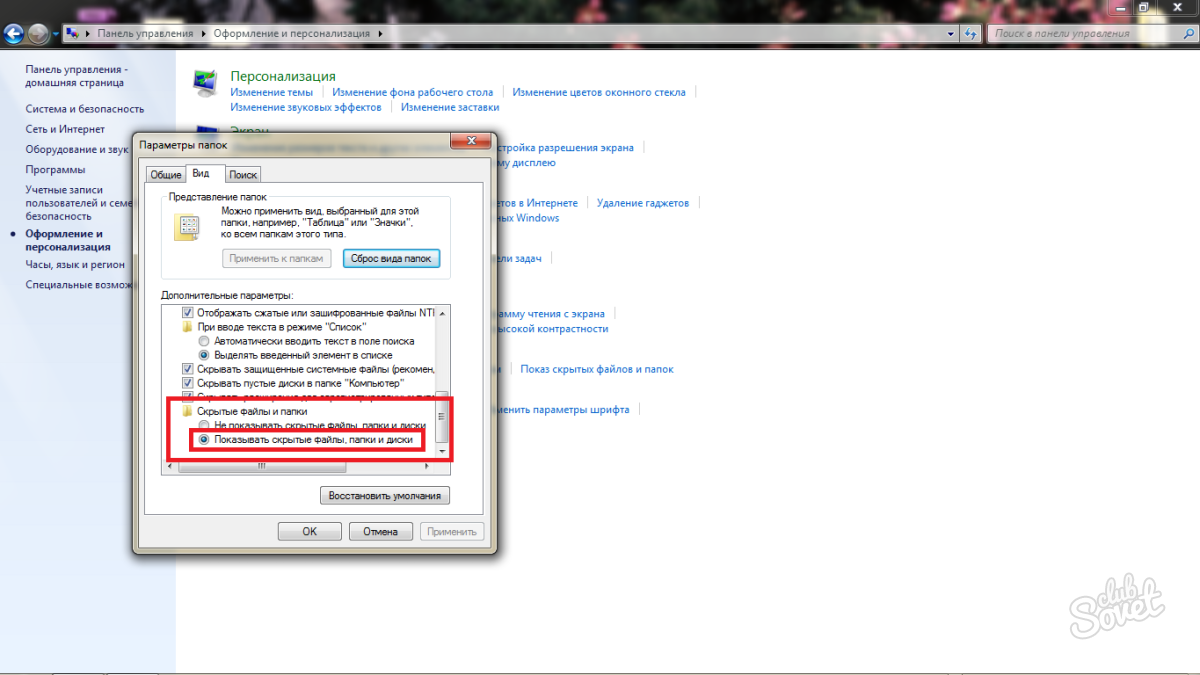
After using one of the methods, a window with 3 tabs will open in front of you, go to the second one, which is called “view”. Move the scroll bar down and check the “show hidden files, folders and disks." Be sure to click on the APPLY button, then OK.
Note: If you need all elements to be visible, make sure that the “hide protected” checkbox is unchecked system files».

As you can see, displaying hidden folders in Windows 7 is not difficult at all. To be sure of the result, go to the system drive and try to find hidden folders that have appeared and have a pale tint. 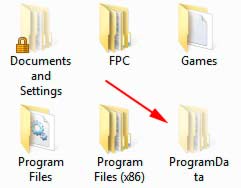
There is another interesting method with . To do this, run cmd and enter the command:
In the current directory all hidden folders and files will be displayed. If you want to change the current local disk, use the command:
Cd/d local drive letter:
The example shows the transition from drive C to D. To change to the directory, enter the following expression:
Cd/folder name
Once you have selected the desired directory, enter the first command.

Using total commander
As you know, total commander is a tool for working with files and folders. In my opinion, much more progressive than a standard conductor. Using his example, we will analyze the inclusion of hidden elements.
- Run total commander.
- From the menu at the top, select “configuration” -> “settings”.
- In the window that opens, click on “Panel Contents”.
- Check the boxes “show hidden files” and “show system files”.
Click APPLY and OK.

After completing the algorithm of actions, hidden elements will be marked with a red exclamation mark.
All recommendations work and will help show hidden folders and files in Windows 7. It's up to you to use one or the other. I would like to highlight standard methods and the use of total commander, as for cmd, this is rather educational information.
In some cases, the user simply needs to see hidden system folders. This happens when installing various add-ons to games, changing programs, or simply deep cleaning systems. If you only need to go into the system folder once or twice, then it is better to hide it after that. This way you will protect yourself from accidentally deleting important system files, changing them and moving them: all these actions are fraught Windows errors 7. Try to configure the display of hidden folders yourself, following the simple and clear instructions in this article.
Go to the control panel. To do this, click on the Start icon in Explorer, then select the “Control Panel” line on the right side of the menu that appears. Display by categories rather than icons. This option is on the right top corner window.Click on the "Appearance and Personalization" section.

![]()
- Parameters for opening and overlaying them.
- The system's response to clicks on folders.
- Display folders.
In addition, in this tab you can immediately return all the original folder settings set by default by the system.
You need to go to the "View" tab.
Click "OK" and then "Apply."

So easy you can customize the display system folders on your computer or laptop with the Windows 7 operating system. If you have later versions of the OS, then this algorithm applies to them. You need to follow exactly the same path, but some line names may be different, along with the new system interface.
All Windows versions By default, some files are hidden, mainly those that are responsible for system performance. This measure allows you to protect system files and folders from unlawful actions by an inexperienced user. After all, deleting them may lead to failures in Windows work, and sometimes a system boot error like NTLDR is missing.
However, malicious and spyware They also create invisible files, making them difficult to detect and delete. Therefore, opening access to them has its benefits and helps in fixing problems caused by unwanted invisible files.
How to access hidden data through File Explorer
There are several options to open hidden files and folders in Windows XP/7/8/10. To do this, in Windows XP, click on the My Computer icon, select Tools and open “Folder Options”, then go to the “View” tab and check the “Show hidden files” line.
In Windows 7, almost everything is the same. Go through Start to the “Control Panel” window and select the “Folder Options” section. Then go to "View". Find the line “Show hidden files” and check the box. To save the changes, click on the “Apply” button. All hidden data will be shown on the screen. To re-hide the folder, follow the same steps, and then uncheck the “Show hidden files” line.
To show hidden data in Windows 8 or 10, press Win+E. In the Explorer window, select View, then Show and Hide. Select the "Hidden elements" checkbox.
If after the above steps invisible folder is still not displayed, try unchecking the “Hide system files” line. But you should be careful here, because system disk(in most cases on C:), all system hidden files will be displayed, deleting or changing which can cause a lot of problems in the operation of the operating system. Before deleting anything on this disk, you first need to hide them, or if you clean them manually, do not mark translucent files and folders for deletion.
There is another method to show invisible data on your computer through the registry editor, but this method is more suitable for advanced users who have a better understanding of how operating systems work.
How to make a folder invisible
Situations often arise when you need to block access to your personal information. For example, you don’t want to show any of your data at work. This can also be useful for a home computer if your family members use it. And if in the familiar Windows XP everything is quite simple, then in Windows 7/8/10 there are some nuances.
Many users store personal data on their computer that they do not want to show to anyone - any materials from work, personal notes, collections of photographs, videos, etc. In order to hide your personal information, you should set the status of the folder to hidden.
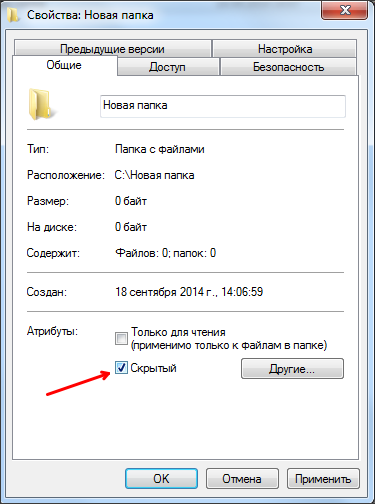
The hiding procedure itself is not complicated and takes little time. To hide a folder, right-click on it and select “Properties” from the drop-down menu. In the window that opens, pay attention to the “Attributes” section. Check the Hide attribute and click Apply. After this, the folder will disappear.
In this way, we hid the information, so that now it will not be available to anyone, unless, of course, no one knows about its existence.
To show a hidden folder, go through the points mentioned above in this article.
Now you know how to hide or show hidden information on Windows examples XP/7/8/10. In general, this is not as difficult to do as you might think.
Not everyone knows how to hide objects in Windows. Many people do not even suspect the existence of such a function, and therefore hide or, conversely, show hidden Windows files 7 - not really simple task for them. It is convenient to put any personal information in such folders that you would like to hide from public viewing or protect access to it so as not to be accidentally deleted. Also, many folders with system files are hidden by default. Hiding system files is a very important function, since if one of the users accidentally deleted such a file, the system could simply “die”. It will need to be reinstalled. Also, deleting hidden files may affect some programs. In principle, the process is not very complicated, but not very pleasant. If you are not afraid of what you might accidentally delete unnecessary file or folder, you can enable the display of hidden folders. However, this defeats the whole purpose of hidden files, since if they are visible anyway, then there is no point in leaving them hidden.
If you turn on the visibility of hidden objects, they will appear next to all other files. In appearance, hidden files in Windows 7 differ only in that their icons (thumbnails) are almost completely transparent. There are regular files inside, but the root folders still appear hidden.

Making them visible in Windows 7 is quite easy. To show hidden files in Windows 7, you should go straight to the Control Panel. Every user knows where it is. On the View tab, Folder Options, select Show hidden files. Windows 7 - very convenient operating system. And therefore, as you see, this function turns on very quickly and easily. There is another way to see hidden files in Windows 7. It may even be easier. To do this, you need to select the "Tools" tab in the top menu of Explorer, and then select the "Folder Options" item. You may not be seeing the Explorer top menu. In this case, press the "Alt" key after turning on the program.
There is also a third way to view hidden files in Windows 7. It's quite simple. If you use file manager Total Commander, then you can use its functionality to see hidden files in Windows 7. In the program menu, you need to select “Configuration”, and then “Settings”. On the left side of the window that appears, select "Panel Contents". In the list of options on the left, check the box next to the appropriate line. Remember that by turning on the display of hidden folders, you open access to system files, and if one of the children uses this computer, then such an action may lead to a not entirely safe outcome.

Hidden folders are also associated with various devices connected to a computer. This means that often, when you connect your player or phone to your PC, you can see that there are strange empty hidden folders on them. Their presence is not a problem, it’s just that the control systems of these devices create various backup folders, placing them in them. Usually, deleting such folders only lasts until the next time the device is turned on, since then they appear again.
These are folders that have the Hidden attribute set. Typically, folders with this attribute are not displayed in Explorer. In order for hidden folders to begin to appear, you need to make changes to the operating system settings. In this material you will learn how to show hidden folders in Windows 7.
In order to force the Windows 7 operating system to show hidden folders, we need to open any folder and press the ALT button on the keyboard.
After pressing the ALT key, a series of drop-down menus will appear below the address bar: File, Edit, View, Tools and Help. Here we need to open the “Tools” drop-down menu and select “Folder Options”.
After this, a small window called “Folder Options” will open in front of you. In this window you can configure all the basic parameters that relate to the display of folders, files and drives in Windows Explorer 7.

It should be noted that if you are unable to open the “Folder Options” window through the drop-down menu, then you can use the search in. To do this, open the Start menu and type “Folder Options.” After this the operating room Windows system 7 will find the desired program and will offer to open it.
So, you have opened the “Folder Options” window, in order to show hidden folders in Windows 7 you need to go to the “View” tab and find the options that are responsible for displaying hidden folders.

You need two parameters:
- “Hide protected system files” – you need to disable it;
- “Show hidden files, folders and drives” – you need to enable it.
After making changes, close the window by clicking on the “OK” button to save the changes. After this, you will be able to see hidden folders and files. Now, if there is such a need, you can remove the “Hidden” attribute and the folder will become normal. To do this, right-click on the folder and select “Properties”. After that, disable the “Hidden” function and close the window.
Once you have cleared the “Hidden” attribute, you can disable the display of hidden folders. From now on this folder will be displayed in any case.


