The question of how to put a password on a folder in Windows arises at a time when information appears on your computer that is not for everyone. It doesn’t matter what it will be - secret documents that should be hidden from competitors and employees, or materials that should not be shown to children - the methods of concealment are the same.
In the article I will look at six ways to block directories, one of which is based on operating system capabilities that not everyone knows about, the rest work using programs:
How to set a password using Windows
There is a widespread belief on the Internet that it is impossible to set a password for a directory without programs using the standard capabilities of the operating system - this is a misconception caused by the fact that the computer literacy of users and many “woe bloggers” is at a low level.
In terms of safety, each a new version Windows is better than the previous one, you need to learn how to use these features.
Folder password protection is based on user accounts. In order to close a directory with a secret key, you must do the following:
- Create separate accounts for yourself and for other users. By default, only your administrator account, created when installing the operating system, is valid.
- Set a password for your account.
- Specify which documents and directories are shared and which are accessible only to certain users. To access such objects, everyone except you will need a password.
As a result, access to your personal data will require access to account administrator. The rest of the information on the computer (general) will be available to everyone.
Now let's look at how to install and configure all this in detail.
Create a shared account
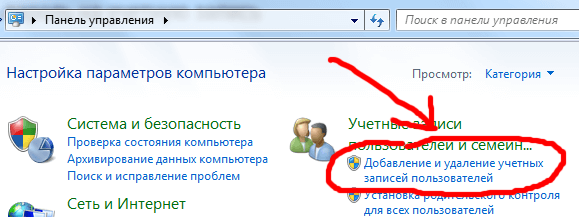
- Go to “Start” -> “Control Panel” ->
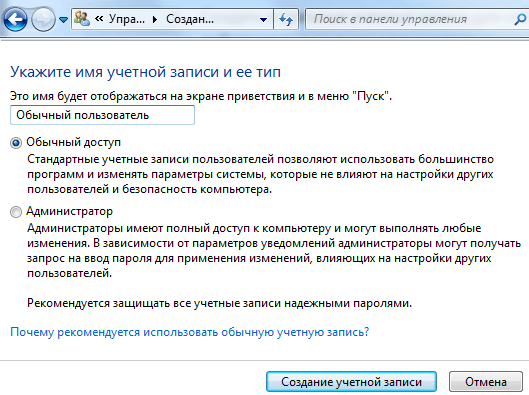
- Select the “Create an account” item. Come up with a name there, if there are any specific users, then you can make them by name (wife/husband, children), or something general, like “Regular User”.
From now on, you will have an administrator - this is you, and everyone else is other accounts.
Put an access code on your account
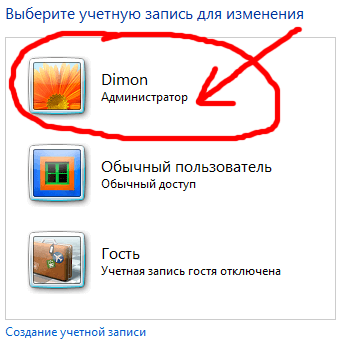
To begin with, select yourself from the list of users. After you have created an additional account, you will have several users (minimum 2). If you forgot how to get to this choice, then again “Start” -> “Control Panel” -> “Adding and removing user accounts”
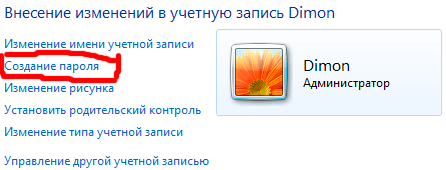
Then click on the “Create a password” link and set it. There will be an opportunity to add a hint; if your password is complex, I recommend doing it so as not to forget and not block your access to your own computer.
From this moment on, the administrator functions will be available only to you, everyone else will lose them, but they can use the machine, including all its folders and files, except for those that we will prohibit later.
Lock the folder with a password
User accounts belong to different groups, you are the administrator, the rest are users. In order to set limited access to certain folders, just remove the read permission for these folders for all users and leave it to the administrator (you).
This is done as follows:
- Click the edit button on the desired folder and select “Properties”;
- Open the “Security” tab (this tab contains the rights of all groups and users in relation to this folder);
- Under the list of groups, click the “Change” button;
- Selecting groups and users one by one (usually these are the “Users” and “Verified Users” groups), check the prohibited boxes next to changing, reading, reading and executing, the list of folder contents (total).
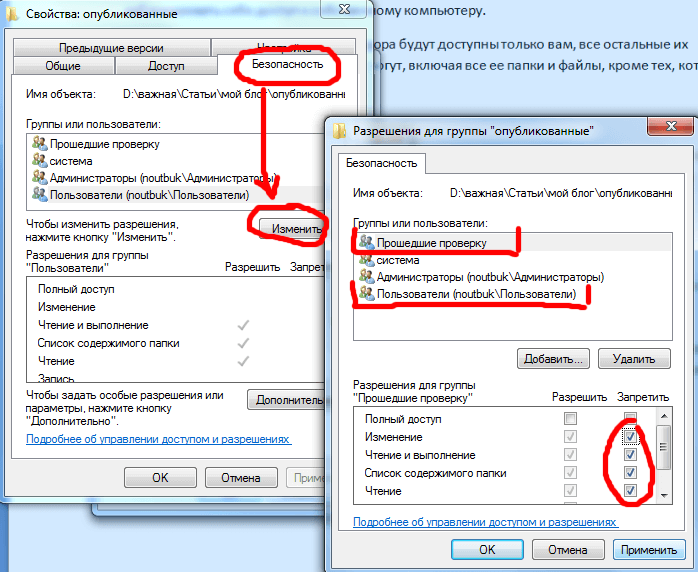
Applying the changes will automatically deny access to this folder to anyone else. To gain access, they will need the password of the account that is allowed access.
Closing an archive with a folder with a password
The second way to put a password on a folder is based on packaging the desired directory in an archive using special program archiver and setting an access code for the archive. It is not entirely correct to call this method setting a password on a folder, since it ceases to be a folder and turns into a RAR or ZIP file.
But, nevertheless, in terms of the ease of use of this method of protection, the method is excellent, since the WinRAR program, necessary for working with archives, allows you to work with files and folders inside the archive directly, without reverse unpacking. That is, you added data to a password-protected archive. In the future, you will have access to them only when you enter the key. And all changes inside the archive are automatically added inside by the archiver himself.
I described in detail how to use WinRAR and how to archive a file in . The instructions there are very detailed, there is even a video tutorial, but here I will summarize everything briefly:
- Install the WinRAR archiver
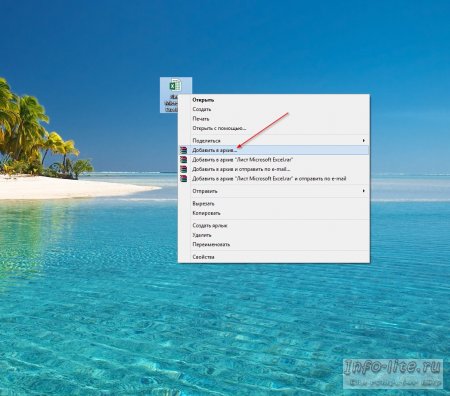
- Select the folder you want to put a password on and right-click
- IN context menu select “Add to archive”
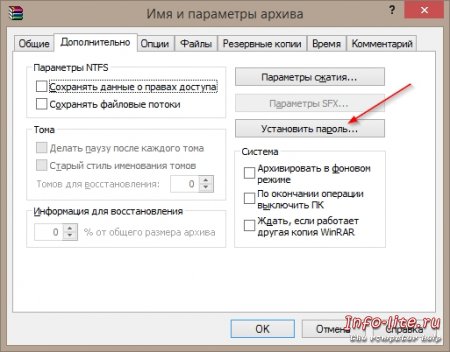
- In the archive settings window, click the “Set password” button
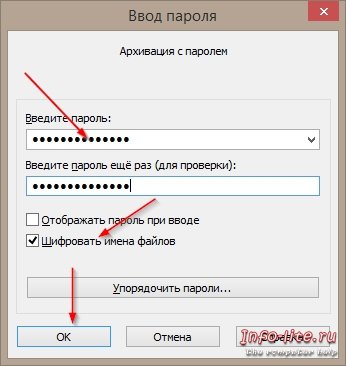
- Enter your password
- Create an archive by clicking the “OK” button
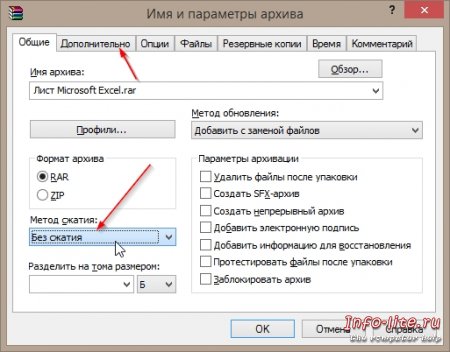
I’ll add just one nuance - if the folder is large and there is no goal of compressing it, but you just need to protect it with a password, then when setting up the archive, set the “no compression” option - this will significantly save time.
Programs for setting a password for a folder
The disadvantage of this method is that it requires the installation of additional special software (third-party programs), which is no longer used for any purpose. Overall, I recommend using special utilities only when absolutely necessary when other methods are not available.
DirLock password setting program
There is no need to study multi-page instructions in order to use the DirLock utility, since it is intuitive even for an inexperienced beginner. Using it to set an access restriction will take 10 seconds.
Download the program here, you need to install it on your computer.
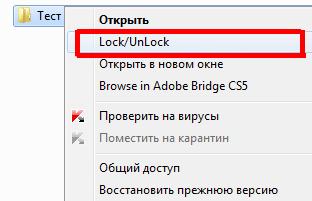
After installing and configuring the program, the “Lock/UnLock” item will appear in the context menu that appears when you right-click on a folder - this is the option to set a password.
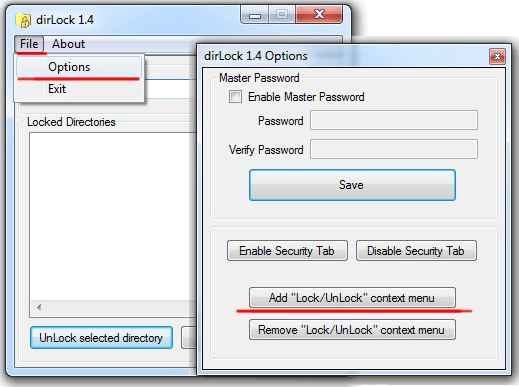
If such an item does not appear automatically for you, then run the utility and select “File” in the menu, then “Options” in it. A window will open where such a menu is added using the “Add ‘Lock/Unlock’ context menu” button.
After this, you can put a password on any folder and when you try to open it, a message will appear stating that access is denied.
It will be possible to reopen the folder only if the ban is lifted through the same “Lock/UnLock” context menu.
Unfortunately, you won’t be able to gain permanent access to a folder locked in this way and you will have to set and remove the password every time.
Locking folders with Anvide Lock Folder utility
Another program designed to password-protect folders on a computer. It is no more difficult to handle than the previous one, just with a slightly different approach.
Download the Anvide Lock Folder program here and install it.
In this utility, closing folders is done through the interface of the program itself.
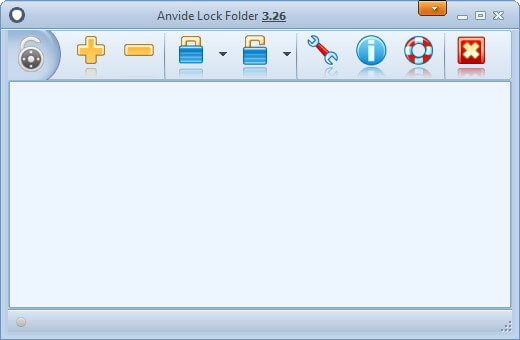
- Launch the program
- Use the built-in explorer (+ button) to find the desired folder,
- Press the closed lock in the panel,
- Enter your password twice and click the “Close access” button
- You can enter a password hint (if you wish)
- The folder will become invisible.
How to remove a password
- Launch Anvide Lock Folder,
- Select a password-protected folder from the list,
- Click on the open lock icon
- Enter the password and click “Open access”.
As in the previous utility, to work with the content you will have to install and uninstall the code each time.
Set the password using Lim LockFolder
This utility is 100% the same as the previous version. All buttons and operating algorithms are the same, the only difference is appearance buttons (design). It won't be difficult to figure it out.
Download Lim LockFolder here and start the installation.
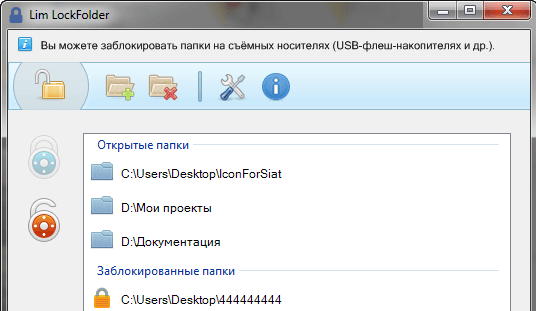
You launch the program, select the desired folders through Explorer, set passwords, then remove them using the open lock button - everything is the same as in Anvide Lock Folder.
Password Protect program
The last option discussed in the article is Password programs Protect. It differs from previous utilities in that it does not require installation on a computer.
The second plus is that it is in Russian.
You can download the program here.
To put a password on a folder:
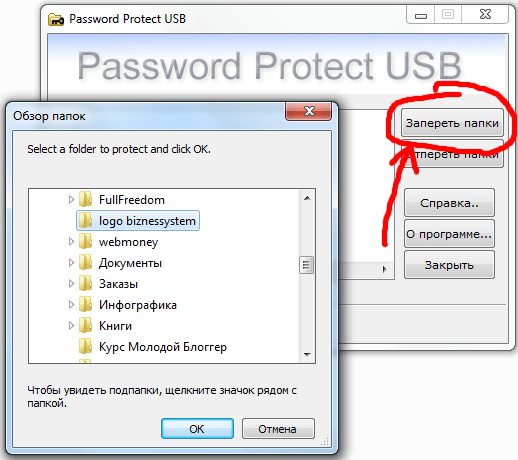
- Open Password Protect
- Click the “Lock folders” button
- Select the desired element in the explorer and click “OK”
- Enter the access code twice and, if necessary, a hint
- We see a message about successful closing - the folder becomes invisible.
To work with the contents of this directory, you will need to remove the password by launching the utility and the “Unlock folders” button.
Similar to all previous options, you will need to constantly remove and set passwords - this is the main drawback of all programs, which is why I advise you to use standard Windows features.
Summary
Six possible options We looked at password protection for directories on a computer today. Each of them has its own pros and cons, so everyone must decide for themselves what to give preference to - whether to trust third party software or use the capabilities that the Windows operating system provides?
Other useful blog articles:

There are many methods you can use to create a password folder. Most of them require the use of some kind of program, but we have a neat method to put a password on a file without third-party programs. The program may be accidentally uninstalled, resulting in data loss. With our method, you can return everything back, even if you forgot the password for the file and cannot find your data. .
I advise you to look at other methods:
Create a folder with a password on Windows 10 without programs
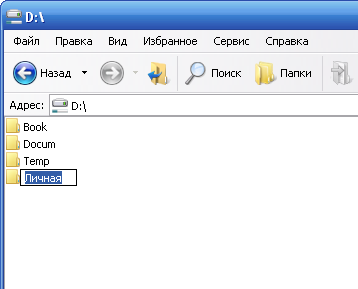
Before creating a password folder, create simple folder anywhere. It will contain another folder with a password protection and your personal data that you want to protect. Come up with any name, it doesn't matter in this case.
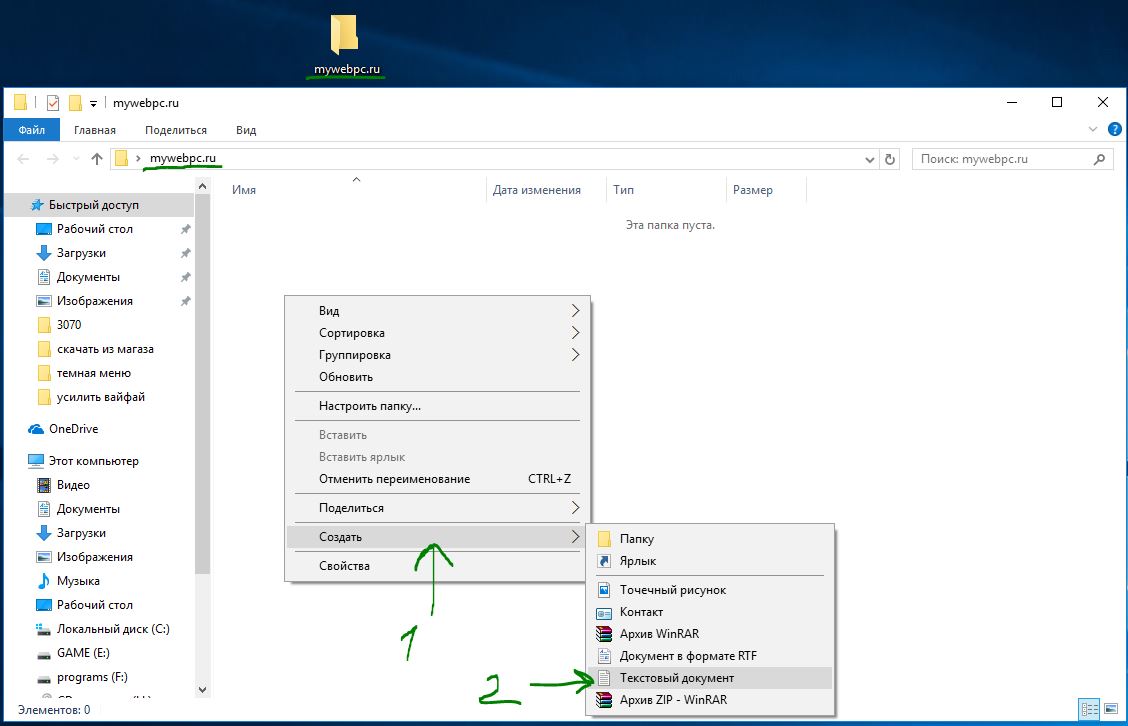
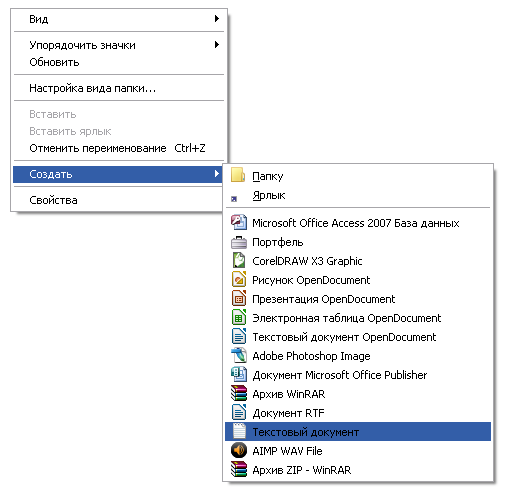
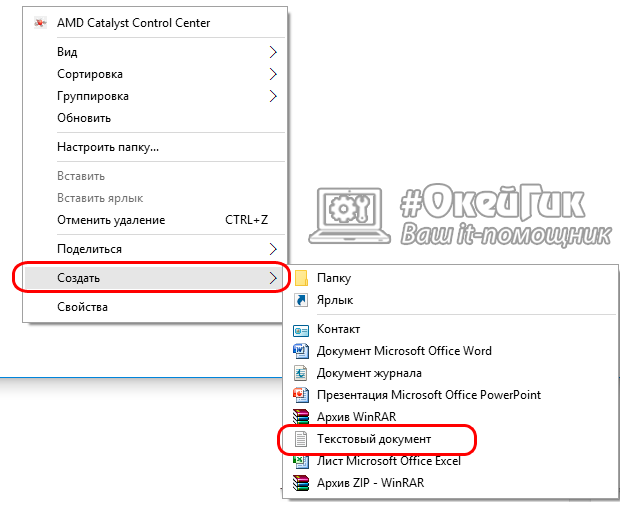
Create a new one Text Document inside this folder by right-clicking on an empty space in the created folder. Select New > Text Document.
Open the new text document you created. Copy and paste the following code into this document:
cls @ECHO OFF title Folder Private if EXIST "HTG Locker" goto UNLOCK if NOT EXIST Private goto MDLOCKER:CONFIRM echo Are you sure you want to lock the folder(Y/N) set/p "cho=>" if %cho% ==Y goto LOCK if %cho%==y goto LOCK if %cho%==n goto END if %cho%==N goto END echo Invalid choice. goto CONFIRM:LOCK ren Private "HTG Locker" attrib +h +s "HTG Locker" echo Folder locked goto End:UNLOCK echo Enter password to unlock folder set/p "pass=>" if NOT %pass%== website goto FAIL attrib -h -s "HTG Locker" ren "HTG Locker" Private echo Folder Unlocked successfully goto End:FAIL echo Invalid password goto end:MDLOCKER md Private echo Private created successfully goto End:End
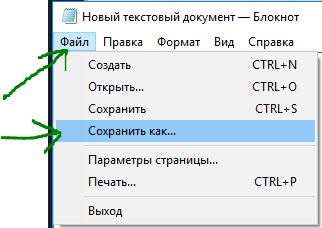
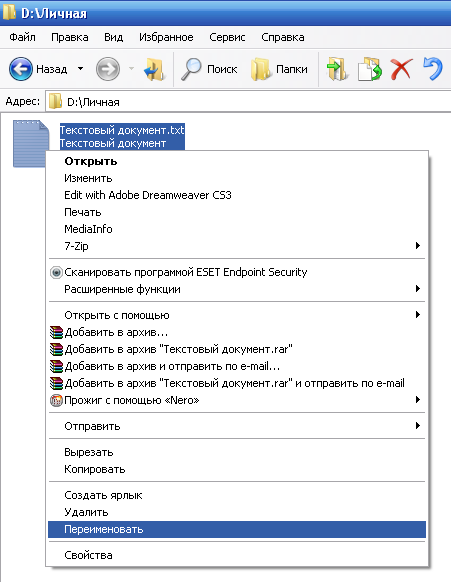
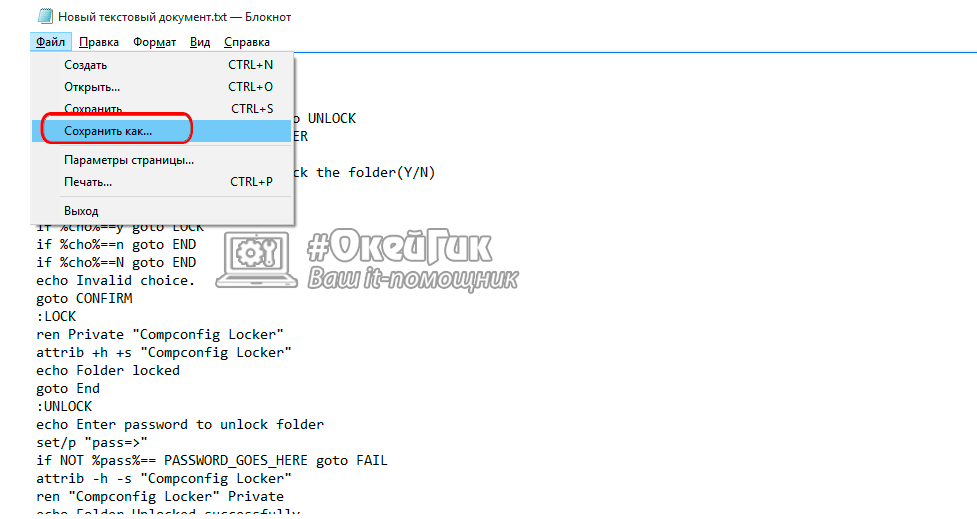
Change the line if NOT %pass% website to your password that you want to set, where is the value website password. Then you need to save the file as a batch file. From the File menu, select Save As.

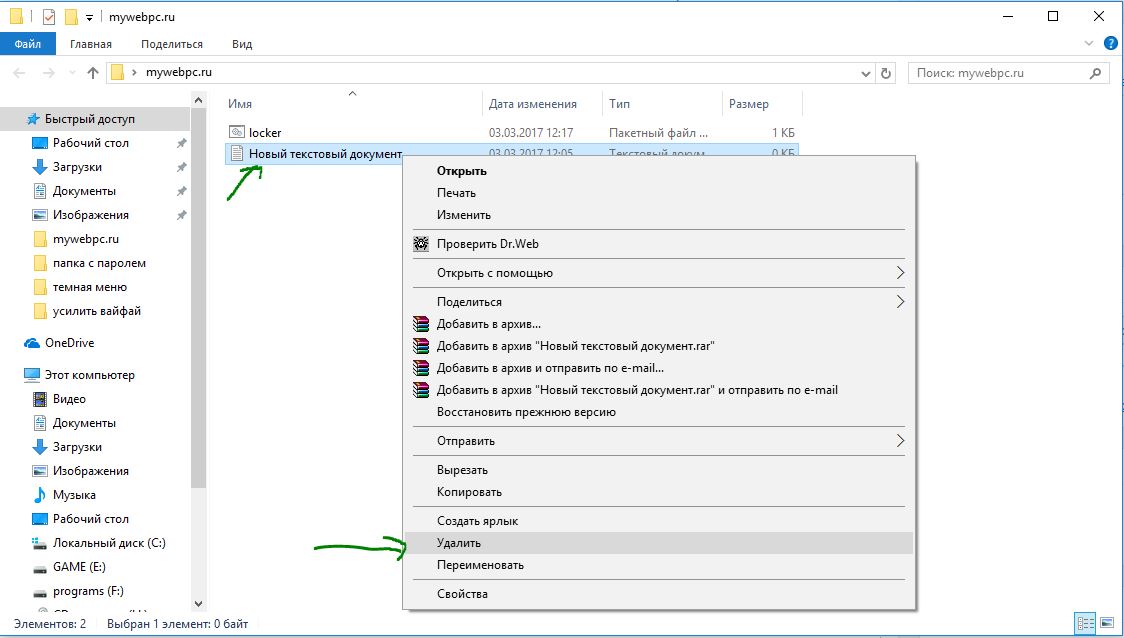
Once the file is saved as a batch file, delete the original text file.
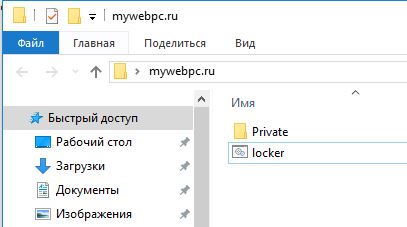
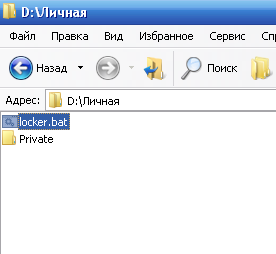
Launch the “locker” file by double-clicking on it. The first time you run the script, it will create a folder called "Private" in the same folder where the batch file is located. In this “Private” folder you will store your personal data for password protection. Add your files that need to be password protected to the “private” folder.
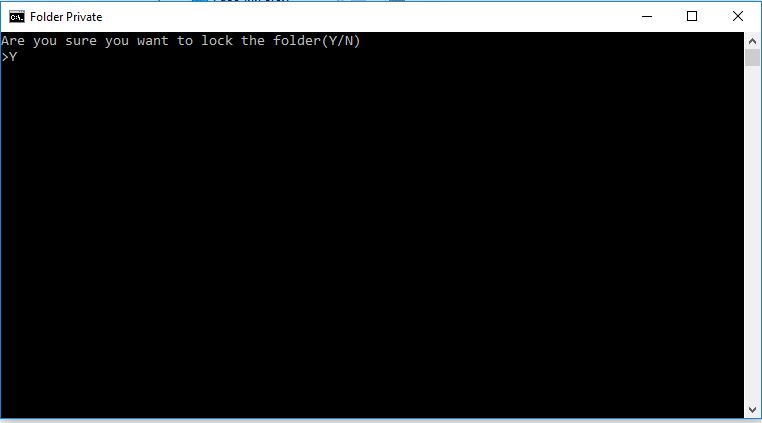
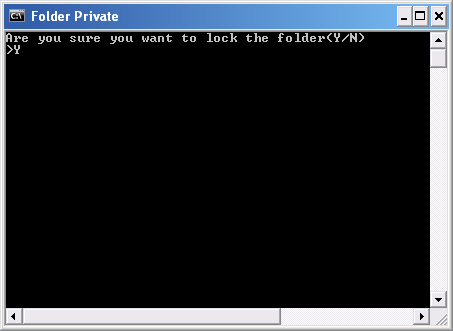
After adding your personal files to the folder, run the "locker.bat" file again. This time you will be asked to lock your data with password protection. Press "Y" if you agree.
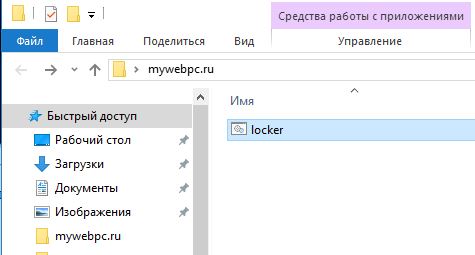
Notice that your personal folder, where you added your personal files, quickly disappears. Only the bat file will remain.
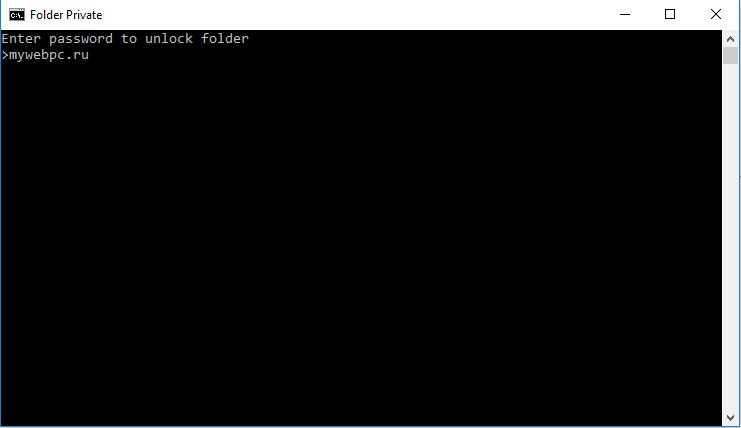
After running the script again, you will be prompted to enter the password that was changed in the script. In this case, my password is the name of the site. If you type it incorrectly, the script will simply stop working and close; you will need to re-run it.
If something went wrong and you want to get back your files that were hidden and protected with a password, then we’ll look at how to get them back in simple ways.
How to see password-protected hidden folders again.
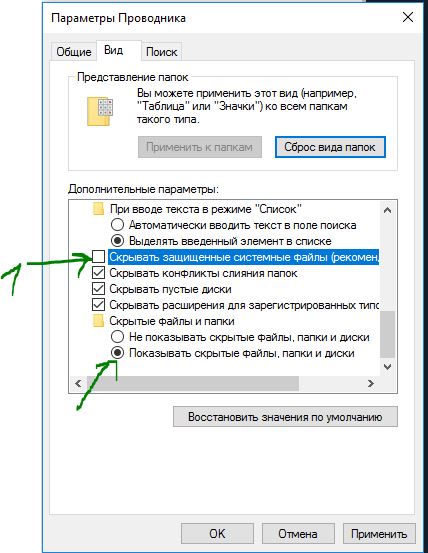
Most people don’t know how to set up showing hidden folders in Windows 10, but those who know will figure it out quickly. Read the topic here on how to enable it for everyone types of windows. All you need to do is turn on “show hidden files" and uncheck "Hide protected system files".
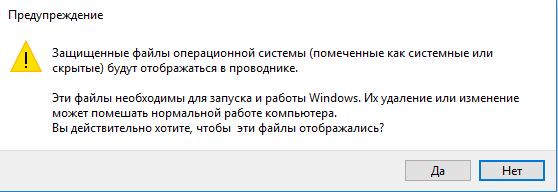
A warning will come out that is scary ordinary users. Click “Yes”, don’t be afraid. Once you find your data, return the settings back.
How to remove the password from the bat folder if you forgot
A very simple method, but not safe for programmers. Users who know what they're dealing with will quickly figure out what's going on and how to view your hidden files. For example, I would never have thought to look clearly at the “locker” file; it attracts little attention. You need to know this purposefully, that there is such a script on the computer, with such a bat file, hidden folder and password. The body file itself can be hidden in the attributes and a shortcut can be created for it. The shortcut, in turn, can also be hidden by first assigning a key combination to it.
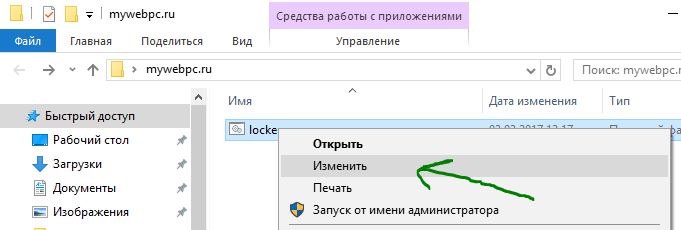
Right-click on the executable bat file and select “Change..ru” password from the drop-down menu.
Using this method, you can create a folder with a password without programs, thereby protecting your files. It turned out to be easier than ever to password protect a folder in Windows 10 without third-party programs. If a program can be deleted accidentally and all the data under its password can no longer be found, then the methods given in the article can be easily restored.
Video instructions: Put a password on a folder without programs
There are many ways to protect a folder on your computer with a password, but most of them require you to install a special software. However, many of these programs are paid. There is an easy way to put a password on a folder using a batch file. Although this method does not provide 100% protection, it can be used as an option to protect your data.
Setting a password for a folder
First, let's create a regular folder anywhere with an arbitrary name. For example, Personal.
Then you need to enter this folder and create a text document with any name in it. This is easy to do using the context menu.
 Open a text document and paste the following code:
cls
@ECHO OFF
title Folder Private
if EXIST "Compconfig Locker" goto UNLOCK
if NOT EXIST Private goto MDLOCKER
:CONFIRM
echo Are you sure you want to lock the folder(Y/N)
set/p "cho=>"
if %cho%==Y goto LOCK
if %cho%==y goto LOCK
if %cho%==n goto END
if %cho%==N goto END
echo Invalid choice.
goto CONFIRM
:LOCK
ren Private "Compconfig Locker"
attrib +h +s "Compconfig Locker"
echo Folder locked
goto End
:UNLOCK
echo Enter password to unlock folder
set/p "pass=>"
if NOT %pass%== PASSWORD_GOES_HERE goto FAIL
attrib -h -s "Compconfig Locker"
ren "Compconfig Locker" Private
echo Folder Unlocked successfully
goto End
:FAIL
echo Invalid password
goto end
:MDLOCKER
md Private
echo Private created successfully
goto End
:End
Now we find the field in the code PASSWORD_ GOES_ HERE and replace it with the password we need. Save the file and rename it to locker.bat.
! If you have file extensions disabled on your system, you may have difficulty changing the file name. The point is that in the file locker.bat, locker is the name of the file, and .bat- extension. When displaying file extensions is disabled, you see only the file name and when you rename a text file, you assign a name to it locker.bat, but the extension remains the same - txt. Therefore, to avoid such problems, before renaming the file you need .
Checking the code
We run the file locker.bat, as a result of which a Private folder should be created, in which you need to place all your documents that you want to protect. After that, run the batch file locker.bat again.
You will now be prompted to lock the folder. Select Y.
This will make your Private folder disappear.
![]()
If you run the locker.bat file again, you will be prompted to enter a password.
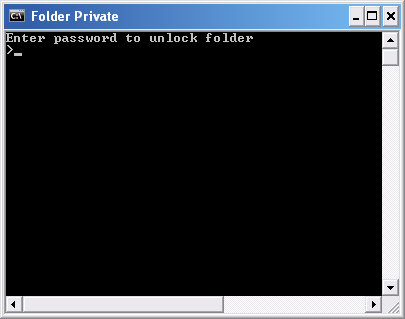
When you enter the password you specified in the batch file, the Private folder will be displayed and you can work with it again.
Conclusion
This method of setting a folder password is not the most secure. The fact is that an experienced user can see your documents if he turns on the display of hidden and system files. You can also find out your password by viewing the contents of the locker.bat file. The advantage of this method is that no additional software is used. Therefore, it can be used as an option to protect your documents from inexperienced users or children.
Many users personal computers people are asking exactly this question - how to set a password for a folder or file in order to limit other people’s access to information. This can be done thanks to third party programs. There are quite a lot of them. They have their advantages and disadvantages. Today we will look at the simplest and reliable way Protect information on your computer using a password. We will use the usual WinRar archiver as third-party software to protect our files and folders.
Why this particular program? The thing is that WinRar is widespread and installed on almost all user computers. In addition, the program has a simple and easy-to-understand interface in Russian, as well as great functionality. The level of protection of the created archives is so impressive that it’s not even worth comparing it with anything else. Although, of course, there are programs that can be used to protect user information no less efficiently. But for the most part, they are either very expensive or difficult to work with. Therefore, we chose the WinRar archiver.
Let's get started. To begin with, if you do not have this archiver installed, install it. After that select required file or folder and right-click. In the context menu that appears, click “Add to Archive.”
In the window that opens on the left, change the compression method by selecting “No compression” and go to the “Advanced” tab.
In this tab you need to go to the “Set password” section.
After this, we automatically return to the previous menu, where we press the “OK” button again. The archive has been created.

Now, when you try to open it, the “Enter Password” window will appear. In this simple way you can protect your files and folders from prying eyes.
Now a little about creating a password. A strong password for WinRar archive is a password consisting of at least 8 characters. These characters must include uppercase and lowercase letters, spec. symbols. Then this kind of password will be considered reliable. Example of a fourteen-digit password: r$F@wmA%*dfVVc. This is a really powerful password and cracking it will be very problematic! This can take many tens of thousands of years using the most powerful equipment, yes, yes, thousands of years, it will be easier to knock it out of you than to hack it.
How to create such a password? Everything here is simple and elementary. For such purposes, there are various programs - password generators. If you own Windows 8, then you can find just such a free program in the store.
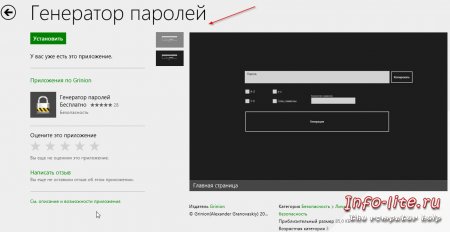
With this application you can create a password of any complexity. I would like to point out right away that a complex password is not the most important thing. It is important to protect your computer from various types of malicious code. Most strong password can become completely useless if the computer is infected, for example, with a keyboard interceptor, which can easily read it and send it wherever it is needed. Therefore, protecting information is a comprehensive measure, from creating a strong password to choosing anti-virus software! And one more piece of advice. Keep your passwords in a safe place away from prying eyes. Buy, for example, a USB flash drive, put your passwords on it and use the disk encryption function -. This option will be reliable. Good luck to you.
Manufacturers operating systems are seriously concerned about the security of user data, and Microsoft company from among them. Many large corporations use Windows system, which becomes more and more reliable with new versions. Despite this, it does not provide the function of setting a password for a separate folder or file. Microsoft explains the absence of such an opportunity by the presence of an option to activate a password for an individual computer user, but this is not always convenient.
A common situation is when an employee in the office leaves the computer for a couple of minutes to make coffee or talk on the phone. At this point, his personal files are not protected unless he logs out of his profile. Anyone can not only view files on a computer, but also download them, which is fraught with problems. However, there are several ways that allow you to put a password on a folder in Windows any versions, either using or not using third-party programs.
We recommend reading:How to put a password on a folder in Windows without programs?
The method that will be described below does not provide complete protection of the data in the folder from the actions of intruders.
 cls
@ECHO OFF
title Folder Private
if EXIST "Compconfig Locker" goto UNLOCK
if NOT EXIST Private goto MDLOCKER
:CONFIRM
echo Are you sure you want to lock the folder(Y/N)
set/p "cho=>"
if %cho%==Y goto LOCK
if %cho%==y goto LOCK
if %cho%==n goto END
if %cho%==N goto END
echo Invalid choice.
goto CONFIRM
:LOCK
ren Private "Compconfig Locker"
attrib +h +s "Compconfig Locker"
echo Folder locked
goto End
:UNLOCK
echo Enter password to unlock folder
set/p "pass=>"
if NOT %pass%== PASSWORD_GOES_HERE goto FAIL
attrib -h -s "Compconfig Locker"
ren "Compconfig Locker" Private
echo Folder Unlocked successfully
goto End
:FAIL
echo Invalid password
goto end
:MDLOCKER
md Private
echo Private created successfully
goto End
:End
cls
@ECHO OFF
title Folder Private
if EXIST "Compconfig Locker" goto UNLOCK
if NOT EXIST Private goto MDLOCKER
:CONFIRM
echo Are you sure you want to lock the folder(Y/N)
set/p "cho=>"
if %cho%==Y goto LOCK
if %cho%==y goto LOCK
if %cho%==n goto END
if %cho%==N goto END
echo Invalid choice.
goto CONFIRM
:LOCK
ren Private "Compconfig Locker"
attrib +h +s "Compconfig Locker"
echo Folder locked
goto End
:UNLOCK
echo Enter password to unlock folder
set/p "pass=>"
if NOT %pass%== PASSWORD_GOES_HERE goto FAIL
attrib -h -s "Compconfig Locker"
ren "Compconfig Locker" Private
echo Folder Unlocked successfully
goto End
:FAIL
echo Invalid password
goto end
:MDLOCKER
md Private
echo Private created successfully
goto End
:End
This code is a script that will allow you to put a password on a folder in Windows without programs.
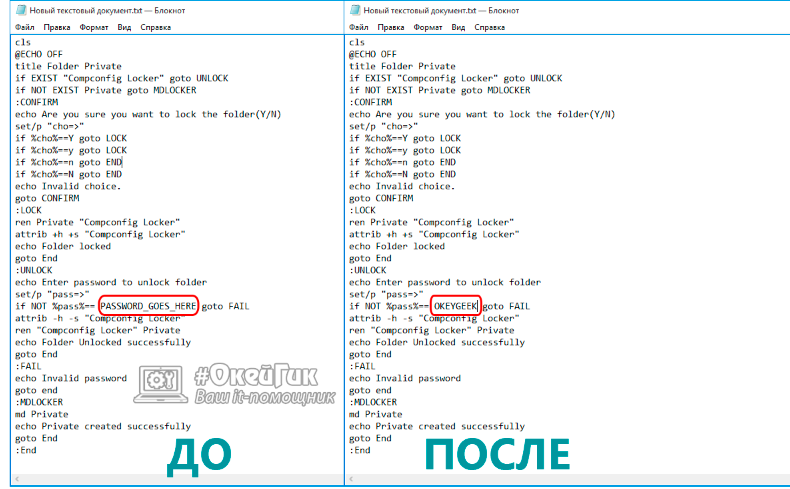
Statistics show that many people are careless about their passwords, choosing secret code your date of birth or your name. OkeyGeek site advises you to be more careful when choosing a password, in particular, adding letters of different case, punctuation marks and numbers to it, which allows you to confuse programs for automatic password selection.
Attention: This file will remain visible to users, and through it they will need to access the personal folder on which the password is set. We recommend choosing a name for the file that would “repel” intruders. For example, the file can be named " Win.bat" or " splwow64.bat».


