In the last article I talked about . Today it’s time to figure out how to make sure that conversions go to Yandex Metrica. This can also be done quickly and easily. And you don't need to have programming knowledge.
Therefore, right now (with the console and debug enabled) I am doing a test conversion - sending a request through the form on the website. And... what do we see!

As you can see, the debug reports that a target with id = send was successfully sent to Metrica. And indeed, in Metrica I have an event configured with the following identifier:
As you can see, to check the operation of goals in Metrica, you do not need to have programming knowledge. All you need to do is follow three simple steps:
- enable the code debugger in the browser;
- enable the goal debugger in Metrica (add a tail to the page url);
- send a test conversion.
That's all for me guys. Please like if this article was useful and ask questions in the comments if anything remains unclear!
Lesson materials Assignment
What are goals in web analytics systems such as Yandex Metrica and Google Analytics and how to set them up?
Let's look into this issue.
If you don’t have time or don’t want to dive into all the features of setting up such a goal, you can entrust this work to me, I will do everything for you.
In the Yandex Metrica system, goals can be found in the Settings - Goals menu.
In Google Analytics, goals are located at the presentation level; there is a menu item called Goals.
What kind of tool is this for such a “purpose” and what is it for?
When visitors land on your site, they begin to make the most different actions. They can start moving from one page to another, start filling out some forms on the site, click on some elements (for example, buttons, sliders, images, etc.) and can follow various links, etc. d.
Depending on the purpose of your site and why you created it, some actions that visitors take may be somehow more valuable to you than others. You can highlight them above the rest.
Depending on what kind of site you have and why you created it, these types of actions may differ and you can determine which of these actions will be more valuable actions for you.
For example, for an online store such valuable actions could be:
Purchase of goods
Click on the "Add to cart" button
Click on the buy button
These actions for an online store directly affect its sales. For the main purpose for which this online store was created, and it was created to sell goods. Therefore, all actions that users take in order to move towards purchasing a product will be targeted for this site.
For a news site, the tasks may be slightly different. For example, a news site may have the goal of reaching as many people as quickly as possible. To do this, it is important that people engage with the site, that it is interesting to them and that they want to return there.
Therefore, for a news site, such valuable actions could be the viewing depth of visitors to the site's pages, how deeply they view the site's pages, and how much time they spend on it.
Web analytics systems allow you to isolate these valuable actions of visitors on the site into a separate group called goals.
The fact is that in analytics reports, by default, we see such analytics indicators as Visits, Visitors, Bounces, Browsing depth, Time on site, but we do not see any specific actions that the user performs on the page.
In web analytics systems, we cannot see by default clicks on some links, clicks on some areas on the page, filling out forms, etc.
All these events that are additionally performed by the user on the page, they need to be configured separately in web analytics systems and this can be done using goals so that these events can be detected and seen.
Goals are a tool that allows you to record the actions of your visitors that are important to you.If you have configured them, the web analytics system begins to “see” these actions.
What will customized goals on your website do for you?
1) You will understand about the sources that bring people to your site who buy from you or perform some other actions. You will know where the visitors who are targeting your site come from.
By knowing the sources that work for you, you can invest more money and attention there and get more results.
2) You will be able to build visual reports that show you not just data on how many people came to your site, but also data on how many people performed a particular target action that would be important to you. Columns for the number of goal achievements and conversions appear.
3) You can build funnels for multi-stage processes.
With the help of these funnels, you can see how many and at what stage of the multi-step process visitors are eliminated. You will see a weak link and can conclude that at some stage there may be something wrong and you need to pay more attention to it.
4) Having set up goals, you can filter only targeted visits in reports.
5) You can advertise based on people who performed the target action on the site in systems such as Yandex Direct, Google Adwords. With the help of goals, you know that a certain group of visitors are loyal to you and are interested in your product or service, and you can advertise only to this interested segment of people, pay less money for advertising and get more results.
Goals are a tool that shows where the money is
Adds clarity to the process of analyzing your website statistics
I hope I was able to convince you that goals are important for your site, especially if that site is a sales site.
If you want to learn more about goals, how everything is configured and where, proceed to study the following videos.
When choosing goals for a site, there can be a lot of features, controversial and rhetorical issues.
Let's try, together with you, to learn how to determine the events on the site that you should and should NOT set goals for.
2) Write what events you will set goals for on this site? Why did you choose these particular events? Why is it important?
Write, we will figure it out, discuss and learn together.
In Internet marketing, a goal or target action refers to the actions of a visitor in which the site owner is interested, for example:
- visiting specific pages;
- clicking on the subscribe button;
- clicking on the add item to cart button;
- following certain links;
- placing and paying for an order.
Wherein:
- visits to the site by users during which goals were achieved are called targeted visits;
- During one target visit, several achievements of the same or different goals may occur;
- and the ratio of the number of targeted visits to the total number of visits is called !
Goals are usually divided into simple and compound.
Simple goals - set by one condition, for example: the number of page views, visits to a specific page, a given JavaScript event.
Composite goals are defined by a specific sequence of steps (conditions) performed by the user on the way to the target action, and each step is described using a simple goal.
Analysis of statistics on the steps of composite goals helps to understand at which stage of the movement towards the goal site visitors have difficulties.
Conversion is the ratio of two indicators to each other; for example, the number of those who went to the number of those who were on the main page of the site. If 1 person out of 100 page visitors clicked into the directory, the conversion would be 1%, if 10 clicked, the conversion would be 10%, and so on.
Conversion rates are important data when determining the effectiveness of a website. Does our site sell? We can get the answer to this question by analyzing the indicators of different conversions.

It depends on the optimization tools and capture forms (they are also data collection forms). The most convenient way to create a plan for tracked conversions is in the following table:

To begin with, you can name the fields exactly as shown in the example - as we progress, we will figure out what they are and what they are needed for. After this, you can optimize the sign to suit your needs. Now, together, step by step, we will identify the conversions we need.
Step 1. Identify conversion elementsFirst, for convenience, we will make a list of all our conversion elements - that is, those that: order a call back, open a catalog, put an item in the cart, go to a social network and even just watch a video.
Here's a sample list of elements that are likely to be on your site that are worth putting on the list.
- Buttons:
- with a call to action;
- adding a product to the cart;
- placing an order;
- newsletter subscriptions;
- registration;
- transition to social networks;
- links to other pages.
- Pictures that serve as links to pages/sections.
- Shapes:
- placing an order in the cart;
- registration;
- subscriptions;
- feedback;
- registration of applications;
- requests/appeals/questions, etc.
- Watchable video.
Attention! It is worth thinking carefully about which elements are worth working on and which are not: not all of them will directly affect sales; It doesn't make sense to track a thousand unnecessary conversions.
Now the necessary elements need to be correctly entered into the table: we will understand how to do this using the example of a button on the main page of the site. Here she is:

The button that interests us is called “More details” - it leads to the training catalog page. We make a note about it in the plan.
Just a few words about the name. There may be several dozen or even hundreds of conversions, but by the name you should immediately clearly understand which one we are talking about. You should not use names like: “Conversion 1” or names in the form of incomprehensible abbreviations. It is convenient to use the following format:
“Site page _ conversion type _ page section.”
For our button, a good, correct entry would look like this:

Recording a conversion in the planning table: it’s immediately clear that we are talking about the main CTA on the first screen home page site
We carry out a similar analysis of each page and find all the elements by which we will track conversions.
Step 2. Identifying conversion pagesNow we track the path that the visitor takes from the moment of the first hit (login page) to the final moment of purchase. This path is called the visitor conversion path.
Why do we need this? After analysis, we will receive a list of not only buttons, but also pages where the conversion occurs; their visits are necessarily monitored. Here are some examples of typical trajectories indicating such pages.
- Home page – Catalog – Product card – Filling out the order form
- Home page – Catalog – Product card – Filling out the order form – Payment page – Thank you page (more on that below)
- Home page – Catalog – Service page (landing page) – Call from the website to order
- Main page – Service page (landing page) – Filling out the order form.
- Blog article – Service/product page – Filling out the order form
If we find many such pages, the list should be shortened, leaving only the so-called “hub” pages: those visited by users following different trajectories. For example, in the first two examples there is a node page “Filling out the order form” - we will leave it.
Looking ahead a little (so that you don’t get the feeling that we forgot to say something): visitor trajectories are tracked by setting up the “Goals” tool in Yandex.Metrica and Google Analytics - we’ll talk about this in detail below.
We enter the pages we need (all or just the main ones) into the table in the same way as buttons. As a result of the analysis, we have a planning table in our hands, which contains full list elements and pages whose conversion we will track.
The conversion of elements or pages can be tracked using special goal settings in Yandex.Metrica (no more than 200 goals per site).
The service uses 4 formats – or condition types – of goals.
- Number of views. A format for tracking users who viewed two or more pages in one session. This function is often called “View Depth”.
- Visiting pages. A goal that measures the number of visits to specific pages on a site.
- J avascript event. This type embeds an identifier into the site code that tracks the number of actions performed by visitors: clicking a button, filling out registration forms, etc.
- Composite goal. Tracks visitors' completion of up to 5 specific steps, such as placing pages, clicking on a button, and going to new page and so on.
4 main conditions for setting goals in Yandex.Metrica
The table below outlines the conversion types and goal formats you should use.

Note: If two or three options are provided, you do not have to use them all - choose one that suits you and use it.
It is worth mentioning separately this method as the “Thank You Page”. Add a special thank you page after each targeted customer action. Then the visitor will be taken to it every time he reaches the goal, and we can easily measure the conversion by tracking how many such visitors there were in the end.
Setting up goals in Yandex.Metrica step by step1. Open the “Counters” page of “Yandex.Metrica”. Select the one you need and click on the gear icon:

2. On the page that opens, select the “Goals” tab:

3. Click “Add Goal” and select the “Page Visits” tab.
4. From the drop-down list, select “url: contains” and enter the address of the page to which the transition is being tracked. In our example: how many visitors from the main page will go to the page with the service catalog.

5. Add a name from the planning table and click the “Add goal” button:

Now let’s set up the conversion of used buttons, registration forms and subscriptions.
Attention! Setting up this type of goal requires making changes to the site code. If you do not have the required level of knowledge, it is better to leave this task to specialists.
Setting up involves two steps:
1. Goal setting.
2. Making changes to the site code.
First, let's set up a goal in Yandex.Metrica:
1. Enter the name of the goal from the planning table:

2. Select the conversion type – JavaScript event.
3. Specify the name of the target identifier.
Attention! The identifier must be specified only in Latin letters and numbers without spaces. It is impossible for the name of the identifier to coincide with the url address of the site, even partially.
4. Click “Add target”.
Now we make changes to the site code. You need to find the button or form code and add information about the goal.
onclick="yaCounterХХХХХХ.reachGoal("Identifikator"); return true;"
where instead of XXXXX we add the Yandex.Metrica counter code, which we take on the counter settings page:

Instead of Identifikator, we add the name of the target identifier that we set in the step above.
In our example, the final code will look like this:
onclick="yaCounter40703159.reachGoal("btnZakaz1"); return true;
2. Open the code of the site page on which the button is installed.
3. Find the code for this button on your website.
4. Add a piece of code as shown in the figure and save it. The goal has been set.
Setting up conversion through the “visitor trajectory”1. Enter the name of the goal.
2. Select the type – “Composite goal”.
3. Enter the name of the step.
4. Enter the condition of the first step - the address of the page from which we begin to track the client’s journey. Then click “Add step”.
5. Enter the data for the next step in the same way (note: there can be no more than five). The cycle is repeated as many times as the number of pages the client must go through.
6. Click “Add target”.

You can use not only the format of visiting a specific page, but also individual events. For example: “click on a button”. In this case, at the step selection stage, we specify the condition “Event: Target ID”. The setup is carried out in the same way as setting up button conversion.

"Yandex.Metrica" allows you to analyze the completion of registration forms through a tool such as "Form Analytics":

To measure the conversion of a specific page, do the following:
1. Open Form Analytics.
2. Select the “Interaction with the site” tab, select the page address in the drop-down window and set the required dates:

3. We receive data from the form for the selected period:

Let's look at setting up conversion tracking through Google Analytics. To do this, use the “Goals” tool (no more than 20 goals per view - that is, per level that gives access to reports).
Google Analytics uses the following 4 goal formats:

The table below shows the types of conversions and goal formats for them:

List of conversions and their corresponding condition types in Google Analytics
Setting up the Landing Page format1. We go into our office. Select the “Administrator” tab, select the site in the drop-down list and click “Goals”:

2. In the tab that opens, click on the “+ Goal” button:

3. At the very bottom of the page, select “Own”:

4. Enter the name of the goal, select the type – “Landing Page” and click “Continue”:

5. We enter the address of the page to which the transition is being tracked. In our example, we need to go to a page with a catalog of services, which means we enter the address of the latter. And click “Save”:

6. Check the result:

As in Metrica, here we do two actions.
1. Set up goals in Google service.
2. We make changes to the site code.
Let's set up the goal:
1. Go to the service, click on “+ Goal” and select “Own” in the window that opens.
2. Enter the name, select the type – “Event” and click “Continue”:

3. In the window that opens, we must fill in at least two sections: “Category” and “Action”.
You can only fill out names in Latin letters and numbers. It is desirable that the names reflect the essence. In our case, this is the “Orders” category (we write “zakaz”) and the “Click” action (we write “click”), since we are talking about clicking the mouse on a button to place an order.

Now you need to add the necessary changes to the site code.
1. To track button conversion, add the following code:
ga("send", "event", , );
ga("send", "event", immutable part
- name of category. Instead of this phrase, we enter the word that we specified when setting up the goal: “zakaz”.
– name of the action. The word that was specified when setting up the goal is entered here: “click”.
The final code for our example:
ga("send", "event","zakaz", "click");
Setting up visitor trajectory conversion1. Click “Add Goal” and select “Own” at the very bottom of the page.
2. Specify the name of the goal and select the “Landing Page” type. Click “Continue”:

In the “Transition” tab, indicate the address last page, which the client ends up in the chain. Next, set the “Sequence” button to “ON”:

4. Now we write down sequentially all the stages that the client must go through from the first to the penultimate page (the last one is already indicated). Set the “Required” button to “YES”. Save.
Accounting and analysis of conversion dataSetting up goals in Yandex and Google only gives access to statistical data. But without creating an accounting system and regularly analyzing the results, all this will be useless. Conversion analysis must be carried out dynamically, that is, constantly compare data for one period with data for another.
Example. Knowing that callback conversion rate is 1.2% in March 2017 doesn't tell us anything about the effectiveness of the element. Is this a lot or a little? Unclear. But if we compare this figure with the result of last month, when the conversion was 1.9%, then we can conclude that the conversion has deteriorated.
To properly interpret the results, you must create and maintain a record of all conversion data. The easiest way is to use Excel spreadsheet to regularly record item conversion data.

- For online stores, it is recommended to consider data on a daily basis.
- For other sites, it is enough to analyze data on a weekly/monthly basis.
Then, based on this data, you can create a graph for good results with a few clicks of the mouse. visual representation.
Viewing conversion results in Yandex.Metrica1. To view the results of tracked conversions, open the “Reports” tab, then “Standard reports” and “Conversions”.

2. Select the goal we need:

3. On the page that opens we see detailed information in graphical and tabular form. We can choose the reporting period we need.

1. To view the results, on the left tab, select “Conversions” – “Goals” – “Overview”.
2. In the window that opens, we select the reporting period and in the “Goals” drop-down menu – a specific type of conversion.

Yandex.Metrica and Google Analytics are very different services, but together they solve almost any problem, so you shouldn’t neglect any of them. Having consistently done all the work of setting goals and tracking conversions in both systems, you will track the effectiveness of each significant element of the site. You definitely need to start with planning in order to cut off dozens of unnecessary conversions that have no meaning for your business.
Accounting and tracking of conversions when Google help Tag ManagerTo track the completion of target actions by site users and transfer data about them to the web analytics systems Google Analytics and Yandex Metrica, you can use the Google Tag Manager (GTM) tool.
One of the processes that turns out to be difficult for a beginner is setting up goals in Yandex Metrica. But the future collection of statistics and its processing to improve the result depends on its correct installation.
What are goals in Yandex Metrica?A goal in Yandex Metrica is the actions of visitors that are beneficial to the site owner or important for collecting statistical data. For example, following a link, submitting an application form, etc. The goal is considered achieved if the user has fulfilled the specified condition. Conventionally, goals are divided according to several criteria.
Goals by difficulty levelGoals in Yandex Metrica are divided into simple or compound.
A simple goal is set by one condition. For example:
- Number of views - viewing the initially specified number of pages on the site. If you specified a parameter of three in the settings, the goal will be considered achieved when the user visits three pages during one visit.
- Page visits - viewing specific pages of the site. This condition allows you to track the number of visits to a specified page, such as order form submissions.
- JavaScript event - in this case, the event that you want to track is written manually. Setting up JavaScript events makes it possible to find out the type of user interaction with the site, for example, clicking a button, following URLs, sending an order to the cart, payment, etc. It is actively used for landing pages.
A composite goal includes several sequential steps that the visitor must take. Each action has one condition. This approach allows you to figure out at what stage site guests have difficulties.
Goals by purpose- Conversion goal - used to view statistics (target visits, percentage and number of conversions, etc.)
- Retargeting goal - used to set up impressions based on selection conditions target audience via the Yandex interface. Direct.
The more accurately you plan to customize your advertising, the more retargeting goals you need to create.
Retargeting is a mechanism by which online advertising follows those users who visited a site and showed interest in it (stayed for more than 60 seconds, followed a link, etc.). Since such guests are already familiar with the site’s products and services, they are more likely to place an order by completing the desired goal for the owner on the payment button for the goods.
Setting up goals in Yandex Metrica (step-by-step instructions) Creating a goalTo create a goal in Yandex Metrica:

The metric starts collecting statistics a few minutes after adding a goal. The results can be seen in the conversion report.
Setting goals- Name the goal in a way that makes sense to you (this will help you understand the reports faster).
- Click the button Add a goal.
- Specify the number of pages you want the user to visit.
2. Visiting pages:
- Give the goal a clear name, such as “View product detail page.”
- Set the appropriate condition:
url: contains - this condition is selected when you are interested in traffic statistics for several pages, for example, a filter in a site directory. The condition must include the part that is common to all URLs.
url: matches - this condition is used to analyze the statistics of visits to a specific page. In the target field, the page address is entered in full.
url: starts with - is intended to control traffic to pages that have an identical beginning of the URL (for example, a subcategory of products in a catalog). Only the beginning of the link is entered in the target field.
url: regular expressions- used to set flexible parameters for analytics of user actions.
- Click the button Add a goal.
Using this goal, you can evaluate the dynamics of traffic to a given page on the site and understand how effectively linking works. You can also track the number of orders, tracking visits to the “thankyou” page.
Target Visiting the page most relevant for online stores and service sites. Their owners can find out whether users visit the product description or payment page, whether they add an order to the cart, whether they are interested in delivery options, etc.
3. JavaScript event
In this case, in addition to actions in Yandex Metrica, you will need to install a tracking identifier on the site. To do this you need access to the site code.
- Give the goal a name that is simple and understandable to you, for example, clicking on the “Request a call” button.
- Fill in the field Target ID. It should not match the content of the URL (even partially).
- Click the button Add a goal.

To bind JavaScript to the appropriate event on the site:
Code for tracking form completion:
onsubmit=
Code for tracking clicks on various elements:
onclick= "yaCounterХХХХХХХХ.reachGoal("GOAL"); return true;"
where “ХХХХХХХХ” is the Yandex Metrica counter number, “GOAL” is the tracking identifier.
4. Composite goal
Setting it up is not difficult if you have mastered the principles of setting simple goals.
 Target check
 To check that the target is installed and configured correctly, do the following:

If this does not happen, then Metrica does not read the completed goal for one of the following reasons.
Why don't goals work?There are 4 main reasons:
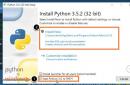
1. The counter on the landing page is not installed or installed incorrectly. To place a counter on your website:
- Log in to Yandex Metrica.
- Click the Add counter button.
- In the Counter name field, enter its name.
- In the Site Address field, specify the main domain of your resource, excluding the scheme/protocol prefix (http://, https://). You can specify the site path (path in the URL structure) in this field, discarding part of the address to a specific file or page fragment (the “#” symbol). If you leave this part, an error will appear in the input field, and the request parameters passed into the URL (the part of the address after the “?” character) will not be taken into account.
- To use one counter to track activities from multiple sites, fill out the field Additional website addresses.
- To ensure reliable statistics, you can also enable the option Accept data only from specified website addresses.
- To take into account subdomains of the main and additional sites when filtering, activate the option Including subdomains.
- Select your time zone.
- If desired, change the visit timeout in minutes - this is the time the visitor spends passively on the site. The default is 30 minutes. It can be raised up to 360. Each step is 30 minutes.
- Click the button Create counter(located at the bottom of the page and confirms all actions performed).
- The counter code appears in a new window.
- Near the option Webvisor, scroll map, form analytics check the box.
- Copy the code.
- Click on the button Save.
For the counter to work, it must be added to all pages of the site between tags or closer to the top of the page.
Statistics collection begins a few minutes after the counter is correctly configured and added to the site.
You can check the activity of the counter in the My counters section, in the status of checking the correctness of the code installation.
2. The counter is blocked by other scripts. The fact of blocking is displayed in the browser console. To correct errors, contact the employee responsible for technical support of the site.
3. The counter is blocked by the Adblock Plus extension. It is used for browsers and other software. Blocks the loading and display of advertising on website pages and in search results.
4. The guest left the site page before the counter loaded.
Notes- A maximum of 200 targets can be set for one counter.
- A visitor's achievement of the same goal on one counter is recorded no more than once per second.
- If the counter has been edited, all previous data is not recalculated.
- When you delete a target, information about it is not displayed in reports.
- If the URL of the given page contains the + symbol, use "%2B" in the template instead.
- Installation and configuration of Yandex Metrics is also possible through gtm (Google Tag Manager).
- Remember that the audience for retargeting begins to appear only after setting up goals. Therefore, complete the setup even before you launch paid traffic to the site.
Setting goals in Yandex Metrica provides the site owner with valuable information to increase conversion: the level of user interest in a product or educational information, ease of navigation, etc.
Using this information, the resource owner can make informed conclusions about the effectiveness of the advertising strategy, the necessary settings on the site, or changes to the assortment of the online store.
We have released a new book “Content Marketing in in social networks: How to get into your subscribers’ heads and make them fall in love with your brand.”
What goals are and their enormous benefits are already outlined in this, so we won’t focus on this, but let’s talk about how to set up.
Immediately after you have decided on the goals of your site and before you launch advertising campaign you need to configure the counters in Metrica accordingly.
Options for goals in Yandex Metrica In general, there are not very many options for goals in Yandex Metrica, but their use can be very flexible. There are 4 main ways to set goals:Now let’s take a look at how to set up goals in Metrica and how to use them.
At the time of writing, there is a limit on the number of targets for one counter - 200 pieces
Goal in Metrica: number of viewsThe first, and the simplest. There are few options for use, but the output can be very useful:
- Is the site navigation easy and how clear is the structure?
- Have we implemented linking correctly and is it convenient to use?
- Does the site provide high-quality content? Does a person want to delve deeper into your structure and learn more about the service/product/information provided?
Scope of use:
Go to Yandex Metrica of your website, click:

If everything is in order, we will see our first target on the list. Don't forget to click the yellow "Save" button. In a few minutes everything will work!
Goals in Metrica: page visitsOne of the most important goals (as it is often part of a composite goal, but more on that later). Here we can specify the URL of the page, transitions to which will be the achievement of the goal. Most often we are talking about the order/delivery/download page and any other transaction. The conclusion suggests itself:
- Is the link to the desired page visible/attractive?
- Correctness of linking.
- Are users reaching the conversion page?
Scope of use:
The initial steps will be the same everywhere, but I’ll duplicate them just in case, you never know.
Go to the Metrica of your site and:

About the conditions:
- url: contains - Analogue of an imprecise entry. They are used if you are interested in visiting a group of pages, for example, a filter in an online store catalog. In this case, the part common to all URLs is specified.
- url: matches - Analogous to exact occurrence. Used to track a specific page. You need to insert the entire address into the hole, along with the http/https protocol.
- url: starts with - Used to track a group of pages with the same beginning of the URL. For example, a product subsection of an online store. Insert the address of the previous directory with a slash into the hole, for example, site.ru/podrazdel/
- url: - Used to set very flexible parameters. Unfortunately, there are so many of them that it would be enough for a separate article.
A super thing that will help track the visitor’s interaction with any elements. We will draw a conclusion after the scope of use.
Where to use:
From life:
Once we increased the conversion rate for an online store in this way, having discovered that the green “order” button did not attract the attention of users at all. All you have to do is change the color of the button to yellow(it fit perfectly with the overall design of the site and was brighter than other elements), we increased the number of orders by 13% from the current one. And all thanks to the goals in Metrica.
How to set up a goal in Metrica: JavaScript eventSetting up this goal raises the most questions. In addition to Metrics, it will require editing access html code and the site. In general, ideally, you need to know HTML at least a little to work comfortably with this tool. Nevertheless, I will try to be detailed and clear:
Please note that you cannot specify identifiers that match the content of the URL, either partially or completely. And you don’t need to enter into the identifier all the symbols that are on the keyboard; be content with Latin letters, numbers and the lower space.

The goal has been created. The second stage will be adding an identifier to the html code of the page. To do this, you need to determine what to add to the button code, find out how the button is written in the code, find it and convert it.
First, let's look at what code is used where:
Code for buttons and links:
Onclick="yaCounter12345678.reachGoal("Nazvanie_Identifikatora"); return true;"
Code for various forms where the user sends us data:
Onsubmit="yaCounter12345678.reachGoal("Nazvanie_Identifikatora", function () (alert ("Data sent"))); return true;"
Onclick="yaCounter12345678.reachGoal("Nazvanie_Identifikatora", goalParams, goalCallback); return true;"
Instead of numbers afteryaCounter
- indicate the Metrica counter code
Instead of‘Nazvanie_Identifier"
- indicate the name of our identifier, which was created in the step above.
If you're going into the code without much confidence, it's best to keep the index. html in its original form, somewhere in a secluded place. If you accidentally break something, you can painlessly fix everything by returning the original file to ftp.
Example button code:
Example code for the “Callback” form:

Since we had inexperienced hands in the code, we check the site for functionality and after a couple of minutes you can try to click on the marked button and see in Metrica whether the statistics are calculated.
Make sure the counter counts your own visits. To do this, you need to go to “Settings” - “Filters” and make sure that there is no checkmark next to “Do not count my visits.”
Setting goals in Metrica: composite goalComposite goals are useful when it is important to track, building a chain of landing pages that a user should visit. Later, we will be able to identify the stage at which users leave the site without purchasing/ordering anything and work on them. Also, if you are blogging to attract topical traffic (and it’s time), you can track the conversion of transitions from information pages to service/product pages and from there to checkout.
- If we have built some kind of chain of pages on the website that the client must visit in order to be converted into a deal.
- Sales funnel for online stores. The most popular and flexible, as funnels can be very different and sophisticated.
There is nothing difficult if you have learned how to set up all the previous goals.
Well, straight to the point:
The screenshot shows a composite goal from “one” step, so as not to confuse anyone. In order to add the next step, you need to click on the corresponding button and repeat the steps starting from point 6.

There are a couple of nuances:
- There can be any number of actions between steps (but the steps must be performed sequentially). Therefore, if a composite goal is visiting two pages and pressing a button, then the user can be busy with anything between these actions, but after completing all the steps the goal will be counted.
- If the user takes the first action from a composite goal, and then leaves the computer for more than 30 minutes (session time), the goal will be considered failed
- A compound goal can contain a maximum of 5 steps
Unfortunately, I haven’t found a better way to check goals in Metrica than manually. 10-15 minutes after setting your goals, go through them yourself and see if it works. Don’t forget to uncheck the “Do not count my visits” checkbox in the filter section!
If you read to the endFor those who have mastered this gigantic layer of text and pictures, I have prepared a small surprise. I asked our Metrics gurus what “unusual” goals are that you won’t find on the Internet, but which they used in their practice, and so that these goals were really useful. Maybe some of them are just what you need?
Setting up non-standard goals will require us to be able to create and connect to the site. Let's briefly look at how to do this just for our example.
How to create a script: Create on the desktop Text Document, give it a name and change the extension to create a file like imya_scripta.js - this file will contain our script. Now paste it in required code and copy it via ftp to the folder with scripts. (where files with the same extension are located.js)
How to connect the script: In the file index. html between tags... write a .
For example, I have all my scripts in the scripts/targets folder.
We write: the consultant responds to the client.
I hope this was helpful!
If you have had experience setting extraordinary goals in Metrica, please tell us about them in the comments.
End