Before applying thermal paste to the processor, you should figure out how often this is done and why. The next step is right choice insulating material.
And, finally, the last thing is the application process itself, which is relatively simple, but still requires compliance with certain rules that are not always known to non-specialists.
Need to change thermal paste
The processor is one of the most important parts of a computer. With its help, millions and even billions of operations per second are performed, resulting in overheating.
To avoid a critical situation when the temperature of the processor leads to malfunctions, the use of fans with heatsinks helps. Excess heat is transferred to the cooler, a closer contact with which is provided by a special insulator - thermal paste.
The same applies to a video card that overheats during prolonged use (except for options with passive cooling when the heatsink is already attached to the GPU).
If the paste is not applied, something like the following can happen:
- An overheated processor will cause the system to hang, reducing usability and even risking information loss;
- The motherboard will completely fail, leading to the need for serious computer repairs.
The first time the paste is applied immediately after the processor is installed on the board, if the assembly is done independently.
For a PC already assembled and under warranty, and, moreover, a laptop, this should not be done because of the possibility of losing the right to free service maintenance.
In the future, thermal paste is changed on average once a year for powerful and, especially, overclocked processors, both central and graphic. For less productive chips, you can apply the material less often.
The reason for early replacement is the slowdown of the device, inexplicable reboots and freezes.
When choosing an insulator suitable for processor lubrication, you should not pay attention to cheap options such as KTP-8. Moreover, there are more effective materials on the thermal paste market that have been created over the past few years.
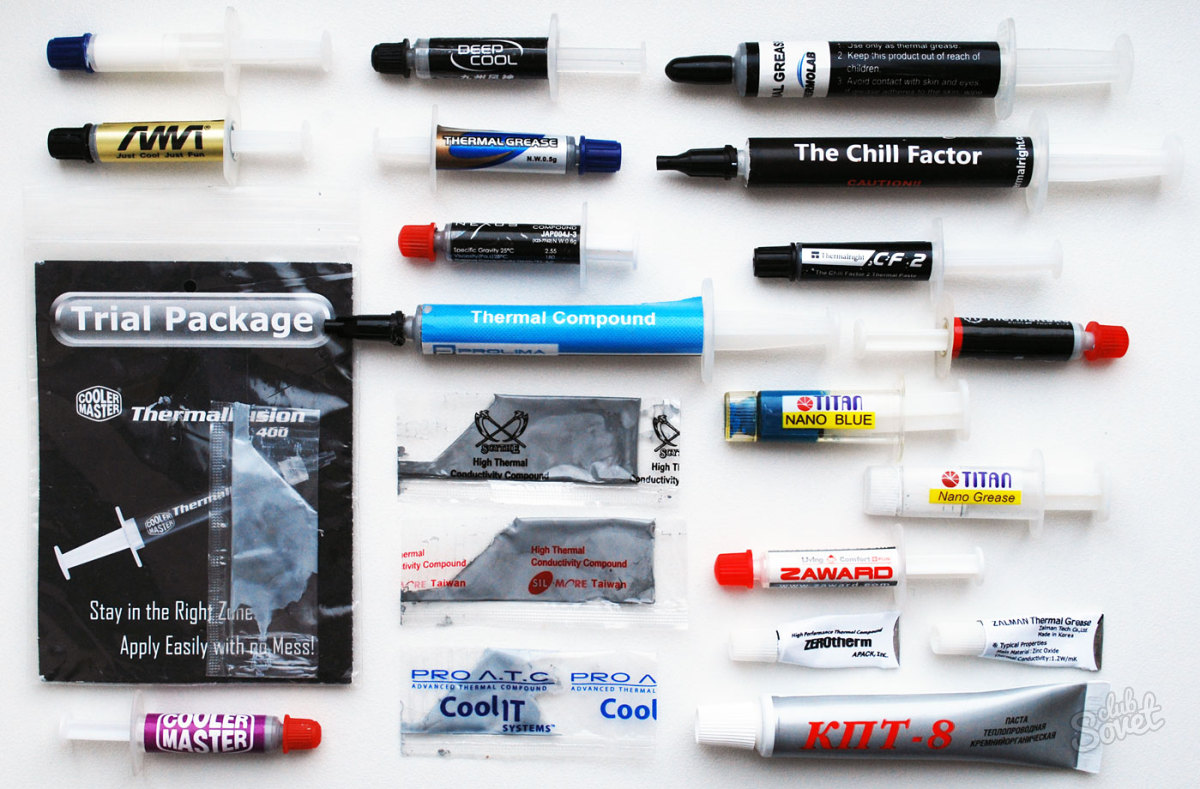
Most of the materials are made using silicone and zinc oxide. Although the packaging of some types of pastes contains information about the presence of silver, ceramic or carbon particles in the composition.
They increase the area of contact between the processor and the heatsink, increasing the reliability of the system.
Note! For the most powerful processors it is worth using materials containing copper and gold. These metals have the highest thermal conductivity among all that paste is made from.
Application steps
Even knowing how to apply the paste correctly and having the right material chosen, you can make a mistake that will lead to a processor malfunction. Therefore, in the process of work, certain rules should be observed:
- The paste is applied evenly and distributed over the entire area of the lubricated processor and the part of the heatsink that is in contact with it;
- The layer thickness should be minimal - almost transparent, allowing you to see the symbols written on the part;
- There can be no gaps or gaps in the thermal paste, leading to a decrease in contact.
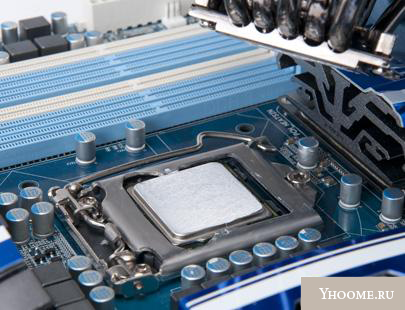
Step 1. Preparatory work
Before starting work on lubricating the processor, you need to disconnect it from the network and remove all parts that prevent you from getting to the chipset itself. including the wall system block, radiator and its cooler. For a laptop, you must additionally remove the battery.
Step 2. Cleaning up old residues
After removing the cooling system, remove the remnants of dried material left over from the last time. They also do this with a new processor, which has already been coated with thermal paste - usually the cheapest and inefficient options are used when selling.
Important! To remove the paste from the chipset and heatsink, use cotton swabs or cotton napkins.
The easiest way to remove grease is to use isopropyl alcohol or an alcohol solution (70-90%) in which the materials used for wiping are wetted.
For a not completely dried insulator, you can also use a ruler, and for a hardened one - a regular school eraser. The latter method takes a relatively long time, which is required to polish the metal part to a shine, but the processor remains intact as a result.
The need for careful removal is due to the uneven surface of the processor and heatsink, which can leave microscopic particles on them that adversely affect thermal conductivity.
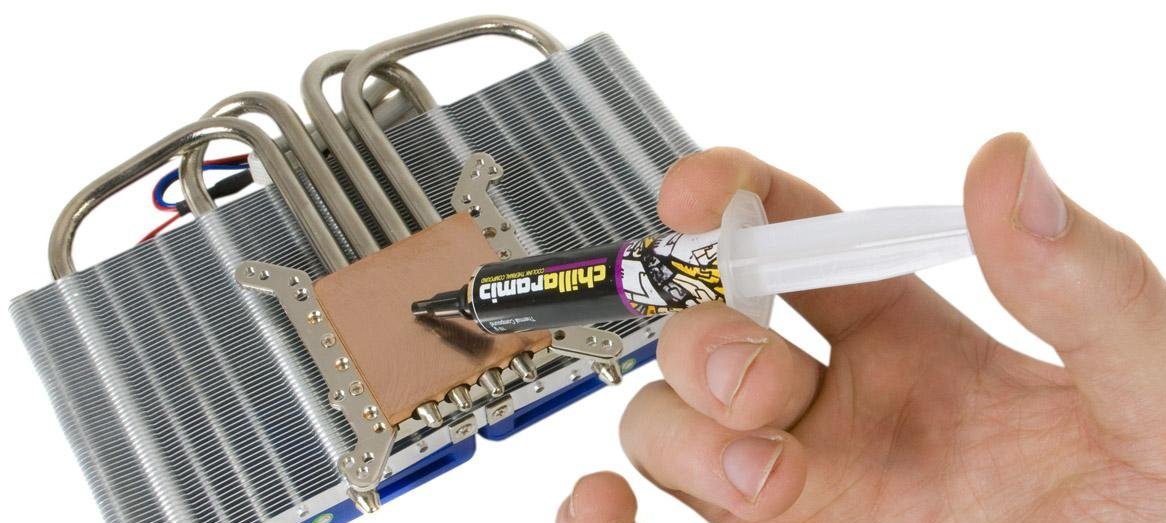
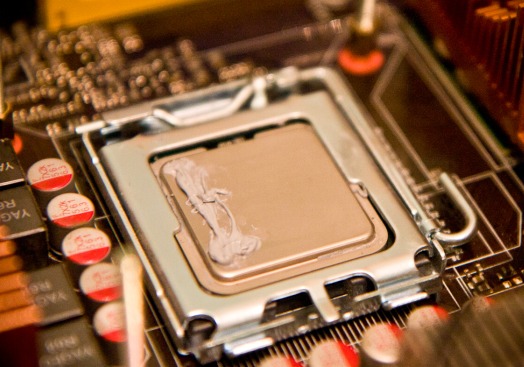
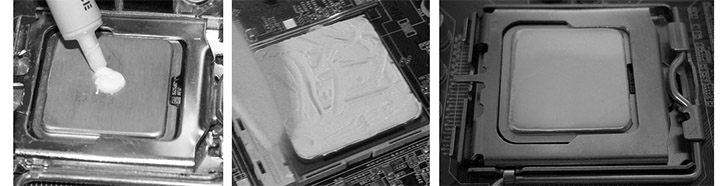
Step 3. Application and distribution of material
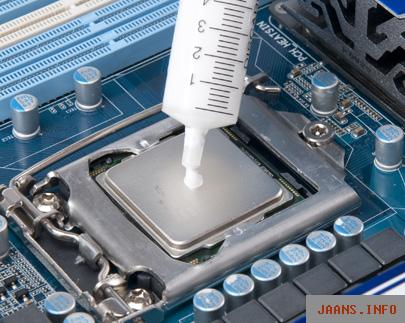
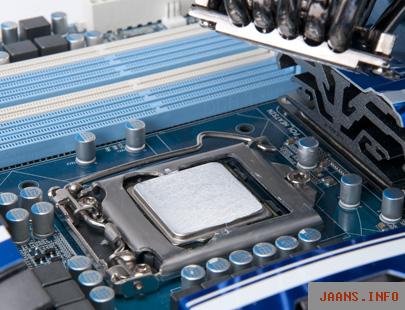
The first stage of application is to place a small drop of paste in the central part of the surface of the part to be lubricated - that is, the processor. The cooler radiator does not require lubrication at all, since it has an area larger than the total contact surface.
And by applying an insulator to it, you can spend extra material and even close the contacts on motherboard.

To distribute the paste over the processor, use:
- A plastic card or other small object with the same thickness (such as a SIM card);
- A special brush (blade), sometimes sold with thermal paste or bought separately;
- Wearing rubber gloves on fingers.
If the material accidentally left the processor, it should be carefully removed using a special solution.
For each type of paste, the answer to the question of which layer to apply it is different. For ordinary material, this is approximately 0.5 mm. For a paste containing precious metals, about 1 mm. Sometimes one drop squeezed out of the tube may not be enough for lubrication.
In this case, apply a second one and repeat the same steps.
You should also like the articles:
- Computer temperature measurement program - Tips for using
- Hard drive checker: how to diagnose an error?
Step 4. Finishing the job
After the paste is applied, the work is completed. Now you need to install the cooler on the chipset until the special fasteners snap into place and return the entire structure to the motherboard.
After that, the fan is connected to power, and the computer or laptop is assembled back.
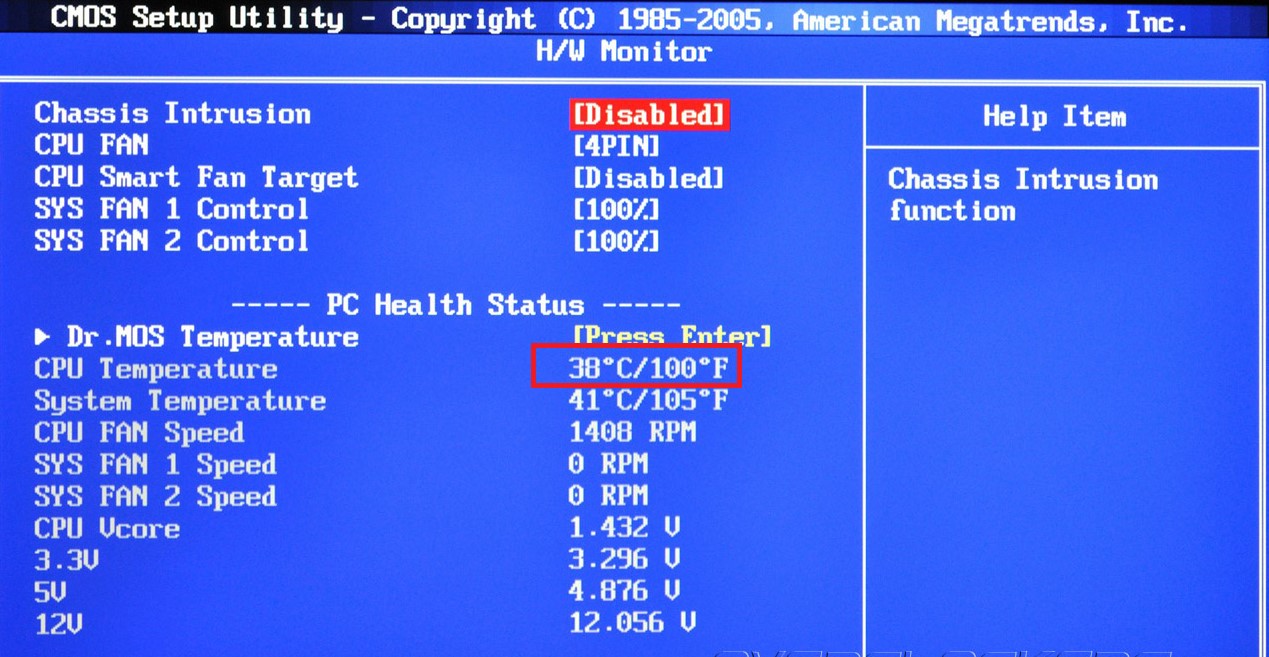
After turning on the PC, you should check in the BIOShow many degrees the system shows. On average, the processor should heat up to no more than 40 degrees. For AMD or Semptron models, temperatures up to 60-90 degrees are allowed.
Overheating of the computer, leading to a system freeze, interferes with the operation or gameplay (considering that during the game, both the central and GPUs receive a high load).
And in order to avoid such a situation, you should, first of all, apply thermal paste on time.
Secondly, perform preventive maintenance by providing proper care for the inside of the device - removing dust from time to time, and cleaning the vents.
And for PC users who are doing this kind of work for the first time, it's worth watching a video showing how to apply the paste correctly.
How to properly apply thermal paste to the processor
How to properly apply thermal paste to the processor.
How to apply thermal paste on the processor? detailed instructions and helpful tips
Is your computer overheating? Or do you collect it, but do not know how to apply thermal paste? Despite the fact that the application process is quite simple, this does not negate the appearance of all kinds of errors and problems. And if you do something wrong, then in the near future you will get serious cooling problems, which can lead to data loss or complete inoperability of your PC.
Thermal paste can be chosen according to many criteria, but the most important one that is really worth paying attention to is thermal conductivity. The larger this parameter, the more efficiently the paste will work. Of course, it’s good if you still check the composition and find there such components as:
- Silver;
- Ceramics;
- Carbon;
This is not a marketing ploy, but a sign of a good product, because these substances improve the thermal conductivity of the system. However, the truth is that the higher the thermal conductivity, the better thermal paste, and therefore, if you buy a paste with the highest level of heat conductivity, then there will certainly be these substances.
Take, for example, the most common model KPT-8. This is a good product and if you use it, then most likely the problems will not touch you for a long time. But, if you want to achieve the best result, then you need something better. The best thermal paste I could find is Coollaboratory Liquid Pro, and indeed any paste from this company. 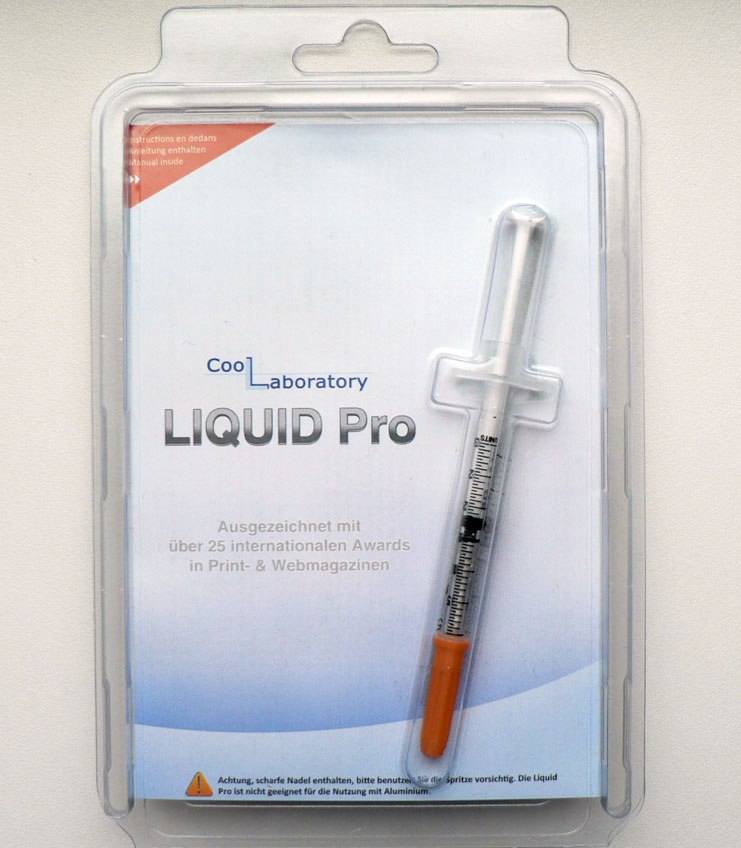
Here are the thermal conductivity values of KPT-8 and Coollaboratory Liquid Pro:
I think it's all clear. In case you don't find this particular model, here is a list of thermal pastes closest in quality to Coollaboratory Liquid Pro:
- Nanoxia Nano TF-1000;
- Liquid metal ZhM-6;
- Any Arctic company;
- Any Rosewill company;
At least some of this will definitely be in the store. Now let's figure out how to apply thermal paste for the processor.
Thermal paste application
Action plan:
- Clean the processor and heat sink from the old thermal paste;
- Correctly applying the paste to the processor;
- Correct distribution of the applied material;
Cleaning the processor and heat sink from the old thermal paste
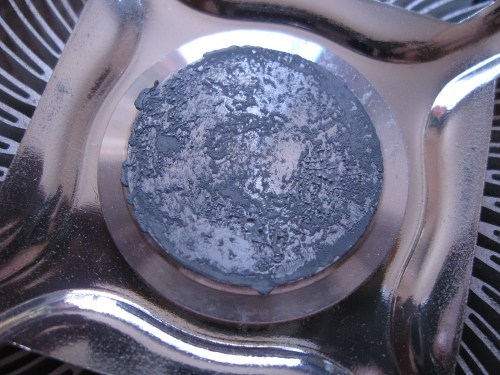
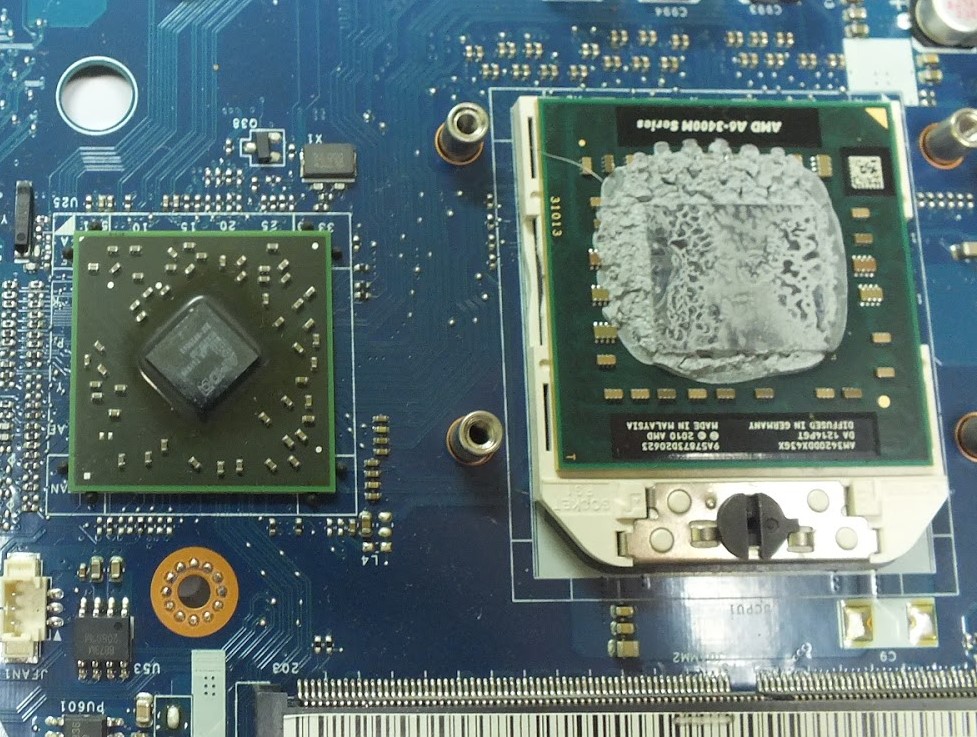
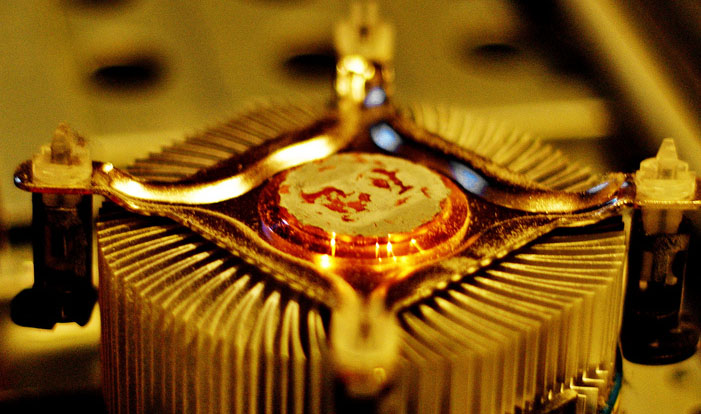
Residual thermal paste on the heatsink
Before applying a new thermal paste, it is necessary to completely clean the base of the radiator and the processor from the old one. You will need:
- Dry wipes, cotton swabs.
- Gloves.
- Isopropyl alcohol (if you can find it, it will be ideal, but you can do without it).
We need napkins and cotton swabs to remove residues, alcohol will be needed to speed up this process, but if you don’t find it, it’s okay. Gloves are needed in order to avoid touching the skin to anything. This should be avoided because the moisture on your skin can get on the metal and create the right conditions for rust to form.
Remember that the surfaces of the processor and heatsink are not smooth and have grooves that are invisible to our eyes, so be careful and check everything carefully. Because even the smallest remnants of old thermal paste can create problems in the future.
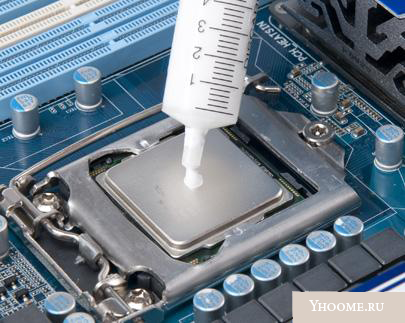
Correct application of thermal paste on the processor
After thoroughly cleaning the processor and heatsink, apply a bead of thermal paste directly to the center of the processor. Just a drop and only on the processor - this will be enough. This is because the area of the sole of the radiator is larger than the processor, so the thermal paste applied to it can interfere.
Proper distribution of applied paste
It is best to use the brush included in the kit (if any), but it is far from always available. Also, a regular SIM card or another, similar in shape, piece of plastic is perfect for us. Spread the paste evenly and in a thin layer.
How to distribute thermal paste on the processor
For completeness, I'll add a video:
Video instruction: how to properly apply thermal paste on the processor
Conclusion
That's all. Now it remains to place the cooling system back and connect the cooler to power, and then turn on the computer. You can test the result of your work in some shooter. Play for about an hour, relax, and then check if the computer has warmed up (just put your hand on it). If you feel that the temperature is clearly high, then you are mistaken in something. However, if you did everything according to the instructions, everything should be fine - good luck to you!
Portal website welcomes everyone who decides to replace the thermal paste on the computer processor on their own! Many of our visitors are faced with overheating of the processor. At the same time, a very small part of computer users knows how to change and apply thermal paste. In fact, if we are talking about the usual desktop computer(system unit), then replacing the thermal paste is not difficult.
We have already given a lot of tips on turning off the computer in the articles "," and "". All of these posts are useful in their own way. In them we have already answered quite a lot of comments on various particular situations. They are united by one problem - for many of our visitors, the computer overheats due to poor cooling of the processor. This is a very common cause, so we decided to tell you in detail how to get rid of it. But first, let's find out why the computer overheats and how to properly apply thermal paste.
Why is my computer overheating
What to do if the computer overheats? You need to find out the cause of overheating. Here are the most common reasons:
- CPU overheating due to insufficient cooling.
- Motherboard chipset overheating.
- The computer may overheat due to insufficient air circulation in the system unit.
In this article, we will talk about problems with the processor. To find out its temperature, you can also find the desired tab, which shows the current temperature. Depending on the generation of the processor, its normal temperature may vary. But if the processor temperature is above 50 degrees, and the computer overheats and turns off, you should think about replacing the thermal paste. Replacing the thermal paste on the processor does not take much time.
How to replace thermal paste
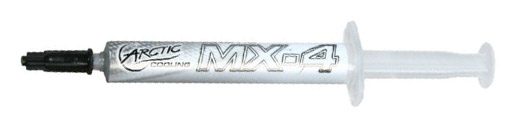
First, let's figure out how to replace the thermal paste, which has already worked out its own and is now not a good conductor of heat between and the radiator. There are many manufacturers of thermal pastes for processors. The most popular brands are: CPT 8, Alsil, Arctic And MX. Actually on CPT we advise you to stop. It is important to remember that any thermal paste dries out over time. How often to change thermal paste? We recommend changing the thermal paste at least once every six months, although modern processors they no longer emit so much heat, and the replacement period can be increased.
Thermal paste is a conductor of heat, so you need to apply it wisely. Let's go through all the stages of applying thermal paste together from opening the system unit to the application itself. We will assume that we figured out how to replace the thermal paste, let's move on to preparing for application.
Before applying thermal paste
Before changing the thermal paste, you need to get to the processor itself. IN regular computer the sequence of actions before replacing the thermal paste on the processor is as follows:
- Turn off the computer, turn off the power supply.
- Remove the cover from the case.
- To remove the heatsink with the cooler, you may have to unscrew the motherboard and disconnect all cables. Some models of coolers, such as regular ones from Intel, allow you to get to the processor without removing the motherboard.
- After removing the heatsink, the processor can be removed, so it is more convenient to spread the thermal paste.
With laptops and other portable gadgets, things are worse. Getting to the processor can sometimes be quite difficult.
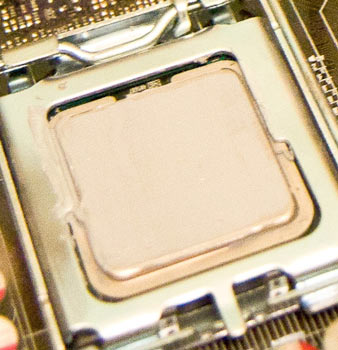
Applying thermal paste to the processor is easy. It is enough to wipe off the old layer of thermal paste. The processor must be completely clean, and all traces of the old thermal paste must be removed. After you clean the CPU, you can apply thermal paste to the processor. Just a small amount is more than enough - you need to apply a thin layer, because, as we wrote above, thermal paste is needed to transfer heat from the source to the radiator. The picture shows the approximate amount of paste.
After that, you just have to spread the thermal paste evenly over the surface. Applying thermal paste is best done with some convenient flat plastic object. If you decide to use your finger for this, then you will have to wash it later. If you overdid it and applied too much, it is better to remove the excess, they will only interfere with heat transfer.
Here's what the processor should look like with the new thermal paste applied:
If you are assembling a computer and need to install a cooling system on the processor, or when cleaning the computer, when the cooler is removed, you need to apply thermal paste. Despite the fact that applying thermal paste is a fairly simple process, mistakes are quite common. And these errors lead to insufficient cooling efficiency and sometimes to more serious consequences.
This guide will show you how to properly apply thermal paste, and will show you the most typical mistakes when applied. I will not go into how to remove the cooling system and how to reinstall it - I hope you know this, and even if not, it usually does not cause difficulties (however, if you have any doubts, and, for example, remove back cover battery from the phone you do not always succeed - better not take it).
What thermal paste to choose?
Firstly, I would not recommend KPT-8 thermal paste, which you will find almost anywhere that sells thermal paste. This product has some advantages, for example, it almost does not “shrink”, but still, today the market can offer somewhat better options than those that were produced 40 years ago (yes, KPT-8 thermal paste is produced that much).
On the packaging of many thermal pastes, you can see that they contain microparticles of silver, ceramic or carbon. This is not purely a marketing ploy. With proper application and subsequent installation of the radiator, these particles can significantly improve the thermal conductivity of the system. The physical meaning in their use lies in the fact that between the surface of the heatsink base and the processor there is a particle, say, silver and there is no paste compound - there is a large number of such metal compounds on the entire surface area and this contributes to better heat transfer.
Of those on the market today, I would recommend Arctic MX-4 (Yes, and other Arctic thermal pastes).
1. Cleaning the heatsink and processor from the old thermal paste
If you removed the cooling system from the processor, then be sure to remove the remnants of the old thermal paste from everywhere you find it - from the processor itself and from the sole of the radiator. To do this, use a cotton napkin or cotton buds.
Very well, if you can get isopropyl alcohol and moisten a wipe with it, then cleaning will be much more effective. Here I note that the surfaces of both the heatsink and the processor are not smooth, but have a microrelief to increase the contact area. Thus, careful removal of old thermal paste so that it does not remain in microscopic grooves can be important.
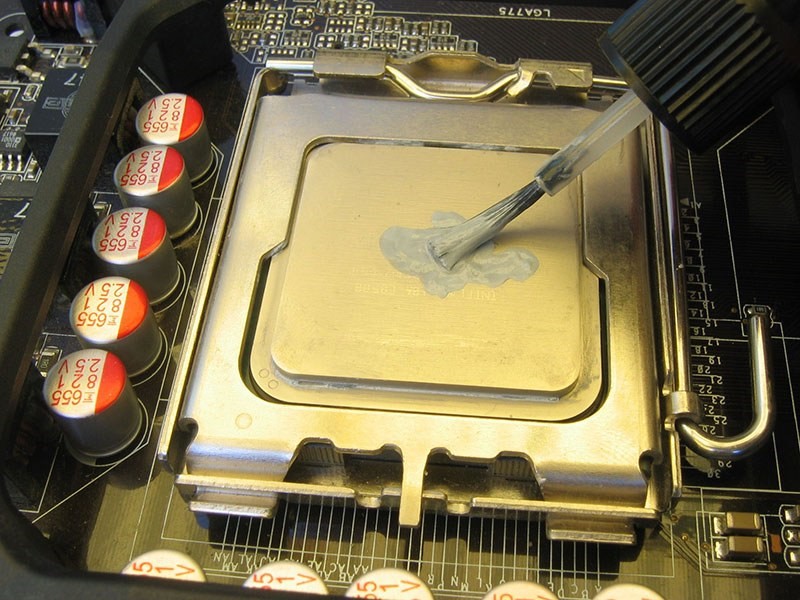
2. Place a bead of thermal paste on the center of the CPU surface
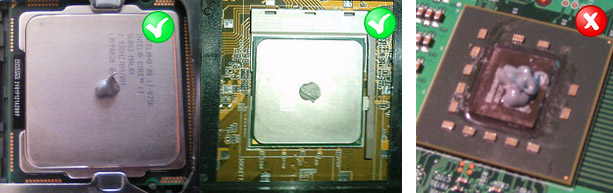
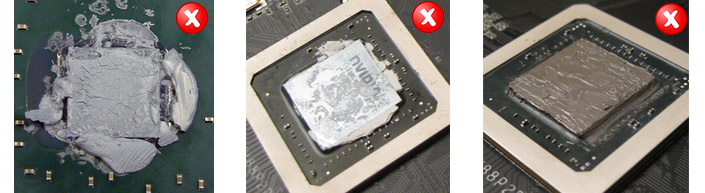
Correct and incorrect amount of thermal paste
It is the processor, not the heatsink - you do not need to apply thermal paste on it at all. There is a simple explanation why: the area of the sole of the radiator, as a rule, is larger than the surface area of \u200b\u200bthe processor, respectively, we don’t need the protruding parts of the radiator with thermal paste applied, but they can interfere (including closing the contacts on the motherboard if there is a lot of thermal paste).
3. Use a plastic card to spread the thermal paste in a very thin layer over the entire area of the processor
You can use the brush that comes with some thermal pastes, just rubber gloves, or whatever. The easiest way, in my opinion, is to take an unnecessary plastic card. The paste should be spread evenly and in a very thin layer.
In general, the process of applying thermal paste ends here. It remains to carefully (and preferably the first time) install the cooling system in place and connect the cooler to the power supply.
Immediately after turning on the computer, it is best to go into the BIOS and look at the temperature of the processor. In idle mode, it should be around 40 degrees Celsius.
There are many in computer assembly milestones but why is the application of thermal paste causing so much concern among novice builders, why is this happening? In part, the fears are justified, because not properly applying thermal paste or installing a cooler can lead to a freeze and a decrease in computer performance, which is at least, as a maximum, a failure of an expensive processor. Our little guide is designed to help in the development of beginner computer scientists correct installation processor and cooler.
What is thermal paste for?
The processor crystal hidden under a metal cap during its operation generates a sufficient amount of heat that must be removed from the processor. A cooler is used for this purpose. Which is pressed against the processor by the metal part of the workspace. Microscopic spaces inevitably remain between two metal elements (processor and cooler), no matter how perfectly polished the surfaces are. But air is not a perfect conductor of heat, which is why we use thermal paste. Thermal paste fills these microscopic voids and transfers heat from the processor to the cooler much more efficiently. There are several various types thermal conductive materials, including ceramic and metal pastes and solid, waxy thermal pads. Some coolers already have thermal paste applied, but we do not recommend using it, it is better to apply a more effective one, such as Arctic Silver 5 or Arctic Silver CERAMIQUE.
Preparing the processor and cooler
If you are reusing a cooler or if you have old thermal paste applied to the cooler, the first step is to remove the old thermal paste. You can buy a special thermal paste remover such as ArctiClean, but any alcohol containing liquid like vodka will do. Put a couple of drops on the old thermal paste and wait a minute for the alcohol to dissolve the thermal paste, now wipe with a dry, lint-free cloth. Repeat the procedure several times.
![]()
Apply thermal paste
We advise you to apply a drop slightly smaller than a pea in the center of the processor. Now gently spread the thermal paste all over the CPU with your finger, trying to apply a thin, even layer. The layer should be approximately such that the processor cover is slightly translucent. Press the cooler in its working position to the processor and slightly move the cooler to the left or right. Now snap the cooler mounts.
If you have any doubts, carefully remove the CPU cooler and see how the thermal paste behaved. If you see a uniform layer, then everything is in order, but if there are gaps, then it is better to repeat the operation. Make sure that the thermal paste does not leak over the edges of the processor, if this happens, remove the excess with a cleaning solution. .
I will add a short video to this post. I suggest you familiarize yourself with this method of applying thermal paste
Updated
After carrying out a number of replacements of thermal pastes from various manufacturers, I came to this conclusion.
How often do you need to replace the thermal paste in a home computer? Approximately once every two years.
How often do you need to change the thermal paste in a laptop? Approximately once every 1 year.
The thickness of the applied layer depends directly on the quality of the thermal paste. The thermal conductivity of the paste must be checked. As a rule, on cheap thermal pastes, it is at an average level or even below average. Such thermal pastes must be applied in a thin layer of about half a millimeter. Watch the video above.
On good thermal paste the applied layer can be up to 1 millimeter (even better), I tested the thermal paste based on gold powder.
Read more about thermal pastes and their thermal conductivity on this site http://www.kakras.ru/mobile/thermal-conductivity.html


