Included in standard Windows tools 10 includes a utility for calibrating the image on the monitor (display) screen of your computer or laptop. It allows you to adjust the color, brightness and contrast of the screen for the most comfortable work in your conditions.
Note: In this article we will not delve into the professional intricacies of calibrating screens using special software or equipment. This manual describes the procedure for setting up your monitor using standard using Windows, no download required additional programs. It is perfect for beginners who have noticed any deviations in the picture quality of a laptop or desktop computer screen, or simply want to slightly adjust the image to suit themselves. The perception of color/contrast/brightness is purely individual, so you should be guided by your own instincts, but not go too far.
One more note: All procedures must be carried out with account administrator. Otherwise you will need an administrator password.
Calibrate your monitor or display in Windows 10
You can go directly to the monitor or display calibration interface in Windows 10 by entering the command in the window Execute. Click Win+ R and enter dccw.
If you are not looking for easy ways, then you can find the screen calibration menu using the following path:
- Open Settings – System – Screen. Go down a little and find the item Graphics adapter properties.

- In the window that opens, find the tab Color management.

- A larger window will open. On it you need a tab Details. Open it and then click the button Calibrate screen at the bottom of the window.

- This will open the screen color calibration wizard.

- The first step is to adjust the gamma. Before directly Windows setup will show you examples of incorrect and correct calibration.

- Try to adjust so that the picture complies with the standard, but no one forbids you to set the parameters that suit you.

- If you don't like the setting, use the button Reset.
- The next step is to adjust the brightness and contrast. If you do not need to configure these settings, click Skip brightness and contrast settings.

- At this stage, you will need to use the image controls of the monitor itself. Each manufacturer has menus and control buttons made differently. How to change the brightness and contrast of your monitor should be indicated in the instructions for the screen - contact it for help, or google it. At this step, Windows will only show sample images for accurate calibration.

- Click Further and start experimenting.

- Adjusting the contrast will help you set the values to properly display the brightness of the highlights. Again, follow the on-screen prompts and sample images, and then adjust the picture in the menu the monitor itself.

- Next is adjusting the color balance. Here calibration is already done using the system (although almost every monitor has the ability to change the color balance in the menu - try playing with these parameters too.

- You want to make sure that the large bars on the screen remain as gray as possible. If you notice impurities of other colors, eliminate them with the red, green or blue sliders.

- At the final stage, you can compare the color settings you created with the previous preset. To do this, click on Previous calibration. Button Current calibration will display the parameters you created.

- To save the new settings, click Ready. Button Cancel will return everything to its previous state.
How to set up ClearType
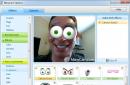
Please also note the point Launch the setup tool ClearTypeafter clicking the "Done" button. With it, you can adjust the quality of font display on the screen. We recommend that you spend another three minutes to fine-tune the monitor's operation as accurately as possible.

In these two screenshots above, you can see the difference between ClearType enabled (top) and disabled (bottom). It’s unlikely that anyone will want to voluntarily turn it off, but someone will definitely need more precise settings.

If you want to configure ClearType without calibrating the screen, then you can do this in the following ways:
After this, configure the fonts as described above. Spend a few minutes fine-tuning your screens. The result of your work will be a more pleasing picture to the eye, which will have an extremely positive impact on your experience of using your device.
Below are answers to some frequently asked questions regarding pen setup and touch device on Windows 8.1 system.
How do I know if my computer has a touch screen?
Try pressing the tile with your finger home page. If the screen is touchscreen, the application will open. You can also check your current system settings using your mouse:
Calibrating the tablet display
Most problems are caused by driver incompatibility. This is even more likely if touch screen will stop working between you. If you are still not sure, you should wait. Do a system search to troubleshoot and select the appropriate result.
The tool will automatically detect problems and then repair them. However, this is by no means comprehensive and you may need to continue reading. When your touchscreen is slow to respond or records your touch gestures inaccurately, it may require recalibration to get it up to speed.
- Select the lower right corner of the screen, move your mouse up, select the Settings panel, then click Change PC settings.
- Select Computer and devices, and then select Computer information.
- In chapter Computer check the setting Feather and touch input , which determines what type of input the screen supports.
If your device has a touch display, touch input is enabled by default and cannot be disabled.
Disable and re-enable the touch screen
Do a search for the system and select "Calibrate screen for pen or touch." Closest fix: "Have you tried rebooting?" This is a technical tip that throws around a lot, but there's a reason: it works. We explain why. which should have been your first step, disables and re-enables the touchscreen.
This is one of the most simple solutions, but it doesn't always work. In fact, you may find that the problem still continues after rebooting the system. If so, please read. A driver is a piece of software that helps your hardware, such as your touchscreen, communicate with your computer's processor. Thus, touchscreen malfunctions may be caused by a faulty driver.
How do I calibrate pen and touch device settings?
To configure pen or finger touch detection accuracy settings:
- Enter your query in the search field Calibration, then click the button Screen calibration
- Click the Calibrate button and then follow the instructions that appear on the screen.
What should I do if, after calibrating the pen and touch device settings, I can’t open the function panels?
If you are calibrating your pen and touch device settings, if quickly moving away from the right edge of the screen does not display the feature bars, it is likely that Windows is not recognizing the edge of the screen correctly as a result of the screen edges being reset during calibration. Try the following steps to calibrate your pen and touch device settings.
You want to automatically search for updated driver software. Follow the wizard if necessary, then restart and check if your problem is resolved. If not, try going directly to the manufacturer's website, looking at their drivers page, selecting your device number, and downloading the latest driver.
When you download this driver, you will be able to extract it and install it automatically. For getting additional information about updating your drivers, check out our guide on how your drivers may be outdated and need updating, but how will you know? First of all, don't fix it unless it's broken!
- Open the Function Panel using the keyboard shortcut: Windows Logo Key+C. Then click the Search button.
- Enter your query in the search field Calibration, then click the button Screen calibration at a pen or touch angle to open the tablet settings window.
- Make sure the monitor in the Screen window matches the screen you want to adjust.
- Click Reset You may be required to enter an administrator password to confirm your selection.
Unfortunately, not all driver versions work equally well. If it is indeed driver updates that are causing problems, you should try reverting to default. Then go to the Driver tab and select. If you know there is a specific older version of the driver that will work, but you won't be able to get to it through a rollback, on the Driver tab, select Uninstall and then follow the method in step 4 above.
Now you can pick and choose. This has benefits, like improved security, but it can also go wrong. Hopefully our advice above has resolved any issues you had with your touchscreen. If you've never been able to get your touchscreen to work, especially if it's on multiple operating systems, contact the manufacturer for support.
If resetting your device's pen and touch screen settings does not help, try calibrating again by pressing Calibrate, then follow the onscreen instructions. To ensure that the Windows operating system correctly detects the edge of the screen, try gently dragging closer to the center of the screen while touching the calibration points.
For related touch content, if you're having trouble with your tablet screen, check out our guide on how. Some products may not be available in your country or region. Before you look at the solutions below, here are some things you need to know.
The solutions most likely to solve your problem are at the top. If you're having trouble touching only the item you want, try using a surface pen or other capacitive stylus. To find out more, watch. . Use a soft, lint-free cloth dampened with water or eyeglass cleaner, but do not apply liquids directly to the screen.
How to set up touch input on your screen?
If you have two monitors, one of which is touch, the touch input signal may not work as expected. For example, clicking on one monitor causes the cursor to move on the second. To solve this problem:
- Quickly slide your finger inward from the right edge of the screen, and then click on the Search bar. (If you're using a mouse, select the top-right corner of the screen, move the mouse pointer down, and then click on the Search bar).
- Enter your query in the search field Calibration, then click the Calibrate button to open the tablet setup window.
- Click the Setup button, and then follow the instructions that appear on the screen.
How do I change the actions of my pen and touch device?
To change speed, range, and duration:
Solution 3: Install the latest updates
You will need a keyboard or mouse connected to your surface. Sometimes all you need to get your touchscreen working again is a reboot. Your touchscreen may not be working because you don't have the latest updates.
Solution 5: Disable and enable the touch screen driver
You will need a keyboard or mouse connected to your surface, as in the solution. If the two button shutdown doesn't work, try the following.
Solution 6: Reinstall the touchscreen driver
If disabling and re-enabling your touchscreen driver doesn't work, try the following.- Quickly slide inward from the right edge of the screen, and then click on the Search bar. (If you're using a mouse, select the top-right corner of the screen, move your mouse pointer down, and then click on the Search bar.)
- Enter a phrase in the search field pen and touch input, and then click the Pen and touch button.
- Tap or select the action you want to configure, and then select Settings.
- Follow the instructions that appear on the screen.

Solution 7: Reset touch screen calibration
Your surface will automatically download and install the touchscreen driver when connected to the Internet. If solutions 1-6 do not work, recalibrate the touchscreen. After your surface has cleared the recalibration data, test the touchscreen to ensure it is responding appropriately.
Check electromagnetic interference
Solution 8. . Sometimes others electronic devices nearby may interfere with the touch screen or move the cursor to the surface unexpectedly.If we say what multi-touch is in a tablet in ordinary words, then it is its ability to recognize several touches at the same time. So, the first tablets had resistive displays and could only understand one touch (+ there was an imitation of the second). True, this is also considered multi-touch. After the advent of capacitive models, the possibility of multi-touch appeared. At first there was an understanding of only two touches, but now their number reaches 10.
Solution 9: Restore or reset your surface
The culprit could simply be a power strip or lamp on your desk, or it could be something like large equipment or banks of computers. Turn off all other devices in the area and then turn them on one at a time to find out which device is causing the problem. If you don't find the source of the problem, check nearby rooms for more powerful equipment that may be causing electronic interference. If you are still having problems with your touch screen, try restoring or resetting your surface in this order.
- Device management
- Special Applications
The system uses multi-touch to control widgets and other system applications. Much more possibilities are implemented in third-party applications. For example, Google Maps perfectly demonstrates the capabilities of multi-touch. With just two fingers you can go anywhere on Earth.
Solution 10: Submit your surface for service
If the touch screen still doesn't work after these steps, your surface needs servicing. If your touch screen doesn't respond correctly to touch, try these solutions. Section “What to do if the surface screen is damaged.” . Section "Cleaning and caring for your surface." If the touch screen still does not work properly, go to Solution 2.
Solution 2: Reboot the surface
To complete the remaining troubleshooting steps, you will need a keyboard or mouse connected to your surface. Here's how to reset your surface when your touchscreen isn't working. If the touch screen still does not work, go to Solution 3.

Interesting technology implemented in Windows systems. You can program your own gestures. That is, to give each movement almost any function or option.
But in games, multi-touch reveals its full potential. They often use a joystick on which you need to press several buttons at the same time. For example, take the game Mortal Combat, where you need to press different combinations of buttons to achieve certain hits, combos and fatalities.
Resetting your touch screen settings
The touchscreen does not need to be recalibrated, but if someone recalibrates it, it may affect its performance. Here's how to check the calibration and restore the factory default calibration if necessary using your keyboard or mouse.
Solution 4
Enter calibration, use the arrow keys to highlight "Calibrate screen for pen" or "touch input" and press Enter. Press the Enter key until the Yes button is selected, press Enter, and follow the onscreen instructions. After your surface has cleared the recalibration data, check the touchscreen to make sure it is responding correctly. Go to solution 4. . Here's how, using your keyboard or mouse. If the touch screen still does not work after you have installed Latest updates, try Solution 5.

How to check multitouch on a tablet? It's easy to check multitouch. There is a primitive way. Right at the inspection site, launch the camera and take a photo. Open it and, by moving two fingers apart and sliding on the display, see if the picture enlarges/shrinks.
To check for more than 2 touch points, download one of the special programs. For example, Multi-Touch Tester. It is small in size and immediately determines the number of possible touches. In addition, you can personally see the result by touching the display again.
Solution 5: Check for EMI
Sometimes other electronic devices can interfere with the touch screen. For example, they may cause the cursor to move unexpectedly. The culprit could be as simple as a nearby power strip or a lamp on your desk, or it could be something like large pieces of equipment or banks of computers.
If your touchscreen problem only occurs in certain areas, you may be getting electronic interference. If you think your touchscreen is experiencing interference, turn off devices in the area where you use your surface until you can determine the source of the problem. If you do not find the source of the problem in the room where you are using your surface, check adjacent rooms for more powerful equipment that may be creating electronic interference. If the touch screen is still not working properly, try Solution 6.

Calibrating the tablet display
Calibration is needed so that your gadget responds adequately to the touch of your fingers. An uncalibrated device behaves as follows. For example, you write an SMS, press the letter “A”, and the display shows the letter “K” or “E”. Not very convenient, right?
Solution 6: On/off switch
Use this two-button stop process to ensure your surface is completely disabled. After your Surface turns off, press and hold the Volume Up button and the Power button at the same time for at least 15 seconds and then release both. After you release the buttons, wait 10 seconds. Press and release the power button again to turn your surface back on. Use the arrow keys to highlight Shut Down and press Enter. . If the touch screen still doesn't work, try Solution 7.
Calibration in Windows
Since the tablets contain several Windows options, then there are several ways to calibrate the screen. Or rather, there are several ways to get into a special application for this. In inferior Windows (such as Windows 8 CP), you need to open the general settings. Almost at the very bottom of the window there will be a treasured button. In full versions, the option is located in screen personalization.
Solution 7: Restore, refresh, or reset your surface
If you're still having problems with your touchscreen, try restoring, refreshing, or resetting your surface, in that order. Restoring your surface is a way to undo recent system changes that may be causing problems. Restoring your Surface doesn't change your personal files, but it may remove recently installed apps and drivers.
Other apps and your settings will disappear. You can reinstall them after the update is complete. Reset supports apps installed on your Surface. If you have trouble accurately selecting objects on the screen using touch, you can calibrate the screen alignment. If your touchscreen is not calibrated well, you may not be able to press the Calibrate button. Find the orientation lock on your tablet. If orientation lock is enabled, the screen will not rotate between portrait and landscape orientations. The screen displays lines all the way around, forming a box near the edge of the screen and a second box inside the first half inch from the edge. Lines connect these cells near each corner. The result was 16 intersections. Starting at the top left corner, use your finger or stylus to tap each intersection, which displays two short black lines that form a crosshair. If this touch is accepted, the crosshair will move to the next intersection to the right. If not, click the previous intersection again. As the crosshair moves, tap the highlighted intersection from left to right, down, and then left again. The process takes much more time than reading. What to do if you don't have a mouse? Once you have selected each of the 16 calibration points in turn, a window will appear asking if you want to save the calibration data.
- Then select Calibrate Screen for Pen or Touch.
- Ignore the order selection option where your screen rotates.
Often after printing digital photos on a color printer, users are faced with the problem of colors not being displayed correctly.
Those. The photo looks completely different when printed than when viewed on the screen.
To fix this problem, calibrate the laptop screen.
Monitor calibration is a procedure for adjusting its color gamut in order to bring the colors displayed on the device screen as close as possible to the real colors that the user will receive after printing.
After performing the calibration procedure, the image will be almost the same on different computers with different displays.
Display calibration is mainly dealt with by people whose field of activity is related to video and photo editing (both professionals and amateurs), artists and designers, as well as web designers.
The disadvantages of uncalibrated displays include:
- inaccurate representation of colors and shades,
- loss of detail in light and dark areas,
- incorrect brightness and gamma values,
- incorrect display of web page design,
- eye fatigue after working with a computer.
It should be noted that displays on an IPS matrix, although to a lesser extent, also need calibration.
As a rule, a special device is supplied with the monitor. software to perform calibration.
Maybe these articles will also be of interest to you:
- Why might the monitor not turn on? - Common causes
- Top Tips: How to Change Monitor Screen Resolution
Screen calibration methods
There are two approaches to display calibration - hardware and software. The most accessible for the average user is programmatic method calibration.
Software calibration, as a rule, does not allow one to reach the level of hardware calibration, but this method should not be neglected.
The hardware method is more expensive both from the point of view Money, and from the qualifications of the person performing the calibration. The hardware approach can be divided into 3 key stages:
The monitor is adjusted (color, brightness, contrast) in such a way that in the adjusted position it meets the requirements of the equipment (spectrophotometer and calibration software).
Configuring the video card for linear operation mode.
Testing the system and saving the changed settings to the monitor color profile.
Advice! For simplified hardware calibration, you can print the image on a color printer, and then change the display parameters to achieve maximum similarity between the digital and printed image.
Preparing to calibrate the screen
The first thing you should start with is resetting the video card settings; all settings should be brought to the standard form.
Before performing calibration, a very important indicator is the temperature of the matrix.
To achieve a uniform temperature, it is necessary to select a video sequence with a total duration of about 4–5 hours, with a dynamic image, having first expanded the viewing window to full screen.
These manipulations will allow uniform heating of all areas of the display matrix.
The next stage is choosing the right level of lighting. Initially, we recommend working on lighting stability.
This can be achieved by performing calibration on a sunny, fine day in the afternoon.
At this stage, our task is to obtain the most calm, stable and soft light. It should also be taken into account that LCD displays tend to distort colors depending on the viewing angle.
- Instructions: Connect your phone to the TV - favorite photos on the TV screen
We calibrate the screen using programs
Screen calibration using Windows is quite trivial and is more suitable for desktop computers than for laptops.
To configure, you need to go to Start, write “calibration” in the search bar, and then go to the corresponding menu.
To begin calibration, you must click the “Next” button, after which the setup will be performed using the Calibration Wizard, each step of which is provided with detailed explanations in Russian.
There are quite a large number of programs for performing screen calibration.
In this article we will look at just one of them - Atrise Lutcurve.
The program is paid, but has a 30-day trial version, Russified user interface, as well as clear instructions for working with each program mode.
The installation of the program is unremarkable, so we will not focus on it, but will move directly to calibration.
Important! To improve the quality of calibration, before performing it, follow the recommendations described in the previous paragraph. When making adjustments, you need to fix your gaze and try not to change it until they are completed.
We launch the program, go to the first tab “Black Point” and make the settings.
The essence of the setting is to change the parameters “Black” and “R” “G” “B” until the squares “2,2,2” and “3,3,3” are visible, and the background should remain as black as possible, and the square “1,1,1” should be on the verge of being distinguishable.
When setting up, you should first use the ability to adjust the brightness in hardware (in laptops this is a combination of the Fn key and function keys from F1 to F12) and only then, after exhausting the hardware capabilities, should you configure it in the program.

Go to the “White Point” tab and adjust the contrast so that you see the squares “252,252,252” - “254, 254, 254”.
When adjusting, you want to get as neutral a white as possible, with no tints.

We adjust the gamma in the corresponding tab. In this setting, we should get the color of the vertical columns to differ as little as possible from the background.
Ideally, everything should be gray, although easily distinguishable color is acceptable.
It is acceptable to leave the top and bottom of the columns colored, but the middle part should be completely gray.

If your monitor supports sharpness adjustment, you can adjust it in the Gamma and Sharpness menu.
The essence of the adjustment is to make the squares less visible both among themselves and against the background.
The clarity of the monitor is not adjusted correctly if the stripes of squares differ sharply from each other in brightness.

In the next tab “Color Balance” you can fine-tune the color temperature of the image.
To do this, you need to make the light, dark and mid-tone grays as desaturated as possible.
After this, you need to return to the previous settings points, seeking a compromise on all parameters.

The “Adjustment points” tab allows you to adjust the brightness transfer curve from black to white (0...255).
By moving the curve position from 0 to 255, you need to find the points where a color tint appears in the image in the center and adjust them from color to gray.

Let's move on to last tab- “All regulators.” It is necessary to make sure that the brightness transfer curve does not have kinks and does not cut off the edges of the range.

Monitor calibration from A to Z. Calibration quality criteria. Alexey Shadrin
Instructions: Calibrating a laptop screen - adjusting color rendition
Improving image quality using the side buttons on the monitor is not always enough to ensure that the indicator is at the peak of good display. The built-in calibration tool in Windows 10 will allow you to make sure that your monitor can show much better. For content producers, the main thing is to make sure that the work appears on other devices with the same standard quality. For ordinary users, viewing of movies and photos will be improved. Before calibrating your monitor in Windows 10, reset your monitor settings to factory settings and turn off the lights in the room to avoid glare.
Where are the monitor calibration settings?
1 way. Since Windows 10 is updated and the location of the settings changes all the time, I decided to add two ways to enter the Monica calibration parameters.
- Open " Options"and just write in the search" Monitor color calibration".
- After opening a new window, proceed to the bottom method "How to adjust colors using the color calibration tool".
Method 2. Right-click on your desktop and select Display Settings.

In the window that appears, click " Extra options screen".

Here we come to the two parameters that we need: “Color Management”, “Color Calibration”. Let's look at these two parameters in detail below.

How to use color management in Windows 10
To calibrate your monitor in Windows 10, you need to use "color management", which shows preset profiles for your monitor. The "Devices" line shows the profiles of all connected devices to the computer and associated profiles. The "All Profiles" tab displays all available profiles. Select several options to see how they appear. For truly accurate results, you can create a color profile using the Color Calibration feature.

How to Adjust Colors Using the Color Calibration Tool
To adjust colors and calibrate your monitor in windows 10, you need to use the monitor buttons to adjust specific color aspects. Drag the welcome window onto the calibration monitor. Even if you have several monitors of the same brand and model, you need to configure them individually. Click Next.

The wizard shows that gamma controls the amount of light emitted from a particular color. By clicking "next" you can use the slider to make adjustments.

Achieve minimal visibility of small dots in the center of each circle, as the master tells us.

Brightness and contrast will be adjusted from your buttons on the monitor. Some monitors have buttons that immediately adjust the brightness and contrast, while on others you will need to go into the menu on the monitor and select these two options there. To start setting up, click next.

Adjust the brightness level so that the shirt does not blend into the suit, and the X is barely visible, as the master suggests.

Adjust the contrast according to the middle pattern as recommended.

WITH color balance, colors should not “bleed” into gray tones. Click next to adjust.

Drag the sliders to calibrate the colors.

You can now switch between the previous calibration and the current one. If everything is satisfactory, click done, otherwise click cancel to cancel.

Troubleshooting problems that may arise
If the colors still don't look right, then most likely your video card has failed or your monitor needs to be replaced. Try connecting another monitor to your computer and check. If the problem persists, you will need to replace the video card or check it by replacing it with another one. Correctly calibrating your monitor in Windows 10 will significantly improve the quality of work for photographers, videographers, graphic designers and creative individuals. Improves the quality of images and computer games.
Improving image quality using the side buttons on the monitor is not always enough to ensure that the indicator is at the peak of good display. The built-in calibration tool in Windows 10 will allow you to make sure that your monitor can show much better. For content producers, the main thing is to make sure that the work appears on other devices with the same standard quality. For regular users, viewing movies and photos will be improved. Before calibrating your monitor in Windows 10, reset your monitor settings to factory settings and turn off the lights in the room to avoid glare.
Where are the monitor calibration settings?
1 way. Since Windows 10 is updated and the location of the settings changes all the time, I decided to add two ways to enter the Monica calibration parameters.
- Open " Options"and just write in the search" Monitor color calibration".
- After opening a new window, proceed to the bottom method "How to adjust colors using the color calibration tool".
Method 2. Right-click on your desktop and select Display Settings.
In the window that appears, click "Advanced display options."
Here we come to the two parameters that we need: “Color Management”, “Color Calibration”. Let's look at these two parameters in detail below.
How to use color management in Windows 10
To calibrate your monitor in Windows 10, you need to use "color management", which shows preset profiles for your monitor. The "Devices" line shows the profiles of all connected devices to the computer and associated profiles. The "All Profiles" tab displays all available profiles. Select several options to see how they appear. For truly accurate results, you can create a color profile using the Color Calibration feature.
How to Adjust Colors Using the Color Calibration Tool
To adjust colors and calibrate your monitor in windows 10, you need to use the monitor buttons to adjust specific color aspects. Drag the welcome window onto the calibration monitor. Even if you have several monitors of the same brand and model, you need to configure them individually. Click Next.
The wizard shows that gamma controls the amount of light emitted from a particular color. By clicking "next" you can use the slider to make adjustments.
Achieve minimal visibility of small dots in the center of each circle, as the master tells us.
Brightness and contrast will be adjusted from your buttons on the monitor. Some monitors have buttons that immediately adjust the brightness and contrast, while on others you will need to go into the menu on the monitor and select these two options there. To start setting up, click next.
Adjust the brightness level so that the shirt does not blend into the suit, and the X is barely visible, as the master suggests.
Adjust the contrast according to the middle pattern as recommended.
With color balance, colors should not "bleed" into gray tones. Click next to adjust.
Drag the sliders to calibrate the colors.
You can now switch between the previous calibration and the current one. If everything is satisfactory, click done, otherwise click cancel to cancel.
Troubleshooting problems that may arise
If the colors still don't look right, then most likely your video card has failed or your monitor needs to be replaced. Try connecting another monitor to your computer and check. If the problem persists, you will need to replace the video card or check it by replacing it with another one. Correctly calibrating your monitor in Windows 10 will significantly improve the quality of work for photographers, videographers, graphic designers and creative individuals. Improves the quality of images and computer games.