IN Lately Notebooks on rings are becoming increasingly common. And this is no coincidence; the convenience of such a notebook is invaluable. Sheets can be swapped, pulled out, but the most amazing thing is that you can print on them. How? I'll tell you about this now. I would like to make a reservation in advance that the main condition for printing on such sheets is the presence of a printer with an adjustable rear tray. Without this there is no way.
So first we need to create the sheet template that we have.
1. Create a new document in Microsoft program Office Word(I have the 2010 version), go to the “Page Layout” / Size / Other page sizes ... tab and set the size of our piece of paper on which we are going to print.
2. We measure the margins of our sheet in a box (that is, the distance from the edges of the sheet on four sides to the area where the text will be) and set the values for the document in the program (Page Layout / Margins / Custom Margins...).
3. So that we can visually see where our cells are, turn on the grid.
In the 2010 version, this is possible only in one way: add some shape, for example, an arrow (Insert / Shapes / Arrow), click on this shape and go to the “Format” tab, here click on the “Align” button (on the right, near setting the width and height of the object) and select “Grid parameters”, check the boxes wherever possible, set the grid step: horizontal and vertical - 0.5 cm (standard cell, you can use other values, depending on the size of the cell your sheet); where it says “Show grid”, set horizontal and vertical – 1.
A grid appeared. Now the document in the program resembles a notebook sheet. However, it is necessary to ensure that the text follows exactly the cells. More on this in step four.
4. Click select all (Home/ Select/Select all or the combination Ctrl+A), go to the “Home”/Paragraph tab, set the following value: line spacing – exactly – 14.2 pt., check the “Do not add spacing” between paragraphs of the same style.
5. Again, select everything and choose any font we like, size 14.
6. Save the document as a template (for example, in *.dot or *.dotx format).
Now we have a template that we will always use as a basis. Close the document and open it again.
Next, enter the text we need and edit it. It is advisable to download cursive Propisi and use it (when I type in a notebook using this font, everyone thinks that I write so beautifully myself).
There may be problems with the margins, so before printing you should check whether the size of the margins on the piece of paper corresponds to the settings set in the program. If not, we need to fix it.
You can now print the document. In the printer parameters, set the following: sheet format – A5, paper feed – rear tray.
The printed sheet is ready. Students and other business people! Spend a few hours learning how to print on checkered sheets, and you can be sure that someday you will save more than one hour while doing your schoolwork.
Sometimes students have a situation when lectures are needed urgently, but they have neither the time nor the desire to rewrite them by hand. An excellent solution to this problem would be to print lectures on checkered notebook sheets. I present to your attention detailed instructions How to print on a notebook sheet. So,
First, let’s talk about what we will need: a computer, a printer (preferably inkjet, even better if it is color, in which case the text will look completely natural. Black and white will also do, you can refer to the fact that the text was written with a black gel pen) , tape, stationery or any other knife, a blank notebook.
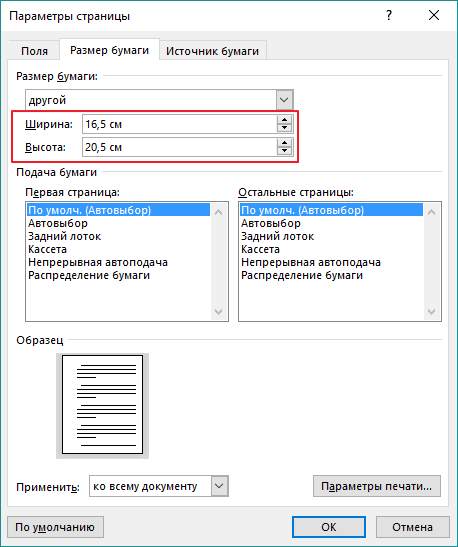
Create a new one Microsoft file word, set custom page sizes in it Layout > Size > Other Paper Sizes:
In the window that opens, you need to set the following dimensions:
Width: 16.5 cm
Height: 20.5 cm:
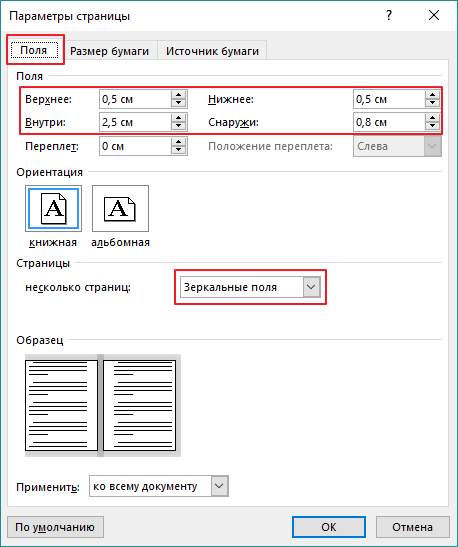
Let's set up the fields:
Top: 0.5 cm - the indentation from the top edge depends on how the first cell is printed on top of the sheet. If it is whole, then 0.5 cm will be what you need. If it is cropped, you need to use a ruler to set the top margin to that size.
Bottom: 0.5 cm
Inside: 2.5 cm
Outside: 0.8 cm
You also need to select "Mirror Fields" so that the pages are printed correctly, since on one side of the page the margins are on the left, and on the other on the right:
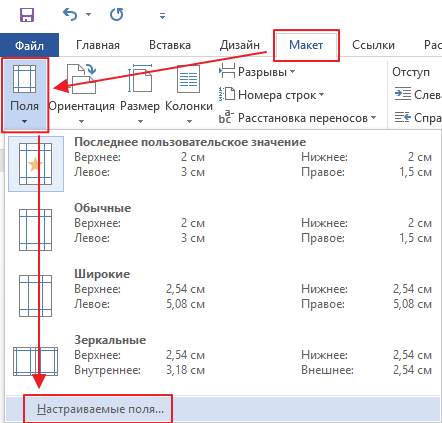
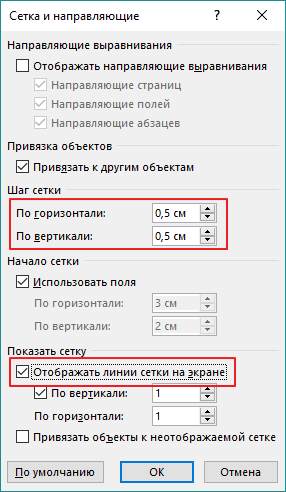
Now, in order to see how the text will be located in the notebook cells, you need to add a grid. The grid is not printed and is only for convenience. Go to the tab Layout > Align > Grid Options:

In the window that opens you need to install grid pitch 0.5 cm and check the box “ Show grid lines on screen»:
A grid should appear. If the indentation at the top was set correctly, then the grid will exactly correspond to the location of the cells in the notebook.
Insert the required text. So far it doesn't look quite right, but there's still more to come. To make the lecture look like a handwritten lecture, you need to use a cursive font.
This can be any handwritten font you like, in this example the font Eskal is used.
Now you need to format the text so that it fits exactly into the cells.
Escal font. .
Font size 16
Line spacing is set manually. Go to the tab Home > Line spacing > Other line spacing options:
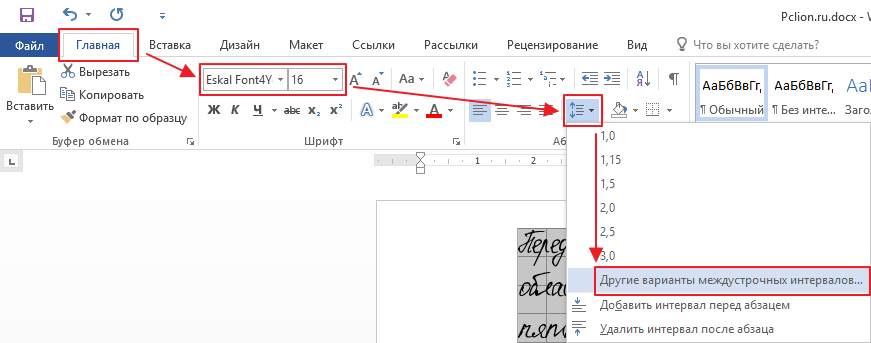
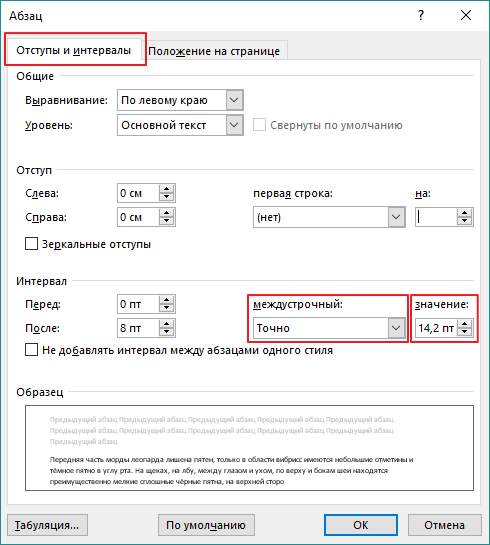
In the window that opens, install line spacing « Exactly», value 14.2 pt:
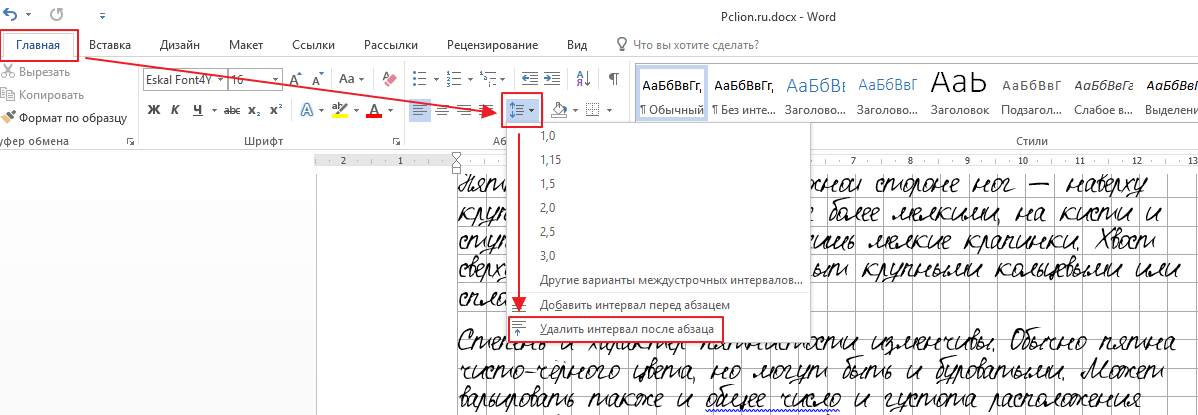
Much better now. Remove spacing after paragraph so that the lines do not extend beyond the cells:
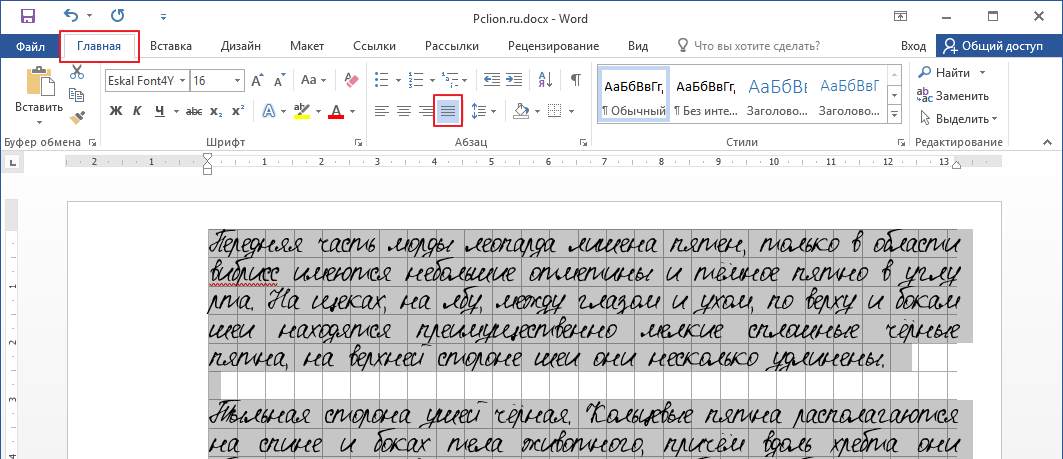
Select the text, set the width alignment:
Enable automatic word hyphenation:

If you did everything correctly, the text will look like this:
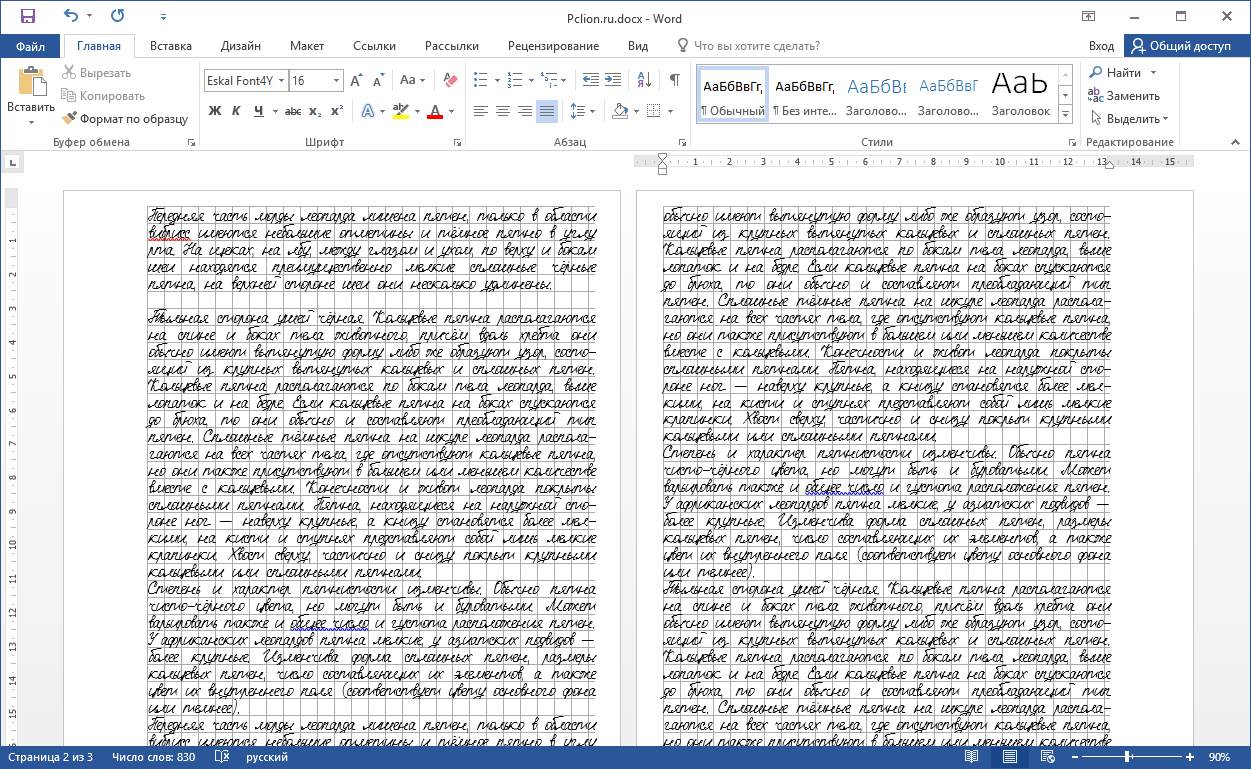
Perfect! Everything is ready for printing.
Now you need to remove the sheets from the notebook and print the text on them. Depending on what printer you have, there may be 2 printing options.
1 - on inkjet printer You can try printing on double sheets. The sheet must be folded tightly in half and printed on each side, folding it correctly each time. This method is more complicated; you need to follow the order of the pages, since the left side of the sheet is at the beginning of the notebook, and the right side is at the end. Carefully! The printer may jam a double sheet. Therefore, if you don’t want to take risks or if you are afraid of mixing up the sheets, then it is better to cut them in half and then glue them with tape.
2 - on laser printer The sheets must be cut in half, then printed on them, glued with tape and inserted into a notebook.
The result is a perfect lecture:
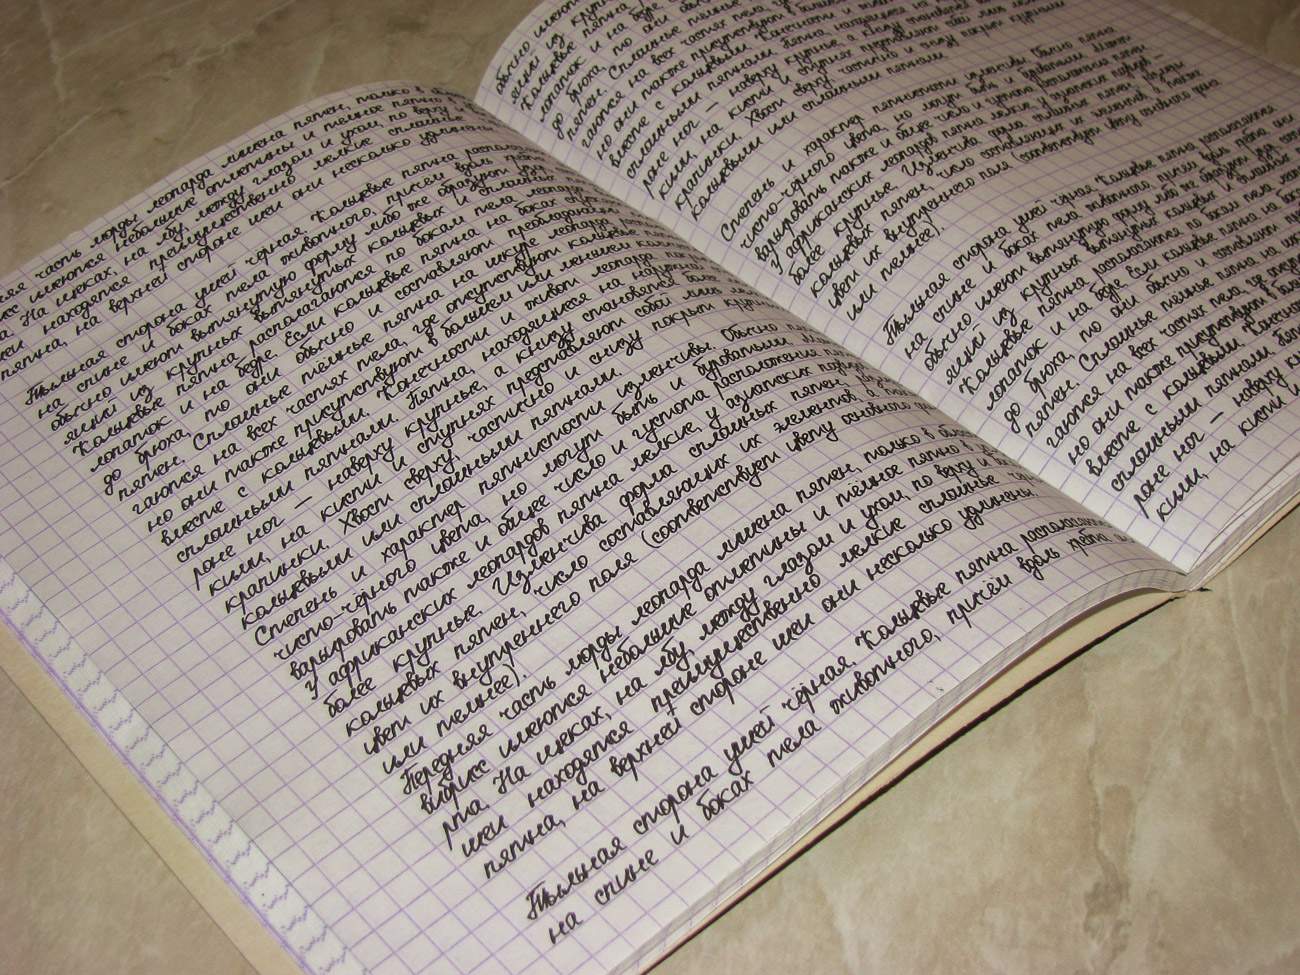
Ready lecture. Click to enlarge.


