Acorp has long been a leader in the supply of OEM devices to operators and providers in Russia. Wireless routers This company has two 100-megabit models on our market: the WR300N and the WR150N (it differs from the first only in its reduced wi-fi speed). We will consider the “senior” model WR300N. In fact, the WR-N series routers are equipped with everything necessary to create home network functions, and only setting up the Acorp router may seem somewhat “unusual” (perhaps this is the main and only drawback). Let's take a closer look.
Configuration is carried out via the web interface. Connect the router with a patch cord (included with the device) to the PC’s network card. In this case, any port except WAN is used. Then, turn on the power to the router.

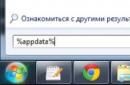
Before configuration, the PC network card must be in “automatic” IP address and DNS mode:

To do this, you configure the local connection properties (as in the figure above).
CONFIGURING ACORP ROUTER
Configure the PC card as described above. After turning on the power of the router, you need to wait 2-3 minutes. Then, open any browser. In the address line - you type: 192.168.1.1

You will be asked to enter your Login and Password (Admin and Admin are suitable). Any Acorp router, modem, that is, anything that has a web interface, allows entry using this password.
Setting up an Internet connection (DHCP protocol)
Go to the first tab (Operation Mode):

Check that AP-Gateway is selected (that is, “router” mode). If not, select it and click “Apply”. Go to “Internet Settings” (“WAN Setup” tab).
Let's look at how to configure an Acorp router that lacks support wireless network"802.11 N". We are talking about models of the “WR-G” family, where the Wi-Fi network operates using a protocol that is less common today. It's called "802.11 G".
Actually, in a wireless network of the previous standard, you can get an acceptable speed of data exchange with the router. To do this, a condition must be met: the number of subscribers of such a network must remain as minimal as possible. If there is one subscriber using Wi-Fi, you can get 13-14 Megabits per second of “one-way” exchange speed.
At this speed, it would be possible to watch IPTV. But the “standard” firmware for Acorp WR-G (WR-G 2.0, WR-G plus) does not provide such luxury. There is no multicast packet translation and it cannot be enabled.
Router Acorp WR-G
To set up such a router, you need to connect it to your computer (the LAN connector is connected to the network card). What's needed next? Now let's take a closer look.
Preliminary steps before setting up
Connecting the router to the computer
The router's power supply is turned on last. First, a patch cord (double-sided network cable) is connected to any LAN port, from 1 to 4. The second side - the patch cord must “reach” to network card PC.

Rear panel of the router
You need to connect the provider's cable to the WAN connector. And the network card in the computer is configured like this:

Wired Ethernet Connection Settings
That is, here you need to set a static address (ending in 1-253) and a standard mask. The router address, as you can see, is equal to the following value: 192.168.1.254 (set it as “Main gateway”).
If everything is done as stated above, you can turn on the power to the router.
Let's go to the web interface
In the browser on your computer, you need to open the address: 192.168.1.254. What is done a minute after turning on the router. Login and authorization password are empty values. The start tab will look like this:

Router status tab
Any router produced by Acorp, including the “classic” WR-G model, allows you to configure it using a wizard. What should we use at the initial stage?
The WR-G+ router is equipped with different hardware “filling” and a new graphical interface(our instructions will not work). Note: for WR-G+, the address ends with a unit (not 254), the login and password are the word “admin”.
It is important to know that if there is nothing at the specified address, it means that the device has already been configured. In this case, after waiting a minute after turning it on, press the reset button on the router (holding for 10-12 seconds).
Setting up a connection and Wi-Fi network
Initial configuration using the wizard
On the start tab, find the second menu item from the top: “Setup Wizard”. Click on this icon (and then click on the “Next” button).
Following the “Wizards” tabs, select the required value and click “Next”:

Setup Wizard Tabs
- First, you need to select the “Gateway” mode
- On the second tab – do not change anything
- On the next one too
- On the fourth tab, we must configure the Internet connection (leave it as it is, DHCP)
- Complete the setup Wi-Fi networks: Set the mode to "AP", set the network name (SSID).
Channel number – must be selected manually:

Setting up Wi-Fi (setup wizard)
- On last tab masters - choose a method Wi-Fi protection(WPA is best).
We left the wireless network without encryption. Click “Finished” and wait for the Wi-Fi network to appear.
Setting up an Internet connection
Let's look at how to set up a connection using the PPtP protocol. At the same time, it will be shown how the MAC address is cloned.

Connection setup
Go to the “TCP/IP…” -> “WAN Interface” tab. Select the required connection type. If you use dynamic addresses, leave the “Enable Dynamic Mode” checkbox.
Next, set the connection parameters (name or address of the VPN server, username and password of the subscriber). To increase speed, you can “explicitly” set DNS. It is impossible to clone a MAC address, but you can specify its value (do this if required).
Finally, click “Apply Changes”. The connection will automatically appear in a minute. Happy routing!
In the film, they are setting up an Acorp router equipped with an ADSL module (W422G).
The interface is also “ancient”, you can see:
Article on setting up the Acorp router models W422G and WAP-G.
The instructions are given using the Acorp router from Rostelecom as an example, but it is also suitable for other models and firmware.
Router connection diagram
There are several ports on the back of the W422G or WAP-G router.
If in the future computers will be connected to it using a LAN cable, there are 4 connectors here.
The fifth port, located separately from the other four, is intended for connecting an Internet cable (the one installed by Rostelecom or Megaline employees from the entrance). If your computer does not have a Wi-Fi antenna, insert the cord that was in the box on one side into the device, and on the other into a similar network card input on the rear panel of the system unit.
Setting up the router's connection to the Internet
After this, turn on the Acorp W422G or WAP-G router, and on your computer open any browser - a program for browsing the Internet.
In the address bar, type 192.168.1.254 or 192.168.1.1 and press Enter.
Let us emphasize, not in the search bar, but in the address bar.
Usually, by default, these are the words “Admin” and “Admin”.

It is also produced here full customization router. To do this, click on the “Setup” tab and then click “New Connection”. Next, fill out all the fields that appear correctly:
- Name - connection name (any);
- Type - connection type (PPPoE);
- Username - user name (provided by your Internet service provider);
- Password - password (provided by your Internet service provider);
If everything is done correctly, save the changes - click on “Apply” and wait for the modem to connect to the Internet, then check its operation using any browser. For a computer, the router acts as a modem.
Setting up a WiFi access point on the router
Wi-Fi is configured on the “Wireless” tab. On the left, select Serup. Check "Enable AP" - it should be enabled. Next, go to “Security” and select the WPA2 encryption method, and in the PSK String field enter a combination of at least 8 characters (this code will be needed to connect via wireless WiFi modem network).
Acorp modems have always been popular due to their good quality at reasonable prices. ADSL modems are no exception either. Today I will tell you how to configure Acorp LAN 110 and 410 to connect to Rostelecom using the PPPoE protocol. Before setting up the modem, I would strongly recommend setting up on the network card static IP address 192.168.1.2 and disconnect the telephone cable from the modem while the work is being performed.
Open a web browser - recommended Internet Explorer or Google Chrome. Enter the address in the address field and press the Enter key.
An authorization window should appear where you must enter your login and password. For ADSL modems Akorp means “Admin” with a capital letter. Click “OK”. The Sprinter LAN110 or LAN410 modem settings window will open:
DIn the menu on the left you need to select the menu item WAN >>> Channel Config:
You can edit existing connections by checking the box in the table Current ATM VC Table. But it is better to delete the old ones and create a new one.
In a new connection in the list Channel Mode select a protocol PPPoE.
“Admin status” should be “Enable”.
Into the fields VPI And VCI you need to enter the parameters of the Internet channel. You can find them out in the technical support of your provider or search on the Internet. For example, here is VPI/VCI for Rostelecom.
The type of encapsulation most commonly used is − LLC.
All we have to do is enter the username and password in the fields User Name And Password— they were given to you when you connected to Rostelecom.
After this, press the button Add in order for the connection to be created. If the existing one was changed, then you need to press the button Modify.
Select section from the menu on the left Admin >>> Commit/Reboot:
Click the Commit/Reboot button to save the settings.
Your Acorp Sprinter LAN 110 or LAN 410 ADSL modem is configured to work in the provider’s network. You can connect a telephone line and check network access. The Internet light should also light up.
IP 144.76.78.4 Browser System Search Bot Country Provider
Setting up Acorp W422G
ADSL router with access point and 4-port 10/100 Base-T Ethernet switch
Instructions for setting up megaline for the Acorp W422G router. This manual provides an example of setting up the device via the WEB interface, installing drivers and other software no need for a computer. All you need is an Internet browser. Any will do - Google Chrome, Opera or Mozilla Firefox
Before setting up the connection, reset your device to factory settings. There is a “Reset” button on the back panel; press and hold it for 5-7 seconds until the indicators on the front panel blink simultaneously.

Connect your device to your computer using a network cable. In the address bar of the browser, enter the address 192.168.1.1 Enter the Username - Username and Password – Password to access device settings. Factory Login and Password Admin- with a capital letter! If you can’t log into the WEB interface, check your settings network connection, in the network connection properties for the TCP/IP protocol, the values of the IP address and DNS addresses servers must be set - receive automatically.

To configure connection settings, go to the tab SETUP>New Connection Configure the following settings as shown in the screenshot:
Name– Name of the new connection; This is a required parameter, but its value can be arbitrary and does not affect the connection.
Type– Connection type: PPPoE;
PVC Settings– Virtual channel parameters;
For megaline users: VPI – 0; VCI – 40;
Username And Password– Username and password issued by your provider.
Then you need to apply the settings Apply and after a few seconds the device will connect to the Internet. For megaline users:
If you do not remember your password, or cannot connect with the password you have, use the guest account. Enter the word “megaline” in the Username field, and also “megaline” in the Password field (all Latin letters are lowercase, and the VPI / VCI values can be any). So, you won’t be able to go online, but you can get into Personal Area and set a new internet password.

By default, device settings can only be accessed from local network, so you can leave the factory login and password Admin.
If you consider it necessary to change the factory login and password, this can be done in the tab TOOLS > User Management.
Apply the settings when finished Apply.

The device is equipped wireless point access, IEEE 802.11 G standard
To configure basic wireless network settings, go to the tab WIRELESS > Setup.
Please pay attention to the following parameters:
Enable AP– Enable wireless network support; Enabled by default.
Primary SSID– Wireless network name; The name you will see in the list available networks when connected. You can leave the factory value.
Hidden SSID– Hide the name of the wireless network; Additional precaution - Not a serious wireless network security tool. Off by default.
User Isolation– Restrict access to local network resources, only Internet access is allowed.
Apply settings Apply.
Configuring Wireless Network Settings

To configure wireless network security settings, go to the WIRELESS > Security.
Select an encryption method WPA2 if you want to ensure the maximum level of protection;
For authorization mode, select Pre-Shared Key– Security key;
Specify the key combination - PSK String, no less than 8 and no more than 63 characters;
Apply settings when finished Apply.
Saving configuration settings