The presence of a built-in webcam is one of the significant advantages of laptops over desktop computers. You do not need to buy a separate camera in order to communicate with relatives, friends or acquaintances. However, such communication will not be possible if your laptop does not have drivers for the device mentioned above. Today we will tell you in detail how to install webcam software on any ASUS laptop.
Looking ahead a little, I would like to note that not all ASUS laptop webcams require driver installation. The fact is that some devices have cameras in the format "USB video class" or "UVC". As a rule, the name of such devices contains the indicated abbreviation, so you can easily identify such equipment in "Device Manager".
Necessary information before installing the software
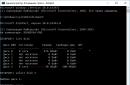
Before you start searching and installing the software, you will need to find out the identifier value for your video card. To do this you need to do the following.

In addition, you will definitely need to know the model of your laptop. As a rule, this information is indicated on the laptop itself on the front and back sides. But if your stickers have worn off, here's what you can do.

Now let's get down to the methods themselves.
Method 1: Official website of the laptop manufacturer
Once you have a window open with the webcam ID values and you know the laptop model, you need to do the following steps.
- Let's go to the official one.
- At the top of the page that opens, you will find the search field shown in the screenshot below. In this field you must enter the model of your ASUS laptop. Don’t forget to press the button after entering the model "Enter" on keyboard.
- As a result, a page with search results for your request will open. You need to select your laptop from the list and click on the link in the form of its name.
- By clicking on the link, you will be taken to a page with a description of your product. At this stage you need to open the section .
- The next step is to select the operating system installed on your laptop and its bitness. This can be done in the corresponding drop-down menu on the page that opens.
- As a result, you will see a list of all drivers, which are divided into groups for convenience. We are looking for a section in the list "Camera" and open it. As a result, you will see a list of all software available for your laptop. Please note that the description of each driver contains a list of webcam IDs that are supported by the selected software. This is where you need the identifier value that you learned at the beginning of the article. You just need to find the driver whose description includes your device ID. When such software is found, click the line "Global" at the very bottom of the driver window.
- After this, you will start downloading the archive with the files that are necessary for installation. After downloading, extract the contents of the archive into a separate folder. In it we look for a file called "PNPINST" and launch it.
- You will see a window on the screen in which you need to confirm the launch of the installation program. Click "Yes".
- The entire further process will take place almost automatically. You will only need to follow further simple instructions. At the end of the process, you will see a message indicating successful installation of the software. Now you can fully use your webcam. This will complete this method.


Method 2: ASUS Special Program
To use this method, we need the ASUS Live Update utility. You can download it on the page with driver groups, which we mentioned in the first method.

Method 3: General solutions for updating software
To install ASUS laptop webcam drivers, you can also use any program that specializes in automatically searching and installing software, like ASUS Live Update. The only difference is that such products are suitable for absolutely any laptop and computer, and not just for ASUS brand devices. You can get acquainted with the list of the best utilities of this kind by reading our special lesson.
Of all the representatives of such programs, Driver Genius and DriverPack Solution should be highlighted. These utilities have a significantly larger base of drivers and supported hardware compared to other similar software. If you decide to opt for these programs, then our educational article may be useful to you.
Method 4: Hardware ID
At the beginning of our lesson, we told you how to find out the ID of your webcam. You will need this information when using this method. All you need to do is enter your device ID on one of the special sites, which will find the corresponding software using this identifier. Please note that it will not be possible to detect drivers for UVC cameras this way. Online services will simply write to you that the software you need was not found. We described in more detail the entire process of searching and loading a driver using this method in a separate lesson.
Method 5: Device Manager
This method is mainly suitable for UVC webcams, which we mentioned at the beginning of the article. If you encounter problems with such devices, you need to do the following.

Laptop webcams are among those devices with which problems arise relatively rarely. However, if you are faced with a malfunction of such equipment, this article will definitely help you solve it. If the problem cannot be fixed using the described methods, be sure to write in the comments. Let's look at the current situation together and try to find a way out.
When purchasing a laptop with the Windows operating system, many often encounter the same problem, which is turning on and configuring the built-in webcam. Everything is very simply done with a couple of clicks or using a specific program. This article will tell you all the common ways to check the status of a laptop camera and activate it.
Determining the functionality of the built-in camera is extremely easy if you have programs such as Skype or Viber. But if the device is new and there are no similar applications on it, then it is better to use one of the two options described below.
View online
The essence of the first option is the possibility of determination through Internet resources. There are quite a lot of sites on the Internet that allow you to quickly find out whether a webcam is working or not. To do this, you can use one of these portals:
- https://ru.webcamtests.com. It's very easy to check functionality here. After going to the page, you need to wait until the webcam is detected. Next, click on the “Test camera” button and allow access to it. If it is working, then the inspector will be able to admire his appearance in a certain window. After a few more seconds, detailed information about image quality will appear on the left side of the site.
- https://webcamtest.ru/. Everything is just as easy to do here. After loading the site, you need to give access to the laptop's webcam. If it works, the broadcast image will appear on the screen. To check on this site you will need a flash player.
- https://testcam.ru/. Here everything happens exactly according to the same principle as in the previous version. Having visited the page, you need to give access to your webcam on your laptop, and then see the image broadcast from it. On this portal you can also check the functionality of the built-in microphone.
Online verification is the fastest and most convenient way, but you must have an Internet connection to use it. If it is missing, then the second option will help.
Via Device Manager
Using Device Manager, you can find out whether the webcam is turned on and whether the installed drivers are ok. The image quality cannot be verified.

To test, you need to open the Start menu, then select Browse by Category and go to Hardware and Sound. Next, find the Devices and Printers section; under it there will be subsections, one of which is Device Manager. After switching to it, a separate window will open, where absolutely all the equipment connected to the laptop will be indicated. Among all the options, you need to select “Image processing devices”. This is where the driver for the webcam is located. If everything is fine with it, then there should not be various icons nearby. If there is a red cross or an up arrow, this indicates that the driver is disabled. In this case, you need to call up its context menu and click “Engage”. When there is a yellow triangle with an exclamation mark next to it, this indicates a hardware malfunction of the equipment. It most often lies in damaged drivers, and in this case reinstallation will help.
Turn on the video camera on the laptop
When the webcam's functionality check has been successful, and the user is convinced that it works and transmits an image, you can proceed to its direct activation. There are two simple and proven ways to turn on the camera on a laptop.
Using original software from manufacturers
The first is to launch using a special program. Every new laptop with an already built-in operating system has a folder with installers for some programs. Among this list there should be a standard official utility that is responsible for launching the webcam at the right time. They are different and depend on the manufacturer, for example, for Lenovo laptops the utility is called Lenovo Easy Camera. When starting it, you must provide access to the immediate device. Such utilities, as a rule, contain various settings. They will help you test your equipment and improve image quality.
By pressing special key combinations
The second method involves activating the webcam by pressing certain buttons on the keyboard. Depending on the manufacturer and model of the laptop, there are the most common key combinations:
- FN+camera icon. Most laptops have a camera icon on the keyboard. This is what you need to press in this combination.
- FN+V. Used in some models.
- FN+F11. This is the rarest case.
Here are all the options on how you can check the functionality and also activate the webcam on your laptop. As you can see, everything is done very simply and does not require a lot of time or special skills. Each of these methods can be used by a beginner who is dealing with a laptop webcam for the first time.
The built-in webcam on a laptop usually does not require additional configuration. But sometimes users are faced with the fact that the camera, which only yesterday allowed active communication on Skype, does not turn on today. What could be the cause of the problem and how can I fix it myself?
Turn on the camera
First, try restarting your laptop - this is a standard recommendation when any problem occurs. If this does not help, then make sure that the required module is enabled at all. Perhaps your laptop camera is not working because you accidentally turned it off. Older models have separate physical buttons on the body that allow you to control the webcam.
If there are no such buttons, examine the laptop keyboard. On ASUS and Acer devices, the “V” key in combination with Fn is responsible for turning on the camera.

If you have a Lenovo laptop, pay attention to the ESC key. You see a camera on it - press Esc in combination with Fn to launch the module.

The keys on different laptop models may differ, so it is better to take the instruction manual and carefully read the section that talks about how the webcam works.
Working with the camera app
Some laptops have special camera control applications that allow you to set shooting parameters and other settings. Lenovo laptops have the EasyCapture program, HP has the HP Camera application, ASUS has Life Frame Utility, etc. Such programs may also have an option to turn the camera on/off.

If the camera does not work in a particular program, then you should check the settings of this application. Let's see how to check your webcam on Skype:

If the camera does not work, then you should see whether the module is enabled in the device manager and whether the necessary software is installed on the system.
Checking drivers
When upgrading a "seven" or "eight" to Windows 10, hardware drivers are installed automatically. However, often the system installs the wrong drivers, which leads to the webcam not turning on. You can fix the problem through the device manager by installing the appropriate software.

If it says "Enable" instead of "Disable", press the button to launch the camera. On Windows 7 and other OS versions, the operation is performed similarly.

If you see an exclamation mark near the camera in Device Manager, then to fix the problem you need to reinstall the drivers. It is recommended to download suitable software from the official website of the laptop manufacturer. Let's look at the order using an HP laptop as an example:

If there is no camera software for Windows 10, then download drivers for Windows 8 or 7. Run the downloaded file to install the drivers, and then restart your laptop.
Hardware faults
Unfortunately, the camera may not work not only due to a software glitch. Sometimes the cause of the problem is a physical problem: for example, damage to the cable or the camera module itself. 
Troubleshooting this kind of problem on your own is difficult. If there is a problem with the cable, you will have to disassemble the laptop, which requires some skill. Therefore, if software error correction methods do not help and the webcam does not work, contact a service center.
How to enable the camera on an Asus laptop
The devices of this company are very popular due to their compactness, reasonable ease of use, reliability and the presence of a wide range of various functions.
It's impossible not to notice that one of the most useful features of the Asus laptop is the webcam. However, it still needs to be turned on.
What is needed for the camera to work?
First of all, you should correctly configure the operating system, as well as install and run all drivers. Please note that you cannot do without the latter, even if your model allows you to turn on the camera using buttons.
It is best to download drivers from the official website for the safety of the device. You will also need to download a special program. For Windows 8, 7, XP and Vista, there are no additional connection tools unless you installed the operating system yourself. Otherwise, you'll have to install them yourself, among other things. The specialists of the official ASUS service center will also be happy to help you.
Owners with a preinstallation system on their laptops can easily turn on the camera on their Asus without unnecessary problems using the buttons.
How to enable the camera on an Asus laptop?
Before you start the activation action, please note the following point. The camera program can be anything, but the drivers used to enable it on an Asus laptop should be standard and intended only for Asus. Once you understand this point, you can proceed directly to activating the camera.
Find the key on your keyboard that has a camera or camera on it. Then press "Fn" and the newly found button at the same time.
Thus, you will successfully turn on the webcam quickly.
You can also find the Life Frame shortcut on your desktop or find the program in a search engine and open it. You can clarify your webcam settings using the Asus Camera Screen Saver program. All you need to do is just double-click on this program shortcut.
A webcam (webcam) is an integral part of the vast majority of laptops. By default, after the first start of the device, it is immediately ready for use. But what if you are trying to get an image from the camera, but there is none?
The main thing is not to panic. Situations when the webcam does not work on a mobile computer are most often due to the fact that it is simply turned off or not installed in the operating system (breakdowns of this device, fortunately, are rare). Read below to learn how to turn on the camera on a laptop and troubleshoot related problems.
How to quickly check if the camera is working
To find out if your webcam works at all (perhaps it doesn’t work in only one program, since it’s disabled in the settings), go to the service and click “ Check webcam».
If you see a request to allow access to the device for Adobe Flash Player, then everything is in order: the camera is working. Check " Allow» and check if the image appears on the screen.

If you see a message like in the screenshot below, it means the camera really isn’t working. We’ll figure out what to do in this case further.

Checking the status of the webcam in the system
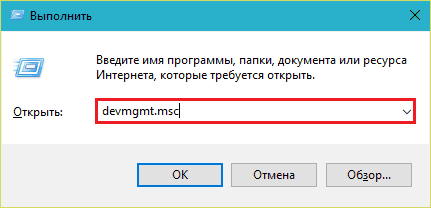
We begin diagnosing any hardware problems by checking how it appears in Device Manager. To open the manager, press the Windows + R hotkeys (this will launch the “Run” application), enter the command in the “Open” field devmgmt.msc and click OK. The method is convenient because it works in all versions of Windows.
In the dispatcher window, expand the list “ Imaging devices» and see if our webcam is there. The following options are possible:
- The web camera is not in the list of equipment - the computer does not see it. This happens due to a hardware failure or physical failure.
- There is no camera, but there is an unknown device, which most likely is it. This means that the computer sees it, but cannot recognize it. The reason is the lack of a driver.
- There is a camera in the list, but next to it there is a yellow triangle with an exclamation mark or a black arrow in a circle. The first indicates a malfunction, the second indicates a shutdown in the operating system.

Turn on the webcam from the keyboard
The function of turning on/off the webcam from the keyboard is not implemented on all laptop models. Where there is one, a miniature image of a camera is applied to one of the keys. Most often this is the “V” key, sometimes “Escape” or others from F1-F12.

To turn on the web camera, press this key simultaneously with “Fn”. After this, the webcam should appear in the device manager. If it's still not there, you probably have that rare case where it's physically faulty or not connected.
Installing the driver
If, after turning on the webcam hardware, something unidentified appears in the device manager, install the driver for it. It is best to download it from the website of the laptop manufacturer or the webcam itself, if you know exactly its model. Or install from a disk, if one was included with your device.
If you do not know the exact name of the laptop model, turn it over. There is a sticker on the bottom cover of every laptop stating this.
This is what the brand label of the MSI MS-1757 laptop looks like:

Having determined the model, find it on the manufacturer’s website and download the driver for your operating system in the “Support” section. Install as a normal application, after installation, reboot the machine.
By the way , there may not be a separate webcam driver for some OS versions, since it is included inWindows (USB Video Class Driver). Problems with this group of drivers can be resolved by installing updates or .
Fixing webcam recognition errors in the system
If the webcam is marked with a black arrow in Device Manager (disabled in Windows), right-click on it and click “ Engage».

When disabled in the operating system (by the user or programs), this is enough for it to work.
If the webcam is marked with an exclamation mark on a yellow triangle, which means: “the device is not working properly,” click the command “ Delete" and restart your computer. The system will recognize it again and automatically reinstall the driver.
If it doesn’t help, click “ Update drivers»:

Specify the search location as the Internet (if you are not sure that the correct driver is present in the system) or this computer (if the camera worked properly with the old driver before the problem occurred or you have a recent version).

All laptops today come with integrated webcams. This attribute allows you to use a variety of applications and video calls. Today, in order to contact a friend on the other side of the continent, it is enough to turn on Skype and activate the device.
To check the camera's operation you often have to use third-party software
Many users are perplexed when the characteristics of their laptop are equipped with such an option, but in fact it is difficult to enable it. The webcam may be deactivated, and before you can start using it, you need to learn how to turn it on. How to turn on the webcam on a laptop? Let's look at it in more detail.
To activate the camera on a laptop computer, it is usually enough to launch a special utility designed to work with such components.
Many experts praise the Live Webcam program, which can be found for free on the Internet. It has a very simple interface and is convenient for the average user.

An alternative option is to use an online service. Today there are a great variety of these resources, all of them make it possible to check the quality of the microphone and the camera integrated into the device as quickly as possible. After visiting such a site, it is important to allow data transfer in a new window. Only after this will it be possible to test the sound and picture. Each service offers its own instructions, which consist of a few simple steps.
Skype
The functionality can also be checked via Skype, it is convenient and simple. Select "Settings" from the "Tools" menu. Then find the Video Settings option. Clicking on this item will launch the image in the right corner of the screen. You can set equipment parameters such as contrast, brightness, white balance, hue after pressing the “Webcam Settings” button.

To check your device via Skype, you must first enable the auto receive option. You can also make a test call to one of your friends.
Configuration via Device Manager
For Windows users, it is possible to check active hardware through a special manager. It’s not difficult to get into it; just select “Device Manager” in the computer properties. If there is a camera in the list, it must be activated (select “Enable” after clicking on the camera).

If the device is missing, try installing the drivers. A laptop is usually sold with a disk on which all the drivers for the product components are recorded. Lost a disk? Download the element through the developer’s website.
If the camera is not built-in, but is connected via a USB connector, then the model and manufacturer will be marked on it. Once you know this data, you can quickly download and install the component.
Keyboard shortcuts
The “magic” Fn key is designed on laptop keyboards. It helps you increase or decrease the screen brightness, add volume, and do many other operations. Another use case is to turn the camera off and on. To activate the device, you must press Fn in combination with the button on which the camera icon is visible. Fn is usually located not far from the Ctrl key (on the left or right).
The combination for each laptop model may be different. For example, on Acer equipment the camera turns on after pressing Fn+V, and the DNS manufacturer claims to use Fn+F11.

For Lenovo, the Fn+Esc combination is usually suitable, but there are various exceptions. The manufacturer of this equipment offers users the EasyCapture utility for working with a webcam. A similar assistant in HP devices is HP MediaSmart.
Hackers are attacking!
The camera must be used with extreme caution. Recently, cybercriminals have become more active in the field of ratting, that is, illegal spying using devices connected to a laptop.
After visiting a malicious site, you voluntarily give the hacker the reins of your PC. Very often, attackers independently record videos and take pictures from the camera without your notice. They usually hunt for celebrities so that they can later post provocative materials online, but ordinary users are often unlucky.

To prevent this, it is important to be careful and follow a number of useful rules:
- do not “follow” malicious, suspicious links;
- install firewall;
- use proven versions of software;
- install updates in a timely manner;
- protect yourself with an effective antivirus.
A webcam is an essential attribute of any modern laptop. With its help you can communicate on Skype, create video conferences and take photos. The built-in cameras are turned on by default, and you can check its readiness for work in several ways.
Make sure you have a video camera installed on your laptop. It is located in the upper part above the screen - it is a small peephole and an LED next to it. Most often, problems arise due to the fact that the mobile camera is simply turned off or there is no USB connection to the external device. We will use the following methods:
- a combination of pressing the Fn + V buttons (marked with a blue camera icon) on the keyboard. This combination is standard for all mobile PCs. As a result, the camera should appear on the taskbar. If this does not happen, then the problem is in the driver or device malfunction;

- camera check online. To do this, go to the page of any site that provides such a service. Launch the application and the “Allow” button will appear on the screen, turn it on and see it. This indicates that the camera is working properly;

- turn on the camera in specialized applications Skype or Movie Maker.


Checking the functionality of the system
By opening the device manager, we will see the status of the laptop’s webcam, the state of its driver and possible malfunctions. It can be accessed like this:

In the device manager we find our camera or the “Image processing devices” tab.

There are three possible options for further developments:
- The webcam is not detected by the computer. This happens due to a hardware failure or problems connecting an external camera. We eliminate the flaw and update the page;
- the device is not recognized, but in its place there is unknown equipment that requires connection. Information about this may be duplicated on the taskbar in the lower right corner of the screen. The problem can be solved by installing the necessary driver or updating the old one;
- The webcam is recognized, but there is an exclamation point icon next to it in a yellow triangle - a malfunction. An arrow in a circle means it is disabled in the operating system.
Interesting! The driver is installed from the official website of the laptop manufacturer. There is no separate driver for the webcam; it is installed along with a Windows update.
Typical errors in web camera operation
A disabled camera in the device manager is activated by clicking “Enable” in the menu that appears after right-clicking on the selected camera.
An error in operation can be corrected by clicking “Delete” and rebooting the laptop. If this does not help, then reinstall the driver.
If these measures do not help, you should contact a service center to have the camera repaired.
Most laptops are already equipped with special programs at the factory. These may be Asus ECam Utility, HP Cyberlink YouCam, Lenovo EasyCapture and others. All of them have a clear interface and are designed for a novice user. Removing them does not lead to loss of functionality of the device’s camera.
Video - How to turn on the video camera on a laptop
Nowadays, a webcam is one of the essential attributes of a modern laptop. Indeed, video calls via Skype or web applications are a very popular type of communication today. By default, it is always turned on as a computer device and is supplied with power. But now it is in an inactive state. Therefore, a lot of users are unaware of this, simply not knowing how to use it and surf the Internet with the question “How to turn on the webcam on a laptop.” In fact, in 90% of cases, to activate it, you just need to launch an application that can work with a webcam. Unfortunately, the Windows 7 and Windows 8 operating systems do not have built-in utilities for working with webcams. Therefore, third-party software comes to the rescue.
The software that comes pre-installed on your computer may contain such a program. If it is not there, then you can download it from the Internet.
The simplest and most convenient, in my opinion, is the utility Live Webcam, which you can download here - link.
Even a child can understand the program interface:

Another program that you most likely already have installed and that can work perfectly with the camera is Skype.
To check the operation of the laptop’s webcam, you need to go to the program settings and find the “Video Settings” subsection:

There you can take a photo and look at the result.
Instead of Skype, you can also use Google Talk or ICQ.
You can also try to start a video call on the Odnoklassniki social network.
The second reason why the webcam may not work is uninstalled drivers.
Often, friends, acquaintances or so-called “computer wizards” are called from advertisements to reinstall Windows, and as a result the user receives a half-working system precisely because some of the drivers are simply not installed. To see this, launch the device manager. To do this, press the Win+R key combination on the keyboard and in the “Run” dialog box that opens, enter the command in the “Open” line:
This will open the Device Manager of your Windows 7 or Windows 8. Now we look to see if there are any devices with a yellow exclamation mark in the list:

In my example, as you may have noticed, there is an “Intergrated Webcam” element - an integrated webcam, and just marked with an icon. This means that the laptop sees it, but it will not work until you install the driver. What to do in this case? First, right-click on it in the context menu and select “Update drivers”:

We search for a driver on the computer.
If the system doesn’t find anything, then you will need to go to the website of the manufacturer of your laptop and find the “Support” section there. In it you will need to select your device model and go to the download drivers and software section (“Download Drivers and Software”). We look for the webcam driver, download the installer and run it. After rebooting the laptop, the webcam will be turned on, of course, provided that everything was done correctly.
The third reason is that the camera is disabled programmatically in the device manager.
To fix this, you will need to go to Device Manager again and find the “Image Processing Devices” section there:

There we find the laptop’s webcam and see if there is an icon with a down arrow on it, which means that the webcam is disabled. In this case, right-click on it to open the context menu and select “Engage”:

After this, we again try to run the program in which we use the laptop’s webcam and check its operation.
As is correct, the methods presented above solve the problem in 99% of cases. The remaining 1% is usually damage to the device at the hardware level. This is especially common on older laptops, and this problem can only be resolved by going to a service center.
How to turn on the camera on an Asus laptop Devices from this company are very popular due to their compactness, reasonable ease of use, reliability and the availability of a wide range of...
How to turn on the camera on an Asus laptop Devices from this company are very popular due to their compactness, reasonable ease of use, reliability and the availability of a wide range of...
Just a few years ago, interactive conversations over long distances seemed like a fantasy. Not everyone could afford international telephone conversations. With the development of special computer technologies, we have the opportunity not only to hear a person, but also to see him in the present time: with the help of a home computer and webcam.
You will need
- Laptop with built-in webcam.
Instructions
1. The manufacturer Asus strives to make the most comfortable keyboards on its laptops - they save space taken up by buttons. The rule for reducing the number of keys is that many buttons can perform several functions, you just need to switch them to a different “mode”. Please note that the Asus laptop keyboard has a special “Fn” key, highlighted in color. Other, more famous buttons also have colored icons. The fact is that when you press and hold “Fn” you can set commands using the additional functions of these keys. To quickly turn on the webcam on an Asus laptop using the keyboard, press and hold the “Fn” key and simultaneously press the button with the camera on it. A green light next to the webcam will immediately light up - a signal that it has been activated, and the Life Frame program will open on the monitor.
2. You can turn on the Life Frame program, that is, the webcam on a laptop, with the mouse. Locate the program shortcut on your computer. By default it is on the desktop. Click on it with your mouse. Life Frame is activated, you can use the webcam.
3. The standard program for Asus laptops is Asus Camera Screen Saver. On a new, newly configured laptop, it is also on the desktop. Click on the Asus Camera Screen Saver shortcut and the webcam will turn on. However, this is not a program for photographs and communication, it is only a demonstration of the capabilities of the Asus webcam.
Range of uses web cameras large They are used for security purposes for surveillance in stores, homes, businesses, and for broadcasting video images of some places on the planet on the Internet. But more often than everyone, web cameras They are used for communication on the Internet, namely for conducting video telephone conversations and video conferencing. In this case web cameras You need to connect it to a computer that has access to the Internet or to a local network. It turns out, in order to connect web cameras to your computer, do the following:

Instructions
1. Install drivers for your computer web cameras s from the disk (it is traditionally included with the camera by the manufacturer). If the disk is missing, there is a chance to find and download drivers on the Internet; to do this, find out the exact name of the camera.
2. Connect to any free USB port web cameras y, it must be determined by the operating system. If you are prompted to restart your computer, do so. If you did everything correctly, your camera's name will appear in the Imaging Devices section of Device Manager.
3. In order to start using web cameras oh, install the software for web cameras s. This could be either the manufacturer's program web cameras s, or a third-party program. For example, you can use free programs: Windows Movie Maker, VirtualDub, Altarsoft Video Capture. To communicate, you need to install an Internet telephony program (Skype, Mail.Ru Spy or similar).
4. Attach camera to the monitor. Check it out. Let's say, in the Skype program menu, go to “tools-settings-video settings”. If you saw yourself, then everything is fine.
Note!
To connect a webcam to a local network, the camera must support this function and have a network interface: wired or wireless (WiFi, Bluetooth).
The standard cursor control provided in modern laptops is unsatisfactorily comfortable for many. Wanting to connect to a laptop mouse, many users may encounter the problem that it does not have a special connector for a standard mouse. In this case, the only solution would be to connect a wireless mouse to your computer.

You will need
- Laptop, mouse.
Instructions
1. A wireless mouse works through a special USB translator, one that transmits manipulations of the product to the computer. To connect wireless mouse to the laptop, you need to perform a number of specific actions, the first of which will be installing the desired program on the computer.
2. Installing mouse software. Take the driver disk, the one that should come with the mouse, and insert it into the drive. If on laptop there is no mechanical launch of disks, go to “My Computer” and double-click on the drive shortcut. In the window that opens, select “Install”. Without changing any installation parameters, wait until the drivers are installed on your laptop.
3. After the mouse drivers are installed, insert into free laptop USB transmitter connector. Wait until a notification appears on the laptop screen indicating that the new device has been installed and is ready for further use.
4. Once the notification appears on the screen, you can start using the mouse. Don’t forget to turn on the device by turning the switch at the bottom of the mouse to the “ON” position. When using a wireless mouse, be aware of its limited battery supply.
Today, when face-to-face communication fades into the background and more and more people begin to communicate “blindly” - in messages through public networks or mail, web cameras are becoming a huge celebrity, allowing you to broadcast your actions to every corner of the planet. Of course, anyone with a laptop and a camera should know how to run this USB video device.

Instructions
1. If your laptop keyboard has a special Fn key, turn on the camera by holding down this key on the keyboard and, without releasing it, press the key with the camera icon in the top row of system buttons. A picture will appear on the screen with the words “On” or “Off” (On or Off, respectively). Make sure the picture shows “On”
2. Launch a portable or built-in camera using a utility that displays the webcam user interface. To do this, find the folder with the camera (the name may use Camera (Cam) and/or Web) in “Start”? "All programs". Launch the application and when it displays the interface on the laptop screen, enable the webcam in the settings.
3. By default, the laptop's built-in camera automatically turns on automatically when you make a video call to someone. That is, in order to turn on the camera, easily launch a program that will have access to the webcam (say, Skype).
4. Enable the USB video device on your laptop in the computer settings settings. To do this, open Control Panel and go to Device Manager. There, open the “Imaging Devices” section. In the expanded subsection there will be the name of your camera (sometimes the camera goes under the name “Unknown Device”). To enable, right-click on the name and select “Enable”.
5. If you are using a separate, rather than built-in, webcam with your laptop, then look at it for the presence of a power button. If it is there, click – the camera will start itself and display the interface of its application on the screen.
Video on the topic
Note!
If the camera is turned on, and instead of the image you see only a black screen, it is possible that there is a problem with the drivers. Don’t rush to reinstall them right away; contact your system manager or a person who understands computers. If he confirms that the problem is with the installation software, then remove the previous drivers and download new ones that are suitable for your camera model.
Today camera– a necessary thing that allows you to capture the most charming moments of life. However, the technology can be so difficult that the user cannot even turn on the purchased product the first time. camera .

Instructions
1. Bring your purchase home and let it sit at room temperature for about an hour. Unpack all the cables that came with the kit and check the drives.
2. Carefully read the instructions included with the camera u. If the operating manual that you have is written in a foreign language, you can always find it on the Internet in Russian. Think about the quality of your purchase, important tea manufacturers invariably supply the unit with the Russian version of the authorities.
3. Remove the battery. It can be either in special packaging or inserted into camera, if it was checked in the store. Insert the battery into the charger and connect it to the mains. Charge the battery for as long as indicated in your instructions. The first time the battery must be fully charged.
4. Connect camera to charge the battery to a computer via a USB cable if a special charger is not available. Insert the charged battery into camera, then insert the memory card if it was purchased separately from the device. To do this, use the section that shows how to correctly insert additional removable media.
5. Turn on the device by pressing the button on the unit body. As usual, it is located under the index finger of the right hand and has an international designation. Try not to let your hand block the lens of the device, because with every probability it will move out.

6. Make sure that the screen (in digital camera ah) an image appeared. Go to settings. Select the “date and time setting” mode. Set the correct time according to your time zone and the date in the required format. Consider whether to include the date and time on photographs. To do this, you need to check the appropriate box.
7. Select “sound” from the menu and set the desired settings, preferring the sound of the shutter, on, off, etc. or by turning it off completely.
8. Put camera to "auto" mode. Take some pictures. Check whether they are preserved and what their quality is. Adjust brightness, contrast and other parameters based on the pictures you take.
Ensuring user convenience, manufacturers are making computers more and more mobile, trying to fit all the features of a full-fledged PC into a small laptop. Virtually all modern laptops have a built-in webcam.

Instructions
1. Before you think about the problem of a permanently disabled camera, make sure that you have one on your computer. It is not provided on older laptop models; It is not available on some netbooks either.
2. If this is your first time using the webcam, check if the drivers for it are configured. Click on the "Start" button and select the "Control Panel" section. In the window that opens, among the list of devices, click on “Printers and other equipment”, then select the “Scanners and Cameras” section. If the camera drivers are activated, you will see your webcam among the working devices. Otherwise, you will need to install the necessary software yourself.
3. If your laptop was sold with system disks, insert them into the drive and install the drivers available on them. As usual, loading such programs is mechanical: you only need to accept the developer’s data and confirm other system requests. It is possible that after installing the settings you will need to restart the computer. If you cannot find the driver on the disk, you can always download it for free from the official website of your laptop manufacturer; to do this, you only need to specify the computer model.
4. In addition to the driver that ensures the webcam works well, your computer system must also contain programs to activate it. The most famous of them are Life Frame, Windows Movie Maker, LiveCam, Play Camera, etc. Find one on the disk or download one of the programs from the Internet. After this, double-click on the program shortcut with the left mouse button, and the webcam will turn on. As usual, a shiny lamp lights up next to the working webcam.
5. Programs prepared for online communication can also start working with a webcam. For example, in the settings of the instant messengers Skype, ICQ, QIP, Mail.spy, the webcam is set to turn on mechanically when a video conversation starts.
Video on the topic
Some modern mobile computers have built-in web cameras. The presence of a large number of additional devices allows you to avoid connecting peripheral equipment that occupies USB ports.

You will need
- Internet access.
Instructions
1. Some laptops have webcams initially disabled. Most often, this is used to reduce the energy spent on maintaining unused devices. Try turning on the webcam through the device manager.
2. To access this menu, open computer properties by clicking on the item of the same name in the Start panel. Now double-click with the left mouse button on the name of the built-in web camera and click the “Enable” button.
3. If you reinstalled the operating system, update the software needed to activate the webcam. Visit the formal Internet source of the company that developed the mobile computer you are using.
4. Search for drivers and applications that are suitable for your laptop. To do this, enter the name of its model in the appropriate field. Download file bundles labeled as webcam software.
5. Update your drivers through Device Manager. Be sure to use the manual installation method. Specify the directory in which the downloaded archives were saved. If you downloaded the installer from the site, run it.
6. After updating the software, restart your mobile computer. Make sure the webcam is strong. Check the functionality of the device. In situations where the camera was activated by manually installing applications, launch a messenger program, say, Skype.
7. With the support of the specified utility, configure the web camera’s operating parameters. As usual, laptops with a built-in camera have a microphone. Activate this equipment.
8. Open Control Panel. Select the “Hardware and Sound” submenu and follow the “Metamorphosis of Sound Devices” link. Find the integrated microphone, highlight its icon and click the "Default" button.
9. Launch Skype again and check your configured hardware.
Video on the topic
Manufacturer ASUS equips many of its laptop models with webcams for video communication on the Internet. The installed device is turned on by pressing the appropriate combination of keyboard buttons. Image adjustment can be done both in the program in which you broadcast video, and using a specialized utility.

Instructions
1. Turn on the laptop and wait until the operating system installed on the device starts. Press and hold the Fn key, which is located in the bottom row of keyboard buttons to the left of the Windows key. This button is responsible for using the laptop functions and is used to turn on the camera.
2. Without releasing Fn, press the key with the camera icon drawn. These could be the buttons on the top row of the keyboard, say F5. Depending on your laptop model, this button may be labeled differently. If you cannot find the camera power key, use your computer's manual.
3. Some models of laptops and netbooks, say ASUS eeePC, have a special switch for the camera, one that is located directly above its eye. This regulator has two settings: ON and OFF. If you want to turn on the webcam, move the shutter to the ON position. To turn off, the valve must be set to the OFF position.
4. The pre-installed software of ASUS laptops also includes a special Life Frame utility made to control the device’s camera. Often the application starts mechanically after the camera is turned on.
5. If this program is not installed, install it from the disk that came with the laptop, or download the utility from the official ASUS website. After installation, you will see a corresponding shortcut on the system desktop. Life Frame allows you to take pictures and adjust the parameters of the images that are obtained when taking photographs or showing a video broadcast through the lens.
6. If you reinstalled the operating system yourself after purchasing the laptop, you will need to install drivers to use the webcam. Insert the driver disc into the device drive or download the necessary software from the official ASUS website. After installing the drivers, reboot the laptop in order to apply the changes made to the system.
After purchasing a computer or reinstalling the Windows operating system, you must first configure the laptop in order to ensure the most comfortable and productive work with the device. ASUS laptop parameters are configured using specialized drivers and configuration utilities.

Instructions
1. After installing the operating system, start your ASUS laptop by pressing the power button. Wait for the operating system to load and install the driver disk that came with the device into the drive.
2. If you own a netbook that does not have a disk drive, or your driver media has been lost, go to the official ASUS website to download the necessary files. Click on the “Help” section of the source. In the provided text field, enter the name of the laptop model and wait for the search results to appear. Download available drivers for your operating system version.
3. After launching the installation files, wait until the menu appears, with which you can install all the necessary drivers. Using the interface, install the necessary programs and utilities for working with computer devices. If applications for setting up your laptop were downloaded from the Internet, run each of them one by one to install all the necessary packages.
4. After installing the necessary files, restart your computer. Now, in order to activate the additional keys that are present on the laptop, as well as configure energy saving settings and notifications about the device’s status, install the ASUS ATK utility package, which is also on the disk or is available for download from the manufacturer’s official website. As usual, the package of utilities for working with a laptop is called ATK Package. Install all programs named ATK, and then install the Wireless Console program, which is responsible for issuing notifications about the functioning of the wireless network interface.
5. Install ASUS Live Frame to configure the webcam and the Power4Gear hardware power management utility. If you wish, you can also install ASUS Splendid and other programs available in the website or disk menu.
6. After installing each software, restart your computer again to use the changed settings. Configuring the laptop hardware to work with the operating system is complete, and you can begin working fully with the device.
Users unfamiliar with computer technology are often interested in how to turn on a webcam on a laptop. If the handheld computer was not configured properly when purchased, the built-in camera may not work in different environments.

Instructions
1. Check the instructions for your portable device to learn how to turn on the camera on your laptop. First of all, you will find out the computer model, its name and technical collations, including the parameters and probabilities of the webcam. If the documentation does not indicate the name of the laptop model, pay attention to its reverse side, where there is usually a corresponding sticker.
2. Right-click on the “My Computer” icon and select “Device Manager”. Pay attention to which components have a yellow question mark on the opposite side, indicating the lack of drivers preinstalled in the system - special services that ensure the identification of devices by the computer and their effective operation. Click on them and select the “Install driver” function. If your laptop comes with a boot disk, insert it into the drive and select the “Mechanical search for drivers” option. The computer will independently search for services and install them from the included disk. If the media is missing, select the option to search for drivers on the Internet.
3. Find the driver for your laptop webcam on the Internet yourself. Try to find the laptop manufacturer's website or suitable drivers by device name. Currently, they are often available for download in the form of an installation file that mechanically downloads and installs the necessary services. If you do not achieve the desired result, use the free DriverScanner application, available for download on the Internet. After installation, the program will perform a mechanical search for missing drivers and install them in order.
4. Look through the list of recently installed programs in the Start menu and find among them an application that allows you to turn on the webcam on your laptop. Launch it and see if the camera image appears on the screen. If yes, try using the camera in different applications, say, Skype, making a video call. Make sure that the webcam eye above the laptop screen is clean and does not contain a protective sticker, since this is often the main reason for the lack of an image.
One of the advantages of Asus laptops is the presence of Bluetooth functionality. However, it may not always be available. Even when installed by default on the computer. Knowing the nuances will help you avoid a lot of trouble.

At first glance, turning on Bluetooth on an Asus laptop is quite primitive: you press the button and everything turns on. A Bluetooth driver is software that helps the operating system gain control of Bluetooth. But this is only at first glance. To enable Bluetooth, drivers will be required only if the operating system was installed independently and not by the manufacturer.
Drivers to enable Bluetooth
As mentioned above, in order to activate the Bluetooth connection, you need to download drivers. But if the manufacturer has relied on a 64-bit system, then there may not be drivers for an 86-bit system. Windows OS has two bit depths: 32-bit and 64-bit. And 86-bit is the second designation of 32-bit. Therefore, you will not be able to turn on Bluetooth. In this case, you need to reinstall the operating system from 86-bit to 64-bit. In order to check the bit depth in the operating system, you need to right-click on the “My Computer” shortcut. In the window that opens, select the “Properties” item. If everything is in order here, then you need to start looking for drivers for your Asus laptop. They are all on the manufacturer's official website, sorted by model. It is not advisable to download from other sites, because the file itself may contain viruses. If your personal laptop (computer) is running Windows 7 or Windows 8, then you can install drivers for Bluetooth from Windows XP or Windows Vista on them. In some cases, a driver disc may be sold together with a laptop. Check: maybe you have it somewhere. Even in cases where the operating system was originally installed by the manufacturer, there may not be drivers for Bluetooth. After you download and install them, try connecting.
Turning on Bluetooth
Most often, to activate the Bluetooth connection, you need to press the fn and f2 keys together. Depending on the modification of the laptop, the second button may be different. Usually it shows an antenna. To enable Bluetooth more quickly, there is a special button on the side of the case. If the above methods fail to connect, you can try the following algorithm: 1. Click Start.2. Select All Programs.3. Open the "Typical" folder.4. Find the Bluetooth icon. You can independently download a program to enable Bluetooth if none of the above methods worked.
Tip 13: How to turn on the webcam on a laptop: detailed explanations
It's hard to imagine a modern laptop without a webcam. With its help, you can take photos, make video calls, and organize web conferences. In fact, the camera is always on when the laptop is on and power is supplied to it. However, in order to start using the camera, this is unsatisfactory.

You will need
- - laptop
- - Webcam
Instructions
1. First you need to check whether the camera drivers are installed. If the laptop is new, and the operating system and main programs were installed by manufacturers or sellers, most likely each driver will be installed. If Windows was installed independently, then you also need to install the drivers yourself.
2. In order to check the presence and functionality of the drivers, you need to go to the Control Panel, select the “System” menu, and in it – “Device Manager”. In the list of equipment, find the item “Image processing devices” and expand it. The name of the webcam and an icon indicating its working or non-working state will open. If there is a question or exclamation mark next to the name of the webcam, you need to install drivers. You can download them from the laptop manufacturer's website.
3. If the device manager says that the camera is working, you can start testing it. Unfortunately, Windows operating systems do not include special applications for working with a webcam, but laptop manufacturers, as usual, supply the system with a proprietary program, for example, for HP it is “MediaSmart”, for Acer it is “Acer Crystal Eye Webcam” . If the laptop is the latest from the manufacturer, then the application will most likely be installed. If there is no application, you need to install it yourself.
4. You can choose one of the famous applications, say, “WebcamMax”. This program has a wide list of settings and allows you to work with video effects, adding them to photos and videos. "WebcamMax" can be used in conjunction with the applications ICQ, MSN, Paltalk, Camfrog, AIM, Skype, Yahoo, Stickam. You can configure the camera so that it starts recording video when motion is detected. The user has a lot of special effects for video files, as well as photo processing. In addition, with the support of “WebcamMax” you can work with one video recording in several applications at the same time.
5. Working with the program is very easy; it opens two windows: the left one will preview the video, and the right one will show you the choice of results and other actions. Using the buttons below the preview window, you can take a screenshot, start and stop recording.
6. Another famous program for working with a webcam is “ManyCam”. This application also makes it possible to use one camera in several applications at the same time, as well as add text and special effects to the video file. There is also a powerful application “Webcam 7”, which allows you to record and process video, and is also easy to set up.
7. Having chosen an application that will be especially comfortable, you can start using the laptop’s webcam for communication and video recording.
Video on the topic
Video on the topic
Note!
If you still cannot turn on the webcam, it is possible that you need to install the appropriate drivers.
Helpful advice
The most famous free programs that allow you to communicate in real time using a webcam are Skype, Mail spy and various versions of “Asec”: QIP, ICQ, Miranda. The Asus laptop webcam can take photos and videos, change color filters, and edit photos.