Reg.ru: domains and hosting
The largest registrar and hosting provider in Russia.
More than 2 million domain names in service.
Promotion, domain mail, business solutions.
More than 700 thousand customers around the world have already made their choice.
*Mouse over to pause scrolling.
Back forward
Creating a simple user registration system in PHP and MySQLCreating a registration system is a lot of work. You have to write code that validates email addresses, sends an email confirming registration, and also validates other form fields, and much more.
And even after you write all this, users will be reluctant to register, because... this requires some effort on their part.
In this tutorial, we will create a very simple registration system that does not require or store passwords at all! The result will be easy to modify and add to an existing PHP site. Want to find out how it works? Read below.
Here's how our super simple system will work:
We will combine the authorization form and registration. This form will have a field for entering your email address and a registration button;
- When filling out the field with an email address, clicking on the registration button will create a record about a new user, but only if the entered email address was not found in the database.
After this, a random unique set of characters (token) is created, which is sent to the email specified by the user in the form of a link that will be relevant for 10 minutes;
- The link takes the user to our website. The system determines the presence of a token and authorizes the user;
Advantages of this approach:
There is no need to store passwords or validate fields;
- There is no need to recover your password, security questions, etc.;
- From the moment a user registers/logs in, you can always be sure that this user will be in your access zone (that the email address is true);
- Incredibly simple registration process;
Flaws:
User account security. If someone has access to the user's mail, they can log in.
- Email is not secure and can be intercepted. Keep in mind that this question is also relevant in the case where the password has been forgotten and needs to be restored, or in any authorization system that does not use HTTPS for data transfer (login/password);
- While you configure your mail server properly, there is a chance that messages with authorization links will end up in spam;
Comparing the advantages and disadvantages of our system, we can say that the system has high usability (maximum convenience for the end user) and, at the same time, has a low security indicator.
So it is suggested to use it for registrations on forums and services that do not work with important information.
How to use this system
In case you just need to use a system to authorize users on your site, and you don’t want to take this lesson to pieces, here’s what you need to do:
You need to download the sources attached to the lesson
- Find the tables.sql file in the archive. Import it into your database using the import option in phpMyAdmin. Alternative way: open this file through a text editor, copy the SQL query and execute it;
- Open includes/main.php and fill in the settings for connecting with your database (specify the user and password for connecting with the database, as well as the host and name of the database). In the same file, you must also specify the email, which will be used as the original address for messages sent by the system. Some hosts block outgoing emails unless the form contains a real email address, which was created from the host's control panel, so provide a real address;
- Upload all index.php , protected.php files and assets and includes folders via FTP to your host;
- Add the code below to each PHP page where you want to display the login form;
Require_once "includes/main.php"; $user = new User(); if(!$user->loggedIn())( redirect("index.php"); )
- Ready!
For those who are interested in how it all works, read on below!
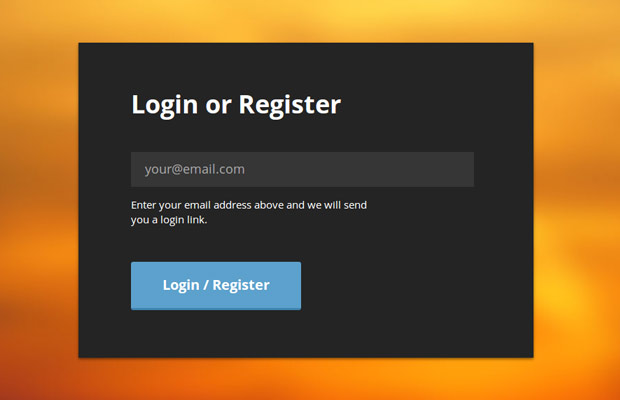
The first step is to write the HTM code for the authorization form. This code is located in the index.php file. This file also contains PHP code that handles form data and other useful login system functions. You can learn more about this in the section below dedicated to the PHP code review.
index.php
Tutorial: Super Simple Registration System With PHP & MySQL Login or Register
Enter your email address above and we will send
you a login link.
In the head section (between the and tags) I included the main styles (they are not covered in this tutorial, so you can look at them yourself. Folder assets/css/style.css). Before the closing tag, I included the jQuery library and the script.js file, which we will write and analyze below.
JavaScript
jQuery tracks the state of the "Register/Login" button using the function e.preventDefault() and sends AJAX requests. Depending on the server response, it displays one or another message and determines further actions/
assets/js/script.js
$(function())( var form = $("#login-register"); form.on("submit", function(e)( if(form.is(".loading, .loggedIn"))( return false ; ) var email = form.find("input").val(), messageHolder = form.find("span"); e.preventDefault(); $.post(this.action, (email: email), function (m)( if(m.error)( form.addClass("error"); messageHolder.text(m.message); ) else( form.removeClass("error").addClass("loggedIn"); messageHolder. text(m.message); ) )); )); $(document).ajaxStart(function())( form.addClass("loading"); )); $(document).ajaxComplete(function())( form. removeClass("loading"); )); ));
was added to the form to display the current state of the AJAX request (this was made possible thanks to the methods ajaxStart()) And ajaxComplete(), which you can find towards the end of the file).This class displays a spinning animated GIF file (as if to hint to us that the request is being processed), and also acts as a flag to prevent the form from being submitted again (when the register button has already been clicked once). The .loggedIn class is another flag - it is set when the email was sent. This flag immediately blocks any further actions with the form.
Database schema
Our incredibly simple logging system uses 2 MySQL tables (the SQL code is in the tables.sql file). The first stores data about user accounts. The second stores information about the number of login attempts.

User table schema.
The system does not use passwords, as can be seen in the diagram. On it you can see the token column with tokens adjacent to the token_validity column. The token is installed as soon as the user connects to the system and sets his email to send a message (more on this in the next block). The token_validity column sets the time 10 minutes later, after which the token is no longer valid.

Table schema that counts the number of authorization attempts.
In both tables, the IP address is stored in processed form, using the ip2long function in a field of type integer.
Now we can write some PHP code. The main functionality of the system is assigned to the class User.class.php, which you can see below.
This class actively uses idorm (docs), these libraries are the minimum necessary tools for working with databases. It handles database access, token generation, and token validation. It provides a simple interface that makes it easy to connect a registration system to your site if it uses PHP.
User.class.php
Class User( // Private ORM case private $orm; /** * Find a user by token. Only valid tokens are accepted for consideration. The token is generated only for 10 minutes from the moment it was created * @param string $token. This is the one we are looking for token * @return User Return the value of the User function */ public static function findByToken($token)( // find the token in the database and make sure the correct timestamp is set $result = ORM::for_table("reg_users") ->where ("token", $token) ->where_raw("token_validity > NOW()") ->find_one(); if(!$result)( return false; ) return new User($result); ) /** * Authorize or register a user * @param string $email. User email address * @return User */ public static function loginOrRegister($email)( // If such a user already exists, return the value of the User function from the specified email address stored in the database if(User::exists($email))( return new User($email); ) // Otherwise, create a new user in the database and return the value of the User::create function from the specified email return User::create($email ); ) /** * Create a new user and save to the database * @param string $email. User email address * @return User */ private static function create($email)( // Write a new user and return the result of the User function from these values $result = ORM::for_table("reg_users")->create(); $result->email = $email; $result->save(); return new User($result); ) /** * Check whether such a user exists in the database and return the Boolean value of the variable * @param string $email. User email address * @return boolean */ public static function exists($email)( // Does the user exist in the database? $result = ORM::for_table("reg_users") ->where("email", $email) ->count(); return $result == 1; ) /** * Create a new user object * @param instance $param ORM , id, email or 0 * @return User */ public function __construct($param = null) ( if($param instanceof ORM)( // ORM check passed $this->orm = $param; ) else if(is_string($param))( // Email check passed $this->orm = ORM::for_table ("reg_users") ->where("email", $param) ->find_one(); ) else( $id = 0; if(is_numeric($param))( // the value of the variable $param is passed to the user identifier $id = $param; ) else if(isset($_SESSION["loginid"]))( // Otherwise, see session $id = $_SESSION["loginid"]; ) $this->orm = ORM::for_table( "reg_users") ->where("id", $id) ->find_one(); ) ) /** * Generate a new SHA1 authorization token, writes it to the database and returns its value * @return string */ public function generateToken( )( // Generate a token for an authorized user and save it to the database $token = sha1($this->email.time().rand(0, 1000000)); // Save the token in the database // And mark it so that it is only valid for the next 10 minutes $this->orm->set("token", $token); $this->orm->set_expr("token_validity", "ADDTIME(NOW(),"0:10")"); $this->orm->save(); return $token; ) /** * Authorize the user * @return void */ public function login())( // Mark the user as logged in $_SESSION["loginid"] = $this->orm->id; // Update the value of the last_login database field $this->orm->set_expr("last_login", "NOW()"); $this->orm->save(); ) /** * Destroy the session and log out the user * @return void */ public function logout ()( $_SESSION = array(); unset($_SESSION); ) /** * Check if the user is logged in * @return boolean */ public function loggedIn())( return isset($this->orm->id) && $_SESSION["loginid"] == $this->orm->id; ) /** * Checks whether the user is an administrator * @return boolean */ public function isAdmin())( return $this->rank() = = "administrator"; ) /** * Find the user type, can be either administrator or regular * @return string */ public function rank())( if($this->orm->rank == 1)( return "administrator" "; ) return "regular"; ) /** * Method that allows you to get the user's private information as * properties of the User object * @param string $key The name of the property that gets access * @return mixed */ public function __get($key)( if(isset($this->orm->$key))( return $this->orm->$key; ) return null; ) )
Tokens are generated using the SHA1 algorithm and stored in the database. I'm using MySQL's timing functions to set a 10-minute time limit for a token's validity.
When a token is validated, we directly tell the handler that we are only considering tokens that have not yet expired, stored in the token_validity column.
Please note that I am using the magic method __get docs library at the end of the file to intercept access to the properties of the User object.
Thanks to this, it becomes possible to access information stored in the database thanks to the properties $user->email, $user->token, etc. In the next code fragment, we will look at how to use these classes as an example.

Protected page
Another file that stores useful and necessary functionality is the functions.php file. There are several so-called helpers - assistant functions that allow you to create cleaner and more readable code in other files.
functions.php
Function send_email($from, $to, $subject, $message)( // Helper that sends email $headers = "MIME-Version: 1.0" . "\r\n"; $headers .= "Content-type: text /plain; charset=utf-8" . "\r\n"; $headers .= "From: ".$from . "\r\n"; return mail($to, $subject, $message, $headers ); ) function get_page_url())( // Determine the URL of the PHP file $url = "http".(empty($_SERVER["HTTPS"])?"":"s")."://".$_SERVER ["SERVER_NAME"]; if(isset($_SERVER["REQUEST_URI"]) && $_SERVER["REQUEST_URI"] != "")( $url.= $_SERVER["REQUEST_URI"]; ) else( $url. = $_SERVER["PATH_INFO"]; ) return $url; ) function rate_limit($ip, $limit_hour = 20, $limit_10_min = 10)( // Number of login attempts in the last hour to this IP address $count_hour = ORM: :for_table("reg_login_attempt") ->where("ip", sprintf("%u", ip2long($ip))) ->where_raw("ts > SUBTIME(NOW(),"1:00")") ->count(); // Number of login attempts in the last 10 minutes at this IP address $count_10_min = ORM::for_table("reg_login_attempt") ->where("ip", sprintf("%u", ip2long($ ip))) ->where_raw("ts > SUBTIME(NOW(),"0:10")") ->count(); if($count_hour > $limit_hour || $count_10_min > $limit_10_min)( throw new Exception("Too many login attempts!"); ) ) function rate_limit_tick($ip, $email)( // Create a new record in the table that counts number of login attempts $login_attempt = ORM::for_table("reg_login_attempt")->create(); $login_attempt->email = $email; $login_attempt->ip = sprintf("%u", ip2long($ip)); $login_attempt->save(); ) function redirect($url)( header("Location: $url"); exit; )
Functions rate_limit And rate_limit_tick monitor the number of authorization attempts over the elapsed period of time since the first attempt. The login attempt is recorded in the database in the reg_login_attempt column. These functions are called when the form data is processed and submitted as you can see from the following code snippet.
The code below is taken from the index.php file and it handles the form submission. It returns a JSON response, which in turn is processed by jQuery in the assets/js/script.js file that we looked at earlier.
index.php
Try( if(!empty($_POST) && isset($_SERVER["HTTP_X_REQUESTED_WITH"]))( // Output a JSON header header("Content-type: application/json"); // Is this email address valid if(!isset($_POST["email"]) || !filter_var($_POST["email"], FILTER_VALIDATE_EMAIL))( throw new Exception("Please enter a valid email."); ) // Check. Is the user allowed to log in, has he exceeded the number of allowed connections? (functions.php file for more information) rate_limit($_SERVER["REMOTE_ADDR"]); // Log this login attempt rate_limit_tick($_SERVER["REMOTE_ADDR"], $ _POST["email"]); // Send an email to the user $message = ""; $email = $_POST["email"]; $subject = "Your Login Link"; if(!User::exists($email) )( $subject = "Thank You For Registering!"; $message = "Thank you for registering at our site!\n\n"; ) // Attempt to authorize or register a user $user = User::loginOrRegister($_POST[ "email"]); $message.= "You can login from this URL:\n"; $message.= get_page_url()."?tkn=".$user->generateToken()."\n\n"; $message.= "The link is going to expire automatically after 10 minutes."; $result = send_email($fromEmail, $_POST["email"], $subject, $message); if(!$result)( throw new Exception("There was an error sending your email. Please try again."); ) die(json_encode(array("message" => "Thank you! We\"ve sent a link to your inbox. Check your spam folder as well."))); ) ) catch(Exception $e)( die(json_encode(array("error"=>1, "message" => $e->getMessage() ))); )
After successful login/registration, the code above will send the user a login link. The token becomes available because it is passed as a variable in the generated link by the method $_GET with tkn marker
index.php
If(isset($_GET["tkn"]))( // Is this token valid for authorization? $user = User::findByToken($_GET["tkn"]); if($user)( // Yes , is. Redirect to a protected page $user->login(); redirect("protected.php"); ) // No, the token is not valid. Redirect to a page with an authorization/registration form redirect("index.php "); )
$user->login()
will create the necessary variables for the session, so that the user, viewing subsequent pages of the site, will remain authorized at all times.
The processing of the function to exit the system is arranged in a similar way.
index.php
If(isset($_GET["logout"]))( $user = new User(); if($user->loggedIn())( $user->logout(); ) redirect("index.php") ; )
At the end of the code, I again set a redirect to index.php, so the parameter ?logout=1 transmitted via URL is not required.
Our index.php file requires additional. protection - we don't want people who have logged into the system to see the registration form again. For these purposes, we use the method $user->loggedIn().
index.php
$user = new User(); if($user->loggedIn())( redirect("protected.php"); )
Finally, here is a piece of code that allows you to protect the pages of your site and make it accessible only after authorization.
protected.php
// To protect every page on your site, include a main.php file // and create a new User object. That's how easy it is! require_once "includes/main.php"; $user = new User(); if(!$user->loggedIn())( redirect("index.php"); )
After this check, you can be sure that the user was successfully authorized. You can also access stored information in the database using object properties $user. To display the user's email and status, use this code:
Echo "Your email: ".$user->email; echo "Your rank: ".$user->rank();
Method rank() is used here because the database usually stores numbers (0 for a regular user, 1 for an administrator) and we need to convert this data into the statuses to which they belong, which is what this method helps us with.
To make a regular user an administrator, simply edit the user entry through phpMyAdmin (or any other program that allows you to manage databases). The administrator status does not give any privileges; in this example, the page will display that you are an administrator - and that’s it.
But what to do with this is left to your discretion; you can write and compose code yourself that sets certain privileges and capabilities for administrators.
We're done!
We're done with this incredibly super quasi simple shape! You can use it in your PHP sites, it's quite simple. You can also modify it for yourself and make it the way you want.
The material was prepared by Denis Malyshok specifically for the website
P.S. Do you want to move further in mastering PHP and OOP? Pay attention to premium lessons on various aspects of website building, including programming in PHP, as well as a free course on creating your own CMS system in PHP from scratch using OOP:
Did you like the material and want to thank me?
Just share with your friends and colleagues!
Today we will look at the exploitation of a critical 1-day vulnerability in the popular CMS Joomla, which exploded on the Internet at the end of October. We will talk about vulnerabilities with numbers CVE-2016-8869, CVE-2016-8870 and CVE-2016-9081. All three come from one piece of code that languished in the depths of the framework for five long years, waiting in the wings, only to then break free and bring with it chaos, hacked sites and the tears of innocent users of this Joomla. Only the most valiant and courageous developers, whose eyes are red from the light of the monitors, and whose keyboards are littered with bread crumbs, were able to challenge the raging evil spirits and lay their heads on the altar of fixes.
WARNING All information is provided for informational purposes only. Neither the editors nor the author are responsible for any possible harm caused by the materials of this article. Where it all startedOn October 6, 2016, Demis Palma created a topic on Stack Exchange in which he asked: why, in fact, in Joomla version 3.6 there are two methods for registering users with the same name register()? The first one is in the UsersControllerRegistration controller and the second one is in the UsersControllerUser controller. Damis wanted to know if the UsersControllerUser::register() method was used somewhere, or if it was just an evolutionary anachronism left over from the old logic. His concern was that even if this method is not used by any view, it can be called by a crafted query. To which I received a response from a developer under the nickname itoctopus, who confirmed: the problem really exists. And sent a report to the Joomla developers.
Then events developed most rapidly. On October 18, Joomla developers accepted the report from Damis, who by that time had drafted a PoC that would allow user registration. He published a note on his website, where he spoke in general terms about the problem he found and his thoughts on this matter. On the same day, a new version of Joomla 3.6.3 is released, which still contains vulnerable code.
After this, Davide Tampellini spins the bug to the point of registering not a simple user, but an administrator. And on October 21, a new case arrives to the Joomla security team. It already talks about increasing privileges. On the same day, an announcement appears on the Joomla website that on Tuesday, October 25, the next version with serial number 3.6.3 will be released, which corrects a critical vulnerability in the system kernel.
October 25 Joomla Security Strike Team finds the latest problem created by the piece of code discovered by Damis. Then a commit dated October 21 with the inconspicuous name Prepare 3.6.4 Stable Release is pushed into the main branch of the official Joomla repository, which fixes the unfortunate bug.
After this coming out, numerous interested individuals join the developer community - they begin to promote the vulnerability and prepare exploits.
On October 27, researcher Harry Roberts uploads a ready-made exploit to the Xiphos Research repository that can upload a PHP file to a server with a vulnerable CMS.
DetailsWell, the background is over, let's move on to the most interesting part - analysis of the vulnerability. I installed Joomla 3.6.3 as a test version, so all line numbers will be relevant for this version. And all the paths to the files that you will see below will be indicated relative to the root of the installed CMS.
Thanks to Damis Palma's discovery, we know that there are two methods that perform user registration in the system. The first one is used by the CMS and is located in the file /components/com_users/controllers/registration.php:108. The second one (the one we will need to call) lives in /components/com_users/controllers/user.php:293. Let's take a closer look at it.
286: /** 287: * Method to register a user. 288: * 289: * @return boolean 290: * 291: * @since 1.6 292: */ 293: public function register() 294: ( 295: JSession::checkToken("post") or jexit(JText::_ ("JINVALID_TOKEN")); ... 300: // Get the form data. 301: $data = $this->input->post->get("user", array(), "array"); . .. 315: $return = $model->validate($form, $data); 316: 317: // Check for errors. 318: if ($return === false) 319: ( ... 345: / / Finish the registration. 346: $return = $model->register($data);
Here I left only interesting lines. The full version of the vulnerable method can be viewed in the Joomla repository.
Let's figure out what happens during normal user registration: what data is sent and how it is processed. If user registration is enabled in settings, the form can be found at http://joomla.local/index.php/component/users/?view=registration.

A legitimate user registration request looks like the following screenshot.

The com_users component is responsible for working with users. Pay attention to the task parameter in the request. It has the format $controller.$method . Let's look at the file structure.

The names of the scripts in the controllers folder correspond to the names of the called controllers. Since our request now has $controller = "registration" , the registration.php file and its register() method will be called.
Attention, question: how to transfer registration processing to a vulnerable place in the code? You probably already guessed it. The names of the vulnerable and real methods are the same (register), so we just need to change the name of the called controller. Where is our vulnerable controller located? That's right, in the user.php file. It turns out $controller = "user" . Putting everything together we get task = user.register . Now the registration request is processed by the method we need.

The second thing we need to do is send the data in the correct format. Everything is simple here. Legitimate register() expects from us an array called jform , in which we pass registration data - name, login, password, email (see screenshot with the request).
- /components/com_users/controllers/registration.php: 124: // Get the user data. 125: $requestData = $this->input->post->get("jform", array(), "array");
Our client gets this data from an array called user.
- /components/com_users/controllers/user.php: 301: // Get the form data. 302: $data = $this->input->post->get("user", array(), "array");
Therefore, we change the names of all parameters in the request from jfrom to user .
Our third step is to find a valid CSRF token, since without it there will be no registration.
- /components/com_users/controllers/user.php: 296: JSession::checkToken("post") or jexit(JText::_("JINVALID_TOKEN"));
It looks like an MD5 hash, and you can take it, for example, from the authorization form on the site /index.php/component/users/?view=login .

Now you can create users using the desired method. If everything worked, then congratulations - you just exploited the CVE-2016-8870 “missing permission check for registering new users” vulnerability.
This is what it looks like in the “working” register() method from the UsersControllerRegistration controller:
- /components/com_users/controllers/registration.php: 113: // If registration is disabled - Redirect to login page. 114: if (JComponentHelper::getParams("com_users")->get("allowUserRegistration") == 0) 115: ( 116: $this->setRedirect(JRoute::_("index.php?option=com_users&view= login", false)); 117: 118: return false; 119: )
And so in vulnerable:
- /components/com_users/controllers/user.php:
Yeah, no way.
To understand the second, much more serious problem, let's send the request we created and see how it is executed in various parts of the code. Here is the piece that is responsible for validating the user submitted data in the worker method:
Continuation is available only to members Option 1. Join the “site” community to read all materials on the siteMembership in the community within the specified period will give you access to ALL Hacker materials, increase your personal cumulative discount and allow you to accumulate a professional Xakep Score rating!
I decided to write this note because I’m tired of answering the same thing 100,500 times on Q&A.
Many novice web programmers sooner or later are faced with the task of introducing human-readable links (HUR) into their website. Before the implementation of CNC, all links looked like /myscript.php or even /myfolder/myfolder2/myscript3.php, which is difficult to remember and even worse for SEO. After the implementation of CNC, the links take the form /statiya-o-php or even in Cyrillic /article-o-php.
Speaking of SEO. Human-readable links were REALLY invented not for easy memorization, but mainly to increase the indexability of the site, because the coincidence of the search query and part of the URL gives a good advantage in the search rankings.
The evolution of a novice PHP programmer can be expressed in the following sequence of steps:
I note that between points 2 and 3, most programmers make an obvious mistake. I won't be wrong if I call this the value of about 95% of programmers. Even most well-known frameworks contain this error. And it consists in the following.
Instead of implementing a fundamentally new way of processing links, the concept of “patches and redirects” based on .htaccess is mistakenly made, which consists of creating many redirect rules using mod_rewrite. These lines compare the URL with some regular expression and, if there is a match, push the values extracted from the URL into GET variables, subsequently calling the same index.php.
#Incorrect CNC method RewriteEngine On RewriteRule ^\/users\/(.+)$ index.php?module=users&id=$1 #....A lot more similar rules...
This concept has many disadvantages. One of them is the difficulty of creating rules, a large percentage of human errors when adding rules that are difficult to detect, but they lead to a 500 server error.
Another drawback is that it is often edited based on the server config, which in itself is nonsense. And if in Apache the config can be “patched” using .htaccess, then in the popular nginx there is no such option, everything is located in a common configuration file in the system zone.
And one more drawback, probably the most important, is that with this approach it is impossible to dynamically configure the router, that is, “on the fly,” algorithmically change and expand the rules for selecting the desired script.
The method proposed below eliminates all these disadvantages. It is already used in a large number of modern frameworks.
The bottom line is that the initial request is always stored in the $_SERVER[‘REQUEST_URI’] variable, that is, it can be read inside index.php and parsed as a string using PHP with all error handling, dynamic redirects, etc.
In this case, you can create only one static rule in the configuration file, which will redirect all requests to non-existent files or folders to index.php.
RewriteEngine On RewriteCond %(REQUEST_FILENAME) !-f #If the file does not exist RewriteCond %(REQUEST_FILENAME) !-d #And if the folder does not exist RewriteRule ^.*$ index.php
Moreover, this rule can be placed both in .htaccess and in the main Apache configuration file.
For nginx, the corresponding rule will look like this:
Location / ( if (!-e $request_filename) ( rewrite ^/(.*)$ /index.php last; ) )
It's simple.
Now let's look at a piece of PHP code in index.php, which analyzes links and decides which script to run.
/part1/part2/part3
The first thing that comes to mind is to break it up using explode(‘/’, $uri) and make a complex router based on switch/case that analyzes each piece of the request. Do not do that! This is complicated and ends up making the code look horribly incomprehensible and non-configurable!
I suggest a more concise way. It’s better not to describe it in words, but to immediately show the code.
4. You need to add one table to the same database. It will store IP addresses that made errors when logging in. This way we can limit access to those who made mistakes more than three times in a row for about 15 minutes. I think programs that select passwords will have to tinker for a long time.
Let's go to phpmyadmin and create a new table with 3 fields:

ip - IP address.
date - date of unsuccessful login for the last 15 minutes for the user with this ip. col - the number of errors over the last 15 minutes for the user with this ip.
Great! Done, now let’s change the login and password verification file, because now our password is encrypted. Open testreg.php and delete everything beyond removing spaces from the login and password. Next we add the following code:
//remove extra spaces
$login = trim($login);
$password = trim($password);
// replace with a new one**************************************************
// connect to the database
include("bd.php");// the bd.php file must be in the same folder as all the others, if it is not then just change the path
// mini-check for password selection
$ip=getenv("HTTP_X_FORWARDED_FOR");
if (empty($ip) || $ip=="unknown") ( $ip=getenv("REMOTE_ADDR"); )//extract ip
mysql_query ("DELETE FROM oshibka WHERE UNIX_TIMESTAMP() - UNIX_TIMESTAMP(date) > 900");//delete the IP addresses of users who made a mistake when logging in after 15 minutes.
$result = mysql_query("SELECT col FROM oshibka WHERE ip="$ip"",$db); // retrieve from the database the number of unsuccessful login attempts over the last 15 for a user with a given ip
$myrow = mysql_fetch_array($result);
if ($myrow["col"] > 2) (
//if there are more than two errors, i.e. three, then we issue a message.
exit("You entered your username or password incorrectly 3 times. Please wait 15 minutes before trying again.");
}
$password = md5($password);//encrypt the password
$password = strrev($password);// for reliability, add reverse
$password = $password."b3p6f";
//you can add a few of your own characters to your taste, for example, by entering "b3p6f". If this password is hacked by brute force on the same md5 server, then obviously nothing good will come of it. But I advise you to put other characters, maybe at the beginning of the line or in the middle.
//In this case, it is necessary to increase the length of the password field in the database. The encrypted password may be much larger.
$result = mysql_query("SELECT * FROM users WHERE login="$login" AND password="$password"",$db); //retrieve from the database all data about the user with the entered login and password
$myrow = mysql_fetch_array($result);
if (empty($myrow["id"]))
{
//if the user with the entered login and password does not exist
//We make a record that this ip could not log in.
$select = mysql_query("SELECT ip FROM oshibka WHERE ip="$ip"");
$tmp = mysql_fetch_row($select);
if ($ip == $tmp) (//check if the user is in the "oshibka" table
$result52 = mysql_query("SELECT col FROM oshibka WHERE ip="$ip"",$db);
$myrow52 = mysql_fetch_array($result52);
$col = $myrow52 + 1;//add one more unsuccessful login attempt
mysql_query("UPDATE error SET col=$col,date=NOW() WHERE ip="$ip"");
}
else(
mysql_query("INSERT INTO oshibka (ip,date,col) VALUES ("$ip",NOW(),"1")");
//if there were no errors in the last 15 minutes, then insert a new entry into the "oshibka" table
}
exit("Sorry, the username or password you entered is incorrect.");
}
else(
nbsp; //if the passwords match, then we launch a session for the user! You can congratulate him, he got in!
$_SESSION["password"]=$myrow["password"];
$_SESSION["login"]=$myrow["login"];
$_SESSION["id"]=$myrow["id"];//this data is used very often, so the logged in user will “carry it with him”
//Next we save the data in cookies for subsequent login.
//ATTENTION!!! DO THIS AT YOUR DISCRETION AS THE DATA IS STORED IN COOKIES WITHOUT ENCRYPTION
if ($_POST["save"] == 1) (
//If the user wants his data to be saved for subsequent login, then we save it in his browser cookies
setcookie("login", $_POST["login"], time()+9999999);
setcookie("password", $_POST["password"], time()+9999999);
}}
echo ""; // we redirect the user to the main page, where we will notify him of a successful login
?>
5. We will completely change the main page. It is necessary to display the user’s avatar on it, display a link to log out of the account and add a checkbox to remember the password when logging in.
Index.php
Home page
Home page
6. It is necessary to make it possible for logged in users to log out. There was already a link to exit on the main page. But this file does not exist yet. So let's create a new exit.php file with the code:
OK it's all over Now! Enjoy it for your health! Good luck!
In the last lesson, we figured out what blocks the trip template will consist of, so we can get to work. First, let's create two folders:
images - this folder will contain any graphic files used to design the template. Because We don’t have any design developments yet, then drop any one graphic file into this folder, otherwise Joomla will not install the template and will give an error if the folder is empty.
ATTENTION: The template images folder does not contain content graphics!
css - this folder will contain cascading style sheet files. First, let's place an empty template.css file in it, which will be used to assign different design styles to site elements.
Next, you can begin to create the main file index.php, which will determine the visual arrangement of site elements and tell the Joomla CMS in which block to place various components and modules. The file is a combination of PHP and HTML.
I always use only Macromedia Dreamweaver when writing code. An excellent program, I strongly recommend it to beginners, because... If you made a mistake while working on the code, the program will definitely highlight your mistake.
On the site you will find a tutorial for Macromedia Dreamweaver. If you are going to develop websites, then you should master this program, at least at the initial level, in order to edit template codes without errors.
The positioning of page elements (blocks) is done using HTML code; specifically, we will use DIV tags. But the way our site will work on the Joomla engine, i.e. It will be dynamic, then you will also have to use the PHP language. With its help, we will determine in which blocks the positions for outputting modules will be located, and what these positions will be called, whether the blocks will be collapsed or not. We will connect style sheets from external files, the content language, set how the site size will change, etc.
index.phpFile header
The file header consists of several parts. The first part of the PHP header code is to ensure that the file is not accessed directly, for security reasons.
<
?php
defined ("_JEXEC" ) or die ;
JHtml::_("behavior.framework" , true ) ;
$app = JFactory::getApplication() ;
?>
<
?php echo
"<
?"
; ?>xml version="1.0" encoding="<
?php echo
$this
-
>_charset ?> " ?>
DOCTYPE is a very important parameter based on which the browser decides how to render this page and how to interpret the CSS.
< ! DOCTYPE html PUBLIC "- / / W3C/ / DTD XHTML 1.0 Strict/ / EN" "http:/ / www.w3.org/ TR/ xhtml1/ DTD/ xhtml1- strict.dtd" >
The following snippet retrieves the installed language from the global configuration.
< html xmlns= "http:/ / www.w3.org/ 1999/ xhtml" xml:lang= "< ?php echo $this - >language; ?> " lang="< ?php echo $this - >language; ?> " dir = "< ?php echo $this - >direction; ?> " >
Next is a piece of code that includes additional header information that is set in the global configuration. You can see this information by looking at the source code of any web page. In particular, these are meta tags, which you already know about.
<
head>
<
jdoc:include
type=
"head"
/
>
The following header lines contain links to the main Joomla CSS styles.
<
link
rel=
"stylesheet"
href=
"<
?php echo
$this
-
>baseurl ?> / templates/ system / css/ system .css" type= "text/ css" / >
<
link
rel=
"stylesheet"
href=
"<
?php echo
$this
-
>baseurl ?> / templates/ system / css/ general.css" type="text/ css" / >
To use template design styles, we link to a file containing cascading style sheets template.css, which is located in the CSS folder. It doesn’t matter that this file is empty for now, the main thing is to connect it, we’ll deal with the design later, when we install the template on Joomla. This will make it easier to observe the result.
< link rel= "stylesheet" href= "< ?php echo $this - >baseurl ?> /templates/< ?php echo $this - >template ?> / css/ template.css" type= "text/ css" / >
The following code snippet allows us to collapse the left or right columns if there are no modules located at the left and right positions. If both columns are collapsed, the content takes up 100% of the page width. If only one column is included, then the content takes up 80%. With two columns enabled, content accounts for 60% of the page width.
<
?php
if ($this - > countModules("left and right" ) = = 0) $contentwidth = "100" ;
if ($this - > countModules("left or right" ) = = 1) $contentwidth = "80" ;
if ($this - > countModules("left and right" ) = = 1) $contentwidth = "60" ;
?>
Header closes
<
/
head>
<
body>
The “page” block contains the design of only the site page, which will be 950px wide.
< div id= "page" >
The "top" block is located at the very top of the page and contains two blocks "logo" and "user1".
< div id= "top" >
In the “logo” bokeh we will place a graphic file of the logo; this will be specified in the style sheets. But we write the automatic display of the site name in the index.php file, and place the name in the H1 tag, which is very important for search engine optimization.
<
div id=
"logo"
>
<
h1>
<
?php echo
$app
-
>getCfg("sitename" ) ; ?><
/
h1>
<
/
div>
Let's define the position “user1” in the block of the same name to display the site search module.
<
div id=
"user1"
>
<
jdoc:include
type=
"modules"
name=
"user1"
style=
"xhtml"
/
>
<
/
div>
<
/
div>
<
!
-
-
конец блока top -
-
>
Output of the horizontal menu module in the “user2” block in the “user2” position. The block will collapse if there is no module at that position.
<
?php if
($this
-
>countModules("user2" ) : ?>
<
div id=
"user2 "
>
<
jdoc:include
type=
"modules"
name=
"user2"
style=
"xhtml"
/
>
<
/
div>
<
?php endif
; ?>
Next comes the site header block. In it we will define the “header” position for displaying modules. The block will collapse if there is no module at that position. I intentionally expanded the capabilities of this block to be able to place in it not only the header image, but also image rotators.
<
?php if
($this
-
>countModules("header " ) ): ?>
<
div id=
"header
"
>
<
jdoc:include
type=
"modules"
name=
"header
"
style=
"xhtml"
/
>
<
/
div>
<
?php endif
; ?>
In the “user3” block we define the position “user3” for outputting modules.
The block will collapse if there is no module output at this position "user3".
<
?php if
($this
-
>countModules("user3" ) : ?>
<
div id=
"user3"
>
<
jdoc:include
type=
"modules"
name=
"user3"
style=
"xhtml"
/
>
<
/
div>
<
?php endif
; ?>
A block of the left column opens, which will collapse if there are no modules in the “left” position.
<
?php if
($this
-
>countModules("left" ) ) : ?>
<
div id=
"left"
>
<
jdoc:include
type=
"modules"
name=
"left"
style=
"xhtml"
/
>
<
/
div>
<
?php endif
; ?>
The most important content block opens, which can occupy 100% of the page width, 80% and 60%, depending on the number of columns included.
< div id= "content< ?php echo $contentwidth ; ?> " >
Displaying messages in components
< jdoc:include type= "message" / >
Output content content.
<
jdoc:include
type=
"component"
style=
"xhtml"
/
>
<
/
div>
<
!
-
-
конец блока контента-
-
>
A block of the right column opens, which will collapse if there are no modules in the “right” position.
<
?php if
($this
-
>countModules("right" ) ) : ?>
<
div id=
"rigth"
>
<
jdoc:include
type=
"modules"
name=
"right"
style=
"xhtml"
/
>
<
/
div>
<
?php endif
; ?>
Output of the “footer” block, designed to display the “HTML code” module with copyright information. You can also place a bottom horizontal menu or content presentation module here. The block will be collapsed if more than one module is displayed in this “footer” position
<
?php if
($this
-
>countModules("footer") ) : ?>
<
div id=
"footer"
>
<
jdoc:include
type=
"modules"
name=
"footer"
style=
"xhtml"
/
>
<
/
div>
<
?php endif
; ?>
The site page block “page”, body and all code are closed.
<
/
div>
<
!
-
-
конец блока page-
-
>
<
/
body>
<
!
-
-
конец блока body -
-
>
<
/
html>
<
!
-
-
конец кода-
-
>
We have created a complete index.php file. Now you know which commands are used and in what sequence the template blocks are displayed.
ATTENTION: In order for the template code to be read from the joomla admin panel, the index.php file must be opened in the AkelPad editor and saved in UTF-8 encoding, while unchecking the BOM checkbox. If you used the Macromedia Dreamweaver program to work with the file, then you need to select “Edit”> “Page Properties” in the top menu and select the document encoding Unicode (utf-8), and uncheck “enable Unicode signatures (BOM)”. However, I strongly advise you not to edit the code from the Joomla admin panel, if you mess something up - there is no turning back, unlike the Macromedia Dreamweaver program, where you can always undo the changes made.
The design of the blocks itself will be described in template.css. But we will configure style sheets after installing the template on Joomla 3 (joomla 2.5), and for this we need to create