To operate and maintain a multifunction device or printer, various consumables are required. This is not only ink and paper for printing, to maintain the printer we need flushing fluid for the print head of the printer. Liquid for washing the print head (PG) of a printer, as the name implies, is used to remove residual ink, dried ink, as well as remove small particles and clots formed during a chemical reaction.
What will we talk about:
Liquid for washing printers
Liquid for washing heads of inkjet printers is used:
- For flushing the printer head when changing ink to similar ink of a different brand. If the MVU head is not washed, then there is a possibility of a chemical reaction occurring between inks of different brands, with the formation of sediment, which leads to clogging of the printer’s CISS.
- For washing printer elements when changing the type of ink from pigment to waterproof or vice versa. Neglecting these manipulations risks clogging the printer's print head with products of a chemical reaction between different types of ink.
- For washing parts from dried paint. A common cause of printer malfunction is drying of ink in printer parts due to prolonged non-use of the device. To remove dried paint particles, washing alone may not be enough and the procedure must be repeated several times. If the stains are severe, you have to soak the parts, which can take quite a long time.

Note: to prevent the ink from drying out in the PG and printer cartridges, if the printer is idle for a long period of time, it is necessary to print at least a sheet of paper on it, at least once a week.
- For washing syringes after refilling cartridges. If you use a syringe with dried ink residue to refill a cartridge, this can subsequently have a detrimental effect on the printer parts. To prevent possible damage, you should use a new syringe or wash it with a special liquid.
Note: to wash syringes and other elements from paint and for minor contamination (without dried paint), you can use a special liquid; it is sold in the same departments as the liquid for washing inkjet printer heads, but it is much cheaper. This liquid has a chemical composition for washing out paint, but when the paint dries it is not effective due to its low chemical aggressiveness.

DIY charging
If necessary, a solution for such purposes can be prepared with your own hands. The ingredients for such a mixture are not rare and can be purchased at any pharmacy. Different types of ink and different brands are suitable for different types of mixture. Such mixtures are divided into neutral, alkaline and acidic. The simplest, cheapest and most common neutral liquid is heated distilled water.
Note: to achieve the best effect, distilled water must be heated to a temperature of 50-70 degrees.

An acidic liquid is prepared by mixing distilled water, essence of acetic acid and alcohol in the proportions: 8:1:1. Mixtures of this type are suitable for HP color printers, as well as other devices that use paint of a similar composition.
Alkaline liquid is obtained by mixing distilled water, ammonia, alcohol and glycerin in proportions 7:1:1:1. This type of solution is used to remove dirt on Epson and Canon printers.
Note: the type of solution used will depend on the type and brand of ink used, so one or another solution may not always be effective. For maximum efficiency, use branded fluids that match your ink brand.
Flushing fluid for EPSON printers
Washing liquid for EPSON printers is used to clean the print head of an Epson printer from dried water-soluble ink; CL-08 washing liquid is suitable. For the liquid to be most effective, it is necessary to warm it up slightly to a temperature of 30-40 degrees. It takes 30-45 minutes to dissolve dried ink; if necessary, the operation should be repeated.
When using pigment ink in an Epson printer, you should use CL-06 washer fluid. For best results, you need to heat it to a temperature of 30-40 degrees.

For water-soluble and pigment inks in Epson printers, WWM CL-10 universal washing liquid is suitable. A mixture of this brand will cope with dried ink of both types. The cost of WWM CL-10 is slightly higher than its counterparts for water-soluble and pigment inks.
Note: it makes sense to take this type of liquid if you use 2 types of ink for printing and change them often.
Flushing fluid for Canon printers
WWM CL-04 liquid is suitable for cleaning Canon brand cartridges and PG printers from water-soluble ink. Like other liquids of this brand, the best effect will be if you warm the liquid to 30-40 degrees before use.

To remove dried pigment ink, it is necessary to use CL-06 washing liquid, heated to 30-40 degrees.
InkTec MCS-DP and OCP NR washing liquids are suitable for cleaning printer parts from pigment and water-soluble inks.
Flushing fluid for HP printers
To clean Canon printer parts from water-soluble ink, use WWM CL-04 liquid, heated to 30-40 degrees.
To remove dried pigment ink, wash liquid CL-06 is used. Before use, it is necessary to warm the liquid to 30-40 degrees.

InkTec MCS-DP and OCP NR washing liquids are suitable for cleaning printer parts from pigment and water-soluble inks.
To wash print heads, universal liquids for several printer models and several types of ink can be used, but there is no guarantee that such universal products will be highly effective. In case of severe contamination, you should use solutions designed specifically for this type of ink, a certain brand.
One, Two, Three - bring your printer to life!
Preface
Even the most reliable equipment, from time to time, requires preventative maintenance and minor repairs to promptly eliminate small problems that would otherwise lead to undesirable consequences.
The print heads of thermal and piezojet printers periodically require preventive cleaning. Droplets of ink remain on the fittings and nozzles of the printed elements and then dry out, dust and dirt are deposited from the air...
There are often cases when, out of ignorance, owners of inkjet printers use pigment dyes after water-soluble dyes, which is strictly prohibited and leads to defects in the printing devices. In all of the above cases, only one thing will help - washing the print head using special service fluids.
Among several types of service fluids for servicing cartridges and print heads of printers found on the Internet, fluids from the German company OCP attract the most attention. It seems like a trifle - a liquid is a liquid, it will perform its functions well and okay, but even here the Germans have thought through everything to the smallest detail.
The uniqueness of the product is that it is color-coded - out of 8 OCP service fluids, each special fluid has its own color and specific purpose.
So:
OCP service fluids. Purpose.
OSR RSL(Rinse Solution Liquid) or “OCP base fluid” is the most popular and widely used flushing fluid. Its composition is very close to the OCP ink base, with the addition of specially selected surfactants and alcohols necessary for the soaking and washing process. It is thanks to these features that ErSeElka, as it is affectionately called by servicemen, in most cases copes well with the assigned tasks and therefore has become widespread in service centers (Fig. 1)
Description: liquid is light yellow in color, with a characteristic odor, of medium aggressiveness. Has good cleaning properties.
Purpose:
— washing the internal surfaces of ink cartridges;
— washing the absorbent material (absorber) of inkjet cartridges;
— flushing the print head channels;
— soaking the print head nozzle plate;
— washing the tray and the entire pump path of inkjet printers.
Features of operation: For a more effective process of cleaning the print head, the OCP RSL service fluid must be used heated to a temperature of 35⁰C - 50⁰C (the approximate temperature range is indicated, it is better to stick to the average or maximum value, since the service fluid cools down quite quickly). Heating can be done in a microwave oven (if the bottle contains 100 g, be sure to remove the packaging foil under the stopper!) for a few seconds at maximum power or in a water bath (a container with boiling water).

OSR CRS(Concentrate Rinse Solution). Liquid concentrate RSL 1:3 (Fig. 2)
Description: liquid of rich yellow color, with a characteristic odor, highly aggressive. Use only after dilution with OCP PIW (see description below). Proportions for obtaining standard RSL liquid: one part OCP CRS three parts OCP PIW.
Attention! Without diluting the concentrate, using it in its pure form is dangerous for all types of print heads and cartridges, since it is very aggressive and can dissolve plastic.

OCP CCF (CISS). Liquid for washing CISS (CISS cleaning Liquid)
Description: light blue liquid with a weak characteristic odor (Fig. 3)
Purpose: used as a flushing liquid for CISS systems (Continuous Ink Supply Systems) to remove ink residues. It is practically non-aggressive and has the ability to block corrosion. Recommended for use as a print head preservative during long periods of inactivity.

OCP EPS Cleaning Ink. Liquid for resuscitation of print heads of EPSON printers (Fig. 4)
Description: dark blue liquid with a weak characteristic odor.
Purpose: Direct filling into the cartridge and printing of the nozzle test on the printer is allowed. Only for EPSON! Not aggressive. Cleans worse than RSL.

OCP CFR(Cleaning Fluid Red). Liquid for removing ink traces (Fig. 5)
Description: light pink liquid with a characteristic odor.
Purpose: used as a detergent to remove traces of ink from the plastic surfaces of refillable cartridges or CSS.
Features of operation:
— Not used for soaking or washing the internal surfaces of cartridges and print heads.

OCP LCF III(Lexmark Cleaning Fluid). Service liquid for pigment (Fig. 6)
Description: transparent liquid with a pungent odor of ammonia, highly aggressive.
Purpose: used for soaking and washing the internal surfaces of cartridges and print heads from traces of pigment ink.
Features of operation: It is possible to use the liquid in two versions - with and without heating. A more effective way of soaking and washing is to heat the liquid to a temperature of at least 70⁰C. Heating can be done in a microwave oven (if the bottle contains 100 g, be sure to remove the packaging foil under the stopper!) for a few seconds at maximum power or in a water bath (a container with boiling water).
If the liquid is used at room temperature, it must be used during the soaking process for up to half an hour to an hour.
Regardless of the method of use, liquid must be removed from the cartridge or printhead after complete use, for which OCP RSL or OCP PIW are used.
The liquid is highly aggressive, and therefore it is not allowed to leave it in the print head for more than an hour!

OCP NRC(Nozzle Rocket Colorless). Flushing liquid with additional components (Fig. 7)
Description: transparent liquid with a sharp characteristic odor, increased aggressiveness.
Purpose: used for soaking and washing the internal surfaces of cartridges and print heads.
The composition contains additional components that destroy stable formations inside the cartridges. The liquid has
increased aggressiveness, which is why it is necessary to use it during the soaking process for up to half an hour.
Regardless of the method of use, the liquid must be removed from the cartridge or head after complete use, for which OCP RSL or OCP PIW are used.

OCP PIW(Pure Ink Water). Industrially purified water (Fig. 8)
Description: clear, odorless liquid.
Peculiarities: Special processing and purification systems make it possible to obtain an almost pure formula of H 2 O, the quality of purification is higher than distilled, and does not contain salts and metal ions.
Purpose:
— preparation of a standard solution of OCP RSL from OCP CRS;
— final washing of cartridges to remove residual washing liquids.
The print head is cleaned when paint and dust clog the nozzles where the ink comes from. As a rule, this happens after the device has been inactive for a long time - the toners become covered with dust and slowly dry out, after which the user receives incorrect prints with various defects. The solution to the problem of dry ink is to manually wash the print head with special liquids. The procedure is not the most difficult, but it will require care and attention. With the right approach and following all the rules, the result will be cleaned elements in the printer and high-quality printing.
When should you clean the print head?
Canon service technicians say flushing is a last resort for printer maintenance.. Incorrect printing may have other reasons: the entry of air bubbles, misadjustment of the print head, excess pressure (when CISS containers are installed above the level of the head) or contamination from adhering dirt and dust. Another reason for a defect in the print is the failure of piezocrystals when the device is overloaded (Epson technology) or burnt-out heating elements (HP technology). If the equipment is used intensively, the print head is cleaned once a quarter or less.
Cleaning does not occur when system errors appear on the printer's LCD indicating that the toner is low or the cartridge icon blinks.

Software print head cleaning
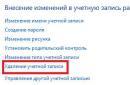
Before you begin mechanical cleaning, you should test the system and run a standard cleaning program. The program start may be located in the PC menu or the printer itself, depending on the model. If you use a computer, you need to go to the control panel, find the active printer and go to the “service” section, where you can check the nozzles and program print head cleaning. Then you need to launch the software.
Upon completion of the program cleaning, you need to repeat test the nozzles. Based on the print, you can draw conclusions whether a mechanical cleaning procedure is required or not. As a rule, this operation solves the problem of slightly dirty nozzles; if the ink is dry, software commands will not help.
Mechanical cleaning of the printer
Printer maintenance begins with preparing and checking all components. Initially carried out visual inspection To evaluate upcoming work, dust, particles of dried ink, and paper particles often accumulate in the printer.
You can manually wash all types of cartridges, except for models with filler. Such elements can only be cleaned using specialized devices - a centrifuge or a vacuum apparatus.
Then check CISS for broken paint supply hoses, tightness of the connections between the airlock and the cartridge. If there are air bubbles in the gateway, first of all the CISS is debugged and balanced. Donor containers or cartridges must be filled; if necessary, refill the printer and print a nozzle check test page.

Checking paint hoses
Not long ago, there was active discussion on the Internet about such a service device as ultrasonic bath. The usefulness of the device has not been proven for certain (and it does not matter whether it is medical equipment or a device for gentle cleaning of small parts). If you consult with specialists, the opinions are not clear, but most often they are negative. Facts of successful use of an ultrasonic bath among craftsmen are difficult to detect, but observations indicate a negative impact on the printer’s print head (failure within 24 hours or upon first use).

Using an ultrasonic bath
Everything you need to know about flushing fluids
Perhaps one of the most useful recommendations is to use a cleaner of the same brand as the ink. No one knows the exact composition of the dye better than the manufacturer, therefore, only the manufacturer himself knows how to remove it effectively and safely. Special cleaning compounds are safe for printers and their components. As a rule, there are several of them: for external cleaning, for removing water-soluble ink, pigment dyes, aggressive liquids for breaking down dried toners and severe blockages.

Universal washing liquid RDM No. 1 for inkjet printers and MFPs
For removing water-soluble ink The following liquids are suitable.
- Desalted water (specialized liquid WWM W01).
- Distilled water.
- A solution of a mixture of distilled water and 5 - 10% ammonia (not to be confused with ammonia) in proportions 1-10:1 (the exact proportions are calculated experimentally). The finished solution based on ammonia must be filtered through a mesh with a size of 0.01 microns.
Pigment dyes dissolve with other compounds:
- isopropyl alcohol;
- various specialized liquids.
In addition to branded cleaners, there are companies that carry various liquids for specific purposes. For example, WWM company boasts a good line of cleaners.

You can also choose an analogue, for example, workshop specialists have been using a conventional one for this operation for many years. glass liquid Mister Muscle. The main thing is to choose the right liquid for the ink: water-soluble dyes are green and pink, based on ammonia (ammonia), pigment dyes remove blue and orange, based on isopropyl alcohol.
To enhance the effectiveness of any solution, heat it to a temperature of 30-60°C.
If you don't know what kind of ink was used, don't rush to wash it. An incorrectly selected composition can quickly and permanently damage the print head. Take some ink and dissolve it in different formulations (or one, of your choice). After a couple of hours, analyze the result. When pigment dyes are exposed to distilled water, a precipitate is released. The transition of the liquid to a jelly-like consistency also indicates that the cleaning liquid was chosen incorrectly; the correct solution dilutes the ink and loosens the clots of dried dye.
Step-by-step washing instructions
After preparation and checks, you can begin the procedure of cleaning the printer’s print head. To do this, you will need technical washing liquid, two syringes (preferably 10 ml), several transparent tubes made of soft plastic or rubber, a container, and a bandage.
Cleaning the mouthguard and knife
Printer service technicians recommend cleaning the mouth guard and rubber blade first. Dust and dirt accumulated here depressurize the system, air enters it, which leads to printing with defects.

Sometimes a rubber knife may be located in the printer, inside the housing. It would be useful to print out the details of the device with a breakdown of the details.

Inkjet printer device
First option for cleaning the head
The printer's print head should only be removed before cleaning. On the lower part, remove accumulated dirt with a bandage soaked in cleaner. If the contamination is severe, use several pieces of bandage and repeat the procedure until the blockage is removed.

Remove the cartridge from the print head, underneath there are ink intake fittings. Gently wipe down all colors of grates. To flush the head, you will need a syringe filled with flushing liquid. The nozzle of the syringe should fit tightly onto the fitting; if the size does not match, increase the diameter of the syringe (for example, with a heated thin screwdriver). As a rule, the difference in diameters does not exceed 1 mm.

After releasing the air from the syringe, pump the wash into the fitting with slow and smooth movements, avoiding getting the cleaner on the head. If, through negligence, liquid does spill, quickly remove it using a second syringe or napkin; do not turn on the device until the moisture has completely evaporated.
Wash all colors in the same way, carefully watching pressure on the syringe rod and the “reaction” of the fittings to flushing. If one or more colors are heavily clogged or have large clumps of dried toner, the cleaner will fill slowly and unstably, or in some cases not flow at all. To eliminate overdried ink elements, more stringent, aggressive cleaning will be required.
Upon completion, remove all moisture by wiping the PG, housing and all accessible elements dry. Place the cartridge in the carriage and take it to a parking space.
Please note: if the cleaner is compatible with water-soluble inks, and the new dyes are pigment inks, you should rinse the system thoroughly with demineralized water (distilled water is not recommended, as sediment may form).
Option two – for “serious” cases
Another method of “reanimating” the PG is not much different from the first, but will help with moderate blockages. In this case, the syringe does not fit into the hole in the ink supply fitting, and the flushing liquid is slowly dig by hand through the grate. A clean bandage folded in several layers should be placed under the head; when it becomes dirty, replace it with a new one.

The procedure will take longer, about 1 – 2 hours, but the methodical action of the cleaner will effectively remove accumulated ink. If there is no result, you can strengthen the process.
- Cut several transparent tubes that match the diameter of the holes and put them on the head fittings.
- Pour cleaner into the tubes through a syringe, leave for several hours, or overnight.
- If the technical fluid passes evenly through the steam generator, it means the operation was completed successfully.

When cleaner does not flow into one or more tubes at all or flows, but more slowly than into others, this indicates severe contamination.
This cleaning procedure can be called gentle; it is allowed to repeat it several times (a week or two).
The third option is forced traction of the cleaner
This method is only suitable for very difficult situations when no method helps. The hard washing algorithm is as follows.

If forced flushing does not help, the next step for “advanced users” is a complete disassembly of the head. As practice shows, it is better to entrust this to a specialist. The reason is that due to inexperience, it is easy to damage the nozzles or the print head board, after which it can no longer be restored.
Cleaning the print head can be a long and tedious process, but the procedure itself is quite simple. It is important to observe caution and safety rules: disconnect the printer from the network and PC, protect the printer’s print head and electronics from moisture.
In contact with
Classmates
Printhead– the most “capricious” element of an inkjet printer. Prolonged downtime of the print head can cause slight blockage in its nozzles. The first signs of a clogged inkjet printer print head are horizontal white streaks on your printouts. If the blockage is not cleared in a timely manner, it can develop into an ink jam, which paralyzes the operation of nozzles clogged with dried ink. A visual comparison of a slight blockage and an ink jam on the print head of an inkjet printer is shown in the figure.
 |
Slight blockage and ink blockage in the nozzles of the inkjet cartridge print head
There are many ways to revive a dried-out inkjet printer print head. Let's look at some of them.
USING THE PRINTHEAD CLEANING UTILITY
Inkjet printer manufacturers supply utilities with their products to check the condition of the print head nozzles. If, after running such a utility, it turns out that some of the print head nozzles are clogged, you should run 1-2 cycles of cleaning them. Cleaning involves running ink through the print head nozzles. The increased pressure under which the ink is driven allows the nozzles to be freed from light ink plugs and accumulation of air bubbles.
One or two such cleanings will be quite enough. If you run the print head cleaning cycle many times in a row, then air-ink bubbles may form in its nozzles and the situation will only get worse. It should also be taken into account that when cleaning the print head, a certain amount of ink is wasted, which would be enough to print 3-5 sheets of high-quality A4 text. After cleaning the print head nozzles, leave the printer alone for a period of 2 to 5 hours. After this, you need to start printing a test page. If horizontal white streaks are still visible on the printout, you can run another cleaning cycle.
SOOOKING THE PRINT HEAD IN CLEANING LIQUID
If cleaning the print head of your inkjet printer does not help, you can try soaking it in a special cleaning liquid. You can only soak removable printheads (most Canon printers and older Epson printer models) and printheads built into the cartridge (HP, Lexmark). To do this, you need to take a small clean container, pour 2-3 millimeters of cleaning liquid preheated to a temperature of 40-50 ° C into it, and place the print head in the liquid with the nozzles down. To reduce evaporation of the cleaning liquid, the container can be covered with a plastic bag. After this, the print head should be left alone for a period of 1 to 3 days, depending on the degree of contamination. Since the cleaning liquid is ethereal in nature and periodically evaporates, it should be added to the container as its volume decreases. After the specified time has passed, the cartridge with the soaked print head is inserted into the printer and based on the print quality of the test page, a conclusion is made as to whether further washing of the nozzles is necessary.PRINTING WITH CLEANING LIQUID
To bring the non-removable print head back to life, you should run a print cycle with cleaning fluid. To do this, fill the cartridge with cleaning liquid instead of ink and start the print head cleaning system. If printing defects do not appear on the entire image, but only in areas of a certain color, then the liquid must be poured into a cartridge of the corresponding color. After cleaning, the printer must be left alone for about 2 hours so that the cleaning liquid dissolves the ink that has dried in the nozzles.
After two hours, you should create a sheet in any graphic editor and fill it with the appropriate color: if a purple cartridge was revived using a cleaning liquid, then the sheet should be filled with purple, if yellow, then yellow, etc. It is better to do this in Photoshop, which allows you to use the CMYK color scheme when filling the page. We print the resulting square filled with paint on standard paper, having previously set the print density to the highest. The cleaning liquid, mixing with the remaining ink in the inkwell, leaves prints on the sheet. If horizontal white stripes are visible on the print, it means the print head has not been cleaned; if the fill is continuous, then the ink jam has been removed.
For a final check of the print head, the cartridge is refilled with ink of the appropriate color, the nozzles are cleaned, and the same sheet of paper filled with ink is printed. If the ink plug is not removed, the printing procedure with cleaning liquid can be repeated.
WASHING THE PRINT HEAD WITH A HOMEMADE SOLUTION
For washing you will need: glass washing liquid with ammonia, distilled water, cotton wool, a small cup, a plastic bag, two syringes with a capacity of 10-20 ml, paper napkins and a hair dryer.
The print head is carefully removed from the printer carriage. Blot the surface of the print head with a paper napkin folded several times. The napkin needs to be changed until the ink prints disappear on it. With a new cloth soaked in washing liquid, lightly wipe all surfaces of the print head with the exception of the electrical contact board, with which the head is connected to the printer. The print head must be completely clean before soaking. The washing liquid is drawn into a syringe and released from a short distance onto areas where ink residues are visible.
If the printer is equipped separate cartridges, you should rinse the intake fittings from the syringe. If the printer uses built-in cartridges, you should empty all the contents from them and rinse the inside of the ink tank several times with washing liquid using a syringe with or without a needle, depending on the structure of the cartridge. After completing the procedure, the print head is blotted with a clean and dry paper towel.
If the printer has removable cartridges, then the intake fittings should be closed with cotton wool, generously moistened with flushing liquid. The cotton wool should be moistened with liquid until liquid begins to leak from the print head. Next, the print head needs to be placed in a small cup with the nozzles down. 2-3 mm of washing liquid heated to a temperature of 35-45 ° C is collected in a cup. Thus, the print head nozzles are immersed in the washing liquid. The cup is placed in a plastic bag and sealed tightly. The print head is left in this state for a day. After a day, the form is opened, the cycle of washing and soaking the print head in the washing liquid is repeated for a day.
OCP RSL
■ flush ■ yellow ■ designed for any inkjet printers
For washing the internal surfaces of cartridges (non-foam or after removing the foam), as well as print heads and components of CISS continuous supply systems (loops, capsules, cartridges, donor jars).
Used before changing ink to another manufacturer, before changing pigment ink to water-based (for undried pigment), as well as after using cleaning or soaking liquids (to neutralize their residues) before refilling with ink.
Peculiarities. Can be used at room temperature or heated. The washing process is accelerated if the liquid is preheated in a “water bath” to a temperature of 35C.
· Mode of application
Fill the volume to be washed with this liquid and let it sit for at least one hour, but not more than one day. Then drain the liquid from the volume being washed and fill the volume with ink. For a heavily contaminated volume, it is allowed to alternate filling with clean liquid, settling and draining several times, but the total time of exposure to this liquid should not exceed one day. Do not allow the liquid in the volume to be washed to dry out.
OCP CCF (OCP CISS)
■ flush ■ light blue ■ designed for EPSON inkjet printers
For washing the internal surfaces of cartridges (without foam or after removing the foam), as well as print heads, components of CISS continuous supply systems (loops, capsules, cartridges, donor jars).
Used before changing ink to another manufacturer, before changing pigment ink to water-based (for undried pigment), as well as after using cleaning or soaking liquids (to neutralize their residues) before refilling with ink. In addition, for preserving the print heads of inkjet printers before a long break in operation.
Method of use for preserving the print head
Fill functional empty cartridges completely with this liquid (it is recommended to use refillable cartridges with refill holes), install the cartridges in the printer and run the print head cleaning program once. (If before this the printer was standing with empty cartridges, then run the cleaning program three times in a row, turn off the printer with the button, leave it alone until the morning, and then turn on the printer and run the print head cleaning program once). This will fill the print heads with liquid. Then, without removing the cartridges from the printer, turn off the printer with the button and pack it in a sealed plastic bag for the storage period. This liquid can be left in the printheads for an extended period of time, but do not allow the liquid to dry out.
OCP ECI (OCP EPS)
■ cleaning ■ blue ■ designed for EPSON inkjet printers
For cleaning print heads from dried ink.
Peculiarities. Use at room temperature.
· Methods of application:
a) clean the heads with this liquid using the “Cleaning cartridge” method (described separately). The exposure time to this liquid should not exceed one day. Immediately after using this liquid, remove the cleaning cartridges from the printer, install ink cartridges into the printer and run the print head cleaning program twice in a row to replace the liquid in the heads with ink;
b) soak the outside of the head nozzles with this liquid using the “Sandwich” method (described separately). The exposure time to this liquid should not exceed one day. Immediately after soaking the heads, run the print head cleaning program at least once.
OCP NRC (OCP NRS)
For cleaning print heads from dried water-based and pigment inks.
Peculiarities. Use only at room temperature, without heating.
Method of application for heads removed from the printer
Soak the outside of the head nozzles with this liquid using the “Drop” method or the “Bath” method (described separately). The exposure time to this liquid should not exceed one hour.
OCP LCF III
■ soak-off ■ colorless ■ designed for any inkjet printers
For soaking and cleaning print heads from pigment, soaking heavily dried pigment ink in cartridges (non-sporen or after removing the foam) and in components of CISS continuous supply systems (loops, capsules, cartridges, donor jars).
Peculiarities. Can be used at room temperature or heated. The soaking process is significantly accelerated if the liquid is preheated in a “water bath” to a temperature of 60-70C.
Application methods for non-removable printer heads:
a) clean the heads with this liquid using the “Cleaning cartridge” method (described separately). The exposure time to this liquid should not exceed one hour. Immediately after using this soaking liquid, before refilling the heads with ink, remove the cleaning cartridges from the printer, install cleaning cartridges with another washing liquid into the printer and run the print head cleaning program twice in a row. Then remove the cleaning cartridges from the printer and install ink cartridges into the printer;
b) soak the outside of the head nozzles with this liquid using the “Sandwich” method (described separately). The exposure time to this liquid should not exceed one hour. Immediately after soaking the heads, run the print head cleaning program at least once.
b) for a print head combined with an ink tank into a monoblock, with very dry pigment ink. Lay oilcloth and several layers of newsprint on the table. Using a knife blade, carefully separate the top plastic cover from the candy bar using a rocking motion around the perimeter, completely remove the foam filler from it (do not throw it away!) and drain the remaining ink from the candy bar. Place the candy bar firmly on the table on a soft, dry cloth. Heat this soaking liquid in a “water bath” to 60C-70C and fill the internal volume of the monoblock completely with it. Allow to sit until the liquid cools to room temperature (but no more than an hour). Then drain this liquid, fill the internal volume of the monoblock with flushing liquid and drain it after 10-15 minutes. Reinstall the foam filler into the monoblock and glue the top plastic cover of the monoblock into its original place. Fill the monoblock with ink, install it in the printer and run the print head cleaning program several times in a row.
OCP CFR
■ cleaning ■ red ■ designed for external plastic surfaces
For cleaning ink and dirt from the outer plastic surfaces of various products - cartridges, print heads, components of CISS continuous supply systems, printer cases, computers, etc.
Peculiarities. Do not pour inside cartridges or print heads.
· Mode of application
Soak a soft cloth with this liquid and wipe the surface that requires cleaning with a damp cloth.
![]()
![]()
Service fluids InkTec, Ink-Mate (Korea)
InkTec MCS, Ink-Mate CS
■ cleaning ■ colorless ■ designed for any inkjet printers
For cleaning print heads from dried ink, including sublimation ink.
Peculiarities. Use at room temperature. Application methods for InkTec MCS and Ink-Mate CS fluids are the same
Method of application for non-removable printer heads
Soak the outside of the head nozzles with this liquid using the “Sandwich” method (described separately). A single exposure time to this liquid is not recommended for more than 10 minutes. Immediately after soaking the heads, run the print head cleaning program once and then run the nozzle test. If the nozzle test shows an unsatisfactory result, repeat the process of soaking the nozzles using the “Sandwich” method another 2-3 times for 10 minutes.
Methods of application for monobloc heads removed from the printer (integrated with the ink tank):
a) place the print head with nozzles under a slow stream of running hot water at a temperature of 40-50C to a depth of 1 cm for about 10 minutes. Then place a suitable container (for example, a plastic plate) on the table and place a dry napkin on the bottom of the container. Pour cleaning liquid into the container (up to 1 cm deep). Place the head with the nozzles in the liquid on a napkin. Be careful - the head contacts should not get wet! After 10 minutes, remove the head from the container and blot the nozzles with a dry cloth. Check - if liquid has leaked under the electrical cable of the head, then the cable must be completely dried before installing the head in the printer! Then install the head into the printer, run the print head cleaning program once and then test the nozzles. If the nozzle test shows an unsatisfactory result, put the nozzle head back into the cleaning liquid and repeat the entire described process 2-3 more times;
b) in the presence of a professional ultrasonic bath. Place a suitable container (for example, a plastic plate) on the table and place a dry napkin on the bottom of the container. Pour cleaning liquid into the container (up to 1 cm deep). Place the head with the nozzles in the liquid on a napkin. Be careful - the head contacts should not get wet! After 3 minutes, remove the head from the container. Then for 5 (five) seconds (no more, to avoid damage to the head!) immerse the head with the nozzles in an ultrasonic bath filled with distilled water. Remove the head from the bath and blot the nozzles with a dry cloth. Check - if liquid has leaked under the electrical cable of the head, then the cable must be completely dried before installing the head in the printer! After this, install the head into the printer, run the print head cleaning program once and then test the nozzles. If the nozzle test shows an unsatisfactory result, again place the head with the nozzles in the cleaning liquid and repeat the entire described process 2-3 more times.
Service fluids InkMaster (England)
InkMaster Flushing
■ washable ■ colorless ■ designed for any inkjet printers
For final washing of the internal surfaces of cartridges (non-foam or after removing the foam), as well as print heads, components of CISS continuous supply systems (loops, capsules, refillable cartridges, donor jars).
Used before changing ink to another manufacturer, before changing pigment ink to water-based (for undried pigment), as well as after using cleaning or soaking liquids (to neutralize and wash out their residues) before refilling with ink. In addition, for preserving the print heads of any inkjet printers before a long break in operation.
Peculiarities. Use at room temperature.
Method of application for washing
Fill the volume to be washed with this liquid and let it sit for several hours. Then drain the liquid from the volume being washed and fill the volume with ink. For a heavily contaminated volume, it is possible to alternate several times between filling with clean liquid, settling and draining. This liquid can be left in the volume being washed for a long time, but do not allow the liquid to dry out.
Method of use for preserving the print head of the printer
Fill functional empty cartridges completely with this liquid (it is recommended to use refillable cartridges with refill holes), install the cartridges in the printer and run the print head cleaning program once. (If before this the printer was standing with empty cartridges, then run the cleaning program three times in a row, turn off the printer with the button, leave it alone until the morning, and then turn on the printer and run the print head cleaning program once). This will fill the print heads with liquid. Then, without removing the cartridges from the printer, turn off the printer with the button and pack it in a sealed plastic bag for the storage period. This liquid can be left in the printheads for an extended period of time, but do not allow the liquid to dry out.
InkMaster Recovery ("recovery")
■ cleaning ■ colorless ■ designed for any inkjet printers
For cleaning and restoring print heads from dried water-based and pigment inks.
Peculiarities. It is highly effective. Use only at room temperature, without heating.
Application methods for non-removable printer heads:
a) clean the heads with this liquid using the “Cleaning cartridge” method (described separately). The exposure time to this liquid should not exceed one hour. Immediately after using this cleaning liquid, before refilling the heads with ink, remove the cleaning cartridges from the printer, install cleaning cartridges with another washing liquid into the printer and run the print head cleaning program twice in a row. Then remove the cleaning cartridges from the printer and install ink cartridges into the printer;
b) soak the outside of the head nozzles with this liquid using the “Sandwich” method (described separately). The exposure time to this liquid should not exceed one hour. Immediately after soaking the heads, run the print head cleaning program at least once.
Application methods for removable printer heads:
a) soak the outside of the head nozzles with this liquid using the “Drop” method or the “Bath” method (described separately). The exposure time to this liquid should not exceed one hour;
b) for a print head combined with an ink tank into a monoblock, with very dry ink. Lay oilcloth and several layers of newsprint on the table. Using a knife blade, carefully separate the top plastic cover from the candy bar using a rocking motion around the perimeter, completely remove the foam filler from it (do not throw it away!) and drain the remaining ink from the candy bar. Place the candy bar firmly on the table on a soft, dry cloth. Fill the internal volume of the monoblock completely with this liquid. Let sit for one hour (but no more than an hour). Then drain this liquid, fill the internal volume of the monoblock with flushing liquid and drain it after 10-15 minutes. Reinstall the foam filler into the monoblock and glue the top plastic cover of the monoblock into its original place. Fill the monoblock with ink, install it in the printer and run the print head cleaning program several times in a row.
Methods of exposure to service fluids
Printhead cleaning method "Cleaning cartridge"
Fill spare functional empty cartridges completely with the required service fluid. (If possible, it is recommended to use refillable cartridges - they have ready-made refill holes with plugs). Install the resulting cleaning cartridges into the printer. Run the printhead cleaning program twice in a row. In this case, the liquid from the cartridges will fill the print heads of the printer. Then, during the required time of exposure of the liquid to the heads, print some texts, images onto plain paper and periodically run a nozzle test. (If the liquid is colorless, you can pre-tint it with one drop of colored ink and see the print quality of the heads on the paper). The time of exposure of the liquid to the heads must be controlled - it is different for different liquids.
(Be careful - when servicing the heads, do not remove the cartridges from the heads for more than a minute to avoid airing the head channels. A sign of airing the head channels - there is ink in the cartridges, but when printing, the ink does not pass through all the nozzles onto the paper, and starting up does not help cleaning programs. If you turn off the printer and leave it alone until the morning, the air will come out of the heads on its own).
After using cleaning cartridges with cleaning or soaking liquid, if the cartridges contain metal elements inside (for example, a mesh filter, outlet valve spring), then you need to drain the remaining liquid from the cartridges and then rinse the volume of the cartridges with washing liquid to avoid metal corrosion. It is impossible to drain the remaining liquid from cleaning cartridges with foam filling. Therefore, if they contain metal elements, then the life of such cleaning cartridges will be limited.
"Sandwich" print head nozzle cleaning method
Prepare dry, thick paper napkins or toilet paper - such that the lint does not separate from them, and so that when wetted the paper does not fall apart into shreds. Prepare a piece of smooth plastic film (for example, cut from a thick bag or from the side of a drinks bottle) slightly larger than the “cap” in the print head parking space in the printer. Turn on the printer. Move the print heads to the cartridge replacement position, and then unplug the printer's power cord from the outlet. (In this case, the printer heads must remain in the cartridge replacement position. Do not remove the cartridges). If you use CISS, temporarily plug all the plugs on the CISS donor jars. Carefully spread the prepared piece of film over the surface of the mouth guard. Place a piece of prepared paper of approximately the same size on top of it and evenly saturate the paper with the required service fluid using a bottle with a long spout or a syringe. Carefully push the print heads into the extreme position of the parking space by hand, making sure that the sandwich of film and paper placed on the “drip” does not slide to the side. In the extreme position, the sandwich will be pressed against the nozzles of the heads. Leave the heads alone for a while. Since the paper with the liquid gradually dries out, during the total exposure time the heads can be extended and retracted several times while changing the paper to a new one, newly soaked in liquid. The time of exposure of the liquid to the heads must be controlled - it is different for different liquids. Immediately after the end of exposure to the cleaning or soaking liquid, you need to pull out the heads, replace the sandwich paper with a new one, soaked in a new washing liquid (to neutralize the remnants of more aggressive liquids), push the heads back into the parking space and leave the heads pressed against the sandwich for another 10-15 minutes. After this, pull out the heads, remove the sandwich from the “drop guard” and push the heads back into the parking space.
Method of cleaning print head nozzles "Drop"
Cover the table with oilcloth and several sheets of newsprint on top of the oilcloth. Remove the print head from the printer and place it on the table upside down so that the nozzle plate is on top and parallel to the table surface. Carefully apply 2-3 drops of the required service fluid onto the nozzle plate. Drops will slowly seep into the nozzles. Be careful - do not allow liquid to flow onto the electrical cable and head contacts! During the required exposure time, repeatedly apply drops of liquid to the nozzle plate. The time of exposure of the liquid to the head must be controlled - it is different for different liquids. Immediately after using the cleaning or soaking liquid, blot the head nozzles with a cloth moistened with the washing liquid. Check - if any liquid has leaked under the electrical cable of the head, then the cable must be completely dried before installing the head in the printer! Install the ink head into the printer and run the nozzle test at least three times in a row, as well as the print head cleaning program once. (Because the head has been upside down for some time, the ink may have leaked from the head and it may not print right away. In this case, you need to leave it alone in the printer for one to two hours, and then run the printhead cleaning program several times.)
"Bath" method for cleaning print head nozzles
Place a suitable container (for example, a plastic plate) inside a plastic bag on the table. Place a dry cloth at the bottom of the container. Pour the required service fluid into the container (3-5 mm deep). Remove the print head from the printer and immerse the nozzles in the liquid on a napkin. Be careful - the head contacts should not get wet! Seal the top of the bag tightly to reduce liquid evaporation. After the required exposure time has elapsed, remove the head from the container with liquid. The time of exposure of the liquid to the head must be controlled - it is different for different liquids. Immediately after using the cleaning or soaking liquid, blot the head nozzles with a clean cloth moistened with the cleaning liquid. Check - if any liquid has leaked under the electrical cable of the head, then the cable must be completely dried before installing the head in the printer! Install the ink head into the printer and run the nozzle test at least three times in a row, as well as the print head cleaning program once.