If you have a bunch of files that you want to rename, but don't want to deal with each one individually? Windows provides many ways to do this.
You can easily rename one or more files to Windows Explorer(Explorer), but you can also do this using the command line or PowerShell.
Let's look at each option and how it works.
Rename multiple files in Windows Explorer.
Windows Explorer (known as File Explorer in Windows 10) is surprisingly powerful. You probably know how to rename a single file, but let's start with the basics since there are advanced techniques available.
If you're using a mouse, you have at least three ways to select a file name and rename it.
We can do the following:
⦁ Click to select a file and then click the " Rename" in the main menu.
⦁ Click to select a file and then click the name of the selected file.
⦁ Right-click on the file and then select " Rename
" in the context menu.
And if you prefer a keyboard then you can simply use the arrow keys (or start typing the file name) to select the file and then press the key F2 to select a file name. Once you have highlighted the name of the selected file, you can immediately enter your name.

When you finish entering the file name, click Enter(or just click somewhere else) to save the new name.
Here's where things get interesting: it's when you press the key Tab to automatically select the next file name in a folder, so you can immediately start typing a new name for it. Keep pressing Tab and enter the names this way and you can easily rename all the files in the folder.
If you have a bunch of files in the same folder and those files don't need different names then Windows provides an easy way to rename those files in batch.
Start by selecting several files while holding down the key Ctrl+A to select multiple files at once, or select files using one of the button commands Rename on the menu home, command in the context menu, or just click F2. You will see that all files remain selected.

Enter a new file name, and then press Enter or click anywhere else in this window. All selected files will be renamed using the name you just entered, and added with a number in brackets so that there are numerical differences.

Renaming multiple files from the command line
If you need more options you can use the rename or ren command in the Command Prompt window on one or more files.
The command accepts wildcard characters such as * and ? to reconcile multiple files, which can be useful if you only want to rename a specific set of files in a folder.
The fastest way to open a Command Prompt window in the desired location is to first open the folder in File Explorer. On the menu " File" select item " Open command line", and then select " Open command line".

To rename a single file, you can use the following command syntax:
ren "current_filename.ext" "new_filename.ext"

These quotes are required if your filenames contain spaces. If there are no spaces then you don't need quotes.
So, for example, to rename files from “WordFile (1).docx” to “file (01).docx” we use the following command:
ren "wordfile (1).docx" "my word file (01).docx"
Because the ren The command can also be used to change the file extension, you can also use it to change the extensions of multiple files at the same time. Let's say for example you had a selection of .txt files that you wanted turned into .html files. You can use the following command along with the asterisk * wildcard pattern:
ren *.txt *.html
Renaming multiple files using PowerShell
PowerShell offers even more flexibility for renaming files in a command line environment.
With PowerShell, you can use the output of a single command known as " commandlet" in PowerShell terminals such as on Linux and other UNIX-like systems. The two important commands you need are Dir, which lists the files in the current directory, and Rename-Item, which renames the item (the file, in this case).
The fastest way to open a PowerShell window in the desired location is to first open the folder in. On the menu " File" select item " Open Windows PowerShell", and then select " Open Windows Powershell."

First, let's look at renaming a single file. To do this you need to use the following syntax:
rename-item "current_filename.ext" "new_filename.ext"
So, for example, to rename a file from “wordfile.docx” to “My Word File.docx” we use the following commandlet:
rename-item "wordfile.docx" "My Word File.docx"
It's quite simple. But the real capability in PowerShell comes from the ability to syntax commandlets together and some of the conditional output supported by rename-itemcommandlet.
Let's say, for example, we had a bunch of files named "WordFile(1).docx", "WordFile(2).docx", and so on.

Let's say we wanted to replace the space in these file names with an underscore, so that there were no spaces in the file names. We could use the following commandlet:
dir | rename-item -NewName ($_.name -replace " ","_")

And now, our files look the way we want.

AdvancedRenamer application
There is another renaming tool called AdvancedRenamer. It also provides a huge number of renaming methods. The tool does the job perfectly and has a much more user-friendly interface and supports creating advanced batch jobs so you can combine multiple renaming methods and apply them to a large number of files . You can also save the created rename method for later use.
In the example below, I have created a rename method using the following syntax:
Word File_
This command tells AdvancedRenamer to name all my files in "Word File" and add the creation date in GMD format (separating each word with an underscore). It also adds the file extension number in parentheses and is separated from each other by an additional underscore.

And as you can see, my files have been renamed exactly the way I want.

Are there other ways to rename files in Windows? Don't forget to leave us a comment and let us know about it.
In Windows, there are many ways to rename multiple files at once - through Explorer, the command line, or PowerShell. There is a solution for both graphical interface lovers and those who prefer to work with commands.Renaming through Explorer works quickly, but is not flexible enough. PowerShell has a lot of flexibility, but for a beginner this method can be intimidating. And if you need a powerful graphical tool, you will have to use a third-party program.
Conductor
Explorer has a rather unobvious way to quickly rename groups of files. First, collect all the necessary files in one folder. Switch to the “Table” view (Details) and sort the files in the required order - Explorer assigns numbers from the list starting from the top.

Select all the files you want to rename, right-click and select Rename. Enter a new name and press .

Explorer will append a number to this name for each file. A convenient way to bring all files to the same denominator, although not very flexible.

Command line
On the command line, you can use the rename or ren command to bulk rename files. You can use the wildcard * to denote multiple files at once.
The easiest way to open a command window in the desired folder is to hold down , right-click on the folder and select “Open command window here”.

Most often, command renaming is used to change the extension of an entire group of files - this cannot be done in Explorer. The command below, for example, turns all .html files into .txt:
ren *.html *.txt
The command itself is not very functional, but it can be used in complex scenarios.

PowerShell
PowerShell offers many more options for renaming files in a command environment. With PowerShell, you can pass the output of one command (cmdlet, as it's called here) to another command, just like in Linux and other UNIX-like systems.
The main commands are Dir to get a list of files in the current folder and Rename-Item to rename an object (in this case a file). Just pass the output of Dir to the Rename-Item command and you're done.

After starting PowerShell, use the cd command to navigate to the folder with the desired files. It is best to put all the files in one folder so as not to accidentally rename unnecessary ones.

Let's say we want to replace spaces in file names with underscores.

The following command lists the files in the current folder and passes it to the Rename-Item command, which replaces all spaces with underscores.
Dir | Rename-Item –NewName ( $_.name –replace “ “,”_” )
You can replace “ “ and “_” with other characters to rename the files differently.

You can learn more about using Rename-Item to perform more complex operations.
Third party utilities
If you need a powerful tool for bulk file renaming, but don’t want to mess around with the command line, you can use third-party utilities, for example. True, the interface of this application is quite confusing, since it provides a lot of capabilities that are usually only achievable using regular expressions and complex commands.
After installing the application, find and select the files to rename.
To quickly find files and quickly navigate through them, it is not enough to put everything in the correct folders. It is equally important to give files names that are easy to read and meaningful. Fiddling with each of them separately is counterproductive. Therefore, there are methods for group renaming.
To work with a group of files, it is better to copy them to a separate folder. This will greatly simplify the process.
Using standard Windows tools
Changing file names
Let's consider the simplest case: we have the nth number of images with meaningless names.
Let's bring the names of these files to a visual form Picture (n), Where Picture will be the name, and n- serial number. This can be easily done directly in Explorer.
Select all the pictures that we want to rename. To do this quickly, use the key combination Ctrl + A. Then simply press F2 or right-click on the first file and select “Rename”. Enter the word as the name for the selected image Picture and press Enter.

Windows will automatically assign the same name to all subsequent files and assign all serial numbers.

If necessary, you can cancel mass renaming with the Ctrl + Z key combination.
If you want to rename a group of folders in Explorer, you can do it in the same way.
Changing file extensions
Let's say we have several text documents that, after double-clicking, open in Notepad. But we need them to be opened by the browser by default. To do this, you will have to change their extension from .txt to .html. These types of operations can be quickly performed using the command line.

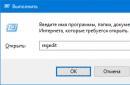
Press the Windows + R keys and enter in the field that appears cmd and click OK - we see the command line window. Now we insert into it the path to the folder in which our files are located, immediately after the command CD: cd C:\Users\Max Volotsky\Desktop\Docs , and press Enter. Then we use a special command that will change their extensions: rename *.txt *.html , and press Enter again.

The original extension is indicated first in the command, the new one is indicated second. After entering the command, the system instantly makes changes.

To return everything as it was, you need to use the rename command again, swapping the extensions.
Using third party utilities
No built-in tools can match the functionality of special programs designed specifically for batch renaming. You can find many such free utilities on the Internet; just enter bulk file rename in the search.
We will look at renaming using the example of the Bulk Rename Utility program. With its help it is very convenient to change the names of folders and files, as well as the extensions of the latter.
When you first launch it, it may seem that the utility’s interface came straight from hell, and perhaps there is some truth in this. But the user does not need to navigate through numerous tabs and menus: he gets access to all functions from one window.

So, let's say we have a group of audio files that we want to make look pleasing to the eye. In this case, the numbers and the lack of artist name are annoying.

We launch the application and use the built-in file manager to go to the folder we need. Next, use the already familiar Ctrl + A key combination to select all files. We need to remove the first 3 characters at the beginning of each file name and add the artist name at the very beginning. To do this, specify the necessary parameters in the Remove and Add panels, and then click Rename.

Now we’ll make sure that all extensions consist of lowercase characters: in the Extension panel, select the Lower option and click Rename.

As you can see, other panels are available in the program window. For example, Numbering allows you to number documents in different ways, and with Case you can change the case of characters in file names. Thanks to the New Name column in the built-in explorer, which shows the result of a rename before it's applied, you'll easily understand the rest of the Bulk Rename Utility.

The last operation with files and folders performed in the program can be easily undone using the Ctrl + Z key combination.
ReName- a program that allows you to batch rename files. Despite its apparent simplicity, it is a powerful tool aimed at experienced users. Using the program's built-in tools, you can remove certain characters from files, change extensions, replace some words with others, and also manually enter the desired names. Unicode support allows users to have peace of mind that names are displayed correctly in any language.
System requirements:
Windows XP / Vista / 7 / 8 / 8.1 / 10
Torrent Batch file renaming - ReNamer Pro 6.8 + Portable details:
Changes in version:
* Optimized files table clearing operation. Clearing all files is significantly faster now.
* Refactored files table import operation.
* Include directories with a system attribute when scanning for presets.
* Show presets directory structure limitation message in Save Preset and Presets Manager.
* Reapply presets limitations after a preset was deleted in Presets Manager.
* Localized filter title in the dialog for importing presets.
* Ignore file extension when sorting presets.
* Sort the list of translit alphabets.
* Meta tags: Decoded escape sequences when extracting complete mailbox specifications.
* Meta tags: Handle tab char (#9) as a fold char in email headers.
* Meta tags: Handle folded (wrapped/multiline) email headers.
* Meta tags: Handle escape sequences in mailbox specification.
* Meta tags: Decode multiple contained MIME encoded words in email headers.
* Meta tags: Decode MIME encoded email subject line and addressee names.
* Meta tags: Extract unquoted name from a mailbox addressee specification.
* A more user-friendly error message when the application of renaming rules on text fails.
* Rearranged Z-order of options to avoid covering up of the radio button in the User Input rule, due to increased system font size.
* Changed the order of options in the Serialize rule for a more natural flow.
* Display separate counters for skipped unmarked files and skipped unchanged files.
* Added new functions to Pascal Script: WideMatchesMask, WideMatchesMaskList, WideSameFileName, WideReverseString, RandomString.
* Refactored registration of custom types and functions in Pascal Script.
* Support directory structures for presets (Pro version).
* Do not show "preset not found" warning in silent command line mode.
* Apply license restrictions to the creation of preset links.
* Show message with the number of successfully created preset links.
* Save Preset dialog is now resizable.
* Allow ampersand sign "&" to be used in preset names.
* Forbid saving a preset with an empty name.
* Added a selection of numeral systems to the Serialize rule: Decimal digits (0..9), English letters (a..z), Roman numerals (I,II,III,IV,...), Simplified Chinese, Custom alphabetic and Custom numeric.
* Avoid a crash when Randomize rule is misconfigured with an empty character set.
* Refactored UTF8 code point splitting routines.
* Added "Reset if file name changes" option to the Serialize rule.
* Added FileReadTextLines function to Pascal Script.
* Added UsePlusAsSpace parameter to URLDecode function.
* Modified import/export icons to minimize ambiguity of color and direction of arrows.
* Added "New Instance" option for opening a new application instance.
* Option "Create Links" can now handle Unicode preset names.
* Option to add a link to "Send To" folder is now Unicode capable.
* Updated Japanese language file. Thanks to Tilt.
* Updated Chinese Simplified language file. Thanks to Max Wander.
* Updated Italian language file. Thanks to Vittorio Ierardi.
* Updated Russian language file.
* Other internal changes.
About Portable:
1. Copy the portable version of the program to a disk, flash drive, etc.
2. Treatment instructions, the same as for the installation version from point 2
Treatment procedure:
1. Install the program.
2. Copy the patch to the folder with the installed program.
3. Run the patch with “Administrator” rights, click the “Patch” button
4. Open the program, register with the key NGC2261HUBBLE
To quickly find files and quickly navigate through them, it is not enough to put everything in the correct folders. It is equally important to give files names that are easy to read and meaningful. Fiddling with each of them separately is counterproductive. Therefore, there are methods for group renaming.
To work with a group of files, it is better to copy them to a separate folder. This will greatly simplify the process.
Using standard Windows tools
Changing file names
Let's consider the simplest case: we have the nth number of images with meaningless names.
Let's bring the names of these files to a visual form Picture (n), Where Picture will be the name, and n- serial number. This can be easily done directly in Explorer.
Select all the pictures that we want to rename. To do this quickly, use the key combination Ctrl + A. Then simply press F2 or right-click on the first file and select “Rename”. Enter the word as the name for the selected image Picture and press Enter.
Windows will automatically assign the same name to all subsequent files and assign all serial numbers.
If necessary, you can cancel mass renaming with the Ctrl + Z key combination.
If you want to rename a group of folders in Explorer, you can do it in the same way.
Changing file extensions
Let's say we have several text documents that, after double-clicking, open in Notepad. But we need them to be opened by the browser by default. To do this, you will have to change their extension from .txt to .html. These types of operations can be quickly performed using the command line.
Press the Windows + R keys and enter in the field that appears cmd and click OK - we see the command line window. Now we insert into it the path to the folder in which our files are located, immediately after the command CD: cd C:\Users\Max Volotsky\Desktop\Docs , and press Enter. Then we use a special command that will change their extensions: rename *.txt *.html , and press Enter again.
The original extension is indicated first in the command, the new one is indicated second. After entering the command, the system instantly makes changes.
To return everything as it was, you need to use the rename command again, swapping the extensions.
Using third party utilities
No built-in tools can match the functionality of special programs designed specifically for batch renaming. You can find many such free utilities on the Internet; just enter bulk file rename in the search.
We will look at renaming using the example of the Bulk Rename Utility program. With its help it is very convenient to change the names of folders and files, as well as the extensions of the latter.
When you first launch it, it may seem that the utility’s interface came straight from hell, and perhaps there is some truth in this. But the user does not need to navigate through numerous tabs and menus: he gets access to all functions from one window.
So, let's say we have a group of audio files that we want to make look pleasing to the eye. In this case, the numbers and the lack of artist name are annoying.
We launch the application and use the built-in file manager to go to the folder we need. Next, use the already familiar Ctrl + A key combination to select all files. We need to remove the first 3 characters at the beginning of each file name and add the artist name at the very beginning. To do this, specify the necessary parameters in the Remove and Add panels, and then click Rename.
Now we’ll make sure that all extensions consist of lowercase characters: in the Extension panel, select the Lower option and click Rename.
As you can see, other panels are available in the program window. For example, Numbering allows you to number documents in different ways, and with Case you can change the case of characters in file names. Thanks to the New Name column in the built-in explorer, which shows the result of a rename before it's applied, you'll easily understand the rest of the Bulk Rename Utility.
The last operation with files and folders performed in the program can be easily undone using the Ctrl + Z key combination.