If the cooler makes creaking sounds while the computer is running, most likely it needs to be cleaned of dust and lubricated (or maybe even replaced). You can lubricate the cooler at home, using improvised means.
First, prepare all the necessary components:
- Alcohol-containing liquid (vodka is possible). It will be needed for better cleaning of cooler elements;
- For lubrication, it is better to use machine oil of a non-viscous consistency. If it is too viscous, the cooler may start to work even worse. It is recommended to use special oil for lubricating components, which is sold in any computer store;
- Cotton pads and buds. Just in case, take more of them, because... the recommended amount depends greatly on the degree of contamination;
- Dry cloth or napkins. It would be ideal if you have special wipes for wiping computer components;
- Vacuum cleaner. Preferably having low power and/or having the ability to adjust it;
- Thermal paste. It is not necessary, but it is recommended to change the thermal paste during this procedure.
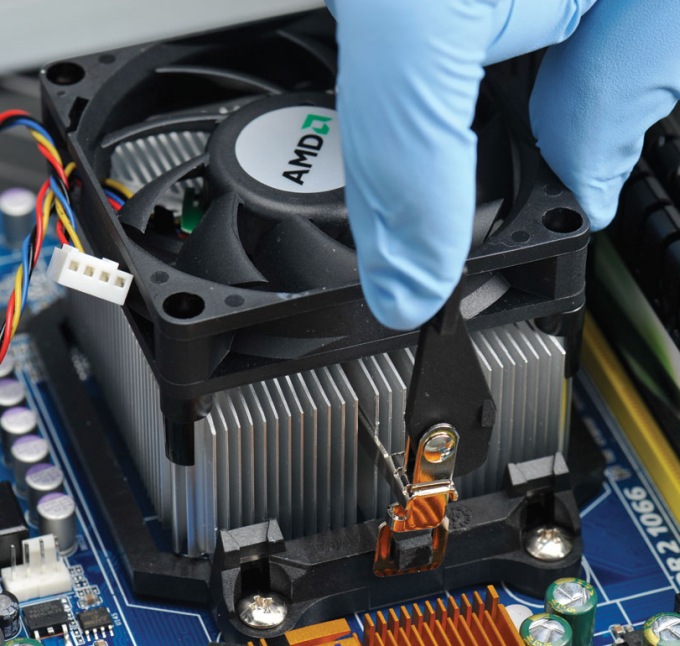
At this stage, you need to disconnect the computer from the power supply; if you have a laptop, then also remove the battery. Place the case in a horizontal position to reduce the risk of accidentally disconnecting any components from the mother card. Remove the cover and get to work.
Stage 1: Primary cleaning
At this stage, you need to do the highest quality cleaning of all PC components (especially fans and radiator) from dust and rust (if any).
Follow these instructions:
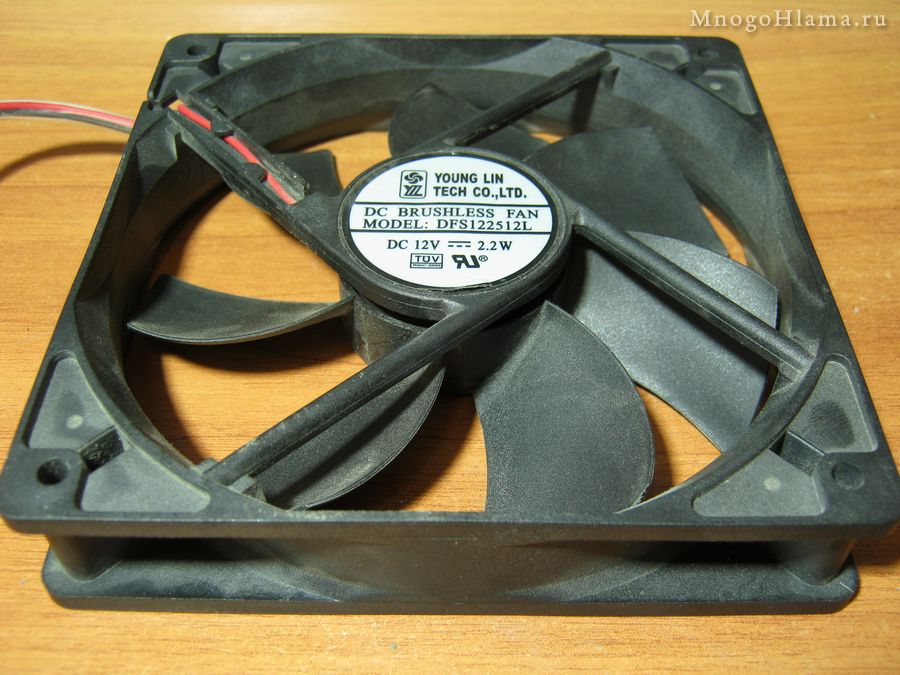
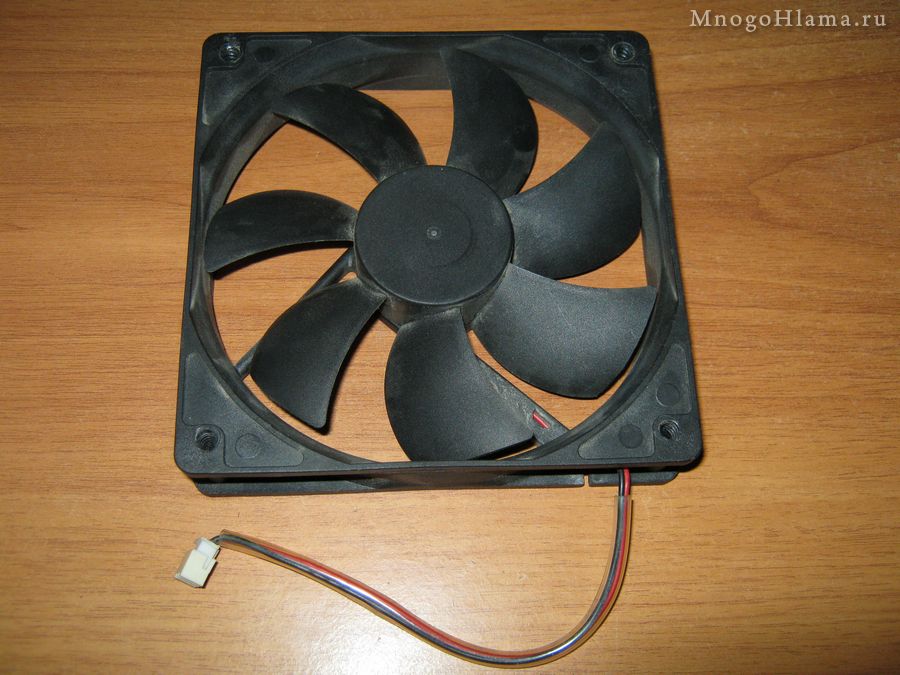
I found a couple of old fans in my hardware and decided to take them apart to see how they work. In addition, it has never been possible to completely disassemble such fans before. All the time I limited myself to the usual peeling off the sticker, removing the plug and adding a couple of drops of oil to the bearing. Both of these fans are from two different power supplies, one 120 mm, the second 80 mm. But also on the body system unit they are attached exactly the same, for pumping cold air into it or for pumping out hot air. So, using these examples, you can carry out preventive maintenance on your fans.
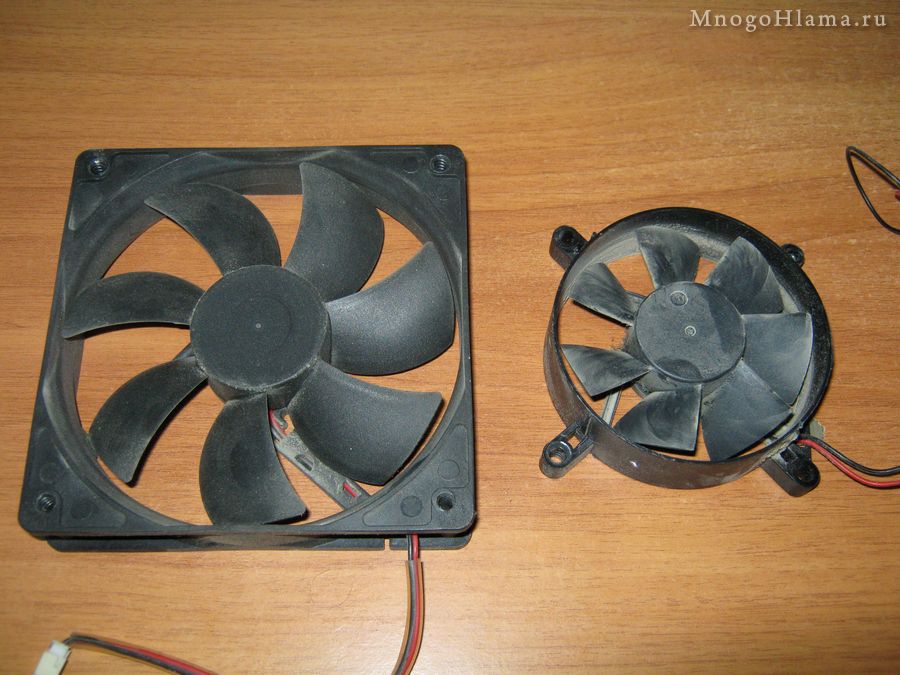
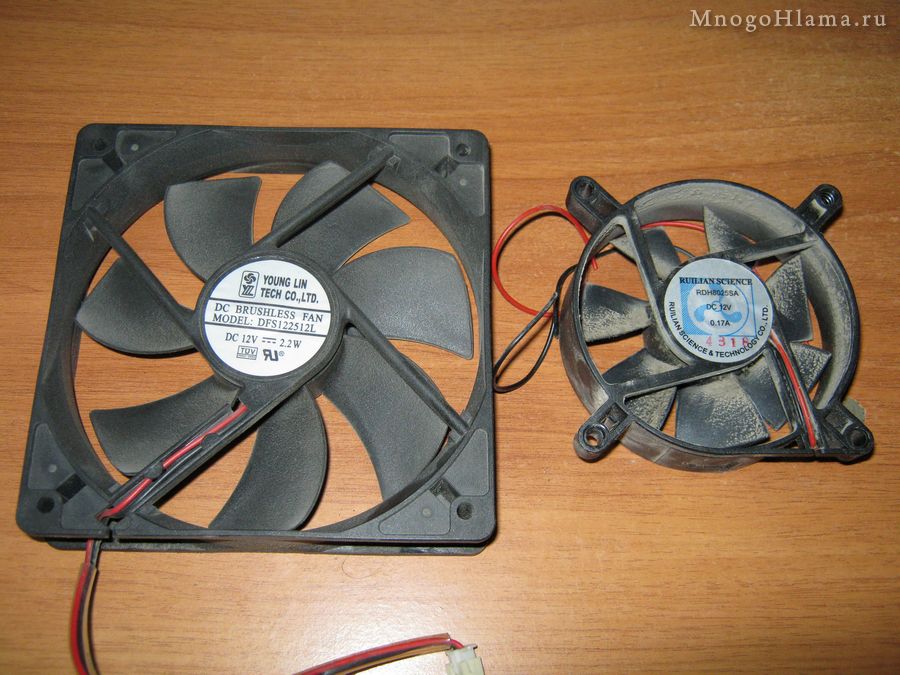
I thought about making a review of both fans, since the small fan is about 15 years old, but later it turned out that their design is almost the same. The only noticeable differences are in the size and shape of the housing, impeller and motor board. Therefore, I will describe the disassembly process on a large fan (120mm).
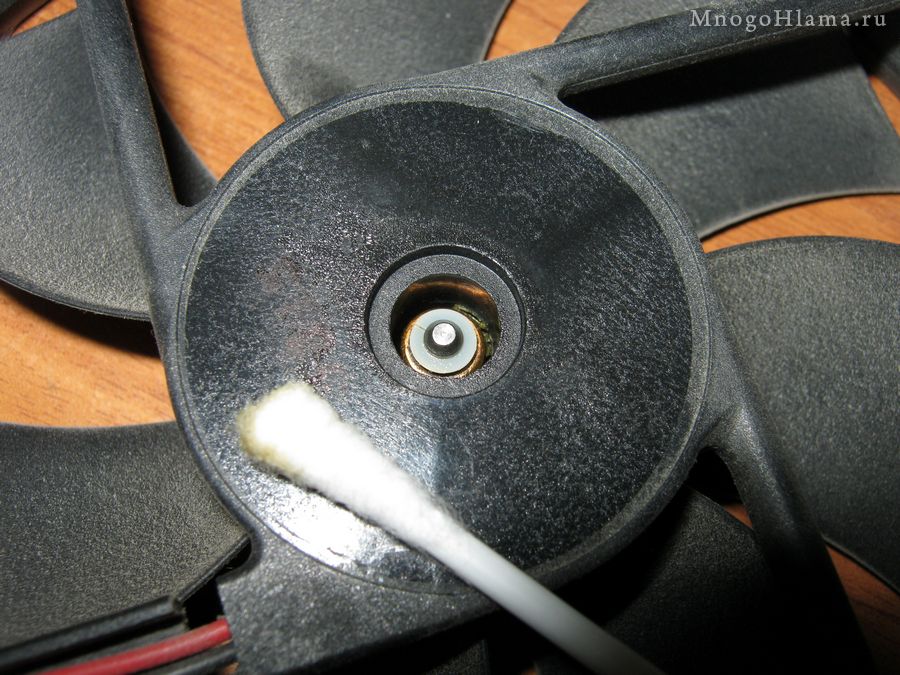
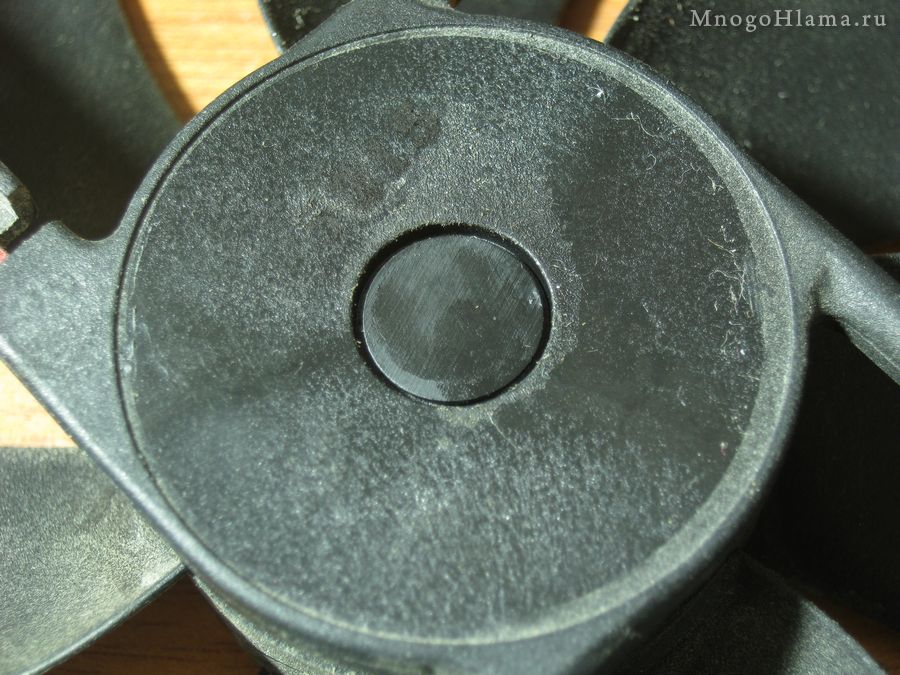
First, peel off the sticker under which the rubber stopper is hidden.

![]()
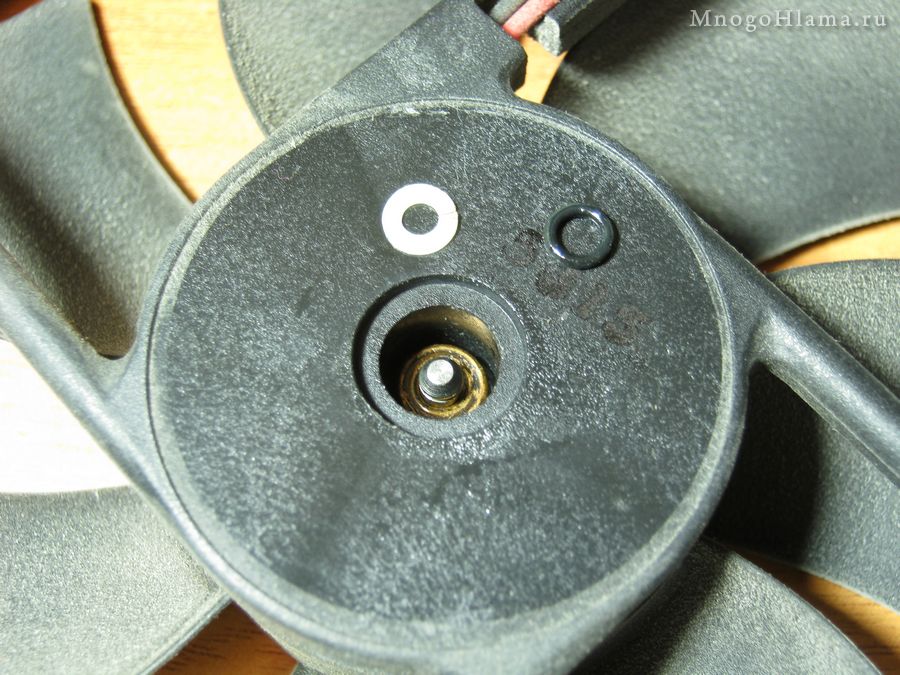
Use a screwdriver or something sharp to pry and remove the plug.
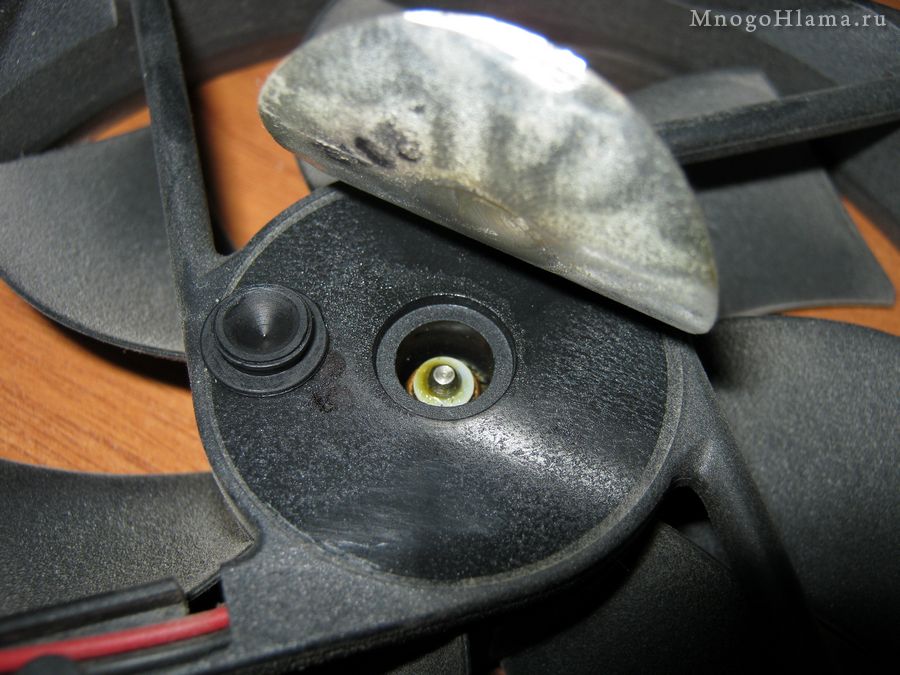
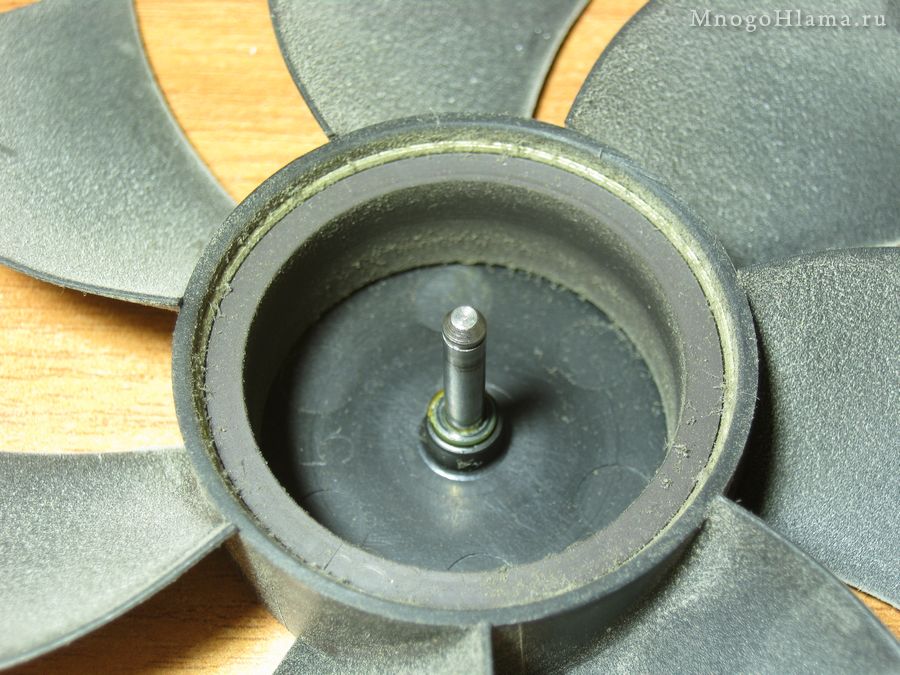
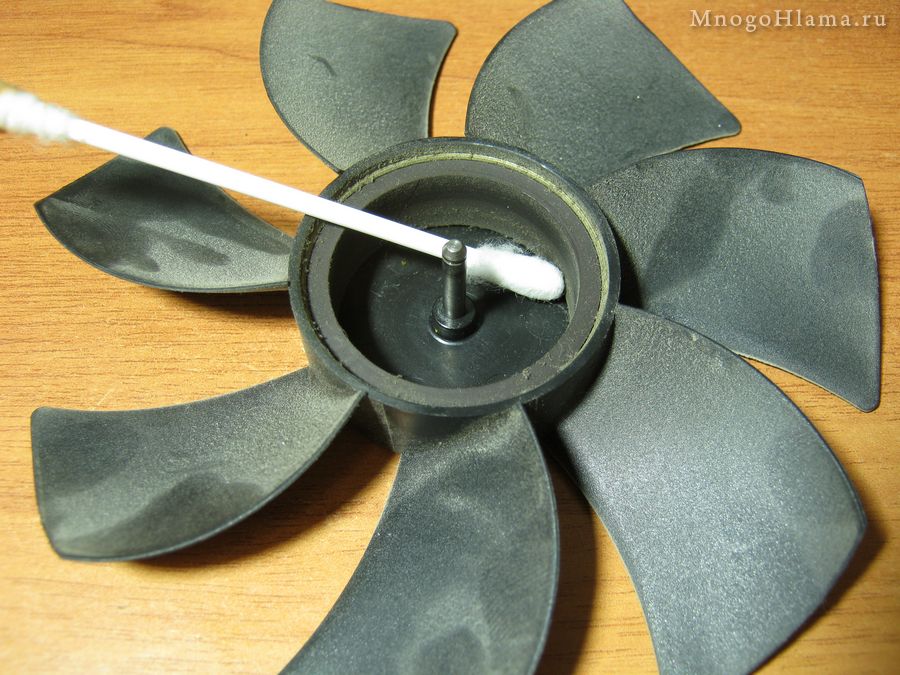
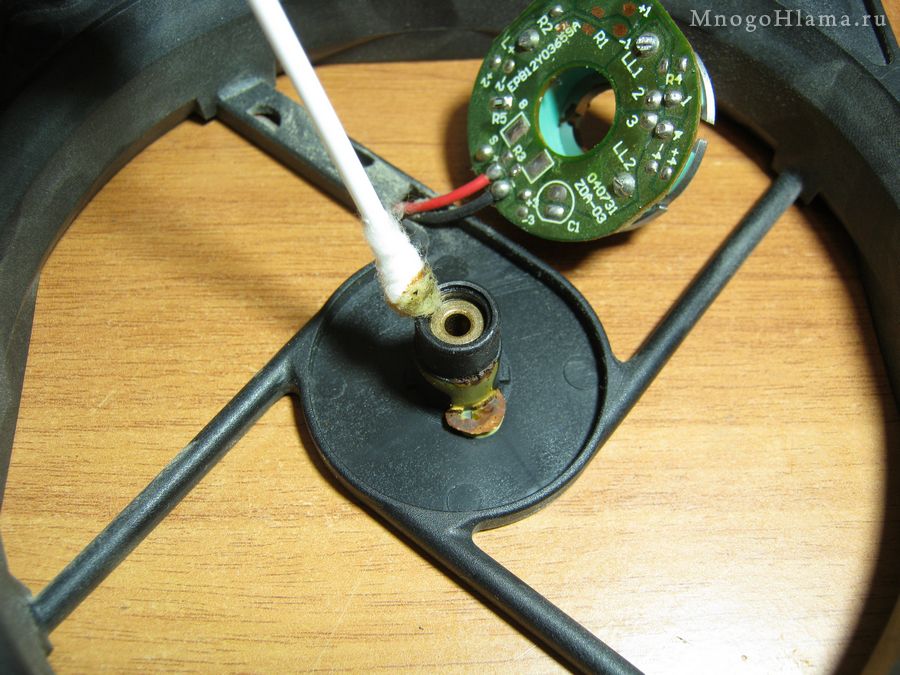
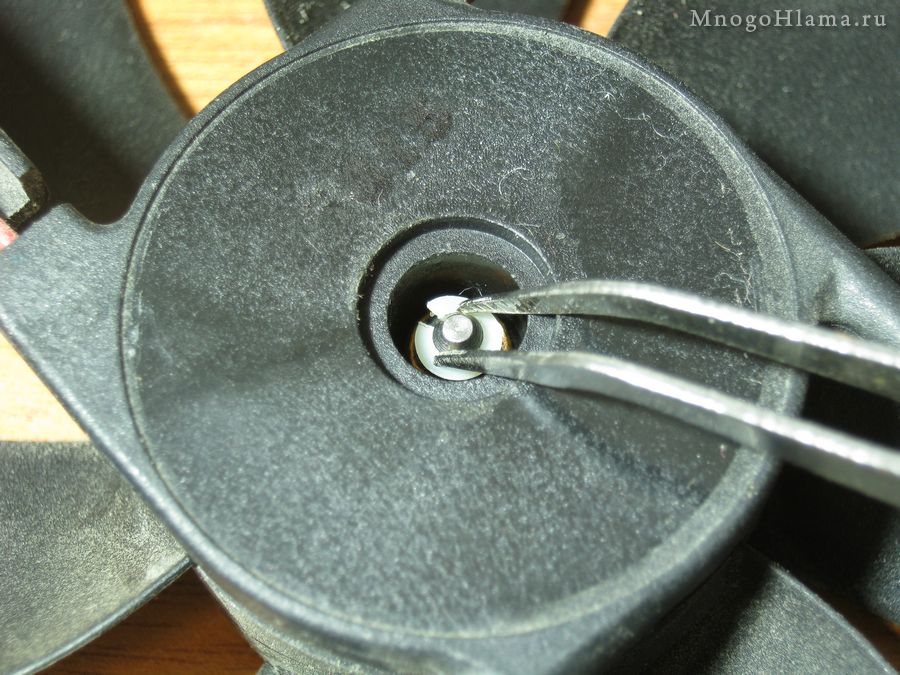
Under the plug you can see the metal axis of the impeller, on which there is a split, white, plastic lock washer. If it is hard to see due to old grease, then wipe it with a cotton swab.
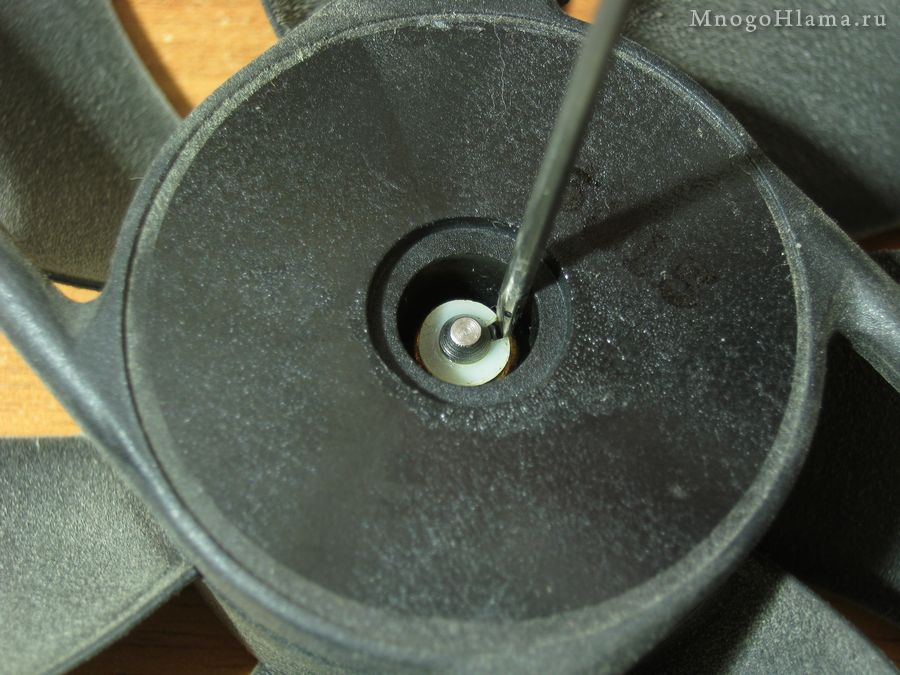
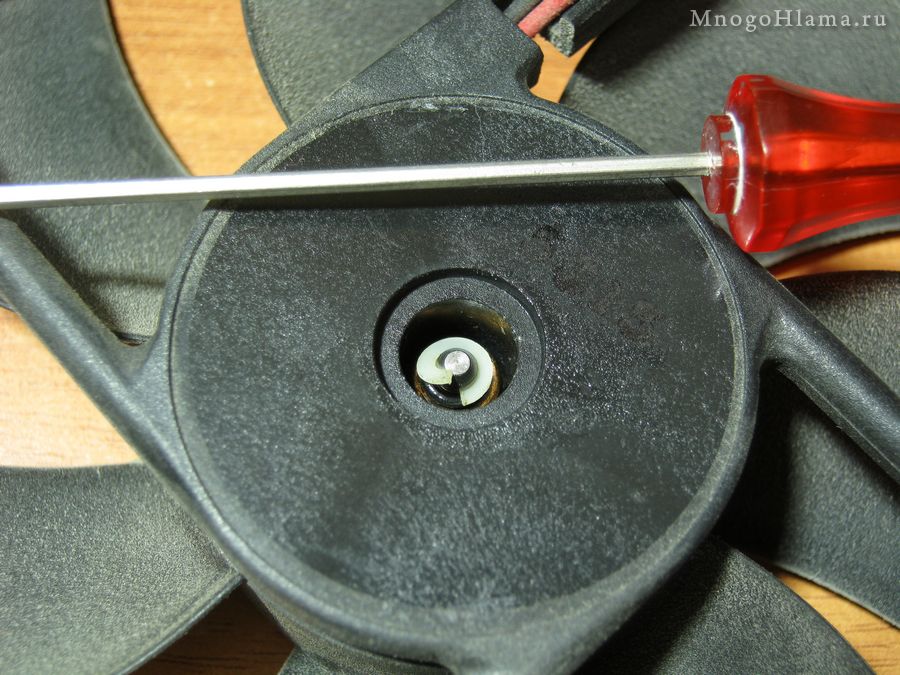
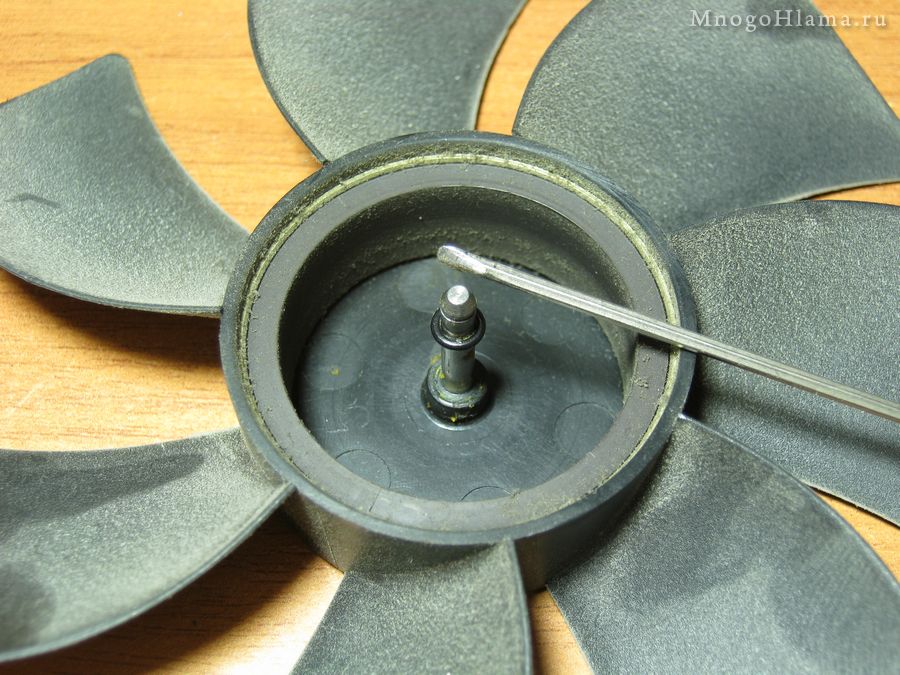
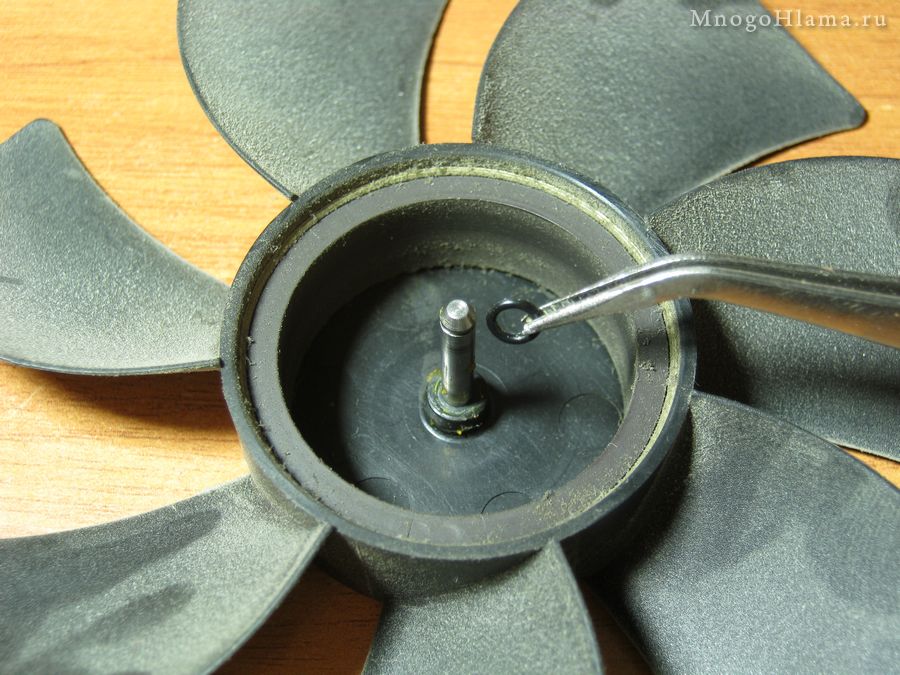
We insert a narrow screwdriver into the cut of the locking ring and turn it 90 degrees so that the ring moves apart. Then pry up the ring with a screwdriver and remove it from the impeller axis. During this process, the puck can easily shoot and roll away somewhere, usually into the most inaccessible place, under a table, sofa, baseboard, etc.
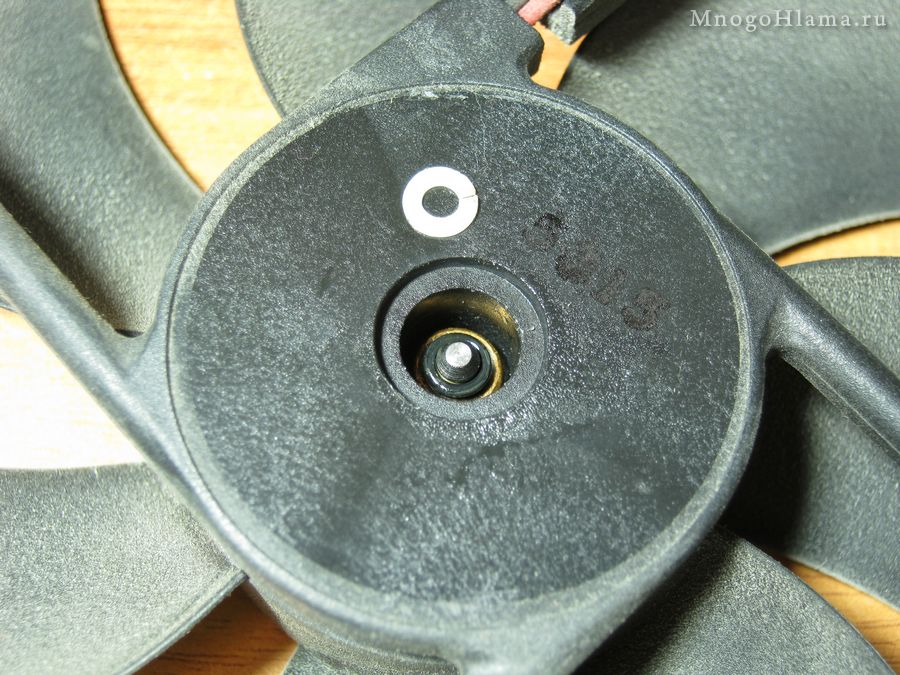
After removing the retaining ring, remove the rubber ring from the axle.
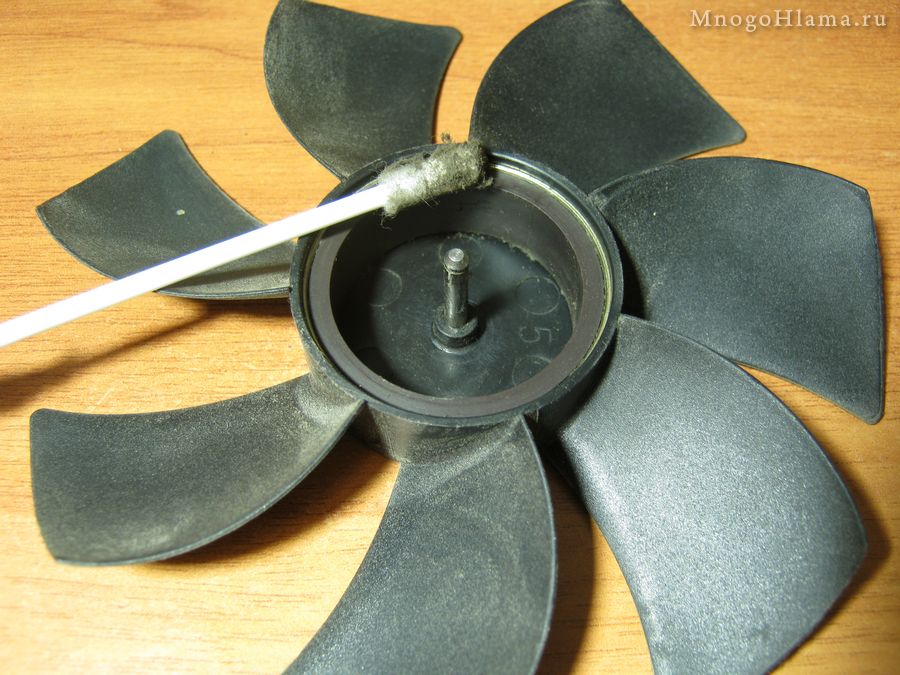
Now, without much effort, you can separate the impeller from the frame, while it will be lightly held by magnets that are built into the impeller body.

Remove another rubber ring from the base of the impeller axis.
At this point we can say the disassembly is complete. We clean everything from dust and old grease.
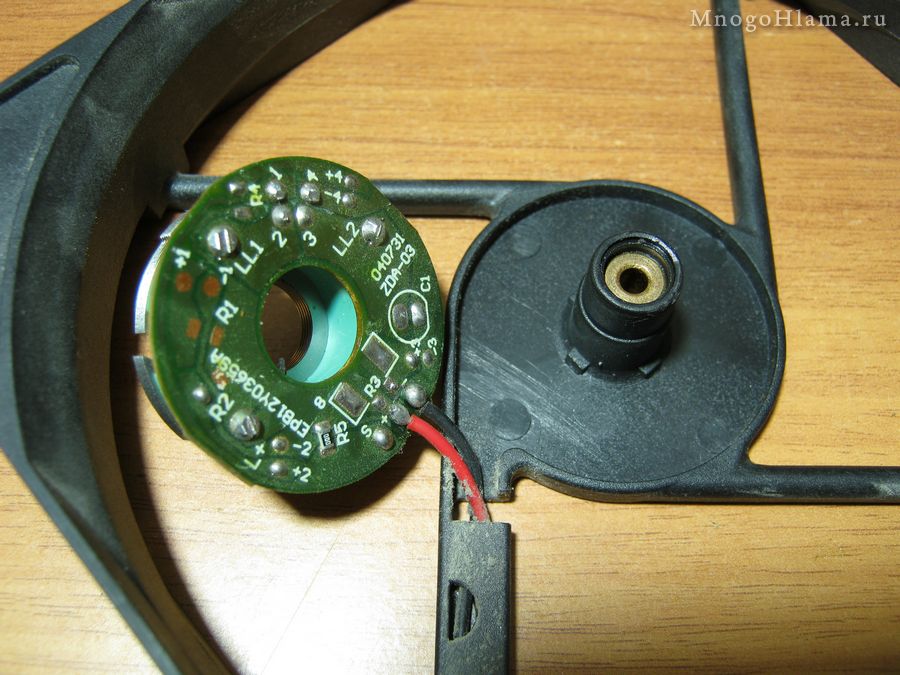
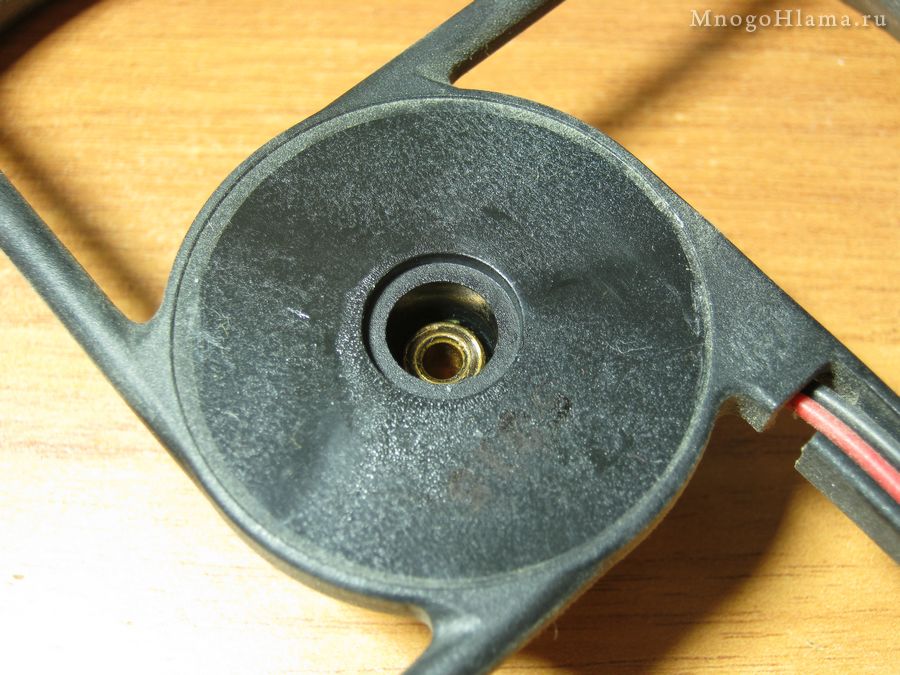
Actually, the frame itself with the engine.

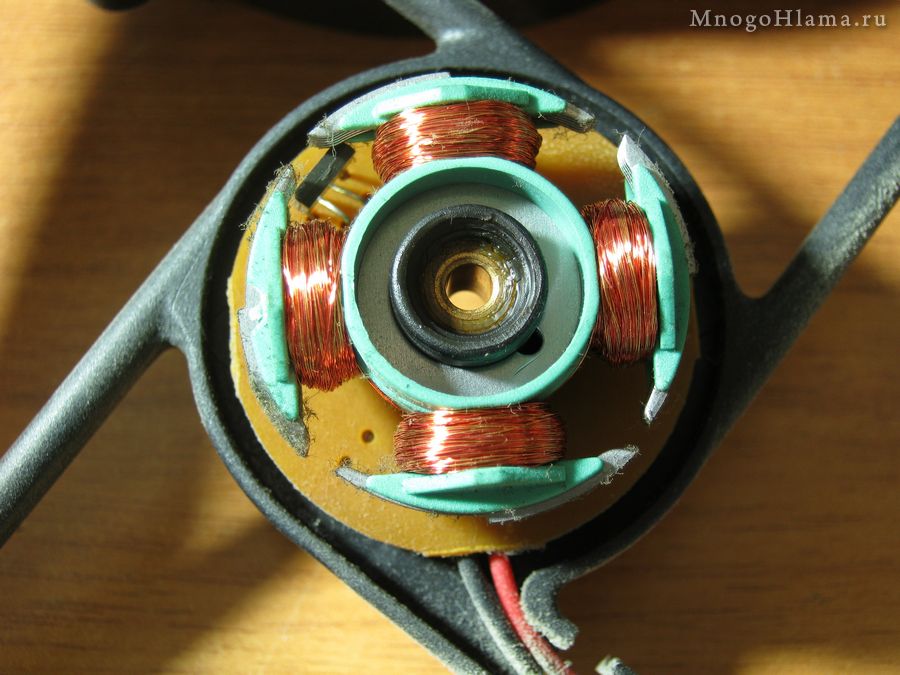
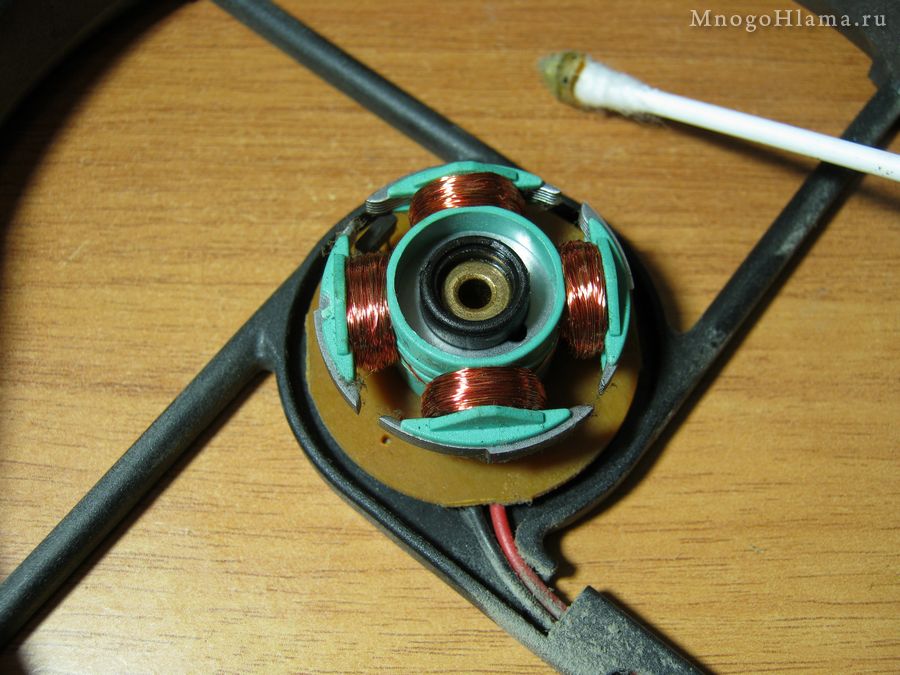
We also thoroughly clean the brass engine liner from dirt and old grease. If you wish, you can remove the board with the motor windings, although this is not necessary for cleaning and lubrication. In my case, it was easily removed from both fans, but I found traces of glue under the board. So you may not be able to remove it so easily.
We assemble everything in reverse order. Rubber rings on the bottom and top.

It is convenient to press the retaining ring with tweezers from both sides at once.
If your fan is very worn (noises, knocks, rattles during operation), then it is better to immediately replace such a fan with a new one. Otherwise, lubricate the impeller axle with thick lubricant (grease, etc.) before installing it on the engine. This fan is relatively new to me, so I assembled it, and only then lubricated it with motor oil because it is liquid and will always fill all the cracks.
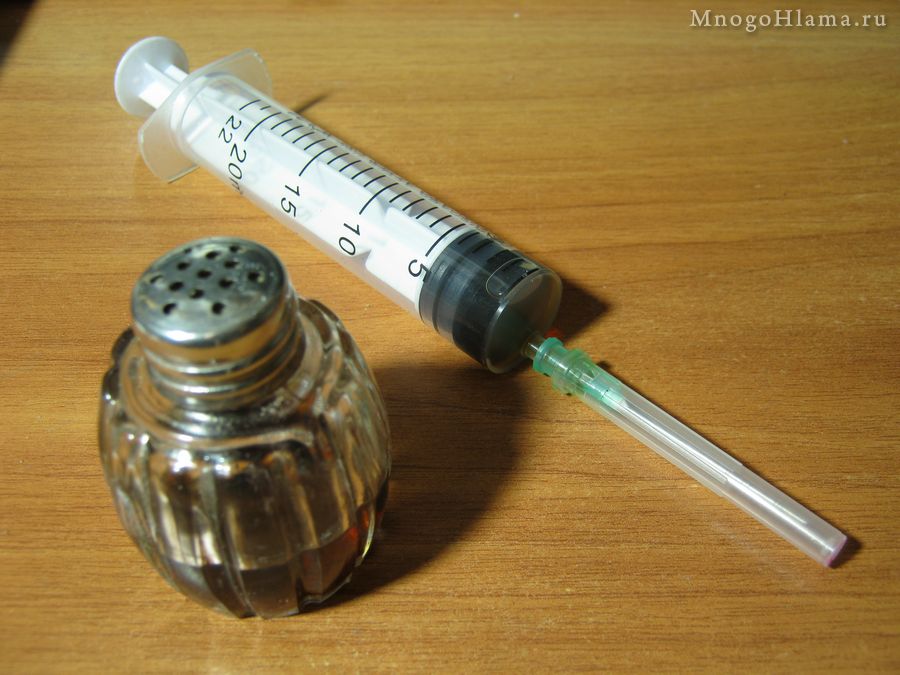
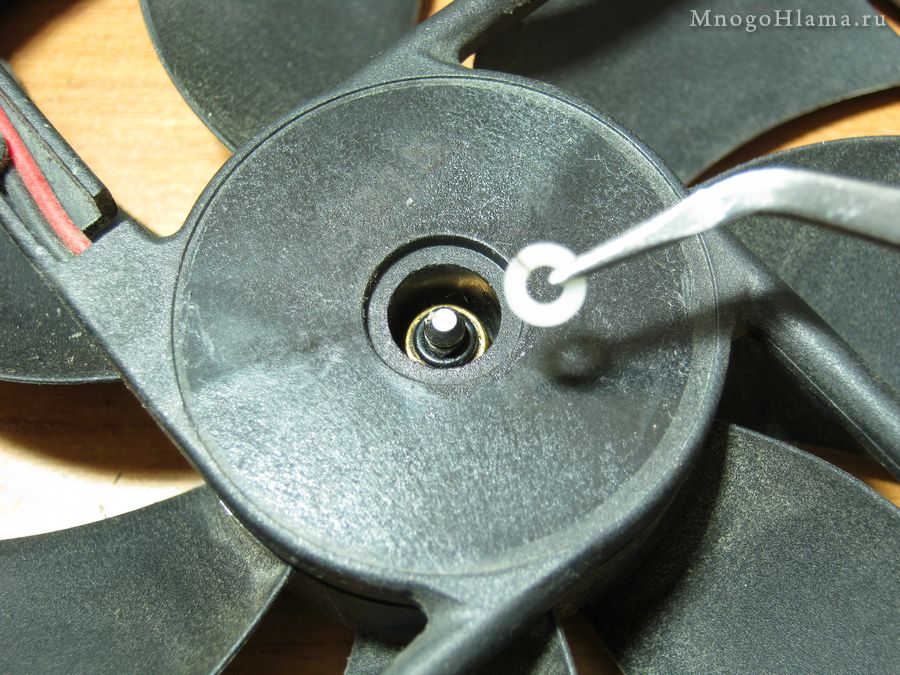
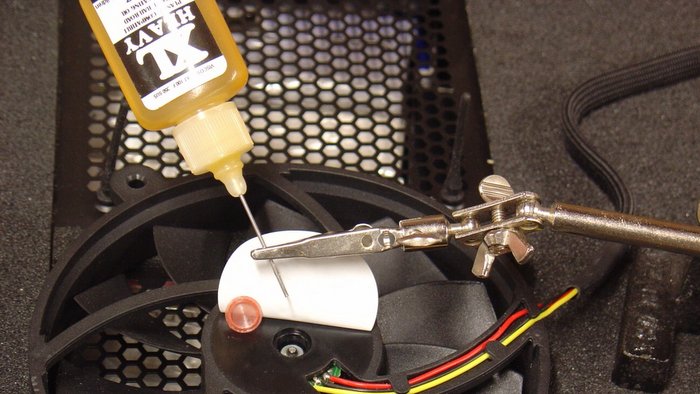
We apply oil with a needle to the rings and the impeller axis; a syringe is indispensable in this regard. In this case, the impeller can be rotated periodically by hand, then it will be easier for the oil to penetrate inside. You shouldn’t pour a lot of oil (3-5 drops are enough) since everything extra will always find a hole and will subsequently collect dust and become overgrown with moss or fly off the blades throughout the entire system unit. Here, of course, everything depends on the size of the fan; a large one needs more lubrication, while a small one needs less.
Let's plug the plug. If this sticker area is accidentally filled with oil, you need to wipe it with solvent or white spirit, since this sticker will no longer stick to oil. The sticker itself can be replaced with tape if the old one has become unusable.

In principle, everything is about prevention. We connect, check, then, depending on the test results, install it in the computer case or power supply. Or we throw it away and go to the store for a new fan, if during disassembly we completely destroyed our old fan. Fan designs can be different, both on plain bearings, as in my case, and on rolling bearings (ball bearing), but I think the general principle of disassembly is similar.
Most computers have three fans. One is located in the power supply, the second is in the computer case, and the third is in the central processor.
A fan malfunction can be detected by noise.
Fans are needed to cool the system. If at least one of the fans stops working, the system may overheat and some information may disappear.
Your first instinct may be to replace the cooler. But this is most often not necessary. You can simply lubricate a faulty fan, and all it takes is one drop of oil.
How to choose oil
The wrong choice of oil for the fan can lead to complete failure. Many people use WD-40, a special lubricant developed by an American company to lubricate all kinds of noisy and squeaky surfaces. But you should not use this product on your computer fan.
It only helps if you lubricate an object that rarely moves, for example, a door hinge. But the fan is in constant motion and spins at high speed.
It is better to use household lubricating oil designed for sewing machines, power tools, door locks, and hinges.
There is a special oil for sewing machines. It is light and viscous, can withstand high temperatures and is specially designed to lubricate parts operating at high speeds.
Fan operating principle
Most fans are supported by journal bearings, which consist of a shaft that rotates inside a cylinder or sleeve.
The cylinder consists of porous metal lubricated with oil. When the shaft begins to rotate, some of the oil from the bushing moves closer to the shaft, creating an oil film. This way the metal parts hardly touch, are not damaged, and the noise is almost inaudible.
Ideally, there is always enough oil inside the cylinder and the fan does not wear out. But at some production costs, for example, if the bearing is poorly glued, some of the oil evaporates. Then the fan will start to work slower, its parts will begin to rub against each other and wear out, and the computer will overheat. There will be noise.
In this case, you should add one drop of oil into the cooler.
How to lubricate a fan
To lubricate the fan, you need to disassemble the computer and remove the cooler from it. Place the fan on the table and carefully remove the sticker. Part of the sticker is located just above the wiring gap. From here it is easier to bend it.
Remove the rubber plug from the middle of the fan. To do this, you can use a small screwdriver, carefully placing it behind the edge of the plug.
You will see the end of the shaft inside the cylinder in the resulting depression. Place one drop of oil into the indentation.
Just one drop is enough, no need to pour oil into the bearing.Return the rubber stopper to its place and cover it with a sticker on top. Sometimes the sticker stops sticking. Then you can use regular electrical tape.
After the fan has returned to its place, the computer must run for several minutes before the oil completely lubricates the cooler. After some time, the computer will become quieter and stop getting too hot.
As you know, a fan or cooler is a very important part of your computer. It regulates the temperature of the processor and prevents it from overheating. Everyone knows the sound of a computer fan running. But if at one point you notice that this sound has changed, for example, your computer began to hum like an airplane taking off, then this means that the fan clearly needs help, that is, cleaning and lubrication.
Surely, every owner of a personal computer is very familiar with the situation when, after several years (from a year to three, depending on operating conditions), the computer begins to make noise, and you have to figure out how to lubricate the cooler. What could be better than playing an interesting game after a difficult day at work? computer game when everyone in the household goes to bed! But what is it? The wife grumbles with displeasure, and the child also tosses and turns - they are disturbed by the noise of the system unit. What happened? After all, there was no such noise before, but now it is clearly audible. Before identifying the culprit, let’s take a short mental journey inside the case.
One of the properties of a conductor when electric current passes through it is heating. Its value depends on the conductor resistance, operating frequency and some other factors. Since all the electronic components that make up Computer Engineering, are based on interaction with electric shock, in the process of their work they release thermal energy. In this case, it is undesirable and needs to be removed, and the heating elements need to be cooled. Ignoring this leads to disruption of normal functioning, up to thermal breakdown and the need for subsequent expensive replacement. This is why many voltage converter microcircuits have a metal radiator installed.
First models personal computers These radiators were used to cool the components, and the method was called “ passive cooling", since heat exchange occurs naturally in it. However, soon, due to the constant increase in power and performance, passive cooling became unable to dissipate the temperature from the surface of the chips. As a result, fans were installed on the radiators to forcefully create a blowing air flow (active cooling). Efficiency increased tenfold, but I had to say goodbye to silence forever. By the noise of the fans, it was easy to determine whether the computer was turned on. Any fan, sometimes called a cooler (from the English cooler - cooler), is a rotating part, and therefore is subject to gradual wear, and the question “how can I lubricate the cooler” is not at all trivial.
The cooler's structure is quite simple: a metal axle, one end of which is fixed with a locking ring, and the other is fitted with an impeller that creates an air flow. The interaction of the magnetic fields of the windings: placed on the axle and the ring around it, creates a torque. The rotation of the axis is possible thanks to bearings - a system familiar to many. The noise of the system unit begins to increase due to the production of lubricant in the bearings, which means it’s time to lubricate the cooler.
A seemingly simple question gave rise to serious debate on forums. Indeed, every user wants to know how to lubricate the cooler. First of all, you need to remember that under no circumstances should you use edible vegetable or animal oils. Although the noise will disappear immediately after this, over time the fan bearings may stop rotating completely, damaging the fan motor. Still, how to lubricate the cooler? It's simple: everyone must answer for themselves what they would use to lubricate the bearings and gears in their watches. Liquid mineral or any is suitable, a few drops of which you can ask from a car enthusiast you know. What else? You can lubricate the cooler with machine oil that comes with household hair clippers and electric shavers. Just 1-2 drops of oil into the bearing is enough; you shouldn’t add too much oil.
You should refrain from using “solids”, “litols” and thick fatty lubricants (“1-13”), because the mass of lubricant will be squeezed out of the open bearing and the desired effect will not be achieved.
Every laptop owner eventually experiences the fact that the device begins to get very hot and noisy. In such a situation, the cooler is to blame because it is clogged with dust. After all, during operation, dust and dirt constantly penetrate into the device. As a result, the cooler becomes dirty and sometimes stops working altogether. Solving such a problem is quite simple; you need to clean and lubricate the fan, having previously found out How can you lubricate a laptop cooler?
The first thing you need to do is decide what is the best way to lubricate the laptop cooler. Let's start with the fact that you should absolutely not lubricate it with Vaseline, grease and other fatty compounds, which will instantly be squeezed out and end up on all the insides of the device. Also, many users may think about using sunflower oil, since not everyone knows How to lubricate a laptop cooler at home. At first, such oil will give results, the noise will disappear. However, it dries quickly and dirt begins to collect much faster.
The following options are ideal for fan lubrication:
- synthetic automobile oil,
- oil used for power tools,
- silicone grease used for household appliances,
- special lubricant for the cooler.
After we found out the best way to lubricate a laptop cooler You can proceed directly to the lubrication procedure.
How to lubricate a laptop cooler
The fan lubrication procedure is quite labor-intensive and consists of several stages:
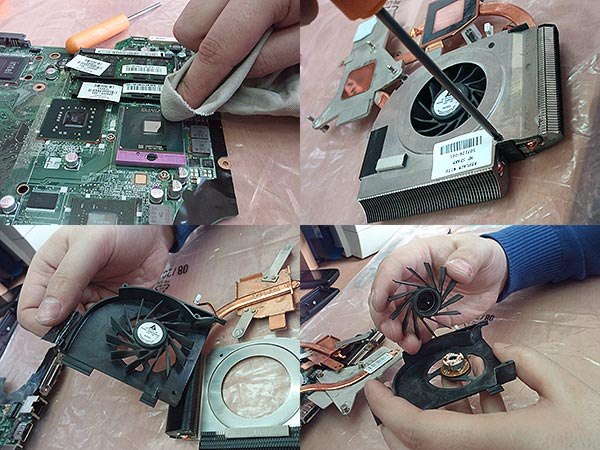
- The first thing you need to do is get to the cooler. To do this, you need to study the instructions or use some kind of guidance. Usually to see the cooler you just need to remove it back cover.
- To do this, take out the battery and, using a special screwdriver, unscrew the screws that secure the back panel. After removing it, it will immediately become clear how to lubricate the cooler on a laptop processor.
- Next, remove dust from the radiator and fan. To do this, it is better to use a vacuum cleaner; it is guaranteed to remove dust from hard-to-reach places.
- We remove the cooler. Usually you need to unscrew a couple of screws and, of course, disconnect various cables and power connectors.
- Using a small brush, remove dust from the blades. You can also use any alcohol-based product.
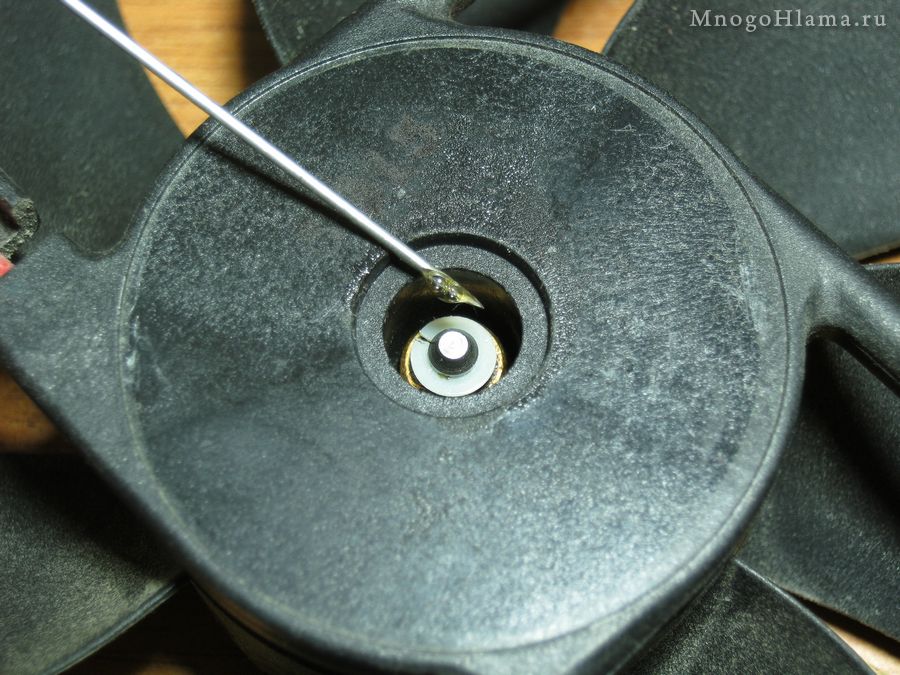
- We look for a sticker on the cooler body; it is missing on some laptop models. Before that, you need to peel off the sticker with a sharp object. A small hole will appear immediately behind it, sometimes closed with a special sleeve. Having eliminated it, you have the required access to the bearing and axle. On certain models, removing the bushing is extremely problematic. As a result, she is simply pierced with a medical syringe.
- Using the same syringe, we drop it into the hole, a few drops are enough. Next, we turn the blades by hand so that the lubricant spreads better. Remember before How to lubricate a laptop cooler, the oil must be introduced slowly. You should not pour everything into the bearing part in one motion.
- Now we return the sleeve and paste the sticker. If it doesn't hold, then use a piece of tape.
- All that remains is to install the fan in its position. It would be a good idea to apply thermal paste to the surface that is in contact with the processor.
After completing the procedure, do not rush to turn on the device, wait about 20 minutes, let the lubricant penetrate into all components of the fan.
How to lubricate a non-separable laptop cooler
Many manufacturers in Lately They began to install non-separable fans in their laptops. Their only advantage is their cheaper price. However, if the question arises, how to lubricate a non-separable laptop cooler, then this is where the real problem emerges. You can try to avoid this time-consuming procedure and immediately purchase a new fan if you can find one. Otherwise, the question will arise about disassembling the non-separable cooler. It should be said that the procedure, although not easy, is within the power of every person:
- We start by removing the back cover of the laptop.
- We remove the fan, this is done differently in each laptop model, so look at the device's passport.
- Now before that how to properly lubricate a laptop cooler you need to drill out the aluminum plug in the center of the fan; for this we take a suitable drill and drill.
- We drill until the spindle and lock washer become visible.
- We take a needle and carefully remove the lock washer; even if you damage it, nothing bad will happen; you can do without it.
After removing the retaining ring, the impeller can be easily removed, and you can now begin lubrication. We lubricate it well, since most likely the disassembled fan is completely dry. By the way, what oil to lubricate a laptop cooler It's up to you to decide, or rather, what you have on hand.
Having lubricated all the elements, we proceed to reassembly. You don't have to install the lock washer if you can't find it. Also, do not forget to change the thermal paste, even if the thermal pad is installed.
After this procedure, you can easily disassemble and lubricate your fan in the future. Which in the future will allow you to avoid many problems associated with how to lubricate an asus laptop cooler.
How to lubricate the cooler on a Lenovo laptop
A high-quality cooling system is an important element of a Lenovo laptop. It is she who provides effective work many elements of the device. Accordingly, regular maintenance of the cooler can significantly extend the life of the entire laptop. It should be said that the steps for lubricating the cooler of a Lenovo laptop are almost identical to the procedure on alternative models. The same goes for what kind of lubricant to lubricate a laptop cooler. Any option that is used for a similar procedure is suitable.
In the future we will follow the standard procedure. We remove the back cover and take out those elements that interfere with comfortable disassembly. Having reached the desired cooler, remove it.
Now we decide whether it is collapsible or not and, depending on the option, we take those actions that will allow it to be completely disassembled. Carefully wipe the blades from dust and apply oil to the rotation axis. We return the blades to their place and scroll them several times. This will allow the lubricant to be evenly distributed throughout the internal elements of the fan. Next, we assemble the cooler and install it back into the device. After that, how to lubricate a cooler lenovo laptop
We wait a little time and we can get to work.
It should be said that such a procedure should be carried out annually and not wait until the fan makes unpleasant sounds or simply stops working. If, after cleaning and lubrication, the cooler continues to function incorrectly, then it’s time to think about replacing it completely. You can carry out the replacement either yourself or use the services of a specialist. In any case, such a detail will not hit your budget too much. However, if you delay in repairing it, more serious elements of the laptop may fail and you definitely won’t be able to do it without the help of specialists.


