Modern laptops are getting rid of CD/DVD drives one after another, becoming thinner and lighter. At the same time, users have a new need - the ability to install an OS from a flash drive. However, even with a bootable USB flash drive, not everything can go as smoothly as we would like. Microsoft specialists have always loved to present their users with interesting problems. One of them is that the BIOS may simply not see the media. The problem can be solved by several sequential actions, which we will now describe.
Patch releases are also published. Therefore, you may want to upgrade to more new version than in reality. First, make sure you want to upgrade to the new version by reading the release notes for the new version. For example, updating from to is small update. The big update updates everything, as well as the basic one. operating system. For example, upgrading from version 9 to version 3 is a big upgrade. The following are known issues: If you upgrade from releases earlier than then, the server will lose tour definitions.
This means that after the update you will have to redefine round tours. Updated from releases in between and can only be updated to or more. First there must be a release that can be updated to any version. 21. On the server console, enter the administrator menu. Please refer to the section "System Administration via Interface" command line» on page 33 or detailed information on how to do this. You must log in via the server console. Select "Customize update options."
In general, there is nothing better for installing an OS on your computer than a self-made bootable USB flash drive. You will be 100% confident in it. In some cases, it turns out that the media itself is not made correctly. Therefore, we will look at several ways to make it for the most popular versions Windows.
In addition, you need to set the correct parameters in the BIOS itself. Sometimes this may be the reason why a drive is not in the list of drives. Therefore, after we figure out how to create a flash drive, we will look at three more ways to configure the most common BIOS versions.
The update procedure now checks to see if your system can be updated. The screen output will inform you how you can update. Please be very careful to note the update command that needs to be executed after reboot. If you upgrade, select "Disk Druid" when asked to split. Remember to leave the partition table unchanged and mount all partitions the same way they were originally defined. See “Installing from scratch” on page 9.
For all other parameters you can continue as in normal installation. To complete the update, you need to log back in as a user administrator with the same password the user had before the update and select Finish installation. Now all configuration data will be restored and you will be prompted to reboot the server again. Configuring servers for distributed updating. Configuring the main update server Select the “Host Administrator” dialog.
Method 1. Flash drive with Windows 7 installer
In this case we will use .
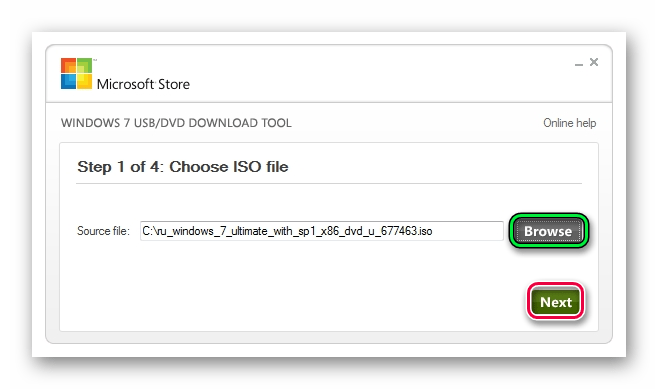
This method Suitable for Windows 7 and older. To record images of other systems, use our instructions for creating bootable flash drives.
You will see a list of available servers on the current network. For each remote server in the list that you want to update from the current host, set the Update option software on remote server. We appreciate your confidence in our products.
This history may include information about when label formats were edited and printed. To preserve this history. User guide. This manual is licensed for use with restrictions to authorized centers. Online backup client.
In the following instructions you can see ways to create the same drive, but not with Windows, but with other operating systems.
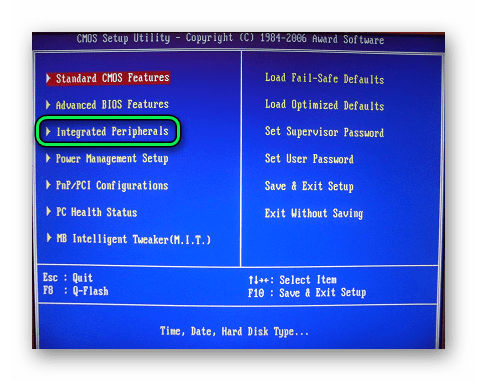
Method 2: Setting up Award BIOS
To go to Award BIOS, press F8 while the operating system is loading. This is the most common option. There are also the following entry combinations:
Kernel protection for virtual machines 1 Comprehensive threat protection for virtual environments. All other trademarks are the property of their respective owners. It is designed to be easily deployed on. Compatible surface devices include. A surface device that must be removed from corporate or organizational use. Deploy the Surface Appliance for use in a new department or for use by a new user. 
- Prepare the surface device for repair.
- Decommissioning.
- Ctrl+Alt+Esc;
- Ctrl+Alt+Del;
- Delete;
- Reset (for Dell computers);
- Ctrl+Alt+F11;
- Insert;
- Ctrl+Alt+F3;
- Ctrl+Alt+Ins;
- Fn+F1;
- Ctrl+Alt+S;
- Ctrl+Alt+Esc;
- Ctrl+Alt+Ins;
- Ctrl+S.
Now let's talk about how to properly configure the BIOS. In most cases, this is precisely the problem. If you have an Award BIOS, do this:
As a rule, problems of this kind are detected when trying to boot from a specific Flash drive. If your computing device does not see the flash drive in the BIOS, then most likely you have not made the necessary changes to the basic system of the computer, or your removable storage device is simply not bootable. However, let's take a closer look at this confusing situation: “the flash drive is inserted into the PC, but does not work properly.”
Is your USB Flash drive working?
Of course, you can suffer for a long time and conduct unsuccessful experiments in the BIOS system itself, which will ultimately turn out to be a waste of your valuable time. Because the flash drive may simply be inoperable. To verify the opposite, try enlisting the help of a testing device - insert the “capricious” flash drive into another PC.

And in general, check whether the (seemingly faulty when you boot the PC) storage device is visible in Windows environment. That is, is USB memory detected in the operating system itself? If not, then the Flash Drive needs to be repaired. Perhaps everything will be resolved after using a special software tool, for example, a proprietary flash drive recovery utility from its manufacturer.
Priority BIOS settings or what, where and how...
- Insert the flash drive into the USB connector of your PC.
- Restart your computer.
- Enter the BIOS using the corresponding button on the keyboard (for those who don’t know how to do this -).
- Depending on the version of the basic microsystem, the name of the section in which the connected flash drive is displayed may be different from the “BOOT” tab discussed below. And yet, be guided by the abbreviation “USB” when searching for the required partition in the BIOS.

- Set to boot from a flash drive.
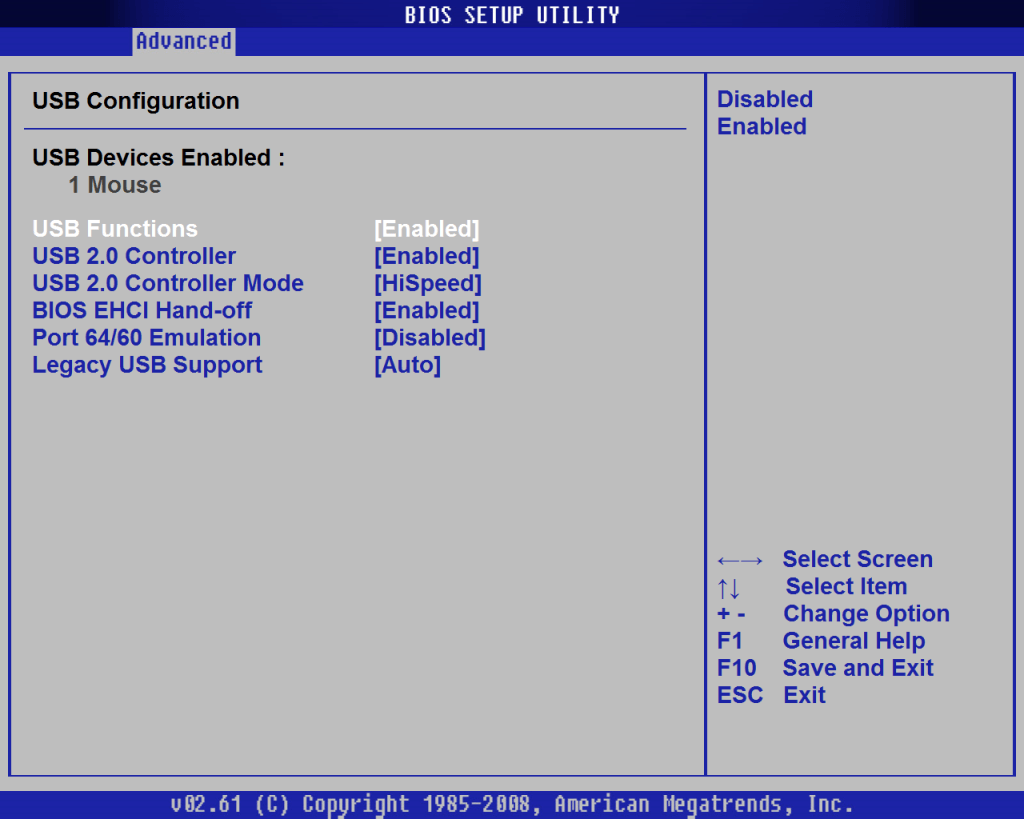
- Also check if the USB hardware controller is disabled.
- Save and reboot the computer.

Great if USB Flash Drive was detected and the PC switched to boot mode from the flash drive. Otherwise, move on to the next section of this article.
Boot properties of USB flash drive
Let's say you want to install an operating system whose distribution is stored on a removable storage device. However, in order for a flash drive to be defined as a bootable drive, it must be configured as such. In other words, during the recording process Windows installation files need to be used special utility, for example, “Rufus” (to download, click here ). Only in this case the flash drive will truly become bootable.
Storage device hardware incompatibility
In some situations, the system BIOS does not see the flash drive due to the outdated interface of the memory device itself. Make sure your USB drive is not an "ancient" 1.1 drive. However, new flash drives with 3.0 technological characteristics may also not be perceived by outdated computer systems.

So, detailed characteristics Your storage device can be found on the official technical support website - enter the model of the flash drive and read the information you are interested in. By the way, this action can help in solving problematic situations related to any malfunction of your USB devices(meaning the presence of a specific recovery utility on the site).
Updating the system BIOS - as a solution to the “invisible” USB problem
Sometimes it is advisable to carry out the process of software upgrading the BIOS of a microsystem. How to do this is described in detail here. However, in modern computers this operation produced by a fairly simple method.
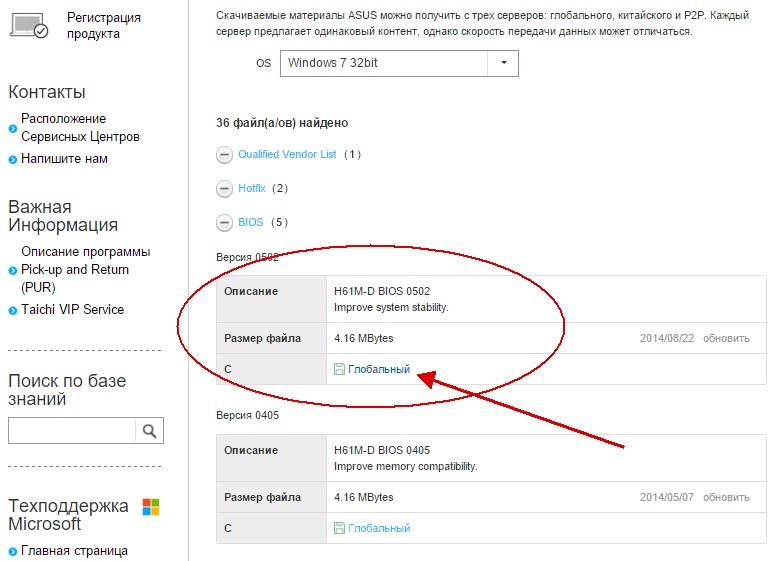
- Visit technical support site your motherboard.
- Download the new BIOS version(s).
- Using a special flasher, flash the BIOS of your computer.
However, before you begin the albeit not difficult, but still very responsible operation of “upgrading the version of the basic PC microsystem,” carefully and in detail study background information about a properly implemented update process (this may be an invaluable help for you - go to ).
Bootable USB incompatibility of outdated computer systems - there is a solution!
Let's call such computers “exotic”. However, if you need to give your old computer the “boot from” properties USB storage", then follow the instructions below.
- Use this link - https://www.plop.at/en/bootmanager/download.html.
- After you have downloaded “Plop Boot Manager”, burn it to a CD.
- Set the BIOS to prioritize booting from the optical drive.

- Next, after the “Plop” workspace of the utility is displayed on the screen, insert USB storage into the appropriate connector (preferably the main one, which is located at the back system unit PC).

- Select USB in the bootloader window.
Now your “old man” can use a flash drive as a boot drive.
Summing up
So, the author of this article is confident that after you have read the material in the presented article, you will certainly succeed. And yet, I would like to note one important fact: most users make mistakes only because they misunderstand the problem and resort to sometimes meaningless advice from “kind Internet GURU”. At the same time, exposing your car to the critical danger of “complete failure.” Be wise when choosing one or another solution to your computer problems and your experience will always be productive!


