Hi all))
This is my first publication in this section. I tried to describe the whole process in detail, so it may seem that it is written for “dummies” :)
In this publication I want to tell you about a fairly popular technique for transferring pictures onto plastic. Everything is made from improvised materials, I did not have any difficulties during production)
Let's start.
For translation we need:
1. Fimo plastic surgery.
2. Picture printed on a laser printer .
Inkjet printer is not suitable.
Any paper.
It is advisable that the picture that we will translate and first print be in vector format. These extensions are .ai, .eps, cdr. Opens at Adobe applications Illustrator and CorelDraw. The vector format can significantly improve the quality of printing on a printer, and it translates better. But you can also translate pictures in any other format (.jpg). It’s just that then, if you look closely at the drawing, small dots (raster) will be visible. The smaller the picture and the more small details it contains, the more noticeable the raster will be.
+ If the translation contains text, it must be printed as a mirror image. Then the text on the plastic will be read correctly.
3.Formic alcohol. Other alcohols do not give such results! Sold in every pharmacy. (But friends of mine have succeeded with regular alcohol; in principle, you can try it).
4. Cotton wool, which we will moisten with alcohol.
5. A handy item that can be used to reprint a picture. Anything with a wide, flat end will do.
6. Tweezers.
Process:
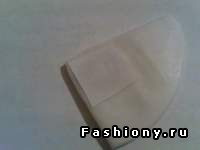
1 . Roll out the plastic and cut out the picture. We cut out the picture not along the contour, but with an indentation so that the paper completely covers the future product. Otherwise, marks from the edges of the paper will remain on the plastic.
2
. We wet the cotton wool with alcohol so that it is completely saturated with it.
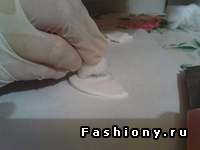
3
. Press the picture tightly onto the plastic and press it in a little. It's time to make recesses for the fittings and indicate the approximate shape of the product. We do this as quickly as possible, otherwise it may negatively affect the final result.
4 . We wet the paper generously with cotton wool soaked in alcohol. You can simply fill the plastic with alcohol and blot it with cotton wool. The paper should be thoroughly wet, but not so wet that it floats directly in the alcohol.
5 . We immediately begin to translate the picture using a stack, ruler, or other object with a flat surface. Everything is like in childhood with translations from chewing gum: We move tightly with the “edge” over all the details of the picture. Particular attention should be paid to the edges. Blot with alcohol again. THE PAPER SHOULD NOT BE DRY FROM ALCOHOL! If it dries out, wet it again.
6
. We do what is written in point No. 5 two or three times, periodically wetting the paper. You must try not to damage the paper itself. Then pour alcohol onto the paper for the last time. We use cotton wool to remove the excess.
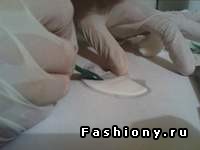
7. Using tweezers, carefully grab the edge of the paper. It is better to choose the corner where the part of the pattern is denser, rather than thin lines. Carefully, very smoothly remove the paper. It is important to remove all the paper!
List of services
Tonfix is best service for office equipment. We are not just a reliable workshop for servicing various printer cartridges, but a company that guarantees exceptionally high-quality work with laser cartridges from any manufacturer. While you are thinking about how to refill the cartridge laser printer independently, our specialists are already visiting the homes of those who have entrusted their equipment to our hands.
Work process
Having a technician come to your home will save you a lot of time. Your printer will be back to life within a few hours. All you need to do is contact our manager, tell him the model of the cartridge or printer and the address where our technician will arrive. Only after you are convinced that the work performed suits you, do you pay for the service.
Our advantages
Free diagnostics during repairs High-quality consumables We go to the office, home More than 8 years of experience Accepting orders 7 days a week from 9:00-21:00 Affordable prices Cashless payment - no prepayment Guarantee for all types of work
TonFix is the best workshop for your printer in Kyiv!
Probably not a single modern person gets along in everyday life without technology. A device such as a printer is very popular in offices and homes. Everyone understands that printing the necessary documents has become much easier and faster since printers entered our everyday life. And almost always, at the most inopportune moment, the printer runs out of toner. Is this familiar to you? If you need to refill cartridges in Kyiv, then feel free to contact Tonfix specialists!
Refilling a cartridge is a matter for a specialist!
If you want to do it well, do it yourself. This is approximately the philosophy that characterizes our mentality. First we do it, and then we look for how it should have been done. Of course, refilling cartridges yourself is quite possible. In fact, there is nothing supernaturally difficult about this. If regular user can simply add toner, then the specialist’s work consists of several stages. From diagnostics and cleaning to refilling and testing. The cartridge itself is a rather fragile structure and can be damaged very easily. In the case of professionals, such an outcome is excluded. We offer the service “refilling cartridges” in Kyiv with a home visit. This will significantly save, at least, your time.
If you are reading this text right now, then most likely you need to refill the cartridge. Don’t hesitate and call us right now, call a technician and continue using your printer. A lot can be said in favor of professional refueling, and it is simply impossible to overestimate the work of a specialist in this field. For us, refilling a printer cartridge is a matter of a few minutes. We encountered different models, manufacturers and materials. We know all the subtleties and nuances thanks to extensive experience and this is a key aspect that ensures the high level of quality of our work.
Do I need to replace the cartridge if refilling the printer is cheaper?
Almost all printer manufacturers skillfully try to “make money” from users. They strongly recommend a complete replacement of the cartridge when the toner runs out. But the price of purchasing a new cartridge is quite high; it is much more financially profitable to simply refill an existing cartridge. Refueling from a specialist may well be an excellent alternative. And believe me, it will cost you much less. Of course, if diagnostics reveal some problem in the cartridge itself, then the question of buying a new one will arise. If you are looking for a specialist who will do this work at home, then call us. Our technicians refill cartridges in Kyiv, with travel to any area. This saves not only your money, but also time.
We provide only high-quality cartridge refills in Kyiv
Of course, you can continue to browse the Internet in search of an answer to the query “cartridge refill Kyiv,” or you can contact us and not waste your time. Here are the advantages of the Tonfix workshop:
Travel to your home or office;
Use of high-quality Supplies;
Highly qualified specialists;
Great experience work;
A wide range of services, including printer refills;
Guarantee for all types of work;
No prepayment;
Excellent value for money and quality.
So, if you need professional cartridge refilling, then our specialists are always at your service. Moreover, we accept orders seven days a week. Our technicians will carry out free diagnostics if you need not only refilling the printer, but also repair it.
Do you need to refill your printer in Kyiv? TonFix is convenient and profitable!
Agree, it is very inconvenient to travel to the other end of the city when you only need to refill the printer. Kyiv is a big city, so we value our clients’ time and visit them ourselves. You just need to dial our number and leave a request. Leave your address and indicate a time convenient for you so that the master can come to you. It is also worth indicating the model of the printer or cartridge. They will not take any advance payment from you! Having called in advance, the master comes to the call. After refilling is completed, the cartridge is tested. And only after the work is completed do you make payment. Our experience shows that refilling printers by a specialist is a guarantee of the longevity of your reliable assistant.
Instructions
Each master has his own technique for transferring pictures onto plastic. One of the simplest is dry translation. In addition, there are technologies for translating pictures using formic alcohol; translation of drawings printed on photographic paper; decoupage.
To work you will need a picture or photograph printed on laser printer on plain paper. It is desirable that the drawing be fresh. A newly printed design will be the easiest to translate.
First, prepare the color of plastic you need, on which you will subsequently apply the design. Perhaps you want a pale red, or striped blue and yellow background. Mix the colors you need and prepare the blank - give it the shape of the finished product. At this stage, you don’t have to remove all the unevenness and roughness. You can do this after you translate the picture.
Place the workpiece on top Pictures and smooth it well so that there are no bubbles. It is best to use an object for this that can be used as a rolling pin - a pencil, a perfume bottle.
Trim off excess plastic and give the product the correct shape.
Go over the workpiece again with your rolling pin and set it aside. Ideally, if future earrings or pendant After lying there for several hours, the picture will be imprinted on the surface of the object. After all, the essence of transferring a picture onto plastic is for the plasticizer to react with the laser printer powder, absorbing it. Therefore, the longer the picture lies on the plastic, the clearer it will be translated.
After the picture has lain on the plastic for a long time, “bake” the product in the oven according to the instructions (usually ten to fifteen at a temperature of 110 degrees), without removing the picture. After the workpiece has cooled, the paper can be removed - the design will remain on the plastic!
After this, the workpiece can be sanded with sandpaper and varnished. Your unique product is ready.
Headlights are one of the most important elements for ensuring the safe operation of your car at night. They must be in good working order, clean and fully transmit light.
You will need
- - masking tape;
- - grinder, drill or screwdriver;
- - abrasive wheels with grain size 1000, 2000, 4000;
- - polish;
- - sponge;
- - water;
- - a set of keys;
- - screwdrivers;
- - soft matter.
Instructions
Restored headlights no longer dazzle oncoming traffic, increase road illumination at night by thirty percent and improve appearance car. When choosing a method for polishing your headlights, you can rub them with plastic polish. But this method is ineffective - after a couple of weeks the paste will be washed off, and the headlights of your car will return to their previous unsightly appearance.
Use the method of polishing headlights using abrasive materials. Wash the headlights thoroughly, dry them and cover the surface of the car adjacent to them with masking tape so as not to damage the body coating during work. It is advisable to dismantle easily removable parts of the car - the radiator grille and direction indicators.
Take a sander, or if you don't have one, use a drill with an attachment or a screwdriver. Using special Velcro, secure the circle of wear-resistant abrasive material to the fabric base. When performing initial surface treatment, install a 1200 grit nozzle.
Please note that for more efficient use and reduced wear and contamination, all abrasive wheels must be moistened before use. Spend two to three minutes on each sanding step. Carry out the first machine treatment, after which the entire surface should become uniformly matte.
After removing the top layer of the headlight, damaged by scratches and microcracks, rinse the plastic with water. Repeat the same steps using 2000 and 4000 grit abrasive wheels. Remember that after the final sanding the entire surface should be almost transparent.
Rinse and lightly wipe the headlight, leaving its surface slightly damp. Apply a small amount of finishing paste to a soft cloth and hand polish the surface of the headlight for ten minutes.
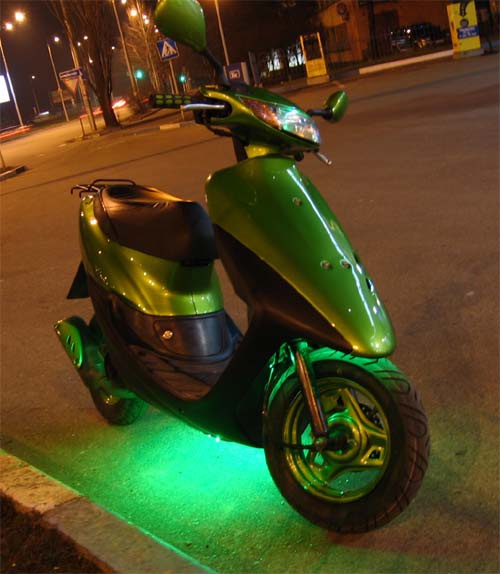
To give scooter technologically advanced, aggressive and simply beautiful in appearance, install an LED suspension on it. To do this, mount the LED strips in pre-designated locations and connect them to the scooter's electrical system.
You will need
- Wide Angle LEDs, 460 Ohm Resistors, Heat Shrink, Wires, Tool
Instructions
Take a regular marker and on the bottom scooter draw the lines along which the LEDs will be installed. Measure the length of each line and divide it by the number of LEDs that are planned on it install. Carefully mark the future LEDs with a core. Drill holes at these points. Use a 4.8mm drill bit. After this, sand the plastic to remove any burrs. For receiving For the best effect, make a recess on the back of the plastic bottom at each hole with a 5.7 mm drill. This is to allow the wide-angle LED to protrude outwards, spreading the light to a full angle. If not do this hole, but just break off the skirt LED, there is simply nothing to attach it to. You can blunt the drill bit a little so that it doesn't go into the plastic too quickly.
Take the required number of LEDs, each with a resistor with a resistance of about 460 Ohms, heat shrink for insulating structures and wires. Solder a resistor to each LED, wrapping it in heat-shrinkable material. Using heat shrink will not only insulate the contacts, but will also protect all connections from moisture, thereby significantly extending the service life of the backlight. Do not confuse the positive and negative contacts of the LED; if you do this, it will simply fail. Install a 2.5 amp fuse on the main wire so that the backlight does not burn out if something happens. All system secure to back side bottoms with ordinary double-sided tape. This may not be done, but then the wires and resistors will be free move and may simply break off.
Backlight, after it is completely assembled and installed, connect to the power output dimensions. Anyone can do this in a convenient way, even to the point of simply wrapping the wires with electrical tape. To avoid damaging the LEDs if the bottom hits the road surface, install a regular automotive molding, gluing it with special glue.


